

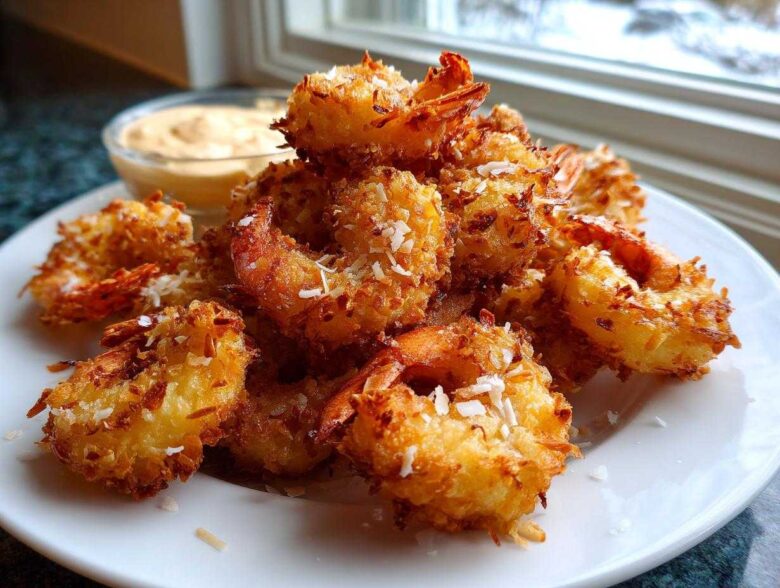
Oh, you are going to absolutely flip for this! Seriously, if you’ve ever ordered coconut shrimp at a restaurant and wondered, “How do they get it *that* crispy?”—well, I cracked the code after what felt like a million messy kitchen experiments. Forget soggy bottoms and weak coatings; this is the ultimate coconut shrimp recipe that guarantees maximum crunch every single time. The secret weapon is a slightly unusual double-dip process that locks in that incredible texture. Pair this crunchy perfection with my super easy homemade Sweet Chili Mayo dipping sauce, and you’ve got an appetizer that people will fight over at your next gathering. Trust me, once you nail this coating, you’re never going back!
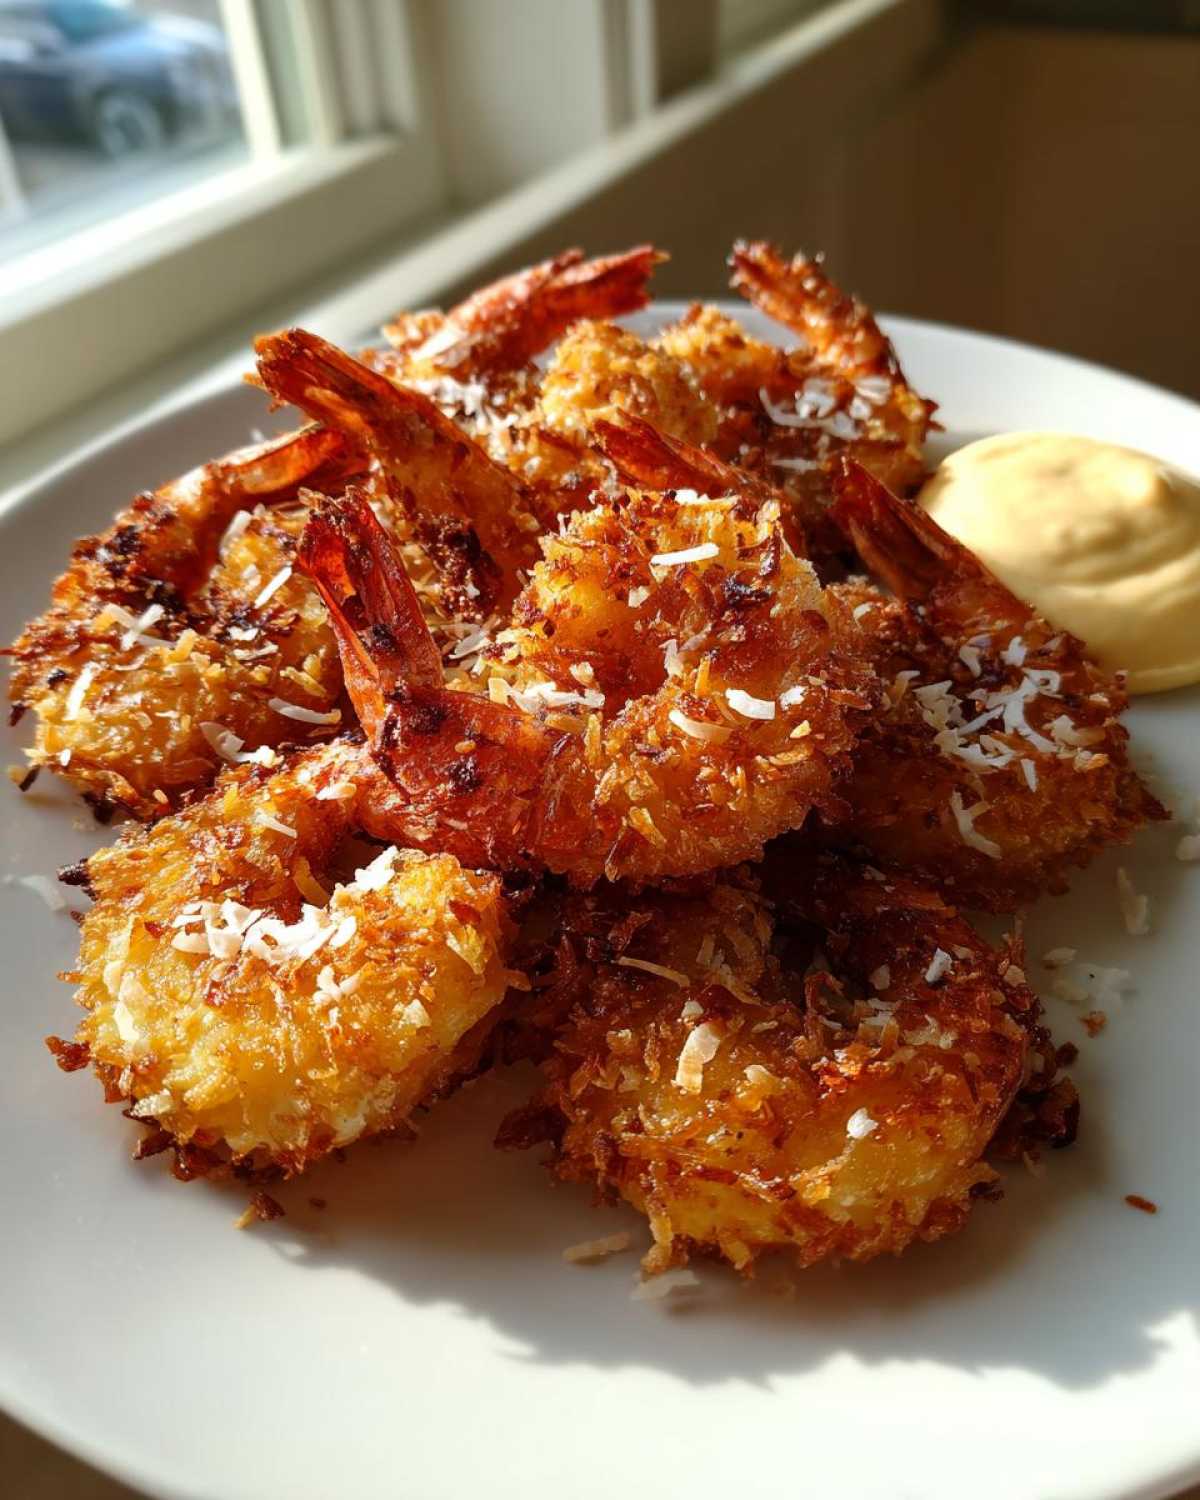
Why This Crispy Coconut Shrimp Recipe Works Best
Honestly, this recipe beats takeout every single time, and it’s so much faster than you think! We’re focusing purely on texture here because, let’s be real, soggy coconut shrimp is a tragedy. These are ridiculously crispy, perfect for just popping in your mouth as a fun party shrimp appetizer.
Here’s the lowdown on why this method is superior:
- Achieving Restaurant Style Coconut Shrimp Texture: We use a special double-coating method—the dry flour first, then egg, then the coconut and panko mix. That little bit of panko breadcrumb in the mix is the superstar here; it creates sharper peaks and unbelievably crisp edges that hold up to dipping!
- Simple Steps for an Easy Coconut Shrimp Appetizer: You can have this whole shrimp platter ready for guests in about 30 minutes total time. It moves fast once you set up your station, making it perfect for last-minute parties or a quick seafood treat without a ton of fuss.
Essential Ingredients for Perfect Coconut Shrimp
You can’t fake good coconut shrimp, that’s my motto! The quality of what goes into that coating is really what separates the good ones from the truly legendary ones. I always shop for the biggest shrimp I can find—the recipe calls for about 1 lb of large shrimp, and I make sure they are fully peeled and deveined, but I always leave those little tails on. They act like perfect little handles for dipping! For the coating, you absolutely must use sweetened shredded coconut; it browns beautifully and adds that essential tropical sweetness.
We also lean hard on panko breadcrumbs here. Don’t even think about using those fine, regular breadcrumbs! Panko gives you the structure you need for that amazing crunch. If you want to jazz up your shrimp preparation, check out my ideas for shrimp boil foil packets, though this recipe is purely appetizer-focused!
Here is exactly what you’ll need for the main event and that unbelievable sauce:
- 1 lb large shrimp, peeled and deveined, tails on
- 1 cup all-purpose flour
- 2 large eggs, lightly beaten
- 1 cup panko breadcrumbs
- 1 cup sweetened shredded coconut
- 1/2 teaspoon salt
- 1/4 teaspoon black pepper
- Vegetable oil, for frying (enough for 2 inches in the skillet)
Ingredients for the Sweet Chili Mayo Dipping Sauce
This sauce is what pulls everything together. We’re mixing creamy, spicy, and tangy in one bowl. The better your sweet chili sauce is, the better this whole dish tastes, so grab your favorite brand! That little squeeze of lime juice really wakes up the whole dipping experience, cutting through the richness of the mayo and the sweetness of the coconut. It’s officially the best coconut shrimp dipping sauce you’ll ever slave over, which isn’t saying much because it takes about two minutes to mix!
- 1/2 cup mayonnaise
- 1/4 cup sweet chili sauce
- 1 teaspoon lime juice
How to Make Crispy Coconut Shrimp Using the Frying Method
This is where the magic happens, and honestly, you need to treat this like a little assembly line to keep things moving fast. The most important thing I learned early on is that wet shrimp equals zero crispiness. So, your very first mission, before anything else, is to take those 1 lb of shrimp and pat them down until they are bone dry with paper towels. Seriously, blot them like you mean it! This is the foundation for that amazing restaurant style coconut shrimp treatment we’re aiming for.
Setting Up Your Coconut Shrimp Dredging Station
Set up three separate stations, side by side. On Plate One, just plain all-purpose flour. In a shallow bowl for Station Two, toss in your two beaten eggs. Finally, for Plate Three, this is where you mix your panko breadcrumbs and the sweetened shredded coconut together with your salt and pepper. Now, take one shrimp at a time and run it through the order: Flour first (shake off the dusty excess!), then straight into the egg bath to get totally wet, and then press it firmly into the coconut-panko mix. You really need to press that coating on so it sticks tight for frying.
Frying Technique for Maximum Crunch
Get your oil ready! Pour about two inches of vegetable oil into a deep skillet. You absolutely have to watch that temperature—you want it right at 350°F (175°C). If it’s too cool, they soak up grease, and if it’s too hot, they burn before the coating crisps up. When you drop them in, work in small batches; do not overcrowd the pan! I learned that the hard way once, and the middle shrimp came out pale and sad. Fry them just for 2 to 3 minutes per side until they hit that perfect, deep golden brown color. As soon as they come out, get them immediately onto a wire rack over a sheet pan. That rack is key—it lets the air circulate so the bottoms don’t steam and get soggy. A quick sprinkle of salt right when they come out? Perfection.
Alternative Cooking Methods for Coconut Shrimp
Okay, I know frying is the gold standard for that true restaurant crunch, but let’s be real—sometimes you want that same tropical flavor without hauling out the giant pot of oil, especially when you’re aiming for a lighter party snack. That’s why I tested this recipe tirelessly in both the oven and the air fryer, so you have options! Offering these alternatives just proves how flexible this coating is, showing off a little bit of my culinary authority, if I do say so myself!
If you’re looking for a way to make these a little easier on cleanup and still get a fantastic result, check out my tips below. These methods are amazing if you’re making a huge batch or just catering to a crowd that prefers less grease, like how I always make my air fryer pizza rolls when I want something quick!
Quick Air Fryer Coconut Shrimp Instructions
The air fryer is my go-to for weeknight quick shrimp dinners instead of just appetizers. It’s fast, and you get a lovely crispiness without all that oil. After you’ve done your three-step dredge—flour, egg, panko/coconut mix—the key here is being gentle. You don’t want to press the coating off when you move them over. Line your air fryer basket in a single layer, which is super important for airflow! Then, they need a light, all-over spray of cooking spray—don’t skip this, or they’ll dry out. Pop them into the air fryer basket and cook at 380°F (195°C) for about 8 to 10 minutes total. Make sure you shake that basket halfway through so they brown perfectly evenly on both sides!
Tips for Baked Coconut Shrimp Recipe Success
If you’re short on kitchen gadgets and just want to use a standard baking sheet, that works too! For the oven method, you’ll want to crank up the heat a bit more than usual to encourage that crisping action. Set your oven to 400°F (200°C).
You’ll need to spread your coated shrimp out on a wire rack set over a baking sheet—just like we did for the fried batch—because lifting them off the hot metal keeps the bottoms crisp! Bake them for a total of 12 to 15 minutes. The crucial part here, because the heat source is only from the top and bottom, is that you must flip them halfway through baking! Give them about 7 or 8 minutes on the first side, flip them gently, and then let the other side brown for the remaining time. They come out beautifully golden brown and are fantastic if you’re trying to achieve a somewhat healthier **coconut crusted shrimp** version.
Tips for How to Make Coconut Shrimp Crispy Every Time
I want every batch of your shrimp to shatter when you bite into it, not bend! Since we already talked about patting the shrimp dry—which is non-negotiable, by the way—let’s dive into the other small things that totally ramp up the crunch factor. I swear, these little tricks move your shrimp from ‘good’ to ‘must-have party food’ status instantly.
First off, utilize that chilling step I mentioned in the notes! After you coat all your shrimp, lay them out on a tray and stick them in the fridge for 15 minutes. I know, waiting is the worst, but this brief chill helps the flour and egg mixture actually set up before the hot oil hits it. It’s like setting cement, but delicious cement!
Also, remember I stressed the panko? If you skip the panko and just use plain shredded coconut, you risk making something that steams instead of crisps. The flaky, sharp edges of the panko breadcrumbs create the armor we need for that perfect crunch. Don’t try to substitute that texture; it’s key for making these feel like real restaurant-level appetizers!
Serving Suggestions for Your Party Shrimp Appetizer
Okay, so you have these stunningly crisp, golden-brown jewels sitting on your counter. Now what? We need to make them look as good as they taste, especially if you have people coming over! Presentation elevates this from a snack to a proper centerpiece. I usually serve them piled high on a big white platter. They look fantastic when they are backlit against a simple green garnish—a few sprigs of fresh parsley or even some shredded lettuce underneath just makes the color pop.
When setting up the buffet, make sure you put the dipping sauce right alongside the shrimp, maybe in a small, colorful bowl. Having a little sign that says “Best Ever Crispy Coconut Shrimp” doesn’t hurt either—it sets expectations high, which I love because this recipe always meets them!
For an added layer of freshness, always offer some citrus slices on the side. A platter with wedges of fresh lime is incredibly appealing. People can squeeze a little juice over their fried shrimp before dipping, and that bright acidity just cuts through the richness perfectly. It’s a tiny step that adds so much flavor complexity!
Pairing the Best Coconut Shrimp Dipping Sauce
While my Sweet Chili Mayo is absolutely the main event and what I think is the best coconut shrimp dipping sauce combination, sometimes variety is the spice of life, right? If you’re serving a big crowd, having two or three dips makes it feel more gourmet!
If you want something that leans spicier, whip up a quick Sriracha Aioli. It’s basically just your mayo, chopped garlic, a big squeeze of lime, and Sriracha. If you prefer something completely different, try a creamy, slightly tangy dip. Mix some sour cream or Greek yogurt with finely chopped cilantro, a little onion powder, and maybe a dash of cumin. It gives it a very subtle, almost tropical vibe that pairs well without fighting the sweet chili flavor.
Honestly, though, most of the time, the sweet chili mayo runs out first. It’s just the perfect counterpoint to that crunchy, sweet crust!
Storing and Reheating Your Coconut Shrimp
Now, the ultimate tragedy is leftover coconut shrimp that has gone floppy overnight. Don’t let that happen to your gorgeous, crispy creation! If you happen to have any survivors from the party—which is rare in my house, trust me—storage is key to keeping them delicious.
You need to store the leftovers completely cool and completely dry. Get yourself an airtight container, but here’s the pro tip: don’t just stack them in there. Layer them between sheets of paper towels inside that container. The paper towels absorb any residual moisture that might try to sneak up on your beautiful crunch later. Keep the container in the fridge for up to two days, max. Any longer than that, and the texture starts to suffer, no matter what you do.
When you’re ready to bring them back to life—and you absolutely should, because they’re too good to toss—you must avoid the microwave at all costs. Microwaves are the enemy of crispiness; they just steam everything! Instead, we are going back to dry heat to resurrect that crunch. If you’re making a bigger batch or just reheating a few, the air fryer is your best friend, just like when I make my bacon jalapeno poppers!
For the air fryer, set it to about 350°F (175°C). Spread the cold shrimp out in a single layer, maybe give them the tiniest spritz of cooking spray if they look dry, and heat them for just 4 to 6 minutes. They heat up so fast! If you don’t have an air fryer, the oven works beautifully too. Spread them on a wire rack set over a baking sheet (again, that rack is vital!) and bake at 375°F (190°C) for about 8 to 10 minutes. You’ll hear them start to sizzle again, and when they are hot straight through and crunchy again, serve them immediately with fresh sauce. No mushy seafood on my watch!
Frequently Asked Questions About Coconut Shrimp
I know you’ve got questions—I certainly did when I was trying to perfect this crispy coconut shrimp recipe! It’s all about getting that texture right so you end up with amazing appetizers, not disappointingly soggy bites. Here are the things people ask me most often when they’re ready to tackle this recipe in their own kitchens.
Can I use fresh coconut instead of shredded for this crispy coconut shrimp recipe?
You absolutely *can* use fresh coconut meat that you grate yourself, but you have to adjust things slightly. The sweetened shredded coconut we use in the main recipe has moisture and sugar already balanced perfectly for that golden brown crisp. If you use fresh, untweetened coconut, you might find the coating dries out a bit faster in the oil, and you’ll definitely want to increase the amount of sugar you whisk into the panko mix to compensate for the lack of sweetness!
What is the best substitute for the sweet chili sauce for shrimp?
That Sweet Chili Mayo is my favorite pairing for these shrimp, but if you run out or just want variety, you have options to make a great sweet chili sauce for shrimp substitution. A quick substitute is mixing equal parts apricot jam with a tiny splash of hot sauce—it gives you that sticky sweetness. For something completely different, a lime-cilantro vinaigrette is incredible, though it’s much thinner than our creamy sauce!
Can I prepare the coated coconut shrimp ahead of time?
You totally can! In fact, I highly encourage you to do the whole dredging process—flour, egg, panko coconut mix—and then lay them out on a baking sheet. When you chill them, as I mentioned in the tips section, it lets that coating really adhere to the protein shell. They hold up beautifully in the fridge for about four hours this way. Just remember, when you’re ready to cook, switch to the air fryer or oven, or if you must fry, make sure your oil is at a steady, high temperature!
Nutritional Estimates for Homemade Coconut Shrimp
Okay, let’s talk numbers for a second. I know when we’re making something this delicious and crispy, we aren’t exactly trying to count every single calorie, but it’s good to have a rough idea, especially if you’re serving these at a big event where people might be tracking things. I ran these through my tracker based on the ingredients listed. Remember, these numbers are just guides based on a serving size of 4 pieces of shrimp, and they assume you’re using the main frying method we detailed earlier!
If you were to use the air fryer or bake them, those fat and calorie numbers would drop significantly, which is a great bonus if you’re worried about that after having a few too many! Always remember that any specific ingredient choices—like using low-fat mayo for the sauce, for example—will change the final tally. You can always check out my official disclaimer page for more specifics on how I calculate these estimations, but here’s the snapshot for our perfect fried version:
- Serving Size: 4 pieces
- Calories: 350
- Protein: 18g
- Total Fat: 20g (with 8g saturated fat)
- Carbohydrates: 25g
- Sugar: 12g
- Sodium: 450mg
It’s a pretty balanced appetizer when you look at the protein we’re getting from the shrimp! If you swap out the vegetable oil for a lighter option or stick to the air fryer method, you’ll really see those fat grams come down, too. Enjoy them guilt-free!
Share Your Crispy Coconut Shrimp Creations
Okay, that’s it! My absolute best tips, tricks, and secrets for making coconut shrimp that shatters beautifully when you bite into it, served with that killer sweet chili mayo. Now the last, most important step is getting feedback from you wonderful people!
If you made this recipe—especially if you tested that double-coating method—I desperately want to hear how it turned out. Did your shrimp stay super crispy? Did your family manage to stop fighting over the last piece? Drop me a comment below and let me know! Seriously, I love reading what you all thought, and your success stories (or even your funny kitchen mishaps!) make my day.
If you snapped a picture of your golden-brown beauties ready for dipping, please tag me on social media! Seeing my recipes come to life in your kitchens is the absolute best feeling. You can share all your amazing creations with me over at the contact page so I can cheer you on. Happy cooking, and I hope these shrimp become a staple at your next party!
PrintCrispy Fried Coconut Shrimp with Sweet Chili Mayo
Make restaurant-style crispy coconut shrimp at home. This recipe uses a double-coating method for maximum crunch and includes instructions for a simple sweet chili mayonnaise dipping sauce.
- Prep Time: 20 min
- Cook Time: 10 min
- Total Time: 30 min
- Yield: 4 servings
- Category: Appetizer
- Method: Frying
- Cuisine: American
- Diet: Low Lactose
Ingredients
- 1 lb large shrimp, peeled and deveined, tails on
- 1 cup all-purpose flour
- 2 large eggs, lightly beaten
- 1 cup panko breadcrumbs
- 1 cup sweetened shredded coconut
- 1/2 teaspoon salt
- 1/4 teaspoon black pepper
- Vegetable oil, for frying
- 1/2 cup mayonnaise
- 1/4 cup sweet chili sauce
- 1 teaspoon lime juice
Instructions
- Prepare the shrimp: Pat the peeled and deveined shrimp completely dry with paper towels. This step helps the coating stick.
- Set up the dredging station: Place flour on one plate, the beaten eggs in a shallow bowl, and mix the panko breadcrumbs and shredded coconut together on a third plate.
- Coat the shrimp: Dredge each shrimp first in the flour, shaking off excess. Dip the floured shrimp into the egg mixture, letting excess drip off. Finally, press the shrimp firmly into the coconut-panko mixture until fully coated.
- Heat the oil: Pour about 2 inches of vegetable oil into a deep skillet or Dutch oven. Heat the oil to 350°F (175°C). Use a thermometer to monitor the temperature.
- Fry the shrimp: Working in batches, carefully place the coated shrimp into the hot oil. Do not overcrowd the pan. Fry for 2 to 3 minutes per side, until golden brown and crispy.
- Drain: Remove the cooked shrimp with a slotted spoon and place them on a wire rack set over a baking sheet to drain excess oil. Sprinkle lightly with salt immediately after frying.
- Make the dipping sauce: Whisk together the mayonnaise, sweet chili sauce, and lime juice in a small bowl until smooth.
- Serve the crispy coconut shrimp immediately with the dipping sauce.
Notes
- For extra crispiness, chill the coated shrimp on a baking sheet for 15 minutes before frying.
- If you prefer baked coconut shrimp, bake at 400°F (200°C) for 12-15 minutes, flipping halfway.
- For an air fryer method, spray the coated shrimp lightly with cooking spray and cook at 380°F (195°C) for 8-10 minutes, shaking the basket halfway through.
Nutrition
- Serving Size: 4 pieces
- Calories: 350
- Sugar: 12
- Sodium: 450
- Fat: 20
- Saturated Fat: 8
- Unsaturated Fat: 12
- Trans Fat: 0
- Carbohydrates: 25
- Fiber: 1
- Protein: 18
- Cholesterol: 150