

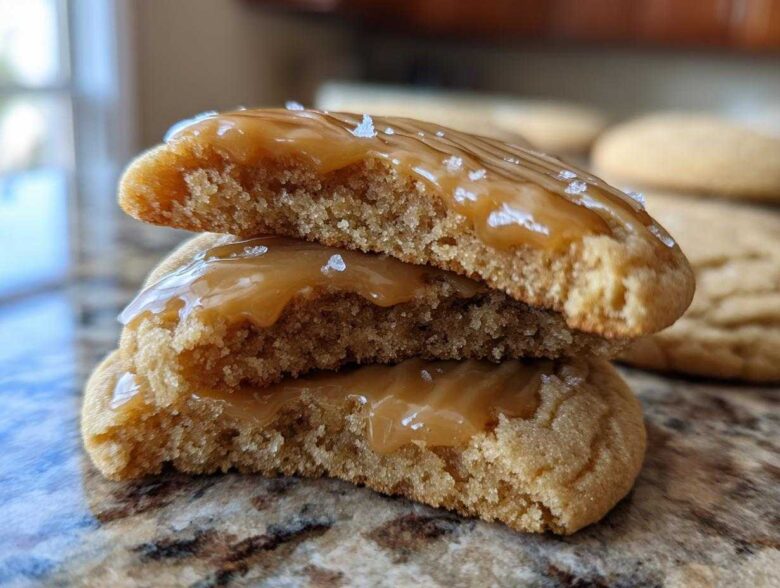
Oh, you absolutely HAVE to make these! When the air gets crisp and you start thinking about cozy sweaters, you need these Soft Maple Cookies in your life. Forget those hard, flat things some places sell; we are aiming for delightfully chewy centers and edges that just barely hold their shape when you pick them up. Trust me when I say the game-changer here is taking that pure maple syrup flavor and pairing it with my secret weapon: a rich brown butter glaze. Seriously, the nutty aroma alone will fill your house with fall comfort! This combination elevates simple maple cookies into something truly special. If you love chewy textures, you’ll want to peek at my guide for making the ultimate chewy chocolate chip cookies too, because the same principles apply here!
Why You Will Love These Soft Maple Cookies
I promise these aren’t just another cookie you mix together. These are the real deal, perfect for your cookie jar!
- Unbelievably soft and chewy texture—your absolute best Chewy Maple Cookies yet.
- The brown butter glaze adds a deep, nutty complexity that pairs beautifully with pure maple syrup.
- They come together fast! We’re talking about a quick bake time, making them perfect for Easy Fall Cookies.
- They look gorgeous drizzled in that glaze, making them a perfect addition to your Cozy Autumn Desserts spread or holiday tray.
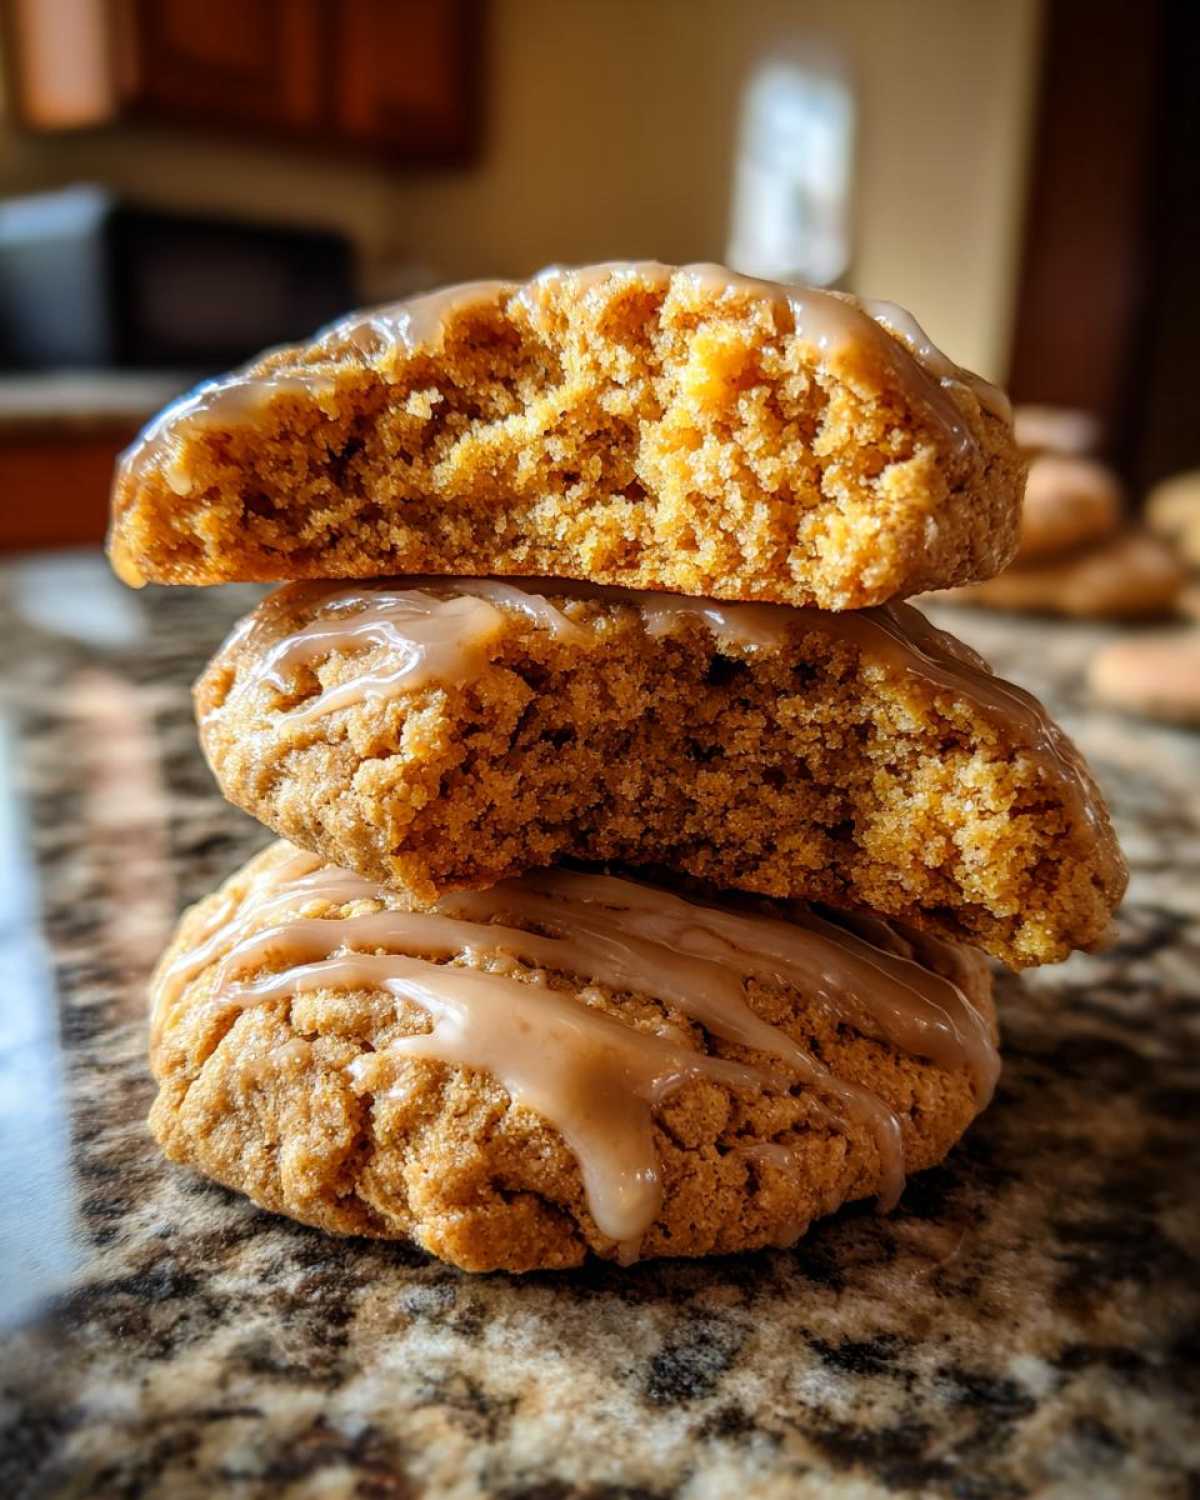
Essential Ingredients for Bakery Style Maple Cookies
Okay, the ingredients list might look a little long, but don’t you worry! They are broken down into two easy parts: the dough itself, and that show-stopping glaze. The most important thing I need you to hear loud and clear is: use pure maple syrup. Seriously, don’t grab the stuff you usually put on pancakes. We need the real, concentrated maple flavor for these Pure Maple Syrup Cookies to sing!
If you’re making a big batch of these Homemade Maple Treats, you might also want to check out my recipe for maple pecan granola clusters—it uses that gorgeous syrup in a totally different way!
For the Chewy Maple Cookies
- 1 cup unsalted butter, softened
- 1 cup packed light brown sugar (Yes, use brown sugar! It helps with the chew!)
- 1 large egg
- 1 teaspoon vanilla extract
- 1/4 cup pure maple syrup (The good stuff!)
- 2 1/4 cups all-purpose flour
- 1 teaspoon baking soda
- 1/2 teaspoon salt
For the Brown Butter Maple Glaze
This is where the magic really happens. Browning the butter takes 30 extra seconds, but wow, it pays off!
- 1/2 cup unsalted butter
- 2 cups powdered sugar (I like to give this a quick sift, just to make sure there are no lumps in the final drizzle.)
- 3 tablespoons pure maple syrup
- 1 teaspoon vanilla extract
- 1 to 3 tablespoons milk (You might only need one tablespoon if your syrup is wet, or three if you like a really thin drizzle!)
Expert Tips for Perfect Soft Maple Cookies
Baking is chemistry, but with cookies, it’s also an art! I’ve made batches of these that flattened out completely, and batches that were too cakey. After a lot of trial and error—and trust me, the mistakes tasted great too—I figured out the secrets to getting these Brown Butter Maple Cookies perfectly soft and chewy every single time. Don’t skip these little pointers; they really make the difference between a good cookie and a bakery-quality Chewy Maple Cookies experience.
If you’re looking for another recipe where technique really seals the deal, you have to try my one-bowl fudgy brownie cookies—texture is everything there too!
Achieving Maximum Chewiness in Your Maple Cookies
The primary weapon for chewiness in these maple cookies is that lovely packed light brown sugar. Brown sugar does the heavy lifting for moisture, keeping everything soft long after they cool. But the real kicker? Don’t fall for the temptation to bake them until they look totally done!
You want those edges set firmly, sure, but the centers need to look just a tiny bit underdone when you pull the tray out. They will set up beautifully on that hot pan while they rest. That split second of underbaking is what guarantees those wonderfully Soft Maple Cookies we are chasing. If you bake them till they look perfect coming out of the oven, you’ll have hard cookies five minutes later! Just trust me on this one.
Mastering the Brown Butter Technique for Maple Glazed Cookies
The glaze sound fancy, but browning the butter is easy if you watch carefully. You melt it down, and it starts to foam up a little. Keep stirring! Eventually, those milk solids start to sink to the bottom and turn gorgeous little specks of deep brown. That’s the nutty smell you’re waiting for!
The second you see those golden-brown bits forming at the bottom and you smell that amazing nutty aroma—BAM, take it off the heat immediately. If you wait even five seconds longer, you transition from heavenly nuttiness to burnt bitterness, and nobody wants that in their Maple Glazed Cookies. Let it cool for just a minute so it doesn’t melt all your powdered sugar into soup right away, but don’t let it fully solidify before you mix in the syrup.
Step-by-Step Instructions for Homemade Maple Treats
Alright, let’s get baking! I know instructions sound boring, but these steps are what guarantee those soft, perfectly spiced Brown Sugar Maple Cookies every time. Don’t rush the creaming part, and definitely don’t overmix once the flour goes in—that’s the secret to keeping them tender. If you need some more inspiration for quick baking projects, you should look at my guide for these chai spice oatmeal cookies!
Mixing the Brown Sugar Maple Cookies Dough
First things first: preheat your oven to 350°F and get those baking sheets ready with parchment paper. That saves scrubbing later, honestly. Grab your big bowl and cream that softened butter and brown sugar together. You need this mixture to look noticeably lighter in color—think whipped fluffy, not grainy mush! Then, slowly beat in the egg, the vanilla, and your precious pure maple syrup until everything looks happy and mixed.
In a separate bowl, just quickly whisk your flour, baking soda, and salt together so everything is distributed evenly. Now, add the dry stuff to the wet stuff gradually. Please, please stop mixing once you see *just* the last few streaks of flour disappear. Overmixing these maple cookies means developing gluten, and that makes them tough. We want soft!
Baking and Cooling Your Maple Cookies
Scoop up rounded tablespoons of dough and drop them onto your prepared sheets, leaving a good two inches between them because these beauties spread just a little. Bake them for about 9 to 11 minutes. Remember what I said about underbaking? You look for the edges to be set, maybe a little golden brown, but the very center should still look slightly soft, almost underbaked.
This next part is non-negotiable for texture: let them sit right there on the hot baking sheet for a full five minutes after they come out. That residual heat finishes baking them perfectly and prevents them from tearing when you move them. After five minutes, gently transfer them to a wire rack to cool down completely. They must be totally cool before we wrestle with the glaze!
Preparing and Applying the Maple Cookies with Icing
While they cool, it’s glaze time! Melt that half-cup of butter gently until it starts smelling nutty and looks brown—that’s your brown butter! Take it off the heat immediately so it doesn’t burn.
Whisk that warm butter into the powdered sugar, maple syrup, and vanilla. If it looks rock hard or super thick, add milk, but do it slowly, just one tablespoon at a time. You are looking for a consistency that drizzles off your whisk nicely, maybe like thick honey. If it’s too thin, add more sugar! Once your maple cookies are completely cool, you can dip the top half into the glaze or use a fork to make those gorgeous, thin ribbons of Maple Cookies with Icing over the top. Give the glaze about an hour to set before stacking them up.
Variations on Classic Maple Cookies
These maple cookies are amazing as they are, but sometimes you need a little twist, right? I love playing around with spices in the fall! If you want a little warmer feel than just vanilla, try this little adjustment from my notes: swap out the vanilla extract completely and use cinnamon instead. Instant Maple Cinnamon Cookies!
That switch adds such depth, especially when paired with the brown butter glaze. You can also amp up that molasses flavor by ensuring your brown sugar is firmly packed—that really leans into the rich, deep flavor profile of a true Brown Sugar Maple Cookie. Honestly, once you master the base dough, you can go wild. If you enjoy spicy cookies with an autumn vibe, you should definitely check out my recipe for apple butter snickerdoodles next!
Storage and Reheating Instructions for Maple Cookies
Making these perfectly soft, chewy maple cookies means we need to treat them right in storage so they don’t dry out! The biggest enemy of a soft cookie is air exposure, so we seal them up tight to keep that lovely brown butter glaze from getting crusty too soon.
First step, which is super important: make sure that brown butter glaze is completely set before you even think about stacking them. If you try to stack them while they are even slightly soft, you’ll have one giant, sticky, delicious maple mess instead of individual cookies. That usually takes about an hour at room temperature, depending on how thick you drizzled it on.
Once that glaze is firm, store your Maple Cookies with Icing in an airtight container. I find they do best layered between pieces of parchment or wax paper. This prevents them from sticking together if the glaze melts a tiny bit, and it keeps the moisture locked in the cookie part. Keep them at room temperature—never put cookies with glaze in the fridge unless you absolutely have to, because the cold dries them right out and makes them hard!
They stay wonderfully soft for about three to four days this way. If you somehow manage to have leftovers past that 4-day mark, you can totally refresh them! Just pop one or two cookies in the microwave for about 5 to 10 seconds. It brings back that fresh-out-of-the-oven softness instantly. Enjoy those Homemade Maple Treats!
Frequently Asked Questions About Maple Cookies
I figured I’d wrap things up by answering some of the quick questions I always get about these maple cookies. If you’re anything like me, you want to know all the shortcuts or make sure you’re using the right stuff before you even start mixing!
These are definitely considered some of my go-to Nostalgic Holiday Baking favorites because everyone loses their minds over the brown butter glaze. If you end up having extra maple flavor on your hands, you should totally check out this recipe for maple candied bacon twists—it’s wild!
Can I use pancake syrup instead of pure maple syrup in these maple cookies?
Oh, please don’t! I know it’s tempting when you’re trying to use up what you have, but pancake syrup is mostly corn syrup and artificial flavorings. It doesn’t bake or taste the same as real maple syrup, and frankly, it will ruin the flavor profile we worked so hard to perfect. You absolutely need that pure maple syrup in both the cookie dough and the glaze to get that authentic, deep maple taste—it’s not just for breakfast!
How do I make these cookies thinner and crispier instead of soft?
If you’re not into the whole soft and chewy thing, that’s fine, but you need to tweak the baking process! For a thinner, crispier cookie, you should flatten the dough balls slightly before you put them in the oven. More importantly, you need to bake them longer. Pull them when the edges are dark golden brown and the centers look totally set—we’re talking maybe 12 to 14 minutes instead of 9 or 10. That extra time in the heat dries them right out, giving you that crisp snap instead of the delightful chewiness we planned for!
Are these the Best Maple Cookie Recipe for holiday gift giving?
They really are! They look gorgeous sitting on a platter because that brown butter glaze shines beautifully on top. They definitely qualify as one of the Best Maple Cookie Recipes out there, in my humble opinion! The only thing you have to remember for gift giving is patience regarding the glaze setting time. Don’t pack them away for gifting until that glaze is completely firm to the touch. If you stack them too soon, they will stick together, and you’ll end up ripping off all your hard work when you try to pull them apart!
Nutritional Estimates for These Maple Cookies
I always feel a little bad posting these numbers, because when we make treats like these Soft Maple Cookies, we aren’t really counting calories, right? We’re counting how many seconds it takes before someone steals the last one off the cooling rack! But for those of you who track things, here is the overall estimate based on the recipe yields. Remember, these are just estimates, and they can definitely swing around depending on the brand of butter or just how thick you make that delicious brown butter glaze.
- Serving Size: 1 cookie
- Calories: 220
- Sugar: 25g (That’s where all that wonderful maple flavor comes from!)
- Sodium: 110mg
- Fat: 11g
- Saturated Fat: 7g
- Unsaturated Fat: 4g
- Trans Fat: 0g
- Carbohydrates: 30g
- Fiber: 0g
- Protein: 2g
- Cholesterol: 35mg
So, while yes, they have sugar—they are cookies, after all—they also deliver a big punch of cozy amazingness that makes the effort totally worthwhile. Enjoy them responsibly, which usually means having one with a big glass of milk!
Share Your Experience with These Maple Cookies
Now that you have a tray of the most perfectly chewy, maple-y, brown butter-glazed wonders sitting on your counter, I absolutely need to know what you think! Did you go for the drizzle or the full dip on that gorgeous glaze? That’s always my favorite part to hear about—some people are purists, others go all in!
Please, if you made these incredible maple cookies, head down to the rating section below and leave me a star score! It really helps other bakers see that this recipe is worth making. And if you snapped any photos of your finished batch—especially how beautifully that glaze set—tag me on social media! I love seeing your creations and sharing them with the community. We are all in this cozy baking adventure together!
If you’re looking for even more delicious things to bake up as we head into the cooler months, you can always check out my main recipe index right here at Spoonful Snap Blog for endless inspiration—but seriously, come back soon and tell me all about these cookies first!
PrintSoft Maple Cookies with Brown Butter Glaze
Make soft and chewy maple cookies topped with a rich brown butter glaze. This recipe uses pure maple syrup for authentic flavor.
- Prep Time: 20 min
- Cook Time: 11 min
- Total Time: 31 min
- Yield: 24 cookies
- Category: Dessert
- Method: Baking
- Cuisine: American
- Diet: Vegetarian
Ingredients
- 1 cup unsalted butter, softened
- 1 cup packed light brown sugar
- 1 large egg
- 1 teaspoon vanilla extract
- 1/4 cup pure maple syrup
- 2 1/4 cups all-purpose flour
- 1 teaspoon baking soda
- 1/2 teaspoon salt
- For the Glaze: 1/2 cup unsalted butter, 2 cups powdered sugar, 3 tablespoons pure maple syrup, 1 teaspoon vanilla extract, 1-3 tablespoons milk
Instructions
- Preheat your oven to 350 degrees Fahrenheit. Line baking sheets with parchment paper.
- In a large bowl, cream together the softened butter and brown sugar until light and fluffy.
- Beat in the egg, vanilla extract, and maple syrup until combined.
- In a separate bowl, whisk together the flour, baking soda, and salt.
- Gradually add the dry ingredients to the wet ingredients, mixing until just combined. Do not overmix.
- Drop rounded tablespoons of dough onto the prepared baking sheets, spacing them about 2 inches apart.
- Bake for 9 to 11 minutes, or until the edges are set but the centers are still soft.
- Let the cookies cool on the baking sheet for 5 minutes before transferring them to a wire rack to cool completely.
- To make the glaze, melt the 1/2 cup of butter in a small saucepan over medium heat until it browns and smells nutty. Remove from heat and let cool slightly.
- In a bowl, whisk the browned butter with the powdered sugar, 3 tablespoons of maple syrup, and vanilla extract. Add milk one tablespoon at a time until you reach a smooth, pourable consistency.
- Once cookies are cool, drizzle or dip the tops into the brown butter glaze. Let the glaze set before serving.
Notes
- Use pure maple syrup, not pancake syrup, for the best flavor in both the cookie and the glaze.
- For extra chewiness, slightly underbake the cookies.
- You can substitute cinnamon for vanilla extract in the cookie dough for a maple cinnamon flavor.
Nutrition
- Serving Size: 1 cookie
- Calories: 220
- Sugar: 25g
- Sodium: 110mg
- Fat: 11g
- Saturated Fat: 7g
- Unsaturated Fat: 4g
- Trans Fat: 0g
- Carbohydrates: 30g
- Fiber: 0g
- Protein: 2g
- Cholesterol: 35mg