

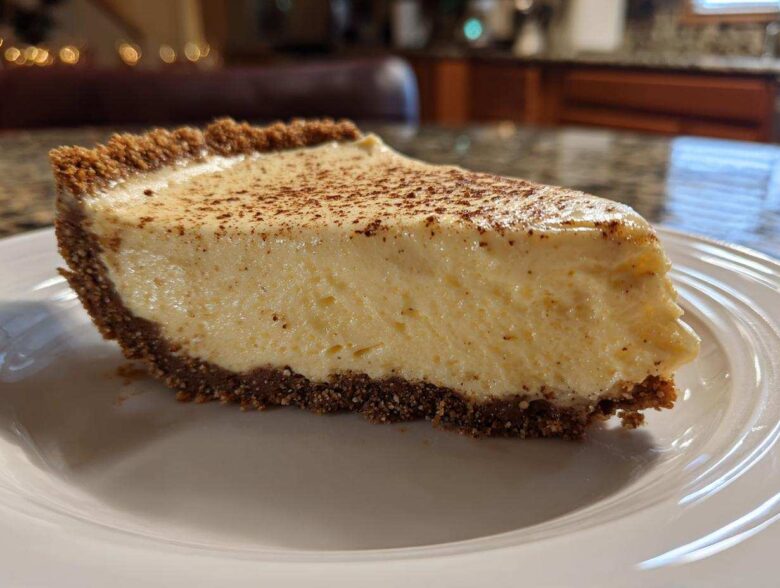
Oh, the holidays! Everyone is scrambling, right? You’ve got cookies baking, casseroles bubbling, and then suddenly you realize you need one more stunning dessert, but the thought of turning on the oven fills you with dread. Trust me, I have been there! That’s why I want to scream about this recipe from the rooftops: this is the absolute easiest, creamiest **eggnog pie** you will ever make. Seriously, it’s a dream. It sets up beautifully in the fridge, tastes exactly like that rich, boozy holiday drink we all crave, and it requires zero baking whatsoever. I love this no-bake magic because it lets me focus on the main meal without worrying about flaky crusts or burnt edges. You’re going to adore how quickly this comes together!
Why This No-Bake Eggnog Pie Recipe Shines
Listen, when you’re juggling a dozen other things, dessert can’t be complicated. This recipe takes all the stress out of serving a show-stopper. It’s my go-to when I need a stunning make ahead holiday dessert that everyone asks for again the next year.
- Simple Holiday Treats: Zero Oven Time: This is the biggest win! Pop it in the fridge and forget it. It makes preparing your kitchen on Christmas Day so much easier. It’s truly the perfect, low-effort Christmas pie option.
- Achieving That Creamy Eggnog Dessert Texture: Unlike baked custard pies that can sometimes curdle or verge on rubbery if they bake a minute too long, this method locks in absolute silkiness. The cream cheese and whipped topping combo creates the dreamiest creamy eggnog dessert every single time.
Gathering Ingredients for Your Easy Eggnog Pie
When you’re making something this easy, you want to make sure your ingredients are top-notch, right? Because there’s no complicated baking to hide behind, quality matters! We’re keeping this list straightforward, focusing on that real, recognizable holiday flavor in every creamy bite of this no bake chocolate peanut butter oat bars style dessert.
Here’s what you’ll need to gather for your perfect **eggnog pie**:
- 1 1/2 cups graham cracker crumbs
- 1/4 cup granulated sugar (for the crust, don’t skip this!)
- 6 tablespoons unsalted butter, melted (Only real butter, please, it makes a difference in the crust!)
- 1 (8 ounce) package cream cheese, softened completely
- 1 cup powdered sugar
- 1 teaspoon vanilla extract
- 1/2 teaspoon ground nutmeg (freshly ground smells heavenly!)
- 2 cups chilled eggnog (The colder it is, the better it mixes!)
- 1 (12 ounce) container frozen whipped topping, thawed
Ingredient Notes and Substitutions for Eggnog Pie
Now, this is where you can customize a little without losing the integrity of the recipe. If you are worried about your pie being too soft—maybe you want it super sturdy for slicing—a little trick is to dissolve one packet of unflavored gelatin into about 1/4 cup of slightly warmed eggnog before you mix it in. That gives your **eggnog pie** a serious structural boost!
Also, for richness: if you want that little extra decadent factor, swap out about half a cup of the whipped topping for the same amount of heavy cream that you’ve whipped yourself until stiff peaks form. It just adds another layer of luxuriousness to the whole experience.
Preparing the Graham Cracker Crust Pie Base
Okay, let’s build this masterpiece from the ground up! With a *no bake* recipe, your crust isn’t getting the benefit of oven heat to set, so we have to be extra dedicated here. If the base isn’t firm, your whole **graham cracker crust pie** might slump when you slice it, and nobody wants that heartbreaking moment!
First, scoop your graham cracker crumbs and that quarter cup of sugar into a bowl. I always rub the melted butter in with my fingers—it just seems faster and somehow ensures everything is coated perfectly. You’re looking for the texture of wet sand, where if you squeeze a little bit in your palm, it holds its shape. Don’t leave any dry pockets!
Now, press it down. This is where you put your elbow grease in! Use the bottom of a measuring cup or a flat glass to really tamp that mixture into the bottom and up the sides of your 9-inch pie plate. Press hard, friends! Firmness is key for structure. Once you think it’s firm enough, pop it into the freezer—or the fridge if you’re really pressed for time—for at least 15 minutes to let that butter solidify. This quick chill is essential for a solid foundation for your no bake key lime pie bars style base.
Making the Creamy Filling for Your No Bake Eggnog Pie
Now for the star of the show—the rich, dreamy filling! This is where all that wonderful **eggnog pie** flavor truly comes to life. Grab your big mixing bowl; we’re starting with the cream cheese. You absolutely *must* let your cream cheese sit out until it’s perfectly soft. I mean fully softened, no lumps allowed! Beat that cream cheese first until it’s totally smooth and velvety. This is my pro tip for avoiding any little gritty surprises in your finished dessert.
Once the cream cheese looks perfect, slowly beat in the powdered sugar, vanilla, and that gorgeous nutmeg. Keep mixing until it’s all incorporated and looks like thick, sweet cloud base. Then, slowly pour in your *chilled* eggnog. Keep the mixer speed medium; you want it smooth, thickened up slightly, but don’t want to over-aerate it yet.
Folding in the Whipped Topping Gently
The very last step for the filling is incorporating the whipped topping. Listen closely: **Do not use the electric mixer here!** This is the difference between a slightly stiff **light no bake pie** and a heavy, dense brick. You need to switch to a rubber spatula and gently, gently fold that topping into the eggnog mixture. Think of it like you are tucking the air into the filling rather than stirring it away.
Use big, slow swooping motions, cutting down the center and scraping up the sides. Stop the second you see no more white streaks remaining. If you mix it too vigorously—like you would when making a cake batter—you deflate all that lovely air, and your glorious **creamy eggnog dessert** will stubbornly refuse to set up right. Be patient; this folding takes an extra minute, but it’s worth it for that soft, amazing cheesecake stuffed strawberries texture (minus the baking!).
Assembling and Chilling the Eggnog Pie
You’ve got your perfectly chilled crust and you have that gorgeous, cloud-like filling ready to go. It’s assembly time, which, thank goodness, is still gloriously simple! Carefully scoop all of that cold filling right into your prepared graham cracker crust. I like to use an offset spatula for this part, smoothing the top out so it looks nice and even before it sets.
Take your time to spread it right out to the edges. You want to make sure the filling is touching every edge of the crust all the way around. This helps seal it in and makes for a clean slice later on. Once it’s settled in its new home, cover it really loosely with plastic wrap. Don’t let the plastic touch the filling! We’re just protecting it from any errant smells in the fridge.
Now comes the hardest part of this whole **no bake eggnog pie**: waiting! You absolutely must refrigerate this pie for a minimum of six hours. And honestly? Overnight is always better. This isn’t like a standard pudding pie that firms up in an hour. Because we used light ingredients like whipped topping, we need that time for the structure to truly set up.
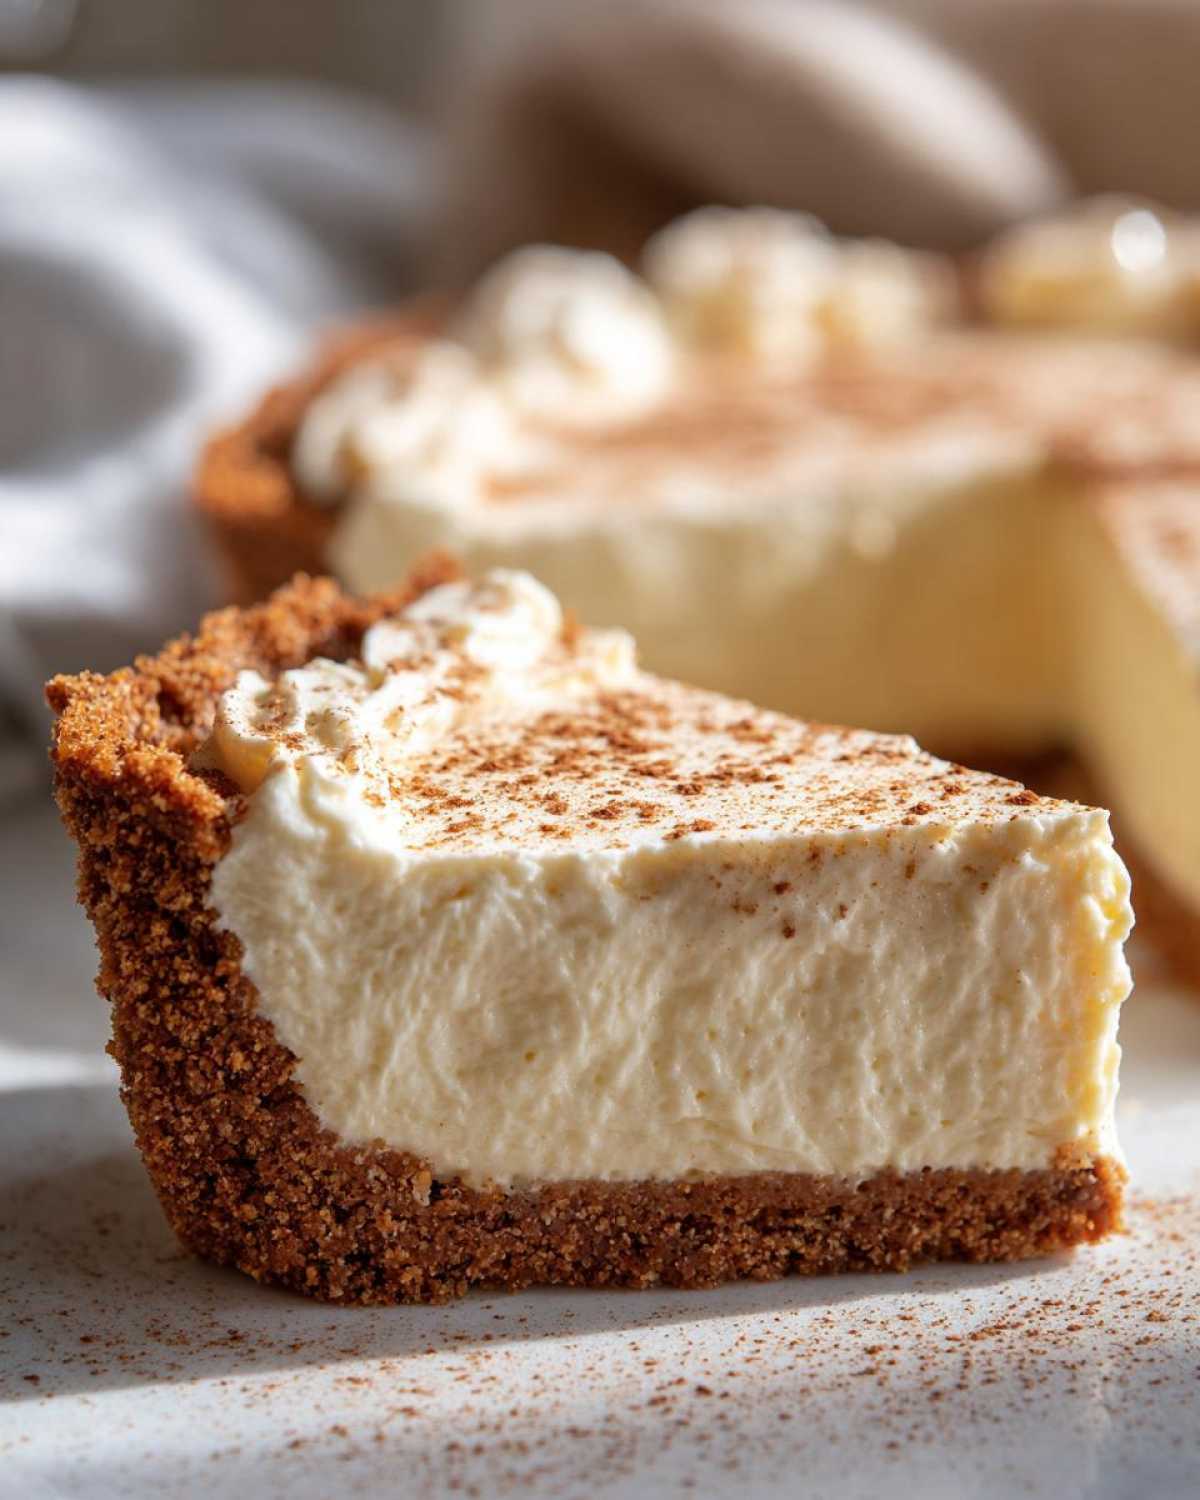
Think of it like this: if you try to slice it too early, you’ll end up scraping a sticky mess onto your plate. Patience guarantees you get that beautiful, firm, almost **cheesecake style pie** texture when you finally take that first perfect slice. This time in the cold is what turns our fluffy mixture into the perfect no bake mango float cake set we’re aiming for!
Tips for Success with This Classic Eggnog Flavor
Getting that unmistakable, perfectly spiced holiday profile in your **eggnog pie** is easier than you think, but it hinges on a couple of tiny details. I learned these little secrets through trial and error—and many tasty mistakes!
First off, the eggnog itself. If you buy quality eggnog that you actually love drinking all by itself, you will love it in the pie. Don’t use light or low-fat eggnog here; we need the full fat content to help this **creamy eggnog dessert** set properly. If your store-bought eggnog feels too thin, just chill it longer before you start mixing! It needs to be icy cold.
Next, nutmeg! The flavor of this **seasonal pie idea** lives or dies by the spice. If you have whole nutmeg, grate it fresh right before measuring it out. The aroma boost is incredible, and it adds a sharpness that cuts through the richness of the cream cheese and butter. You’ll notice the difference immediately compared to the stuff that’s been sitting in the shaker for a year. If you want a nice look, make sure you save a tiny bit extra to dust the top right before you serve it—it signals that warm, holiday flavor right away. For more behind-the-scenes insights into my kitchen standards, check out my About Us page!
Serving Suggestions for Your Festive Pies
This beautiful, creamy pie deserves a grand entrance! Since this is such a wonderful make ahead holiday dessert, you can focus all your energy on presentation when it’s time to serve. The simplicity of the filling means the topping is your moment to shine!
The absolute classic garnish, and the one I insist on, is a generous dusting of ground nutmeg. Don’t even think about skipping it! It ties the whole pie back to the flavor profile of traditional holiday drinks. I use a small fine-mesh sieve and gently tap it across the top right before I set the pie on the table—it gives it that beautiful, professional finish.
If you want to get a little fancier—maybe for a big party where presentation is everything—try sprinkling a little bit of ground cinnamon or even a mix of cinnamon and reserved crushed graham cracker crumbs around the edges of the pie just before serving. It adds lovely visual contrast against the pale filling. You could also drizzle a very light ribbon of melted caramel sauce over the top, but be careful! This pie is rich, so a little drizzle goes a long, long way.
When it comes to what to serve with the pie, keep it simple because the **eggnog pie** is already so decadent. A dollop of freshly whipped cream (if you didn’t use it *in* the filling!) is perfect. If you’re looking for a beverage pairing, I highly recommend skipping heavy red wine. Instead, serve this with something light and autumnal, like a crisp sparkling cider or, my current favorite, a warm caramel apple cider mocktail. It cleanses the palate between bites of that amazing **creamy eggnog dessert**!
Storage and Reheating Instructions for Eggnog Pie
One of the absolute best things about this simple recipe is that it’s already 90% done before the guests even arrive! Because this is a spectacular make ahead holiday dessert, knowing how to store your **eggnog pie** correctly is super important so that creamy filling stays perfect.
Since this is a chilled, dairy-heavy dessert loaded with cream cheese and whipped topping, we need to keep it cold. Once you have successfully chilled your pie until it’s wonderfully firm—and I mean firmly set, not just jiggly!
You need to cover it, but here is a crucial tip: make sure whatever cover you use (plastic wrap or maybe a pie carrier lid) does *not* touch the surface of the filling. If it makes contact, it will stick right to that pretty nutmeg dusting or worse, mar the smooth surface. I usually place a few toothpicks randomly around the edge of the crust before draping the wrap over them to create a little tent over the pie.
How long will it last? Well, because of the fresh dairy, you shouldn’t leave this **eggnog pie** sitting out on the counter for more than an hour or two while you’re serving it. Pop it right back in the fridge. Stored properly, tightly covered, it stays fantastic for about 3 to 4 days. Because it uses a graham cracker crust and no actual baked custard, the texture holds up incredibly well!
Now, can you freeze it? This is a common question for **winter dessert recipes**! If you used the gelatin trick I mentioned earlier, you might get away with freezing it for up to a month. However, if you used the standard recipe with just whipped topping, I honestly wouldn’t recommend freezing! The whipped topping can separate and get gritty when thawed, turning that lovely **creamy eggnog dessert** into something sad. Stick to making it a day or two ahead, and you’ll be just fine!
Frequently Asked Questions About Eggnog Pie
I figured you might have a few burning questions about this **creamy eggnog dessert**, especially if you’re trying to plan out your whole holiday menu! I’ve gathered the ones I get asked most often about this easy dessert. It’s always smart to plan ahead for your winter dessert recipes!
Can I make an Eggnog Custard Pie instead of this no bake version?
Oh sure, you absolutely can! People have definitely made baked **eggnog custard pie** for ages, and they are usually delicious, rich, and taste exactly like liquid eggnog warmed up. However, they require tempering eggs, watching temperatures like a hawk, and you risk that little bit of curdling if you look away for a second.
When I offer a no-bake solution like this one, it’s purely for convenience! If you’re worried about oven space or just want something that tastes equally festive without the babysitting, stick with this recipe. I promise, the texture here is so light and fluffy it won’t leave you wishing you had baked it!
How long does this creamy eggnog dessert last in the refrigerator?
This is the magic of a *cheesecake style pie*! Because we’re using cream cheese and the structure is so stable, this **eggnog pie** holds up really well in the fridge. If you keep it covered loosely (remember the toothpick tent trick!) in the coldest part of your refrigerator, it stays delightfully fresh for 3 to 4 days.
The crust stays crisp, and the filling stays firm and creamy the entire time. This might be the best part about making this **easy eggnog pie**—you can make it Thanksgiving weekend and it will still be perfect for Christmas Eve!
What if I don’t have any eggnog on hand? Can I substitute?
That’s a tricky one for this specific **eggnog pie recipe**! Since the flavor is entirely dependent on the eggnog, substituting is tough without losing the entire theme. If you absolutely cannot find any, you could try mixing half and half: use cold heavy cream mixed with milk and add double the nutmeg, maybe a pinch of cinnamon, and a splash of vanilla and rum extract to try and mimic the flavor profile.
Be warned though: if you substitute the liquid, you MUST use the gelatin option I mentioned in the notes. A milk/cream mixture won’t set up nearly as firmly as actual eggnog will when combined with the cream cheese. It’s worth waiting a week or two for the stores to stock up, trust me on this one!
Is this pie suitable for kids since it’s no bake?
Yes! This is another huge bonus for family gatherings! Because there are no actual raw eggs in the filling (we’re using the stabilized commercial eggnog that is already pasteurized or cooked), this is a fantastic **simple holiday treat** that kids can enjoy safely. Just check the label on your store-bought eggnog to ensure it’s safe for consumption if you are concerned about alcohol content, as many commercial brands have very little or none at all. It’s a perfectly safe and delicious **winter dessert recipe** for all ages.
Share Your Festive Pie Creations
Alright, now that you have the blueprint for the easiest, creamiest holiday dessert ever, I really, really want to hear from you! I pour so much love and testing into these simple recipes, and seeing them show up on your holiday tables is honestly the best reward.
When you make this lovely **easy eggnog pie**, please, please come back here to the blog and leave me a rating and a comment! Did your family love the **creamy eggnog dessert**? Did you use the gelatin trick, or did you skip it? Did your crust set up perfectly? Knowing how it worked out in your kitchen helps me, and it helps the next person who is nervously eyeing their holiday menu planning.
And seriously, take a picture! I live for seeing these desserts decorated for the holidays. Snap a picture of your finished pie—maybe with a tiny dusting of cinnamon on top—and tag me on social media! Seeing your creations makes my entire season brighter. If you have any follow-up questions that weren’t covered in the FAQs, don’t hesitate to reach out directly via my Contact page. Happy baking, friends, even when you’re not baking!
Estimated Nutritional Data for Eggnog Pie
If you’re tracking macros or just curious about what’s in our incredible **eggnog pie**, here are the general estimates based on the ingredients we used. Now, you know how I feel about exact numbers when we’re cooking for fun—these are just ballpark figures!
You have to remember that since this is a **no bake eggnog pie**, the totals can wiggle around depending on what brand of eggnog you buy or if you add any extra swirls of caramel sauce on top. Use this more as a guideline than a strict rulebook!
- Serving Size: 1 slice
- Calories: 380
- Sugar: 35g
- Sodium: 250mg
- Fat: 22g
- Saturated Fat: 13g
- Carbohydrates: 42g
- Protein: 5g
The fat content looks a little high, but remember that comes from the butter in the crust and the cream cheese, which make this a genuinely rich and satisfying **cheesecake style pie** experience! Just try to stick to a standard, thick eggnog, and you’ll land close to these numbers.
PrintEasy No-Bake Eggnog Pie

A simple, creamy, no-bake pie featuring the classic flavor of eggnog in a graham cracker crust. This dessert is perfect for holiday gatherings and requires no oven time.
- Prep Time: 20 min
- Cook Time: 0 min
- Total Time: 6 hr 20 min
- Yield: 8 servings
- Category: Dessert
- Method: No Bake
- Cuisine: American
- Diet: Vegetarian
Ingredients
- 1 1/2 cups graham cracker crumbs
- 1/4 cup granulated sugar (for crust)
- 6 tablespoons unsalted butter, melted
- 1 (8 ounce) package cream cheese, softened
- 1 cup powdered sugar
- 1 teaspoon vanilla extract
- 1/2 teaspoon ground nutmeg
- 2 cups chilled eggnog
- 1 (12 ounce) container frozen whipped topping, thawed
Instructions
- Combine graham cracker crumbs and 1/4 cup granulated sugar in a medium bowl. Pour in melted butter and mix until the crumbs are evenly moistened. Press the mixture firmly into the bottom and up the sides of a 9-inch pie plate. Chill the crust for at least 15 minutes.
- In a large bowl, beat the softened cream cheese until smooth. Gradually beat in the powdered sugar, vanilla extract, and nutmeg until fully combined.
- Pour in the chilled eggnog and beat on medium speed until the mixture is smooth and slightly thickened, about 2 minutes.
- Gently fold in the thawed whipped topping until no streaks remain. Do not overmix.
- Spoon the eggnog filling evenly into the chilled graham cracker crust.
- Cover the pie loosely with plastic wrap and refrigerate for at least 6 hours, or preferably overnight, until the filling is firm.
- Before serving, sprinkle the top with additional ground nutmeg or cinnamon for garnish.
Notes
- Use store-bought graham cracker crust if you want to save preparation time.
- For a richer flavor, substitute 1/2 cup of the whipped topping with an equal amount of heavy cream whipped to stiff peaks.
- If you prefer a firmer set, you can add one packet of unflavored gelatin dissolved in 1/4 cup of warm eggnog to the filling mixture before folding in the whipped topping.
Nutrition
- Serving Size: 1 slice
- Calories: 380
- Sugar: 35
- Sodium: 250
- Fat: 22
- Saturated Fat: 13
- Unsaturated Fat: 9
- Trans Fat: 0.5
- Carbohydrates: 42
- Fiber: 1
- Protein: 5
- Cholesterol: 65