

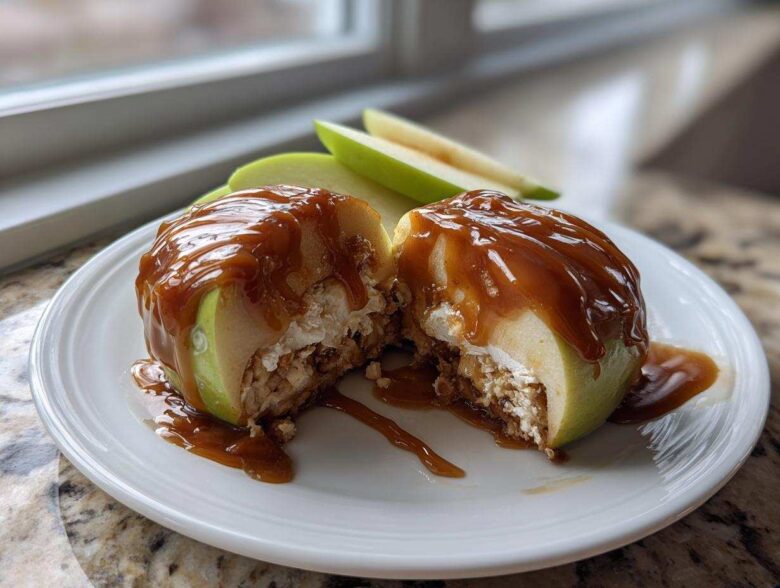
Oh my gosh, the air is getting crisp, which means it’s time to break out the big pots and the apples! Forget those waxy, sad store-bought bags of goodness—we are making the real deal. If you’ve ever spent hours making caramel only to watch it slide right off your Granny Smith like it was on a slip-n-slide, I totally get it. I’ve been there, scraping sad pools of defeated caramel off my counter more times than I care to admit!
But I cracked the code! This guide is my absolute roadmap for creating the best, foolproof homemade caramel apples that actually stick, stay gooey, and taste like pure autumn magic. We’re nailing that heavenly, thick caramel consistency that wraps around the apple perfectly. Trust me, once you master this technique, you’ll be making these incredible apple treats for every fall party.
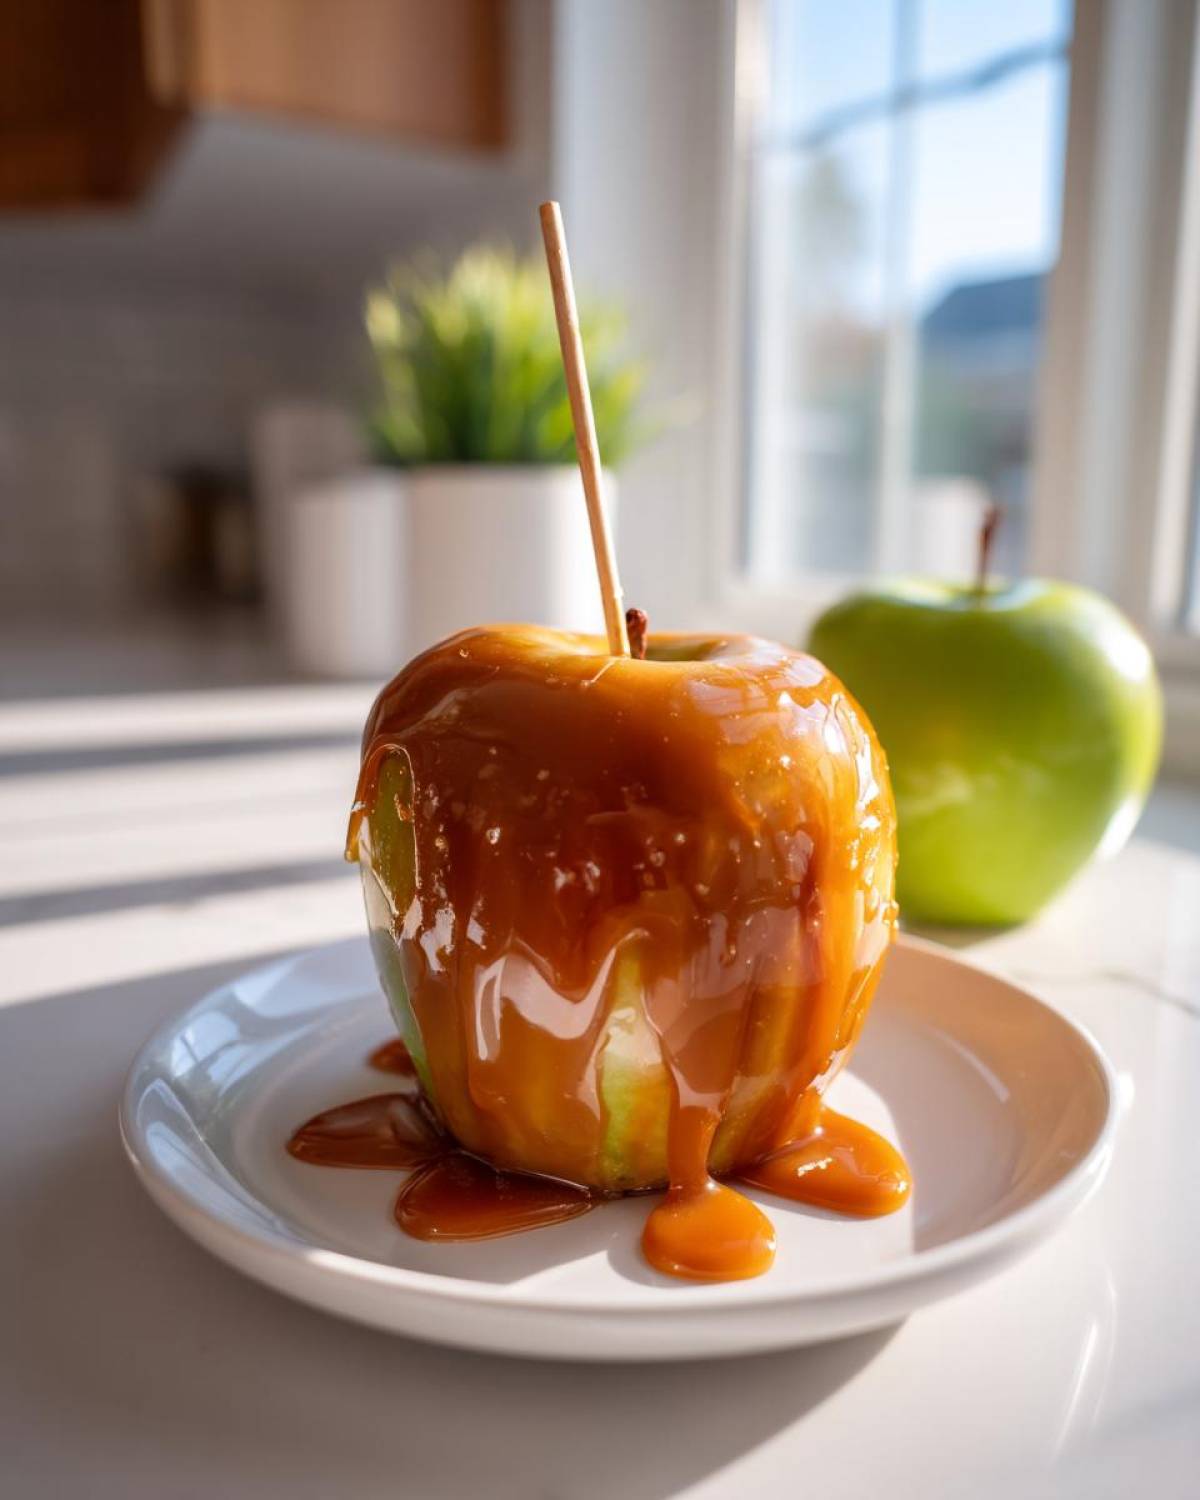
Why This is the Best Foolproof Homemade Caramel Apples Recipe
Honestly, making homemade caramel apples sounds intimidating, but this recipe takes all the guesswork out. If you follow the temperatures exactly, you’ll get that glossy, satisfyingly chewy coating that never quits!
What makes this method so reliable? It’s all about the science, which I learned the hard way! I promise, once you nail the caramel temperature, you’ll never look back. These caramel apples are totally reliable.
- Guaranteed, super sticky results thanks to prep and temperature control.
- The caramel stays wonderfully gooey, never rock-hard or grainy.
- We use the best brown sugar combination for deep, rich flavor.
Key Factors for Perfect Caramel Apples
It boils down to two super important things, gang. First, your apple prep has to be perfect—no wax allowed! Second, we are hitting exactly 245 degrees Fahrenheit on the thermometer. That’s the firm ball stage, where the caramel has just enough structure to hug the apple tight without turning into brittle toffee. Don’t skip that thermometer; it’s your best friend for homemade caramel apples!
Selecting the Best Apples for Caramel Apples
This is a huge make-or-break moment if you ask me! You can’t just grab any apple from the bin because the caramel is so rich and sweet. We need something slightly sour to keep things balanced, otherwise, these things get cloyingly sweet fast. That’s why I always stand firm on picking the best apples for caramel apples being the tart ones.
Granny Smith reigns supreme here, hands down. Their crisp texture holds up beautifully against the hot caramel, and their sharp flavor cuts right through that buttery sweetness like a dream. If you happen to find Honeycrisp apples that are on the tarter side, those work too, but Granny Smith is the gold standard for a reason.
When you’re sourcing them, pick ones that look firm, especially if you plan on storing them for a few days. You want that satisfying *crunch* when you bite in, not a soft, mealy texture hiding under that perfect caramel coat!
Gathering Ingredients for Gooey Caramel Apples
Alright, time to get serious about the ingredients! This is where we make sure our homemade caramel apples recipe turns out perfectly gooey, not gritty or runny. You need some heavy hitters here, especially when it comes to the sugar and the milk. If you skimp on the quality here, you’ll notice it right away in the final texture. Don’t worry, the ingredient list isn’t too wild, but accuracy matters a bunch.
These measurements are precise for getting exactly the right consistency we need for that perfect dip. I always recommend using a dedicated heavy-bottomed saucepan, too—it spreads the heat much more evenly, which is crucial when we’re working at the firm ball stage. Check out those toppings afterward; that’s where you can really get fancy!
Essential Caramel Ingredients
You’ll need these items to form the base of the delicious, sticky coating:
- 1 cup (which is 2 sticks) of good, unsalted butter.
- 2 full cups of light brown sugar, and make sure you pack that cup down!
- 1 standard 14-ounce can of sweetened condensed milk—the full fat kind, please!
- 1 cup of light corn syrup—this is key for preventing crystallization.
- 1 teaspoon of pure vanilla extract (none of that imitation stuff).
- And half a teaspoon of sea salt to balance all that sweetness out.
Gourmet Topping Components
Once the caramel is perfect, you gotta dress those apples up! These are just suggestions, but they look gorgeous when you’re done:
- About 1 cup of finely chopped pecans, toasted if you have the time.
- 1 cup of mini chocolate chips for that lovely sweet drizzle later.
- If you’re feeling extra festive, maybe half a cup of crushed hard candies, like those little peppermint ones if you’re going for a holiday look.
You’ll also need 12 lovely Granny Smith apples, of course, and your wooden sticks ready to go. Don’t forget to look at my thoughts over at caramelized pear brie bites—it’s all about that balance of sweet and savory!
Step-by-Step Easy Caramel Apple Tutorial
Okay, deep breath! We are moving from the ingredient gathering phase into the best part: the cooking and dipping! Even though the thermometer is involved, I promise this is the simplest part, provided you are patient. Rushing the boil is how you mess up the whole batch of your homemade caramel apples.
We need a heavy pot, medium heat, constant stirring until things melt, and then we let science do the heavy lifting. Remember, we are aiming for that beautiful 245°F. Don’t you dare touch that dial once it starts boiling heavily!
Apple Preparation for No Stick Caramel Apples
This step seems basic, but it’s your secret weapon for those no stick caramel apples. You have to get rid of every trace of wax or moisture. Start by washing the apples really well. Then dry them completely—I mean bone dry, use a clean cloth towel.
Now for my special trick: grab a paper towel, dip it lightly into some white vinegar, and just wipe down the skin of every single apple. The vinegar cuts right through any waxy residue the grocer might have put on them. Insert your stick firmly, right down the middle. If you’re worried about them leaning, stick the base of the stick into a bit of hardened caramel on your baking sheet later to hold them upright.
Cooking the No Fail Caramel Recipe
Get that thermometer clipped on so it isn’t touching the bottom of the pan. Combine the butter, sugar, milk, and corn syrup, and heat it gently, stirring constantly until everything looks smooth. Once it hits that boil, stop stirring!
Now, use a wet pastry brush to wash down any sugar crystals clinging to the side of the pan—this prevents the entire batch from crystallizing and going grainy on you. Sit back and watch the thermometer climb. When it hits 245°F—pull it off the heat immediately! Stir in the vanilla and salt, and let it cool for just five minutes. It needs to thicken just enough to coat beautifully, but it must still be super pourable for our caramel apple dipping technique.
The Ideal Caramel Apple Dipping Technique
Once it’s cooled just a touch (warm, but not scorching hot), hold your prepared apple firmly by the stick. Dip it straight down into the pan, tilting the pot slightly so only about three-quarters of the apple gets covered. You are trying to keep the caramel away from the very top where the stick goes in, as that area needs to stay clean for handling.
Lift the apple out slowly, tilting it side to side just a little bit, letting that excess caramel drip right back into the pot. Patience here means less waste and a cleaner finish! Once it stops dripping noticeably, you’re ready for the toppings or the setting sheet. This is how you get truly gooey caramel apples!
Mastering Caramel Apple Topping Ideas
We’ve got the perfect sticky caramel coating; now we get to the fun, gourmet part! Applying toppings isn’t just decoration; it’s flavor layering! You need to work fast here because that caramel starts to set up pretty quickly once it hits room temperature. As soon as you pull that apple out of the pot, immediately roll the coated side—or the whole thing—in your chopped nuts, crushed candies, or whatever crunchy thing you chose.
If you’re using something bigger like pretzels or toffee pieces, it’s often easier to spread your toppings out on a wide plate rather than trying to dump them onto the apple itself. Give the caramel about 15 minutes to firm up after topping before you even think about adding the final layer. This ensures your beautiful fresh caramel apples don’t get sloppy.
Creating Chocolate Drizzle Caramel Apples
Chocolate drizzle is the boss move for gourmet caramel apples, but timing is everything. Wait until that initial caramel layer is fully set—it should feel slightly tacky but not wet to the touch. If you drizzle while the caramel is too warm, the chocolate will just melt into a messy puddle!
Melt your good quality chips slowly; I usually do mine in 20-second bursts in the microwave, stirring in between until it’s smooth and shiny. Use a spoon or a pastry bag with a very small tip to zigzag the chocolate artfully over the top. Don’t drown it; a thin, delicate drizzle shows off that amazing caramel underneath. Then, let those beauties rest until that final layer of chocolate is hard!
Troubleshooting Common Caramel Apple Issues
Even with the best recipe in hand, sometimes things go a little sideways in the kitchen, right? That’s totally normal! The key to becoming a great baker—or candy-maker, in this case—is knowing how to fix the little hiccups. When it comes to making perfect caramel apples, most problems come down to two areas: the apples or the cooking temperature.
Don’t stress if your first batch isn’t perfect; just check my notes here and you’ll be back on track in no time. It’s all part of the learning process!
Why is my caramel sliding right off the apples?
This is the most common disaster, and it almost always points back to one thing: the apples weren’t prepped correctly. Remember that vinegar wipe-down I mentioned? You absolutely need to get rid of any wax coating or natural oils on the skin, because caramel refuses to grip anything slick. If the apples are also too cold when they hit the hot caramel, the temperature difference can cause the caramel to seize up too fast and not grip evenly, often leading to drips.
Try letting your washed apples sit out for about 30 minutes before starting so they aren’t straight from a cold fridge, and always do that vinegar wipe. That’s your insurance policy!
My caramel is runny and won’t set up!
If you’ve let the caramel cool for 10 minutes and it’s still pouring off the apple like soup, don’t panic! It simply means your caramel didn’t cook long enough to reach the correct temperature—245°F is non-negotiable for that firm ball that sets up nicely.
If you’ve taken it off the heat and it’s runny, you can carefully return the pot to very low heat. Stir it gently and allow it to come up another 3 to 5 degrees, maybe even 248°F if you like them a bit firmer, and then pull it off immediately. Don’t let it boil hard again, or you risk burning that beautiful brown sugar flavor underneath!
Why did my batch of caramel crystallize?
Ugh, grainy caramel is the absolute worst! This happens when sugar crystals form on the sides of the pot and then fall back into your smooth mixture, kicking off a chain reaction. You have to stop those crystals from forming in the first place. That’s why brushing down the sides of the pan with a wet brush while it boils is so important.
If you see any tiny dry specks creeping up the side of your pan, grab that wet pastry brush and rinse them down gently while the mixture is boiling. Also, using corn syrup (which we did in the recipe) really helps inhibit crystal formation, so stick to the recipe for the smoothest possible coating!
Caramel Apple Variations and Alternatives
Once you master the classic, big, beautifully coated caramel apples, you start thinking about how else you can use that amazing batch of sticky goodness! Honestly, you can jazz these up endlessly. If you’re hosting a party or just serving little ones, sometimes a huge apple is just too much, right? That’s where caramel apple slices recipe comes in handy.
For slices, I just cut those Granny Smiths into thick wedges—maybe half an inch thick. Pop a toothpick into the side of each wedge. They dip faster and they don’t require as much caramel! You can knock out a whole batch of those in minutes. Keep in mind they need that vinegar wipe too, or the edges will turn brown too fast.
If you want mini versions, look for small crabapples or Asian pears, but make sure you cook your caramel just a hair longer, maybe up to 248°F, because those small items require a thicker coat to look proportionate. These caramel apple variations are fantastic for dessert platters!
Storing Your Homemade Caramel Apples
So you made a beautiful dozen of these incredible, sticky treats! Now what? You want to make sure that gorgeous caramel shell you worked so hard for stays exactly the way it should be—chewy and fresh—not melted or too hard. The storage method really depends on how quickly you plan to eat them, but generally, I shy away from the fridge if I can help it. Refrigeration can sometimes make that delightful homemade caramel turn a bit too firm, and frankly, it might lose some of that freshly made gooey factor we fought so hard to achieve!
If you plan on serving these within 24 hours, room temperature is my go-to recommendation. Just make sure they are in a cool spot, away from any direct sunshine or heat sources. I usually stand them upright, making sure they aren’t touching each other. It’s best to wrap them individually right away, ideally in plastic wrap or maybe even some cute cellophane bags if you’re gifting them.
If you’ve got leftovers and you simply must refrigerate them, here’s what I do: wrap each one snugly in plastic wrap, like a little candy cocoon. When you pull them out later, let them sit on the counter for at least an hour before you plan to serve them. This gives the caramel time to relax back into that perfect, chewy texture. You can generally keep finished caramel apples fresh at a cool room temperature for about a week. If your kitchen is super hot, cut that down to 3 or 4 days, but they rarely last that long anyway, trust me!
Frequently Asked Questions About Caramel Apples
I get so many questions about these beautiful fall treats! Making caramel apples is fun, but knowing the little details makes you feel like a pro. Here are some of the things I hear most often when folks are trying out this recipe for the first time.
Can I make caramel apples without a candy thermometer?
Oh, I really, really wish I could say yes, but for foolproof, sticky results, the thermometer is your best friend. Remember, we are aiming for that high, specific temperature—the Firm Ball stage at 245°F. If you guess, you risk the caramel being so soft that it slides right off, or so cooked that you end up with something brittle.
If you absolutely, positively cannot find one, you can try the cold water test. Drop a tiny bit of the boiling caramel into a glass of ice water. If it forms a soft, pliable ball that flattens slightly when poked, you’re close. But honestly, for the expertise needed to get consistently gooey caramel apples, investing in a simple candy thermometer is the surest bet!
What is the difference between candied apples vs caramel apples?
This is a great question that trips people up! The main difference is the sugar stage. Caramel apples use a soft caramel made by cooking the sugar mixture to the Firm Ball stage (that 245°F we talked about). This leaves you with that rich, chewy, mouth-coating caramel.
Candied apples, on the other hand, are cooked much higher, usually to the Hard Crack stage—that’s 300°F or higher! This results in a completely hard, glass-like shell that cracks when you bite into it. It’s shiny and delicious, but it’s a totally different texture than what we’re aiming for with these gooey Halloween apple treats.
How do I keep the caramel from getting too hard?
If you followed the 245°F rule, the caramel shouldn’t get rock hard at room temperature, but if you notice it getting stiff quickly, it means it cooked just slightly past the ideal mark, or perhaps the ambient humidity is super low. The biggest ingredient helping us maintain that soft chewiness is the corn syrup!
Corn syrup (or glucose, if you want to get technical) is an invert sugar that actively prevents the sugar crystals from interlocking too tightly, keeping everything pliable. So, make sure you include that in your homemade caramel apples recipe! If you’re storing them long-term, remember my tip about keeping them at cool room temperature rather than the fridge—that helps maintain the softness too.
Sharing Your Gourmet Caramel Apples
Now that you’ve successfully navigated the stovetop and created a batch of gorgeous, foolproof homemade caramel apples, I truly want to see what you’ve whipped up! This part is optional, but I live for seeing your creations pop up online. Did you stick to the classic nuts, or did you go wild with sprinkles and cookie crumbs?
Seriously, drop a rating down below once you’ve tried them—let me know how perfectly sticky your caramel turned out. It helps everyone else who might be nervous about tackling this project for the first time. Have you discovered a new favorite topping combo that nobody else has thought of yet?
If you took some beautiful photos of your gourmet caramel apples, tag me! I love comparing everyone’s results, especially how everyone handles that gorgeous chocolate drizzle. Happy snacking!
PrintFoolproof Homemade Caramel Apples with Gourmet Toppings

Make perfect, sticky caramel apples every time using this guide. Learn the best apple choice and dipping technique for a gooey, gourmet fall treat.
- Prep Time: 20 min
- Cook Time: 25 min
- Total Time: 45 min
- Yield: 12 apples
- Category: Dessert
- Method: Stovetop Cooking
- Cuisine: American
- Diet: Vegetarian
Ingredients
- 12 medium Granny Smith apples
- 12 wooden or parchment-lined lollipop sticks
- 1 cup (2 sticks) unsalted butter
- 2 cups packed light brown sugar
- 1 (14 ounce) can sweetened condensed milk
- 1 cup light corn syrup
- 1 teaspoon pure vanilla extract
- 1/2 teaspoon sea salt
- For Toppings: 1 cup chopped pecans, 1 cup mini chocolate chips, 1/2 cup crushed hard candies
Instructions
- Wash and thoroughly dry the apples. Remove the stems and insert the sticks firmly into the core of each apple.
- Line a baking sheet with parchment paper or silicone mats. Set aside.
- In a heavy-bottomed saucepan, combine the butter, brown sugar, sweetened condensed milk, and corn syrup.
- Heat the mixture over medium heat, stirring constantly until the butter melts and the sugar dissolves.
- Attach a candy thermometer to the side of the pan, ensuring the tip does not touch the bottom.
- Bring the mixture to a boil without stirring, occasionally brushing down the sides of the pan with a wet pastry brush to prevent sugar crystals from forming.
- Continue cooking until the caramel reaches 245 degrees Fahrenheit (Firm Ball stage). This usually takes 15 to 20 minutes.
- Remove the pan from the heat immediately. Stir in the vanilla extract and salt. Let the caramel cool slightly for about 5 minutes; it should thicken slightly but still be pourable.
- Dip each apple into the caramel, tilting the pan if necessary to coat the apple evenly. Lift the apple and rotate it slowly to allow excess caramel to drip off back into the pan.
- Immediately roll the coated apple in your chosen toppings, or place it on the prepared baking sheet.
- If using chocolate drizzle, allow the caramel to set for 15 minutes before drizzling melted chocolate over the top.
- Let the caramel apples set completely at room temperature for at least 2 hours before serving or wrapping.
Notes
- For caramel that sticks, ensure the apples are completely free of wax and moisture. Wipe them down with a paper towel dipped in white vinegar before inserting the sticks.
- If the caramel is too thin after cooling slightly, return it to low heat briefly to cook it down further. Do not overheat.
- To make caramel apple slices, cut the apples into thick wedges, insert toothpicks, and dip the wedges quickly.
- Store finished caramel apples individually wrapped in plastic wrap at cool room temperature for up to one week.
Nutrition
- Serving Size: 1 apple
- Calories: 450
- Sugar: 65
- Sodium: 150
- Fat: 20
- Saturated Fat: 12
- Unsaturated Fat: 8
- Trans Fat: 0
- Carbohydrates: 70
- Fiber: 2
- Protein: 3
- Cholesterol: 45