

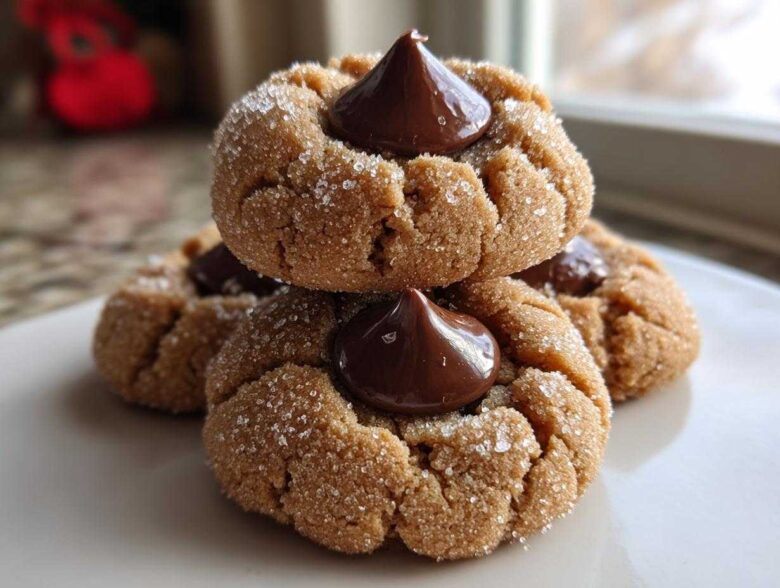
Listen, if you are looking for that one cookie that everyone asks for at every holiday party and family gathering, you’ve found it. Forget those dry, crumbly things you sometimes find; we are making the absolute *best* **peanut butter blossom** cookies here! I swear by this recipe because these turn out perfectly soft and delightfully chewy, every single time. My aunt Mildred used to make these for Christmas Eve, and honestly, getting that soft texture right was her secret to winning the neighborhood cookie contest year after year. This recipe is pure magic, seriously.
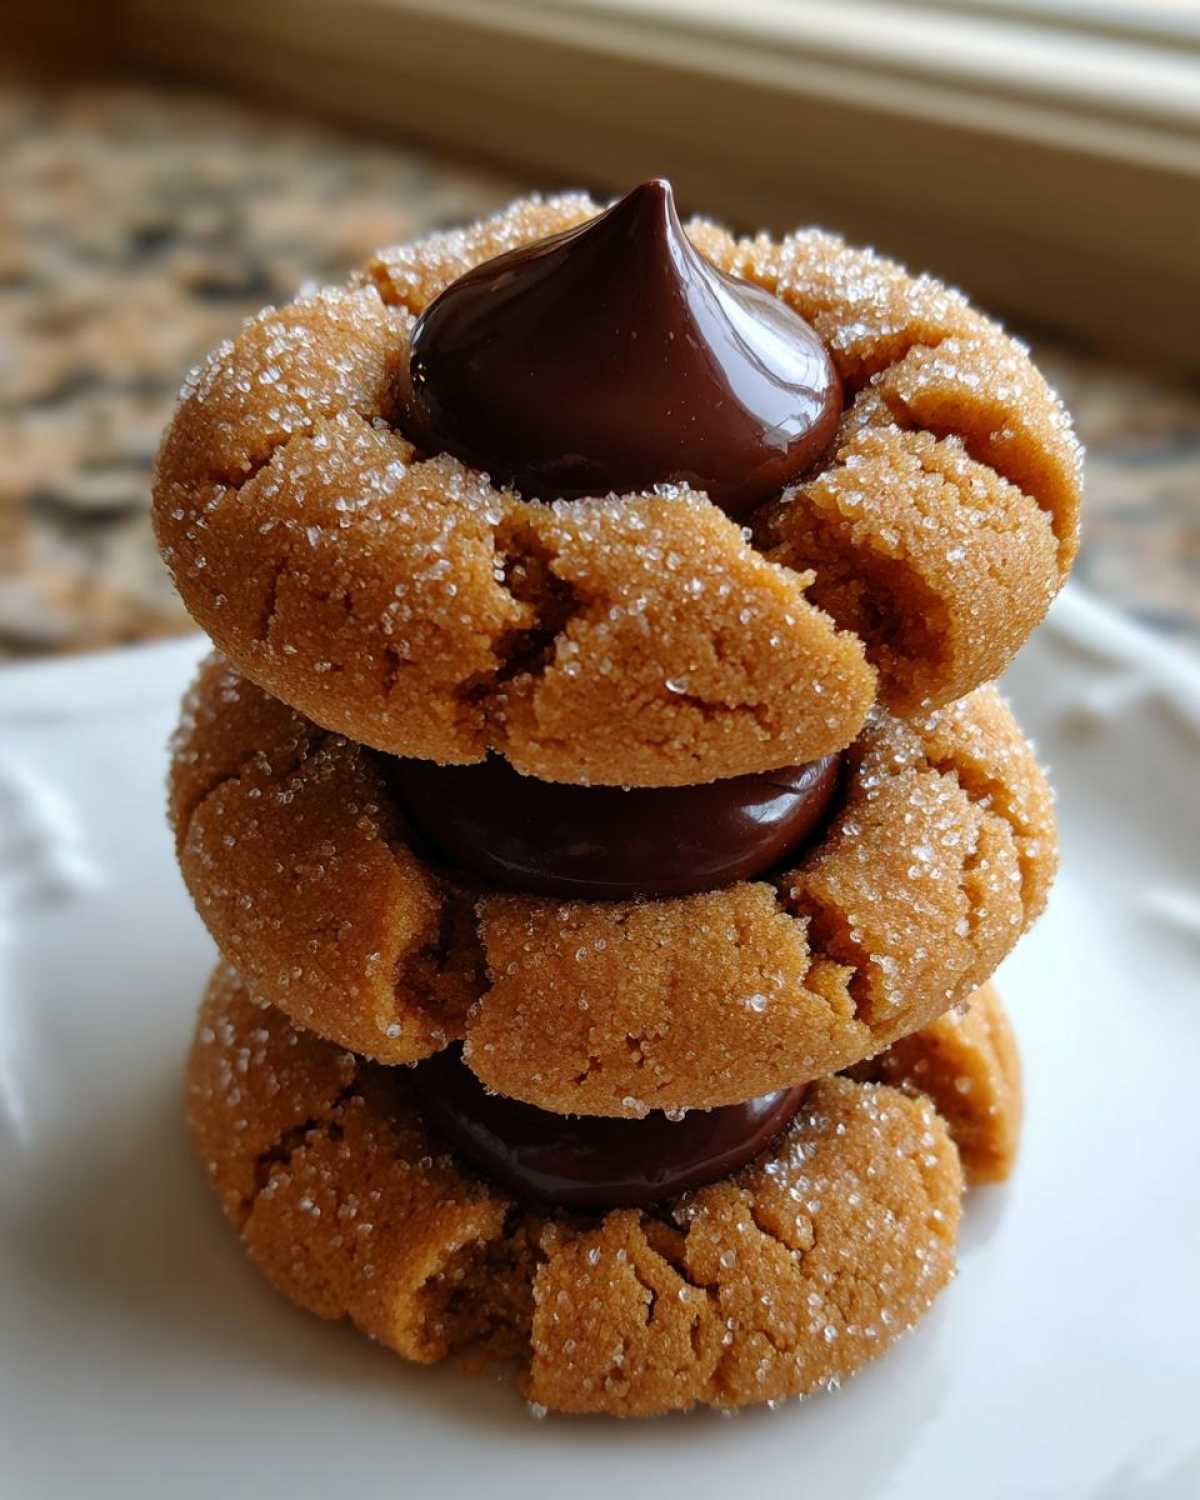
We skip the chilling step entirely, which is a huge win when you’re baking for a crowd. If you want to check out my runaway favorite for chewy cookies in general, you should look at my guide for ultimate chewy chocolate chip cookies, but right now, let’s focus on these classic beauties!
Why This is the Best Blossom Cookie Recipe (Soft and Chewy)
If you’re going to make a **peanut butter blossom**, you have to make it the right way—soft, chewy, and with that crackled top that just begs you to take a bite. So many recipes out there yield cookies that turn out hard as rocks the next day. Not ours! This is absolutely the **best blossom cookie recipe** because it holds its texture beautifully, even days later.
Here is what sets these cookies apart from every other recipe card you might find:
- They bake up perfectly fluffy, never flat or greasy.
- The chocolate kiss melts just right, creating that signature look without sinking completely into the dough.
- They are ready faster than almost any other holiday treat; we don’t even chill the dough!
Achieving the Perfect Soft Peanut Butter Cookies Texture
It all comes down to the sugar, my friend! We lean heavily on light brown sugar in this recipe. That extra bit of molasses in the brown sugar is the secret sauce that locks in moisture and keeps our **soft peanut butter cookies** tender. Trust me when I say don’t swap it all out for white sugar. Also, when you mix in the flour, stop as soon as those streaks of white disappear. Overmixing means overdeveloping gluten, and that’s how you end up with a tough cookie instead of a great one.
Why We Love These Chewy Chocolate Kiss Cookies
What’s not to love about salty, rich peanut butter meeting that perfect, slightly bittersweet chocolate center? These **chewy chocolate kiss cookies** are the definition of a classic for a reason. They are simple enough for kids to help make, which is why they are perfect for **easy holiday baking** sessions. You get maximum flavor with minimal fuss!
Ingredients for Classic Peanut Butter Blossom
Okay, ingredient gathering is the easiest part of this whole process, I promise! You probably have most of this stuff sitting around already. Making these **peanut butter blossom** cookies means relying on basics, but the ratios are everything. Make sure your butter is truly softened—not melted! And don’t forget, you need about 48 unwrapped Hershey’s Kisses ready to go right near the oven because timing is everything once these come out.
Here’s the full list you’ll need:
- 1 cup unsalted butter, softened
- 1 cup packed light brown sugar
- 1/2 cup granulated sugar (plus extra for rolling!)
- 2 large eggs
- 1/4 cup creamy peanut butter
- 1 teaspoon vanilla extract
- 2 1/4 cups all-purpose flour
- 1 teaspoon baking soda
- 1/2 teaspoon baking powder
- 1/2 teaspoon salt
- About 48 Hershey’s Kisses, unwrapped
If you’re looking for other quick, no-bake sweets while you have the chocolate out, check out my recipe for no-bake chocolate peanut butter oat bars—they freeze great!
How to Make Perfect Peanut Butter Blossom Cookies Step-by-Step
While the ingredient list is simple, the construction of this **Hershey Kiss cookie recipe** is where the magic happens. We want those cookies cracked on the outside, but still gooey in the middle, which means we have to pay close attention to mixing and, most importantly, the baking time. Don’t wander off to do dishes—you need to be ready for that chocolate moment!
Mixing the Dough for Your Homemade Peanut Butter Cookies
First things first, get that oven preheated to 375 degrees and line those sheets with parchment paper. You don’t want any sticking! In your biggest bowl, you’re going to cream together that softened butter, the brown sugar, and the initial half-cup of white sugar. Beat this mixture until it gets really light and fluffy—this traps the air that keeps your **homemade peanut butter cookies** from being dense. Once fluffy, beat in your eggs one by one, then mix in the peanut butter and vanilla. In a separate bowl, quickly whisk together your flour, baking soda, baking powder, and salt.
Now, here’s the stop sign: add the dry stuff to the wet stuff gradually, mixing on low speed only until it just comes together. Seriously, stop mixing when you see the last streak of flour disappear. We are not making bread here!
The Crucial Step: Baking and Adding the Chocolate Kiss
Next, set up a little assembly line. Put that reserved granulated sugar in a shallow dish. Roll your dough into one-inch balls—I use a small scoop for consistency—and give each ball a quick, light roll in the sugar. Place them about two inches apart on the sheets.
Bake these for only 8 to 10 minutes. I watch them like a hawk because they should look slightly underbaked in the middle when you pull them out! As soon as those sheets hit the counter, you must immediately press one unwrapped Hershey’s Kiss right onto the center of each warm cookie. If you wait too long, the cookie hardens and cracks the kiss right in half! Let them sit on the hot tray for five minutes to firm up before you move them carefully to a cooling rack. That short bake time ensures you get the absolute chewiest results.
If you loved this step-by-step method, you might enjoy trying my apple butter snickerdoodles next for another easy spin on a classic!
Tips for the Ultimate Peanut Butter Blossom Success
Even with a straightforward recipe like the **peanut butter blossom**, little tricks can take these cookies from ‘good’ to ‘famous.’ We need to ensure they stay soft, don’t spread into thin pancakes, and that the chocolate sets up perfectly. Trust me, having done this dozens of times, a few simple checks make all the difference in achieving the **best blossom cookie recipe** status in your home.
If you need more foolproof recipes for quick sweets, you should check out how I make my one-bowl fudgy brownie cookies—they are seriously simple!
Ingredient Temperature and Peanut Butter Choice for Peanut Butter Blossom
Let’s talk butter first. It absolutely needs to be softened to the point where your finger leaves an indent, but it shouldn’t look oily or shiny. If the butter is too warm, the dough spreads too fast in the oven, and poof—no crackle tops!
As for the peanut butter, stick to that classic creamy kind, like Skippy or Jif. The natural, oil-separated peanut butters often mess with the texture because they have more liquid fat, and that liquid fat causes the cookie to spread too much before it sets. We want that creamy, thick texture for the best results.
Troubleshooting Flat Peanut Butter Blossom Cookies
If your cookies always spread out completely flat, it’s usually an issue with the butter being too soft, like I mentioned, or maybe scooping the dough balls too small. But here is my biggest trick: if your dough seems really soft when you roll it, pop the entire tray of sugared dough balls into the fridge for just 10 minutes before they go into the oven. That quick chill firms up the fat just enough so that the cookies hold their beautiful plump shape while baking.
Make Ahead Holiday Sweets: Storing Your Peanut Butter Blossom
One of the best things about our **peanut butter blossom** recipe is how great they are for planning ahead! Since these are perfect **make ahead holiday sweets**, you can bake them a few days before your big event and they will taste just as amazing. Once they are completely cool—and I mean totally cool, otherwise the chocolate gets messy—store them in a single layer in an airtight container at room temperature.
They stay really moist for about three days this way. You can actually bake the cookies (without the Kisses) up to a week early and store them in a tightly sealed container. Then, just press the kisses into them the day you plan to serve them. If you’re prepping for a big party, you can even freeze the unbaked, sugared dough balls! Just make sure you have your sheet ready to go, throw them on, and add about two extra minutes to the baking time. Easy street!
If you are batch cooking for the week, my recipe for make ahead campfire breakfast burritos is a savory saver for the mornings after all that cookie baking!
Variations on the Classic Peanut Butter Blossom
While I truly believe this classic **peanut butter blossom** recipe is perfection as written—it’s traditional for a reason!—I never stop tinkering. Baking should be fun, right? If you want to shake things up a bit for your next batch, I have a few super simple variations that keep that chewy texture you love but add a fun little twist.
These changes are easy to implement and they don’t require you to hunt down any crazy ingredients. It’s all about maximizing fun for **easy holiday baking**!
Here are a couple of my favorite ways to switch things up:
- Swap the Crunch: If you prefer a little texture in your bite—and I sometimes do!—just swap out the creamy peanut butter for crunchy peanut butter. You get those little nutty nuggets scattered throughout the dough, which is fantastic. It adds a little more heft to your **homemade peanut butter cookies**.
- Spice It Up: I love adding warm flavors to baked goods. Try whisking in half a teaspoon of ground cinnamon or even a tiny pinch of nutmeg right into your dry ingredients when you mix the flour. It smells incredible coming out of the oven and blends surprisingly well with the peanut butter and chocolate. It gives it that slight depth you find in spicy cookies!
- Different Chocolate Kisses: While the milk chocolate is the standard, why not switch up the candy in the middle? Try using dark chocolate Kisses for a richer, less sweet center, or even the Hugs Kisses during the holidays for a colorful look. Just remember, you still press them in immediately when the cookies come out of the oven!
If you are into adding warming spices to your baking, you absolutely have to try my chai spice oatmeal cookies next! They use similar warming notes!
Serving Suggestions for These Simple Dessert Recipes
Honestly, the **peanut butter blossom** is pretty much perfect on its own, right? I mean, it’s a rich, salty-sweet cookie topped with a solid piece of chocolate. But if you’re serving these **simple dessert recipes** at a party or just want to make an afternoon snack feel extra cozy, you have to think about what you’re washing it down with!
These cookies are sturdy and rich, so they need something creamy or something sharp to balance them out. My go-to, hands down, is a big, cold glass of whole milk. There is nothing better than dunking that sugary, crackled edge just barely into the milk before taking a bite—it softens it up just a touch! I still do this, and I am definitely an adult now, ha!
If you’re serving these after dinner, a hot cup of coffee is amazing. The slight bitterness of the coffee cuts right through the richness of the peanut butter and makes the chocolate flavor really pop. For something a little fancier, or if you have kids running around and want a fun non-alcoholic option, you should absolutely check out my recipe for the caramel apple cider mocktail. The warm spice of the cider goes surprisingly well with the salty peanut butter.
For a dessert spread, pair these **easy holiday baking** favorites with something lighter, like lemon bars or maybe some plain sugar cookies. That way, your **peanut butter kiss cookies** stand out as the rich, necessary centerpiece they deserve to be!
Frequently Asked Questions About Peanut Butter Kiss Cookies
I get so many questions about these cookies because everyone wants their batch of **peanut butter kiss cookies** to be perfect! Since this recipe is famous for being a **no chill peanut butter cookie** option, there are definitely a few things folks always ask me about regarding texture and storage. Happy to clear things up so your baking is foolproof!
Can I make peanut butter blossom dough ahead of time?
This is the best part! Because this recipe relies on slightly warmer butter and no chilling, it’s designed for speed. You absolutely can make the dough ahead of time. If you want to mix the dough up and keep it in the fridge for up to three days, you should be good to go. The only thing you need to watch out for is the temperature when you bake it. If the dough is rock hard coming from the fridge, it might spread less, but it can also affect how quick those edges set. If you do chill it, let it sit on the counter for about 20 minutes before rolling into balls. Honestly, though, I usually mix it and bake it right away because it’s so quick!
What is the best way to store leftover peanut butter blossom cookies?
If you actually have leftovers—which rarely happens in my house—storage is simple, but you have to be smart about it, especially because of that chocolate top! Always make sure the Kisses are completely set before you try to stack them. Store the cooled cookies in an airtight container at room temperature. You should try to keep them in a single layer if you can, or use parchment paper between layers if you must stack them. If you overload the container, the chocolate from the top cookie can stick to the bottom cookie when they warm up even slightly. They stay delightfully soft and chewy like this for three to four days. Don’t bother with the fridge; it usually dries out most cookies!
Estimated Nutrition Facts for This Peanut Butter Blossom Recipe
Okay, I know when we are deep into baking **classic christmas cookies**, the nutrition label isn’t usually the main focus—we are here for the joy and the deliciousness! But since you asked, I wanted to share the general estimates for one standard **peanut butter blossom** cookie, based on the recipe ingredients above. Keep in mind that these are just ballpark figures, darling! They will definitely change depending on the brand of peanut butter or the exact size of your cookie balls.
Think of these as aspirational numbers, not strict dietary facts! The most important thing is that these **traditional christmas baking** staples are made with love.
Here’s a quick breakdown:
- Serving Size: 1 cookie
- Calories: 150
- Sugar: 12g
- Sodium: 75mg
- Fat: 8g
- Carbohydrates: 18g
- Protein: 3g
Remember, these are estimates, and every measurement changes depending on if you’re baking a smaller ball or a larger one for a **family favorite cookie recipe**. If you use natural peanut butter or low-carb sweeteners, your final count will look different, so always treat this as a guideline!
PrintClassic Soft and Chewy Peanut Butter Blossoms
Make soft, chewy peanut butter blossom cookies topped with a chocolate kiss. This is a simple recipe for traditional holiday baking.
- Prep Time: 20 min
- Cook Time: 10 min
- Total Time: 30 min
- Yield: About 4 dozen
- Category: Dessert
- Method: Baking
- Cuisine: American
- Diet: Vegetarian
Ingredients
- 1 cup unsalted butter, softened
- 1 cup packed light brown sugar
- 1/2 cup granulated sugar
- 2 large eggs
- 1/4 cup creamy peanut butter
- 1 teaspoon vanilla extract
- 2 1/4 cups all-purpose flour
- 1 teaspoon baking soda
- 1/2 teaspoon baking powder
- 1/2 teaspoon salt
- About 48 Hershey’s Kisses, unwrapped
- 1/4 cup granulated sugar for rolling
Instructions
- Preheat your oven to 375 degrees Fahrenheit. Line baking sheets with parchment paper.
- In a large bowl, beat the softened butter, brown sugar, and 1/2 cup granulated sugar with an electric mixer until light and fluffy.
- Beat in the eggs one at a time. Mix in the peanut butter and vanilla extract until combined.
- In a separate medium bowl, whisk together the flour, baking soda, baking powder, and salt.
- Gradually add the dry ingredients to the wet ingredients, mixing on low speed until just combined. Do not overmix.
- Place 1/4 cup of granulated sugar in a shallow dish. Roll the dough into 1-inch balls. Roll each ball in the sugar to coat lightly.
- Place the sugared balls about 2 inches apart on the prepared baking sheets.
- Bake for 8 to 10 minutes, or until the edges are lightly set but the centers still look slightly soft.
- Remove the sheets from the oven. Immediately press one unwrapped Hershey’s Kiss into the center of each warm cookie.
- Let the cookies cool on the baking sheet for 5 minutes before transferring them to a wire rack to cool completely. The chocolate will set as they cool.
Notes
- For the softest cookies, do not overbake. Remove them when the edges are just starting to brown.
- You can chill the dough for 30 minutes if your kitchen is very warm, but this recipe works well without chilling.
- If the chocolate kisses start to melt too much, wait a minute or two after removing the cookies from the oven before pressing them in.
Nutrition
- Serving Size: 1 cookie
- Calories: 150
- Sugar: 12
- Sodium: 75
- Fat: 8
- Saturated Fat: 4
- Unsaturated Fat: 4
- Trans Fat: 0
- Carbohydrates: 18
- Fiber: 1
- Protein: 3
- Cholesterol: 25