

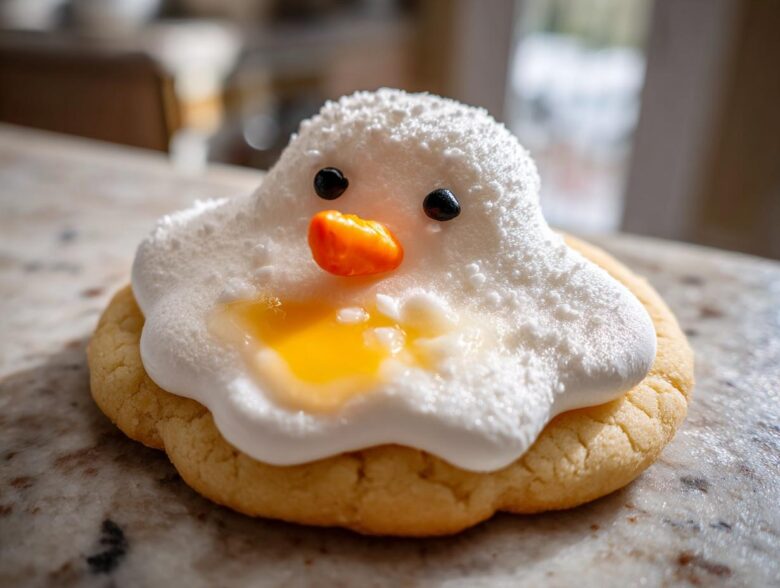
Oh my goodness, are you ready for the most adorable, giggle-inducing cookies of the entire holiday season? Forget perfectly piped gingerbread men; we are going straight for chaotic, whimsical fun with these melted snowman cookies! Seriously, my kids talk about these every December. They look way more complicated than they actually are, which is my favorite kind of holiday baking magic. If you’re looking for a festive bake that doubles as a fun activity, stop scrolling! We’re using a super simple sugar cookie base and the secret weapon is a marshmallow that we trick into melting just right. Trust me, you’re going to want to whip up a huge batch of these melted snowman cookies for your next party. You can see loads of other fun baking inspiration over on the blog, too!
Why You Will Love These Melted Snowman Cookies
I’m telling you, these cookies win every time we make them. They tick all the boxes for great holiday baking: simple ingredients, a low-stakes assembly process, and a presentation that just screams, “Look how much effort I put in!” (Even when you really didn’t! Wink.)
- Kid-Friendly Fun and Easy Assembly: The kids absolutely adore watching the marshmallows melt—it’s like quick, edible science! It’s one of those genuinely easy kids Christmas cookies because the decorating is forgiving.
- Adorable Snowman Themed Treats: These aren’t just cookies; they’re little winter dioramas! They stand out against the usual lineup of standard holiday cookie recipes because they look like tiny, whimsical scenes. Everyone calls them my most cute winter desserts.
Essential Ingredients for Perfect Melted Snowman Cookies
You don’t need a pantry full of fancy candy making supplies for these winter treats, which I think is just marvelous. We pull most of this list right out of the standard baking cabinet. I’m laying out exactly what you need to create that sturdy cookie foundation and the perfect puddle on top. If you’ve already got a favorite recipe for quick cookies, you might even skip the first part! We’ve got lots of great recipes on the site, like these no-bake bars, but for these snowmen, stick to the sugar cookie base for the best melt!
For the Sugar Cookie Base
This base has to be firm enough to hold a warm marshmallow puddle, so stick close to these amounts:
- 2 1/4 cups all-purpose flour
- 1 teaspoon baking soda
- 1/2 teaspoon baking powder
- 1 cup unsalted butter, softened—I mean *softened*, not melted!
- 1 1/2 cups granulated sugar
- 1 large egg
- 1 teaspoon vanilla extract
- 1/2 teaspoon salt
If you’re short on time, you can totally use store-bought dough, but if you use a pre-made recipe, make sure it’s one that doesn’t spread too much. Sometimes those no chill sugar cookie dough versions work wonders here.
For the Melting Marshmallow Topping and Decorations
This is where the magic happens! You need the right tools to get that ooey-gooey look you want:
- 1 bag of large marshmallows – these are essential for the size of the puddle!
- 1/2 cup powdered sugar
- 2 tablespoons milk
- 1/4 teaspoon vanilla extract (for the optional glaze base)
- Orange food coloring (just a drop for the nose element)
- Black decorating gel OR small black candies for the eyes and buttons
- Orange sprinkles or tiny orange candies for the carrot nose
The black gel is easiest, but if you use little candies, just make sure they are flat enough not to look too bulky once the marshmallow settles around them.
Step-by-Step Guide to Making Melted Snowman Cookies
Okay, let’s get down to business! Making the dough is pretty standard, but don’t rush the chilling part—that’s how you get those nice, neat circles that won’t spread out into thin pancakes in the oven. If you want the absolute best guidance on getting your creaming technique down, check out my tips for the ultimate chewy chocolate chip cookies; the creaming method is the same!
Preparing the Sugar Cookie Dough
First, whisk together all your dry stuff—the flour, soda, powder, and salt. Keep that aside. In your big mixer bowl, you need to cream that softened butter and the sugar until things look genuinely fluffy and pale yellow. Beat in the egg and vanilla until it all comes together smoothly. Now, add the dry mixture in small batches, mixing only until you see just a hint of flour disappear. Don’t mix it more than you have to! Wrap that dough up tight and pop it in the fridge for at least half an hour. Trust me, that chill time is non-negotiable for good shapes!
Baking the Cookie Bases
When the oven is preheated to 375 degrees F (190 degrees C), get your baking sheets lined up with parchment paper. Roll that chilled dough out to about a quarter-inch thick, and then use a round cutter to make your base shapes. Pop them in for 8 to 10 minutes. You’re looking for edges that are just barely kissing golden brown. Once they come out, you have to let them cool completely right there on the tray before you even think about touching them. If you try to move them hot, they’ll crack, and that’s a sad start for a snowman!
Achieving the Signature Melted Snowman Cookies Look
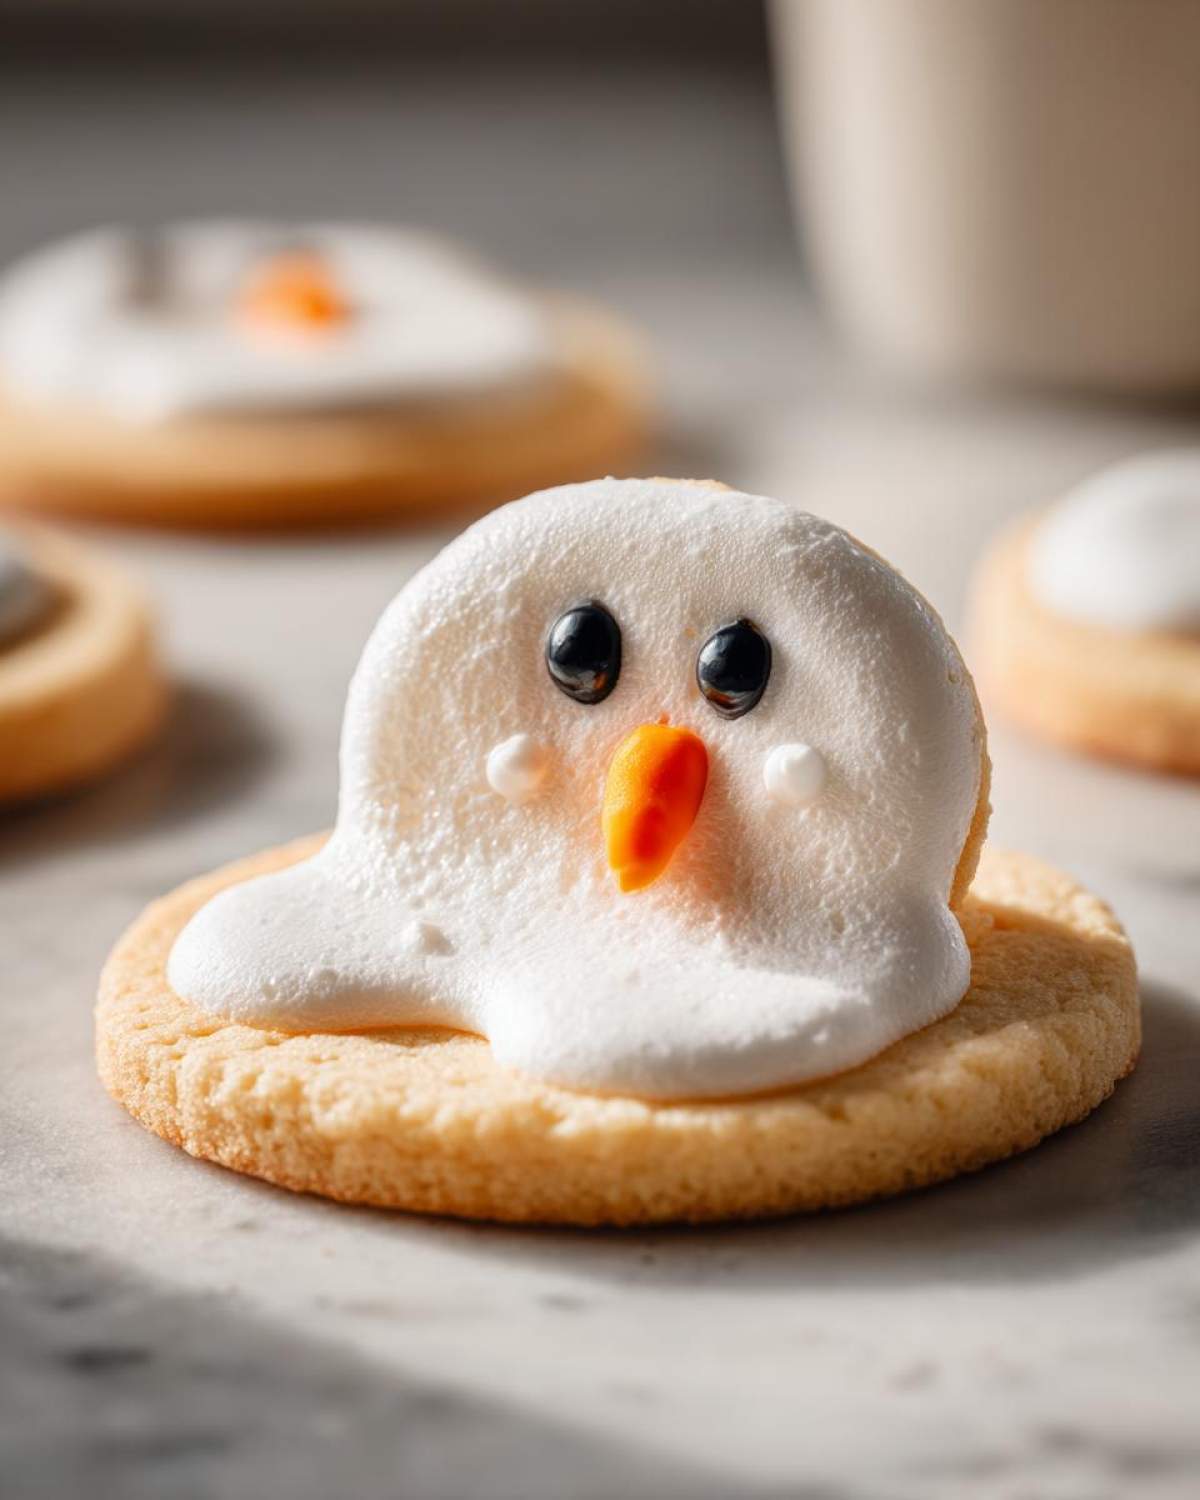
This is the fun, slightly nerve-wracking part! Once those cookies are totally cool, place one large marshmallow right in the center of each one. Now, turn your oven OFF. We are using residual heat here! Put the cookies back in the turned-off oven for just one or two minutes. You’re watching them like a hawk! You just want the marshmallow to start looking soft and maybe puff up a tiny bit. Pull them out immediately, and while they are hot, use the back of a spoon or a small offset spatula to gently press down and swipe that warm marshmallow outward. That quick press makes the beautiful, messy puddle shape that shows you just how much our little snowman is melting away!
Decorating Your Snowman Faces and Buttons
You have to work fast here because the marshmallow sets up quickly. While it’s still slightly tacky, it’s time to decorate! Use your black decorating gel or those tiny black candies to give him eyes and a few buttons down the mound. Then, use those orange sprinkles or tiny orange candies to fashion that poor little melting snowman a carrot nose. These decorated sugar cookies look amazing when you finish the whole batch and see all their unique little melted expressions.
Expert Tips for Perfect Melted Snowman Cookies
Listen, even though these look simple, the difference between a cute melt and a scorched mess comes down to paying attention during those last two minutes. These little tricks are how I make sure my batch of festive holiday baking always turns out perfectly cute without any drama. I learned these things the hard way, so you don’t have to!
Controlling the Marshmallow Melt
You have to hover when those marshmallows go into the turned-off oven. Seriously, set a timer for 60 seconds and check them. If you forget them for even an extra minute, they can go from puffy to brown super fast, and nobody wants a sad, burnt puddle! If you’re experienced and know your oven’s hot spots, using a quick blast with a kitchen torch right before you press them down works too. That gives you instant warmth without putting the cookie back in the oven environment, which some people prefer.
Dough Management for Uniform Shapes
When you are rolling out that sugar cookie dough, be a ruler about the thickness! If you roll some bits to 1/8 inch and others to 1/2 inch, you’ll end up with cookies that are either burned or still doughy when others are perfectly baked. I always use little guides—sometimes I just use two wooden chopsticks laid parallel on the counter to roll against—to make sure every single base for these snowman themed treats is exactly 1/4 inch thick. It ensures everything bakes evenly!
You can find more great tips on handling dough evenly when working with things like my rainy day chocolate chip pan cookie recipe too!
Variations on Melted Snowman Cookies
So, while I truly believe the marshmallow melt is the superior method for achieving maximum cuteness in these melted snowman cookies, I know everyone’s pantry and preferences are a little different, right? It’s important to know you can give these any little twist you want and they’ll still be totally adorable Christmas baking projects. Don’t feel you have to stick to my plan 100% if you have something else you prefer to use!
Swapping the Cookie Base
The sugar cookie is great because it’s sturdy and relatively neutral in flavor, but what if you really love peanut butter? You could absolutely use a sturdy peanut butter cookie base instead. Just make sure that peanut butter cookie recipe bakes up nice and firm so it can handle the melted topping. If you’re looking for an established recipe, you could try searching around for a good recipe for Peanut Butter Cup Cookies—just skip whatever topping that recipe calls for and use our marshmallow method!
Also, if you are truly pressed for time and skipped my chilling instruction because you went with a pre-made dough, look for a recipe labeled as No Chill Sugar Cookie Dough. Those are often formulated to hold their shape better right out of the gate, which is perfect when you’re just trying to get these cookies baked so you can get to the melting stage!
Alternative Melting Agents
Sometimes people want a flatter cookie for packaging or stacking, and you just can’t get that with a big puffy marshmallow center. If that’s your goal, you can absolutely skip the marshmallow step and use a thick, white royal icing instead. You’d just spread it out directly onto the cooled cookie base in a puddle shape.
Now, honest truth? The royal icing melt looks flatter, and it doesn’t have that incredible slightly chewy give that the true baked marshmallow gives you. But, if you’re looking for a very clean look for a big platter of cute winter desserts, a thick layer of plain white icing works in a pinch. I always suggest whipping up a little batch of something yummy, like my apple butter snickerdoodles frosting, if you’re going to use icing!
Serving Suggestions for These Fun Christmas Desserts
Now that you’ve got a whole tray of these silly, wonderful little snowmen, what are you going to serve them with? These fun Christmas desserts for parties fly off the plate fast! They look gorgeous just sitting on a simple white platter, but nothing beats pairing them with a warm, cozy drink.
I always serve mine alongside a big pitcher of mulled cider or maybe even my favorite caramel apple cider mocktail—the warm spices just marry perfectly with the vanilla cookie. They are also perfect next to a hot chocolate bar when you’re having friends over for a cozy night. They are definitely a showstopper!
Storage and Reheating Instructions for Melted Snowman Cookies
These little guys are best eaten the day you make them, especially because of that lovely, slightly gooey marshmallow melt we worked so hard to achieve. However, if you do have leftovers, don’t panic! You want to store them in a single layer, or with parchment paper gently placed between layers, in a completely airtight container at room temperature. Seriously, keep them away from the fridge!
Putting the cookies in the refrigerator can actually make the sugar cookie base hard and stiff. Also, the moisture will make your beautiful black decorations start to run. I wouldn’t reheat these at all; they soften up just enough at room temperature to be perfect again the next day. If you’re using the royal icing version, they hold up even a little better!
Frequently Asked Questions About Melted Snowman Cookies
I always get a few questions when people first try to make these adorable little characters come to life! It’s one of those snowman themed treats that seems tricky, but once you get the hang of it, it’s a breeze. Here are the things I hear most often from other bakers trying this recipe out.
Can I make the cookie dough ahead of time for these melted snowman cookies?
Yes, you absolutely can! That’s the beauty of a good sugar cookie base. You can wrap that dough up really tightly in plastic wrap—like it’s getting ready for a long winter nap—and keep it in the fridge for up to two days. When you’re ready to roll it out, just let it sit on the counter for about 20 minutes or so until it’s soft enough to handle without cracking everywhere. If it’s too cold, it’ll fight you!
What is the best way to get the marshmallow to look perfectly melted?
This is the secret sauce for that realistic effect! You want residual heat, not active heat. Do not put the cookie *back* into a hot oven. The best way is to place the cookie with the marshmallow on it back into the oven only after you’ve turned the heat OFF. The warmth trapped inside will soften it perfectly without burning it to a cinder. Once they come out, you have to immediately press and spread that warm, gooey marshmallow outward while it’s still totally pliable. That quick action creates the puddle!
Are these easy snowman themed treats suitable for gifting?
Oh yes, they make the cutest little gifts! Since you are dealing with a marshmallow topping, they are best gifted and eaten within three days. Keep them in an airtight container at room temperature, just like I mentioned in the storage tips. If they sit around too long, the marshmallow can start to get a little chewy or start sweating condensation, which ruins the cute face decorations. But honestly, these cute winter desserts never last that long in my house anyway!
If you’ve got any other burning questions, I’m always happy to chat. You can always reach out over on my contact page!
Estimated Nutritional Data for Melted Snowman Cookies
Because these cookies involve butter, sugar, and a whole marshmallow on top, they are definitely a treat rather than an everyday snack! Since every oven and every brand of flour is slightly different, please remember that this information is just an estimate based on the recipe proportions. For official dietary needs, you might want to plug your exact ingredients into your favorite nutrition calculator.
- Serving Size: 1 cookie
- Calories: 180
- Fat: 8g
- Saturated Fat: 5g
- Carbohydrates: 26g
- Sugar: 22g
- Protein: 2g
- Cholesterol: 25mg
For complete dietary disclosures and more information about my reporting standards on nutrition, please check out my full disclaimer.
Estimated Nutritional Data for Melted Snowman Cookies
Because these cookies involve butter, sugar, and a whole marshmallow on top, they are definitely a treat rather than an everyday snack! Since every oven and every brand of flour is slightly different, please remember that this information is just an estimate based on the recipe proportions. For official dietary needs, you might want to plug your exact ingredients into your favorite nutrition calculator.
- Serving Size: 1 cookie
- Calories: 180
- Fat: 8g
- Saturated Fat: 5g
- Carbohydrates: 26g
- Sugar: 22g
- Protein: 2g
- Cholesterol: 25mg
For complete dietary disclosures and more information about my reporting standards on nutrition, please check out my full disclaimer.
PrintMelted Snowman Sugar Cookies

Make adorable and fun melted snowman cookies using a simple sugar cookie base and marshmallow topping for a cute winter treat.
- Prep Time: 30 min
- Cook Time: 12 min
- Total Time: 42 min
- Yield: 24 cookies
- Category: Dessert
- Method: Baking
- Cuisine: American
- Diet: Vegetarian
Ingredients
- 2 1/4 cups all-purpose flour
- 1 teaspoon baking soda
- 1/2 teaspoon baking powder
- 1 cup unsalted butter, softened
- 1 1/2 cups granulated sugar
- 1 large egg
- 1 teaspoon vanilla extract
- 1/2 teaspoon salt
- 1 bag large marshmallows
- 1/2 cup powdered sugar
- 2 tablespoons milk
- 1/4 teaspoon vanilla extract
- Orange food coloring (for carrot nose)
- Black decorating gel or small black candies (for eyes and buttons)
- Orange sprinkles or small orange candies (for carrot nose)
Instructions
- Whisk together the flour, baking soda, and baking powder in a bowl. Set aside.
- In a separate large bowl, cream the softened butter and granulated sugar until light and fluffy.
- Beat in the egg and vanilla extract until combined.
- Gradually add the dry ingredients to the wet ingredients, mixing on low speed until just combined. Do not overmix.
- Chill the dough for at least 30 minutes.
- Preheat your oven to 375 degrees F (190 degrees C). Line baking sheets with parchment paper.
- Roll the chilled dough out to about 1/4 inch thickness. Cut out round cookie shapes for the snowman’s body base.
- Place the cookie rounds on the prepared baking sheets. Bake for 8 to 10 minutes, or until the edges are lightly golden. Let cool completely on the baking sheet.
- Prepare the royal icing: Whisk the powdered sugar, milk, and vanilla extract until smooth. Add a drop of orange coloring if desired for a slightly tinted base, though white is fine.
- To assemble the ‘melted’ effect, place one large marshmallow on the center of each cooled cookie.
- Place the cookies back into the turned-off oven for 1 to 2 minutes, or until the marshmallow just begins to soften and slightly spread. Watch closely to prevent burning.
- Remove from the oven. Immediately use a small offset spatula or the back of a spoon to gently press and spread the warm marshmallow outward, creating the ‘melting’ puddle shape around the center of the cookie.
- While the marshmallow is still slightly tacky, decorate the face and buttons using the decorating gel or small candies. Use orange sprinkles or small candies for the nose.
- Let the cookies set before serving.
Notes
- For a quicker assembly, you can toast the marshmallows lightly with a kitchen torch before placing them on the cookie base.
- If you want a firmer ‘melted’ look, you can use a simple glaze instead of marshmallow, but the marshmallow gives the best 3D effect.
- You can use pre-made sugar cookie dough to save preparation time.
Nutrition
- Serving Size: 1 cookie
- Calories: 180
- Sugar: 22
- Sodium: 110
- Fat: 8
- Saturated Fat: 5
- Unsaturated Fat: 3
- Trans Fat: 0
- Carbohydrates: 26
- Fiber: 0
- Protein: 2
- Cholesterol: 25