

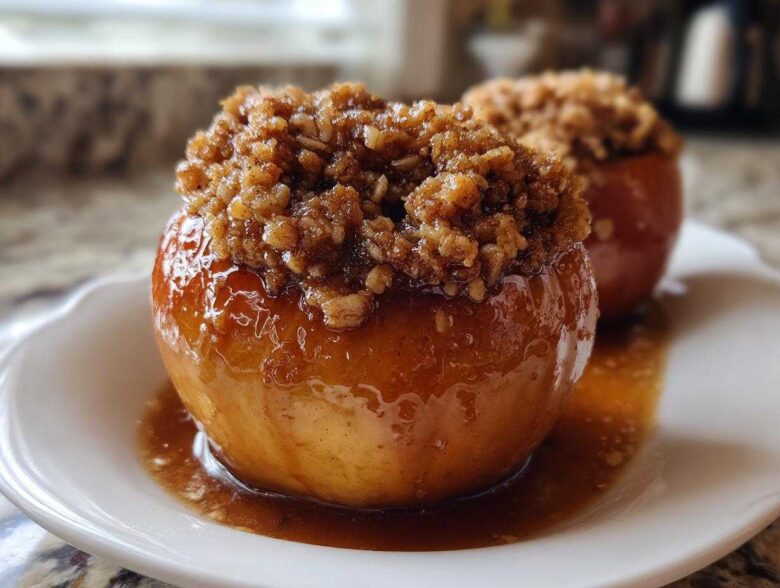
Oh my goodness, is there any scent that screams ‘cozy’ louder than warm spiced apples hitting the oven? I swear, the minute those cinnamon notes mix with the sweet, slightly tart apple smell, I’m instantly grabbing my thickest sweater. Forget complicated pies; when I need an easy, satisfying fix for a chilly evening—whether it’s a quiet Sunday or a casual fall get-together—I always turn to these **baked apples**. Trust me when I say this stuffed baked apples recipe is the simplest thing you’ll make all season, thanks to that incredible warm, crunchy oat filling we pack right into the center. If you ever want a delicious, hands-off alternative, you should totally check out the slow cooker method over at Slow Cooker Cinnamon Apples, but for now, let’s stick to the oven magic! I’ve made these dozens of times for everything from post-football game snacks to simple holiday treats, and they never, ever disappoint!
Why This is the Best Way to Make Baked Apples
If you are searching for the best baked apples, you’ve landed in the right spot because this recipe needs almost zero fuss. It’s the easy baked apples recipe you’ll keep pulling out year after year. Seriously, the hands-on prep time is maybe ten minutes, and then the oven does all the hard work! You get that perfect texture where the apple is tender but still holds its shape, which is key.
Plus, we aren’t settling for skinny flavor here! That cinnamon and brown sugar oat mixture seeps down into the apple as it cooks. When you scoop out that warm, slightly gooey filling, it’s just perfection. It’s honestly such a straightforward way to get a homemade, comforting flavor everyone adores.
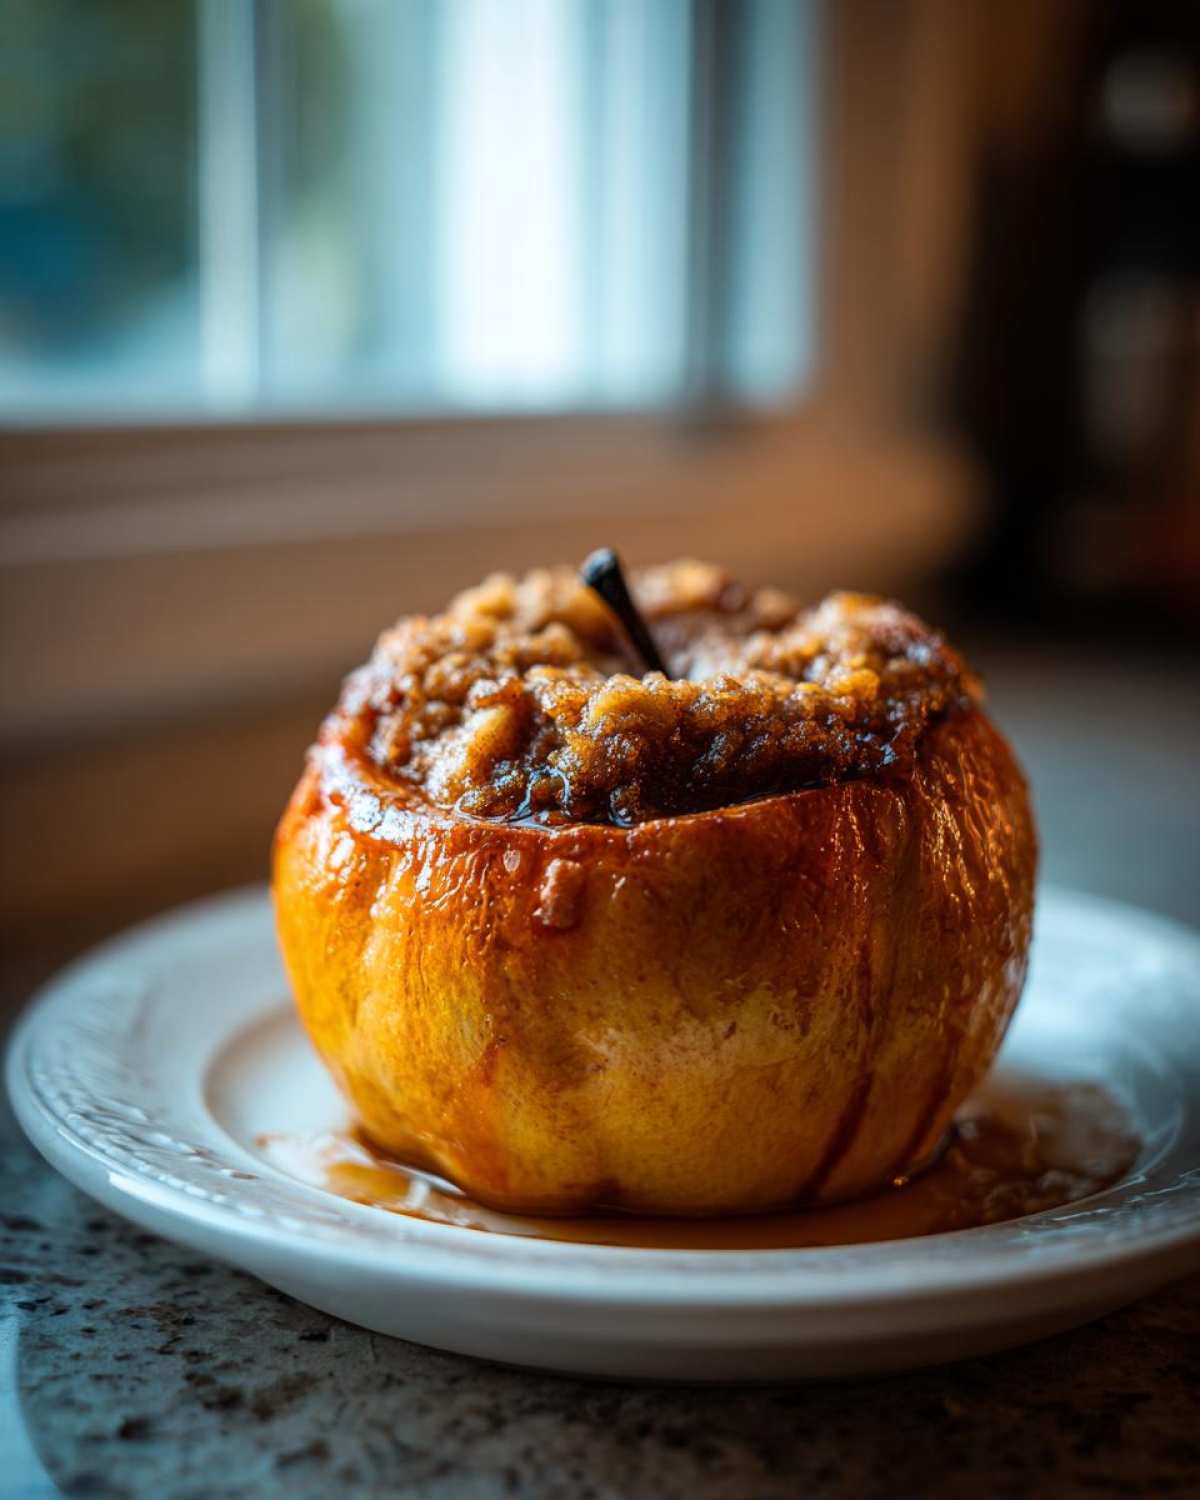
Ingredients for Stuffed Baked Apples
Okay, let’s talk about what you’ll need to get these gorgeous **baked apples** in the oven. The ingredient list is short and sweet, which is perfect for a quick weeknight treat. Remember how I mentioned that texture matters? That starts right here with the apples!
You absolutely have to use firm apples—Honeycrisp or Granny Smith are my go-to choices. They bake up beautifully without turning into complete mush. They need to support that delicious filling we’re about to pack in! If you’re feeling like making something similar you can bake later, you might want to check out my recipe for Apple Cinnamon Streusel Muffins, but for these whole apples, stick to the firm ones.
Here is what you need for four servings. Make sure that butter is nice and cold when you cut it into those tiny pieces—it melts perfectly over the filling as it bakes!
- 4 large firm apples (like Honeycrisp or Granny Smith)
- 1/4 cup rolled oats
- 1/4 cup packed brown sugar
- 1 teaspoon ground cinnamon
- 1/4 cup chopped pecans or walnuts (optional)
- 2 tablespoons unsalted butter, cut into small pieces
- 1/4 cup water
Step-by-Step Instructions for Perfect Baked Apples
Now that we have all our beautiful ingredients ready, let’s dive into how to bake apples the easy way! This whole process is really rhythmic once you get going. We want tender apples, not mushy soup, so pay attention to how we prep the core and the pan. If you love apple butter, you might want to whip up some Apple Butter Snickerdoodles for next week, but right now, the oven is calling!
Preparing the Apples and Oven for Baked Apples
First things first: get that oven humming at 375 degrees Fahrenheit. You also want to grease a small baking dish—just a light slick of oil or butter will do. Now for the apples! Carefully wash them up. Grab a small paring knife or a melon baller, and start working on the core. Here is the secret tip: you MUST stop before you cut all the way through the bottom! Leave about a half-inch wall so your beautiful filling doesn’t just leak out onto the pan while baking.
Mixing the Cinnamon and Oat Filling for Baked Apples
Grab a small bowl while the oven heats up! We are making the best part of these **baked apples** right now. Just toss in your oats, brown sugar, cinnamon, and the optional nuts—I love the crunch the pecans give it! Mix that all together until it looks uniformly spiced and fragrant. Once it’s combined, gently stuff that mixture right into the hole you made in each apple. Don’t pack it too tight, though! Top each stuffed apple with just a few tiny pieces of butter.
Baking Time and Checking Tenderness for Whole Baked Apples Recipe
This is where the magic happens. Pour that small amount of water—about a quarter cup—into the very bottom of the baking dish. That water turns to steam, which keeps the skin and the fruit’s side walls from drying out before the center cooks. Pop them in and let them bake for 35 to 45 minutes. The time really depends on how big your fruit is. To check if these **whole baked apples recipe** stars are done, just pierce one gently with a fork. If it slides in easily, they’re ready! Let them cool just a tiny bit before you serve them warm.
Expert Tips for Flavorful Cinnamon Baked Apples
Getting those perfectly cooked, flavorful **cinnamon baked apples** is all about a couple of extra little checks before and after baking. Like I mentioned, apple choice is huge! If you use soft apples, you’ll end up stirring applesauce, not eating a lovely baked fruit. You want that firm structure to stand up to the heat.
Here’s a fun trick for achieving the *ultimate* crunch on that topping: once the apples are tender—say, at the 35-minute mark—peek in, and if the fruit looks done, switch your oven to broil for just one minute. Watch them like a hawk! This blasts the oat topping with heat, making it golden and crispier without overcooking the inside. It’s a small step, but it makes these **baked apples** look and taste totally professional. If you love that nutty crunch, you might even try my Maple Pecan Granola Clusters recipe sometime!
Variations on Stuffed Baked Apples
While I truly adore this classic oat and brown sugar filling, one of the best things about making simple **baked apples** at home is you can change things up based on what you have! These aren’t just one-note treats; they are wonderfully adaptable.
If you’re out of oats or just want a different texture in your **stuffed baked apples**, try swapping them out! Crushed cornflakes or an inexpensive box of crispy rice cereal make a fantastic substitute. They give you that crunch without the chewiness of the oats. Just use the same measurement. If you’re feeling extra festive, toss in about two tablespoons of dried cranberries into the filling mixture. The tartness pairs beautifully with the brown sugar!
Now, if you love that traditional crumble topping you see on crisps but want it attached to an apple, adapting this recipe is easy. For a more classic **baked apples with crumble topping** look, just ditch the apple pieces, remove the water from the bottom of the dish, and make sure you use slightly more butter—about four tablespoons total—mixed right into your oat and sugar filling. This creates a thicker, more buttery topping that browns up nicely. Speaking of festive drinks, if you need something to sip while these bake, grab my Caramel Apple Cider Mocktail recipe!
Honestly, once you know how to core the apple correctly, you unlock a whole world of delicious, warm fruit treats!
Serving Suggestions for Your Fall Baked Apple Desserts
The wait is over! Your **baked apples** are gorgeous, piping hot, and smell like autumn perfection. You can absolutely eat them just plain—they are delicious on their own! But, let’s be honest, serving them up right turns a simple treat into a true celebration. I love setting out a little topping bar when my family comes over after Thanksgiving so everyone can customize their own dessert.
If you’re making these for breakfast or a lighter snack, try spooning a warm apple right on top of your oatmeal. It mixes in beautifully! Or, if you prefer that classic temperature contrast, a scoop of really good quality vanilla bean ice cream—that cold shock against the hot fruit—is just heavenly. It’s the ultimate comfort food apple recipe pairing, no joke.
For those looking for a slightly more healthy baked apples side dish vibe, you can skip the ice cream and top it with a dollop of Greek yogurt instead. It gives you the creaminess without all the extra sugar.
Here is my absolute favorite, slightly weird, but totally traditional way to serve them. My grandfather, who grew up on a small farm, always insisted on serving his warm spiced apples alongside a slice of sharp, aged cheddar cheese. I know, I know, it sounds wild! But the salty, sharp tang of the cheese cuts through the sweetness of the brown sugar and cinnamon so perfectly. It’s the best way to end a heavy meal. You simply cut the apple in half and place a small wedge of cheddar right next to it on the plate. If you are hosting, you have to try my Caramel Apple Cinnamon Rolls the next morning!
No matter how you dress these up, remember they are meant to feel cozy and special. Enjoy every single bite!
Storing and Reheating Leftover Baked Apples
Don’t fret if you can’t finish all four of these amazing **baked apples** in one sitting! They actually keep really well, which makes them the perfect make-ahead treat for parties. The most important thing is to let them cool down completely before you try to store them, otherwise, you trap steam and that equals soggy apples the next day. Not what we want for our crispy little oat topping!
Once cool, transfer them into an airtight container. Plastic or glass works just fine. You can keep them tucked away in the refrigerator for about three or four days. I often make a batch specifically to have healthy-ish grab-and-go breakfasts ready for the next few mornings. If you love no-bake options for snacks, you should seriously try my No-Bake Chocolate Peanut Butter Oat Bars for lunchboxes!
Reheating is super quick, but you have to choose your method wisely depending on how you like your texture. For the absolute best results, use the oven. Pop the apple (or half an apple) onto a small, oven-safe plate and heat at 300 degrees for about 10 minutes. This dries out any absorbed moisture and re-crisps that topping beautifully. This is the best way to serve genuine warm spiced apples again.
If you are in a huge hurry for breakfast, the microwave is fine, but I have to warn you: it zaps the crisp right out of the oat topping. If you use the microwave, only zap it for about 20 to 30 seconds until it’s just warm enough, and maybe sprinkle a tiny pinch of ground cinnamon over the top right before eating to bring that fresh flavor back. It’s not ideal, but it works when you’re rushing out the door!
Frequently Asked Questions About Baked Apples
I get so many questions about these **baked apples**! As much as I love this recipe, I know people like to tinker a bit or run into small issues with their fruit sourcing. Don’t worry, we can troubleshoot anything and keep your fall baking successful. It’s amazing how many ways you can spin these simple **whole baked apples**!
Can I make these baked apples without an oven?
While I really champion the oven method because that dry heat helps the oat topping stay crisp—seriously, that’s the secret to homemade **baked apples with crumble topping**—yes, you can absolutely do this other ways if you need to! A slow cooker is fantastic for ultra-tender, almost stewed apples. Just place the stuffed apples in a slow cooker around the sides, add about half a cup of water, and cook on low for 4 to 6 hours until they are fork-tender. They won’t brown on top, but the flavor inside is still rich and comforting.
If you have an air fryer, that works too, especially if you’re only making one or two servings! Remember, the air fryer cooks hotter and faster than the oven, so you’ll need to lower your temperature slightly and check them often after about 20 minutes. For the best texture, though, the standard 375°F oven method is still the gold standard for these.
What are the best apples for baked apples?
This is critical! The wrong apple choice means you end up with apple pie filling instead of a nice, structurally sound baked apple. You need an apple that has a good balance of firmness and tartness so it can hold up to that sweet brown sugar filling in the heat. You absolutely want to stick to firm varieties after you’ve tried my method once! Granny Smith apples are the classic choice because they are reliably tart and firm—they are hard to mess up. However, I’ve fallen hard for Honeycrisp lately because they stay so snappy! Fuji also works really nicely. Just avoid anything labeled as ‘soft’ or ‘early harvest’ if you want a solid apple that doesn’t turn to soup on your plate.
How do I make this a healthier baked apples side dish?
That’s a great question, especially if you want to serve these alongside a big roast instead of just as a heavy dessert! We can easily tweak this to be a much lighter option, transforming it into a wonderful **healthy baked apples side dish**. The easiest swap is cutting back on the sugar in the filling. Try using only 2 tablespoons of brown sugar instead of the full quarter cup, or substitute the sugar entirely with an equal amount of real maple syrup!
Also, the butter adds richness, so if you skip the two tablespoons placed on top, the apples still bake beautifully using just the moisture from the water you add to the pan. And while nuts are healthy fats, omitting them during preparation slashes a few more calories. You still get all that beautiful cinnamon flavor mingling with the warm fruit!
If you’re looking for more ways to incorporate healthy fruits into your routine, make sure to poke around my main blog archive. There are tons of great ideas hiding there!
Nutritional Estimate for Baked Apples
Now, I always want to be upfront with you all about the nutrition side of things—especially when we bake things with brown sugar and butter! This recipe is pure comfort food, and while it’s fantastic as a dessert, it’s helpful to know what you’re looking at.
This estimate is based on enjoying one whole apple with the filling, treating this as a dessert serving, and using standard measurements. Please remember that these numbers are just guidelines! If you use extra buttery pecans or swap Granny Smiths for Honeycrisp, those figures can shift a little bit. I always say that the joy of eating these **baked apples** far outweighs any minor fluctuation in the numbers, but here is the general breakdown:
- Serving Size: 1 apple
- Calories: 280
- Sugar: 35g
- Fat: 12g (with 4g being saturated)
- Carbohydrates: 45g
- Protein: 3g
- Fiber: 6g
- Sodium: 5mg
See? Six grams of fiber from the apples themselves and the oats—that’s pretty respectable for a sweet treat! If you’re watching your sugar intake closer to the holidays, remember the tips I shared earlier about scaling back that brown sugar. Either way you bake them, I hope you enjoy this simple little slice of heaven!
Share Your Cozy Autumn Sweets Experience
Well, that’s it! You now have everything you need to make the most comforting, easiest batch of **baked apples** you’ve ever had. Seriously, don’t let these sit unbaked on your counter!
I truly hope these **warm spiced apples** bring as much joy and cozy energy into your kitchen as they do mine. When you give this recipe a try, please, please come back and tell me all about it! Did you try the surprising cheddar cheese pairing? Did you discover your own favorite nut mix to tuck into the filling?
Leave me a star rating right here on the recipe card—it helps other home cooks find this quick apple dessert recipe! And if you snapped a picture of your gorgeous, steamy, cinnamon-dusted beauties, tag me online! I absolutely love seeing your interpretations of these cozy autumn sweets. I check my messages often and love hearing from you all. If you’re curious about the face behind all these recipes, you can always browse further over on the About Us page. Happy baking, friends!
PrintSimple Stuffed Baked Apples with Cinnamon and Oats

Make easy stuffed baked apples featuring a warm filling of brown sugar, cinnamon, and oats. This recipe is a simple, comforting fall dessert.
- Prep Time: 10 min
- Cook Time: 40 min
- Total Time: 50 min
- Yield: 4 servings
- Category: Dessert
- Method: Baking
- Cuisine: American
- Diet: Vegetarian
Ingredients
- 4 large firm apples (like Honeycrisp or Granny Smith)
- 1/4 cup rolled oats
- 1/4 cup packed brown sugar
- 1 teaspoon ground cinnamon
- 1/4 cup chopped pecans or walnuts (optional)
- 2 tablespoons unsalted butter, cut into small pieces
- 1/4 cup water
Instructions
- Preheat your oven to 375 degrees Fahrenheit (190 degrees Celsius). Lightly grease a small baking dish.
- Wash the apples. Use a small knife or melon baller to core the apples, removing the seeds and leaving about a half-inch border at the bottom so the filling stays inside. Do not cut all the way through the bottom.
- In a small bowl, mix together the rolled oats, brown sugar, cinnamon, and chopped nuts, if using.
- Divide the oat mixture evenly and stuff it into the center cavity of each apple. Press the filling down gently.
- Place 2-3 small pieces of butter on top of the filling in each apple.
- Pour the 1/4 cup of water into the bottom of the prepared baking dish. This creates steam to keep the apples moist.
- Bake for 35 to 45 minutes, or until the apples are tender when pierced with a fork. Baking time depends on the size and variety of your apples.
- Carefully remove the apples from the oven. Let them cool slightly before serving warm.
Notes
- Serve these warm baked apples plain, or top with a scoop of vanilla ice cream or a drizzle of caramel sauce for a richer dessert.
- If you do not have nuts, you can substitute them with an extra tablespoon of oats.
- For a softer apple, you can peel the skin off before coring.
Nutrition
- Serving Size: 1 apple
- Calories: 280
- Sugar: 35
- Sodium: 5
- Fat: 12
- Saturated Fat: 4
- Unsaturated Fat: 8
- Trans Fat: 0
- Carbohydrates: 45
- Fiber: 6
- Protein: 3
- Cholesterol: 15