


There are some desserts so classic, they just scream celebration, right? For me, the smell of bright citrus and toasted sugar instantly takes me back to those warm afternoons when Amina and I are testing things out, trying to capture that perfect moment of sunshine on a plate. We’re finally sharing our Ultimate Homemade Lemon Meringue Pie recipe today! Forget those dry mixes from the box; this is truly from scratch, hitting that perfect triangle of textures: a buttery crust, a genuinely tart custard filling, and, oh my goodness, that high, fluffy, showstopping lemon meringue topping. If you want to dive deeper into the absolute best techniques, our guide on the classic lemon meringue pie recipe has even more detail!
We put so much love into perfecting this recipe because, honestly, a good lemon meringue pie should be worth the effort. It’s the kind of dessert that stops conversation when you bring it to the table. Trust me, once you nail this technique for the stable meringue, you’ll never look back. I know you are going to love making this!
Why This Homemade Lemon Meringue Pie Recipe Stands Out
So, why bother making this instead of grabbing one from the bakery case? I promise you, the difference is night and day, and honestly, it’s not as tricky as people make it sound! We focus on making sure every layer sings. If you’re ready to conquer this classic, check out the extra tips we use for the full classic lemon meringue pie recipe.
- It delivers that true, sharp tartness you crave, balanced perfectly by the sugar.
- It completely eliminates the fear of that weeping meringue, which is honestly the bane of every baker’s existence!
- This is a true Family Favorite Pie, meant to be made with love, not shortcuts.
The Perfect Balance: Zesty Custard and Buttery Crust
Aria (that’s Amina’s sister) always says the crust has to snap, not crumble sadly. We use a super buttery recipe to make sure that flaky foundation holds up against our vibrant, From Scratch Lemon Custard. The acidity from the real lemon juice is what cuts through all that richness. It’s tangy, sunshine-bright, and just perfection.

Achieving a Tall, Fluffy Meringue Topping
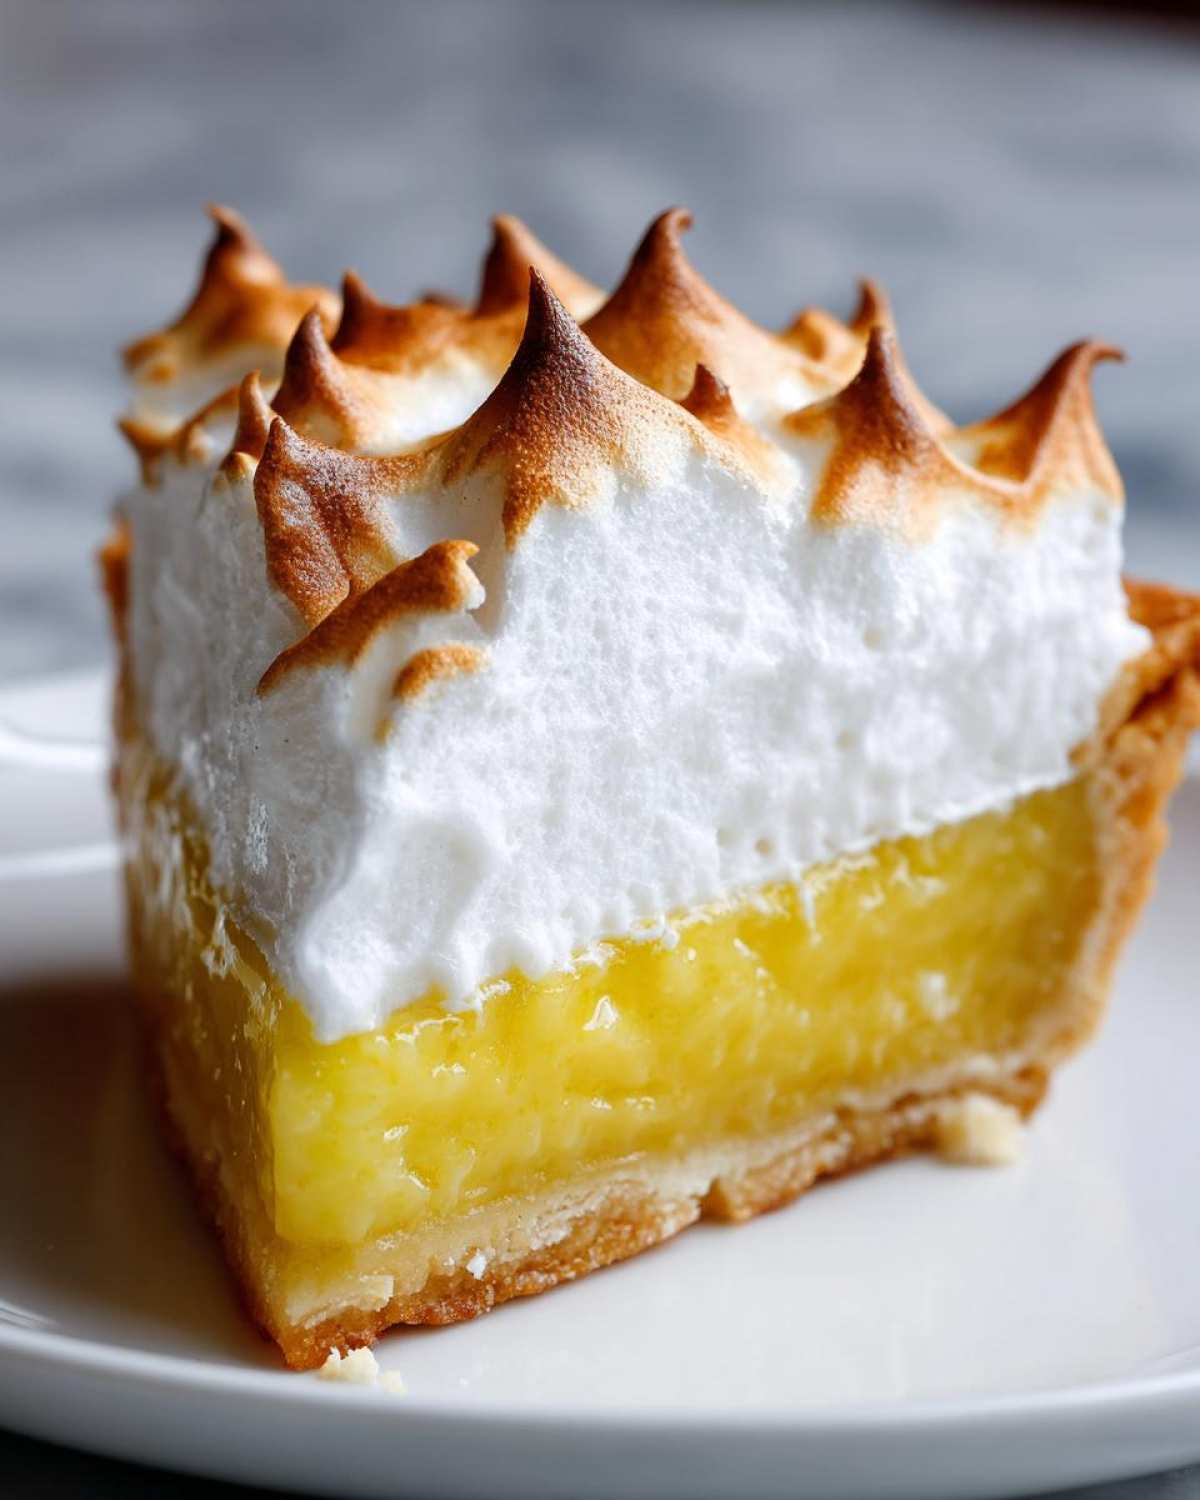
This is where we shine! We focus heavily on that Fluffy Meringue Topping. The secret isn’t just whipping hard; it’s starting with completely temperature-correct ingredients and adding the sugar slowly, piece by piece, while the mixer is running. That gradual addition creates the perfect internal structure, so your meringue stands tall and proud!
Gathering Ingredients for Your Classic Lemon Meringue Pie Recipe
Okay, friend, let’s talk about the stars of the show—the ingredients! Since we’re making this Classic Lemon Meringue Pie completely from scratch, precision matters here, especially for the custard. We want that perfect, sunny flavor, and you can’t get that from concentrate, trust me! If you want some ideas for making icing for some other treats while you wait for your pie to cool, I’ve shared some great tips over on my sugar cookie icing recipe page, but for this pie, focus on these core items. Get everything measured out before you even turn on the stove, that’s half the battle won!
For the Buttery Pie Crust (Use your favorite 9-inch recipe)
You absolutely need one fully baked and cooled 9-inch pie crust. If you’re following our method here, this crust should be made with real butter—no sad, floppy crusts allowed for this masterpiece! Use your tried-and-true recipe, or find a good one online, but please make sure it’s completely cool before you pour in the filling.
For the Zesty Lemon Custard Filling
This is where the zing comes from! You’ll need:
- 1 1/2 cups granulated sugar and 1/2 cup granulated sugar (we separate this for the meringue later!)
- 1/3 cup cornstarch for that perfect thickness
- 1/4 teaspoon salt
- 1 1/2 cups cold water
- 3 large egg yolks, lightly beaten—this gives the custard its lovely depth!
- 1/2 cup fresh lemon juice—please, please use fresh!
- 1 tablespoon lemon zest—Amina says this is the *real* secret to brightness.
- 2 tablespoons unsalted butter
For the Fluffy Meringue Topping
For that huge, cloud-like hat on top, grab these:
- 6 large egg whites—and this is vital, they must be at room temperature!
- 1/4 teaspoon cream of tartar—our stabilizer buddy!
- 1/2 cup granulated sugar (this is the reserved sugar mentioned above)
How to Make Lemon Meringue Pie From Scratch
Alright, this is the moment of truth! Making a spectacular lemon meringue pie from scratch requires timing, especially juggling the hot custard and the delicate meringue. It’s an artistic dance, but totally doable when you follow the rhythm of the steps. We’ll be moving fast once the custard is ready, so make sure your meringue ingredients are sitting out and ready to go! If you want to dive deep into making just the curd first, I have a great lemon curd recipe guide you can check out for practice!
Preparing the Crust and From Scratch Lemon Custard
First things first: make sure your pie shell is ready and cooled down completely. We need that barrier set before the hot filling goes in. Now for the custard! Whisk your first measure of sugar, cornstarch, and salt in a saucepan, then slowly add the cold water until it looks smooth. Get it over medium heat and stir constantly until it really thickens up and hits a full boil—let it boil for just one minute, stirring the whole time so it doesn’t scorch on the bottom!
Now, the crucial part: tempering the yolks or they’ll scramble right away! Whisk your three yolks lightly, and then *slowly* drizzle about a cup of that hot liquid into the yolks while you whisk like crazy. Once that’s incorporated, pour the yolk mixture back into the saucepan. Keep it over medium heat until it thickens again. Pull it off the heat, stir in the butter, zest, and fresh juice until everything melts together. Pour that rich, From Scratch Lemon Custard right into your cooled crust. You want the filling to settle nicely.

Whipping the Fluffy Meringue Topping
You need a large, completely clean, grease-free bowl for this part—I’m talking spotless! Throw in your room temperature whites and the cream of tartar. Start slow with the mixer until they get nice and foamy. Then, add that final 1/2 cup of sugar, just a tablespoon at a time. Don’t rush this! Keep whipping until you get stiff, glossy peaks. When you pull the whisk out, the peak should stand straight up and look shiny. That’s your beautiful, strong meringue ready to go!
Baking and Cooling the Best Lemon Meringue Pie
Working quickly now! Immediately spread that meringue over the *hot* lemon filling. Make sure you push the meringue right to the crust edges all the way around—this seals the deal against separation! Use the back of a spoon to make fancy swirls on top. Pop it into a 350°F oven for about 12 to 15 minutes, just until those peaks turn beautifully golden brown.

The final, and maybe hardest, step is cooling. Don’t rush it into the fridge! Let the Best Lemon Meringue Pie cool slowly on the counter for at least four hours. Rapid temperature changes are what cause that awful weeping we talked about. Slow cooling lets that heat escape gently, locking in the stability you worked so hard to build!
Expert Tips for No Weeping Meringue and a Showstopping Lemon Meringue
Okay, let’s talk about the real drama of this pie: the meringue. We all want that towering, perfectly toasted top, but weeping—that gross, sugary syrup that starts pooling between the filling and the meringue—is what ruins it for so many people. I’ve gathered all the survival tips from Amina’s family notes right here so your lemon meringue pie stays gorgeous for hours. If you’re still struggling, check out some advanced techniques over at this recipe resource that sometimes pops up when we are testing new oven settings.
Grease Check: The Secret to Stable Egg Whites
This is non-negotiable, folks. If your bowl, mixer attachment, or even your hands have even a teeny, tiny bit of fat residue, your egg whites will stay floppy. Butter or oil is the enemy of stiff peaks! Before I even start whipping, I take a clean cloth, dip it in a little white vinegar, and wipe down my entire bowl and whisk. It sounds obsessive, but that little bit of acid definitely ensures a super stable base for our meringue.
Sealing the Deal: Edge-to-Edge Meringue Coverage
This is the physical barrier trick that keeps the moisture locked *inside* the filling where it belongs. When you spread that fluffy cloud onto the hot custard, you *must* make sure the meringue makes firm contact with the crust edge all the way around the circle. If there is a gap, the steam releases, condenses, and that condensation drips right back down, causing the weeping we’re trying to avoid. Seal that crust! Make beautiful peaks while you’re at it, but make sure that seal is tight.
Ingredient Notes and Substitutions for Your Lemon Meringue Pie
I wanted to take a moment to chat specifically about the ingredients because Amina and I see so many people try to shortcut their way through this recipe, and honestly, it just ruins the magic! This isn’t the time to reach for the powdered stuff or the concentrate if you truly want that authentic, showstopping flavor we’re aiming for. The quality of what goes in directly determines the success of your final slice. It’s all about honoring the ingredients!
The Importance of Fresh Lemon Juice and Zest
If you take one thing away from this whole guide, please let it be this: use fresh lemons! I’m talking about squeezing them yourself until your wrists hurt a little bit. Bottled lemon juice is loaded with preservatives and stabilizers designed to last months on a shelf, which completely dulls that bright, electric zing we need for a truly Zesty Lemon Pie. When you use fresh juice and zest, the flavor explodes in the custard. It’s brighter, cleaner, and the tanginess perfectly cuts through the sweetness of the meringue. Buying fresh lemons is a small investment for huge flavor returns, I promise!
Egg Whites: Room Temperature is Non-Negotiable
This is another area where folks try to rush things. If your recipe calls for room temperature egg whites, it’s for a scientific reason, not just a suggestion! Cold egg whites just won’t cooperate; they don’t incorporate the air needed to create that massive volume for your Fluffy Meringue Topping. Cold egg whites whip up stubbornly and stay in smaller, weaker strands.
When your whites are at room temperature—and you can check this by gently poking them; they should feel slightly less firm than when they were in the fridge—they relax. This allows the whisk to trap air more easily and quickly. It means you get that higher structure, which helps prevent the meringue from shrinking down onto the custard later. It’s worth waiting 30 minutes for them to come up to temperature!
Serving Suggestions for This Tangy Sweet Dessert
You’ve done the hard work! You’ve managed the hot custard, you’ve conquered the weeping meringue, and now this absolute triumph of a pie is cooling beautifully on the rack. It deserves a grand entrance! This is that perfect centerpiece dessert that just screams springtime holidays or those long, lazy summer evenings when you need something bright to cut through the richness of the main course. I love seeing our readers use this pie for everything from Easter Sunday to cookouts!
Because this dessert is so intensely flavorful and tangy, you need to keep accompaniments simple, or risk flavor overload. If you’re looking for another classic bake that balances beautifully with citrus—perhaps as a slightly less intense follow-up to the magnificent pie—you should check out the recipe I have for the most incredibly moist carrot cake. It’s another total classic, and the spices just sing next to lemon; you can find that moist carrot cake recipe right over here.
When it comes to plating, I lean into the contrast. A tiny dollop of unsweetened whipped cream right next to a slice can be lovely, or serve it completely plain so that gorgeous, golden meringue does all the talking. If you want to see how another great kitchen shared their take on this classic, especially for a party setting, this classic lemon meringue pie post shows off some fantastic serving ideas, too. Enjoy every single bite of this tangy sweet dessert—you earned it!
Storage and Reheating Instructions for Lemon Meringue
Okay, this is the tough love part of owning a beautiful lemon meringue pie. The hard truth is, because that gorgeous cloud of perfect meringue is basically just sugar and water, it doesn’t love the refrigerator one bit. We put so much work into getting rid of the weeping, and the fridge speeds that process right back up! This pie is, without a doubt, best enjoyed the day you make it. Seriously, slice it while it’s still slightly warm to the touch, and watch everyone swoon!
But hey, sometimes life happens, and you have leftovers. If you absolutely must store it, you need to be strategic. Do NOT cover the pie tightly, especially not right away. Covering it traps humidity, and humidity equals weeping right under that dome. If you have a cake carrier with a dome top, that’s your best friend here! Place it gently over the pie without touching the meringue peaks.
If you only have plastic wrap, you have to tent it very loosely. Try sticking a few toothpicks vertically into the filling (not touching the sides of the meringue) to create little support posts, and then drape the plastic wrap *over* those posts, leaving plenty of air space between the wrap and the meringue. It’s clunky, but necessary.
You can keep it this way on the counter at room temperature for maybe 12 hours, but honestly, if you have to keep it longer than that (say, until the next afternoon), it’s better to chill it. If you are chilling it, put it in the fridge for no more than 24 hours, use that tented setup, and then let it come back to room temperature for at least an hour before serving. Reheating isn’t really a thing with meringue pies; the texture just isn’t the same once it’s been cold. Just enjoy those glorious leftovers as a sweet reminder of your baking success!
Frequently Asked Questions About Lemon Meringue Pie
I know you might still have a few jitters, especially after wrestling with that perfect meringue! That’s totally normal when tackling a classic like this. We want everyone to feel confident making their very own showstopper. If you’re looking for other easy baking wins while you ponder pie structure, I have an easy classic apple cobbler recipe that is almost impossible to mess up!
Can I make the Lemon Meringue Pie ahead of time?
This is the million-dollar question, isn’t it? For the absolute best result—where the meringue is tall and totally un-wept—you really want to make this pie the same day you plan to serve it. The meringue starts to release moisture and can shrink if it sits too long, even in the fridge. If you absolutely must make parts ahead, bake the crust and make the custard, then wrap them tightly and keep them cool. You should only assemble and top it with the meringue about 3 to 4 hours before you plan to serve it.
What is the best way to slice the pie cleanly?
Oh, the presentation! You’ve got this beautiful pie, and you don’t want the slices to smear and look messy. The secret here, which I learned through many sticky kitchen disasters, is to use a very sharp, thin knife—I like one with a slight curve, actually. But here’s the trick: dip that knife into a tall glass of hot water, wipe it dry quickly, and then make your cut. Repeat the dip-and-wipe process between every single slice! It keeps the knife from dragging through the sticky custard and ensures clean separation between the layers.
Can I use pre-made crust for this Homemade Lemon Meringue Pie?
You certainly *can*, if you are in a real pinch for time! I won’t stop you, especially if you’ve nailed the custard and the meringue. However, remember we talked about how this pie is about that buttery, homemade quality? A store-bought crust often doesn’t have the same structural integrity or buttery flavor that stands up to our bright, zesty filling. If you use pre-made, just make sure you blind-bake it really well so it’s fully crisp, because the filling is very wet initially!
Share Your Spoonful Snap Kitchen Magic
Phew! You made it! We’ve conquered the custard, tamed the meringue, cut through the citrus, and created something truly magnificent. That, my friend, is what cooking is all about—a little bit of challenge, a lot of flavor, and all the joy of creating something beautiful for the people you love. Amina and I honestly can’t wait to see your beautiful, towering lemon meringue pies! It makes our whole day when you share your successes with us.
If you made this pie, do us a huge favor and come back here and drop a comment below! Tell me what you thought—did your meringue stay tall? Was the custard zesty enough? We read every single note, and your feedback really helps our little kitchen grow. Seriously, those little stars you click rating the recipe mean the world to us.
And please, if you snapped a picture of your gorgeous, golden-topped creation, share it! Tag us over on social media—we love reposting your amazing kitchen magic. It reminds us that even though the world moves fast, taking the time to make something wonderfully classic and delicious like this pie is always worth it. Don’t forget to explore the rest of the sweet and savory adventures over on the main Spoonful Snap blog! Happy baking, and we hope this pie becomes a celebrated staple in your own home!
PrintThe Ultimate Homemade Lemon Meringue Pie: Classic Recipe with Tall, Stable Meringue

Make the best Lemon Meringue Pie from scratch. This recipe delivers a buttery crust, a zesty, tart lemon custard filling, and a high, fluffy, toasted meringue topping that resists weeping.
- Prep Time: 30 min
- Cook Time: 30 min
- Total Time: 4 hours 0 minutes
- Yield: 8 servings
- Category: Dessert
- Method: Baking
- Cuisine: American
- Diet: Vegetarian
Ingredients
- 1 recipe for Buttery Pie Crust (9-inch, unbaked)
- 1 1/2 cups granulated sugar
- 1/3 cup cornstarch
- 1/4 teaspoon salt
- 1 1/2 cups cold water
- 3 large egg yolks, lightly beaten
- 1/2 cup fresh lemon juice
- 1 tablespoon lemon zest
- 2 tablespoons unsalted butter
- 6 large egg whites, room temperature
- 1/4 teaspoon cream of tartar
- 1/2 cup granulated sugar (for meringue)
Instructions
- Prepare your 9-inch pie crust and bake it according to your preferred recipe until lightly golden. Let the crust cool completely on a wire rack.
- Make the Lemon Custard: In a medium saucepan, whisk together 1 1/2 cups sugar, cornstarch, and salt. Gradually whisk in the cold water until smooth.
- Cook the mixture over medium heat, stirring constantly, until it thickens significantly and comes to a boil. Boil for one minute, stirring constantly. Remove from heat.
- In a separate small bowl, whisk the egg yolks lightly. Slowly temper the hot liquid into the yolks by whisking about 1 cup of the hot mixture into the yolks, then pour the yolk mixture back into the saucepan.
- Return the saucepan to medium heat. Cook, stirring constantly, until the custard thickens again and bubbles slowly. Do not let it boil rapidly. Remove from heat immediately.
- Stir in the lemon juice, lemon zest, and butter until the butter melts completely. Pour the hot lemon custard into the cooled, pre-baked pie shell.
- Make the Fluffy Meringue Topping: In a large, clean, grease-free bowl, beat the room temperature egg whites with an electric mixer on medium speed until foamy. Add the cream of tartar and continue beating until soft peaks form.
- Gradually add the 1/2 cup of sugar, one tablespoon at a time, beating well after each addition. Increase the speed to high and beat until stiff, glossy peaks form. The meringue should hold its shape firmly.
- Spread the meringue immediately over the hot lemon filling, making sure the meringue touches the edge of the crust all around to seal it. This helps prevent shrinking. Create decorative swirls with the back of a spoon.
- Bake the pie in a preheated 350°F (175°C) oven for 12 to 15 minutes, or until the meringue peaks are golden brown.
- Cool the pie completely on a wire rack at room temperature for at least 4 hours before slicing. Avoid placing it in the refrigerator too soon, as rapid cooling can cause the meringue to weep.
Notes
- To prevent weeping, make sure your mixing bowl for the meringue is completely free of any grease or fat.
- Seal the meringue to the edges of the hot filling to create a barrier between the filling and the air.
- For the best texture, cool the pie slowly at room temperature before chilling.
Nutrition
- Serving Size: 1 slice
- Calories: 380
- Sugar: 45g
- Sodium: 150mg
- Fat: 18g
- Saturated Fat: 7g
- Unsaturated Fat: 11g
- Trans Fat: 0g
- Carbohydrates: 52g
- Fiber: 1g
- Protein: 6g
- Cholesterol: 110mg