

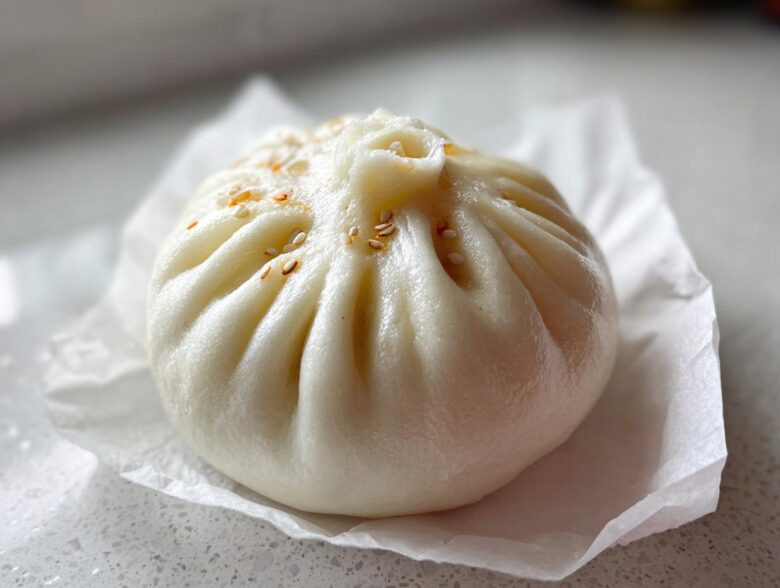
Oh my gosh, you know those days when you just need that glorious, slightly sticky, sweet barbecue pork flavor, but you’re craving something meat-free? I totally get it! For ages, I tried to satisfy that craving with substitutes that just fell flat. But trust me, after weeks of testing, I finally cracked the code to make the dreamiest, softest steamed buns filled with the juiciest, most flavorful vegetarian filling.
This recipe for Char Siu Mushroom Bao is my little triumph. We’re swapping out the pork for hearty mushrooms that soak up all that famous Char Siu sauce, and I’ve finally figured out the bao dough to get those pillowy-soft insides that practically melt in your mouth. It takes a little patience with the kneading, but once you see those buns puff up in the steamer, you’ll understand why I’m obsessed. You can find some of my other favorite baking adventures over at my main blog page right here—but first, grab your steamer basket; we are making magic!
Why This Char Siu Mushroom Bao Recipe Works
Seriously, stop searching for just any old veggie bun. We nailed the essentials here, and what you end up with is something that truly rivals the takeout classic. I spent so much time perfecting the balance so you don’t have to worry about weird textures or dull flavor!
- We’ve created a flavor powerhouse filling. The key is getting those mushrooms properly browned before adding the sauce. That step builds huge, deep umami flavor so you *never* feel like anything is missing.
- The bao dough texture is revolutionary because we follow the two-rise rule. It’s the secret to those ridiculously soft, snowy-white steamed buns that are cloud-like, not dense or chewy.
- This recipe is totally suitable for almost anyone! It uses standard pantry items, and with just one small swap you can make the whole thing vegan. It’s built for weeknight satisfaction or weekend baking projects.
If you are looking for another absolute show-stopper for your baking lineup, you have to check out my Easy Classic Apple Cobbler Recipe. It’s just as comforting but way less fussy!
Essential Ingredients for Perfect Char Siu Mushroom Bao
Okay, let’s talk supplies! You can’t fake flavor in these buns, so we need the right foundation. Don’t skip any of these measurements; they are exact because we need that perfect texture in both the filling and the dough. If you’re not sure about the yeast, always activate it first. You want your warm water sitting right around 105°F to 115°F to get it nice and foamy!
This is what you need to gather. Notice the cornstarch slurry? That’s our magic trick for the glaze—it thickens up everything beautifully and keeps the sauce clinging right to the mushrooms. And see that red food coloring note? It’s optional, but it really helps give that signature look! If you want something more natural, check out my notes later on using beet juice instead!
- 1 pound mixed mushrooms (shiitake, oyster), roughly chopped
- 1/4 cup soy sauce
- 2 tablespoons hoisin sauce
- 2 tablespoons maple syrup or brown sugar (my preference is maple syrup!)
- 1 tablespoon Shaoxing rice wine (or dry sherry if you don’t have rice wine)
- 1 teaspoon sesame oil
- 1/2 teaspoon five-spice powder
- 1/4 teaspoon white pepper
- 1 teaspoon cornstarch mixed with 1 tablespoon water (this is your slurry!)
- 1/4 teaspoon red food coloring (optional, just for that classic pinkish hue)
- 1 tablespoon vegetable oil
- 1 cup all-purpose flour
- 1/2 cup warm water (about 105-115°F)
- 1 teaspoon instant dry yeast
- 1 tablespoon granulated sugar
When you’re done setting these out, swing back over to my moist carrot cake recipe if you need a totally different dessert inspiration later!
Mastering the Umami-Rich Char Siu Mushroom Filling
Listen, if you want that authentic taste, you have to treat this filling right. We aren’t just simmering mushrooms; we are building depth. Forget everything you know about quickly wilting vegetables—we need texture and serious savoriness here.
First things first, get that vegetable oil hot over medium-high. You want the pan slightly aggressive! Toss in those chopped mushrooms—shiitake and oyster work so well together for chew and bulk. Now, this is critical: you must cook them until they happily release all their water and start actually browning. We are looking for some nice dark spots on the edges! This process develops the necessary umami foundation that replaces the richness of the pork. This should take about five to seven minutes of patience.
Once they’re good and browned, pour in that pre-mixed sauce potion—the soy, the hoisin, the wine, all of it! Bring that mixture just to a gentle bubble. Then, grab your cornstarch slurry (that cornstarch mixed with water). Drizzle that in while stirring everything constantly. This is what turns your liquid sauce into a thick, glossy coating for your mushrooms. It happens fast, honestly!
As soon as it thickens enough to coat the back of a spoon, kill the heat. Why cool it completely? Because if you try to wrap hot filling in your beautiful raw dough, you’ll end up with a sticky, gummy mess. Trust me on this one—let it cool down until it’s just room temperature or better yet, chilled.
If you’re skipping the food coloring and want that classic hue naturally, here’s a little expert tip: grab some beet juice. You can actually simmer about a quarter cup of beet juice right along with your main sauce mixture until it reduces significantly. It gives you that beautiful pinkish-red color without any artificial junk!
If you served this filling on its own alongside seasoned rice, it would still be amazing! Check out my recipe for Easy One-Pot Beans and Rice if you need a quick side dish to go with these buns. It’s simple comfort food!
Achieving Authentic Char Siu Sauce Substitute for Mushrooms
The flavor balance is everything! We use maple syrup because it brings a deeper, slightly caramel sweetness than plain granulated sugar. Mix that sweet element with the deep saltiness from the soy and the fermented complexity of the hoisin sauce. That trio is what mimics that distinct, slightly fermented BBQ profile diners crave in their buns. It’s savory, it’s sweet, and it all sticks perfectly.
How to Make Soft Steamed Bao Dough Recipe for Char Siu Mushroom Bao
Now we move onto the dough, and this is where a lot of people get intimidated, but I promise you, it is so straightforward if you just trust the process. Remember how I said we need those pillowy clouds? That comes from good kneading and not rushing the waiting game. We are kicking off this recipe for Char Siu Mushroom Bao by getting our yeast happy.
In a bowl, dissolve that yeast and one teaspoon of sugar into your warm water. If the water is too hot, you’ll kill the yeast, and the dough won’t rise—oops! If it’s too cold, nothing happens. Give it five minutes until it looks frothy on top. That’s your sign it’s alive and ready to work!
Next, mix in your flour and the remaining sugar. Once it becomes a shaggy mess, turn it out onto a lightly floured surface. Seriously, commit to this part: you need to knead it for a good full 8 to 10 minutes. You want it smooth, elastic, and soft, almost like play-doh. If you poke it and it slowly springs back, you’ve got fantastic elasticity!
Tuck that beautiful dough ball into an oiled bowl, cover it with plastic wrap or a damp cloth, and leave it somewhere warm for about an hour and a half until it’s doubled in size. That’s our first proof, and it builds the flavor base.
After that long, satisfying rise, gently punch the air out. Divide the dough into 10 equal bits. Roll each bit into a small ball, and then you gently stretch or roll them out into about a 4-inch circle. Remember the classic technique: stretch them so the edges are a tiny bit thinner than the very center where the filling sits. This helps them seal properly!
I love the simple, chewy quality of these buns, especially when paired with something soft and chewy like my Soft & Chewy Peanut Butter Cookies if you need another baking project later on.
The Critical Second Proofing Stage for Fluffy Bao Buns
I know you’re excited to steam them as soon as they are filled, but please, don’t skip this very quick rest period! After you seal the buns around the mushroom filling and place them on their little parchment paper squares, they need 20 minutes completely untouched. This second proof is what ensures they are airy. It allows the yeast one last little push to inflate the dough structure before the heat hits it. If you skip this, your bao will come out looking dense and sad. Trust me, those final twenty minutes make the difference between a standard bun and a truly fluffy, cloud-like bun!
Assembling and Steaming Your Char Siu Mushroom Bao
Alright, the filling is cool, the dough is proofed—now for the fun part where it starts looking like actual takeout magic! Remember those 10 balls of dough we made? Take one and gently flatten it out into that 4-inch circle on your counter. I always treat the edges a little more gently than the center, which helps when we pinch them closed later. We want the dough thin enough to steam quickly but thick enough in the middle to support that savory filling.
Spoon about two tablespoons of your cooled mushroom mixture right in the center of the dough circle. Now, lift the edges of the dough up high around the filling. You’re basically wrapping the dough around the filling like a little pouch, gathering all the edges right at the top. Pinch, pleat, and twist until it seals closed. It’s okay if your pleats aren’t perfect—no one sees them under the steam, really! Just make sure they’re sealed shut. Place each finished bun onto a little precut square of parchment paper so it doesn’t stick to the steamer.
Here’s your absolute non-negotiable rule for perfect steaming: arrange the buns in your steamer basket, making absolutely sure they aren’t touching because they’re going to puff up during cooking! Cover the whole thing tightly and let those beauties rest for that final 20-minute proof. Then, place the steamer over water that is already boiling hard. Steam them for 12 to 15 minutes. And here’s the serious part: DO NOT lift that lid early! If you let cool air rush in, those beautiful **Char Siu Mushroom Bao** steam clouds will deflate instantly. Let them steam the full time, then turn the heat off and let them sit covered for just two extra minutes before opening the lid.
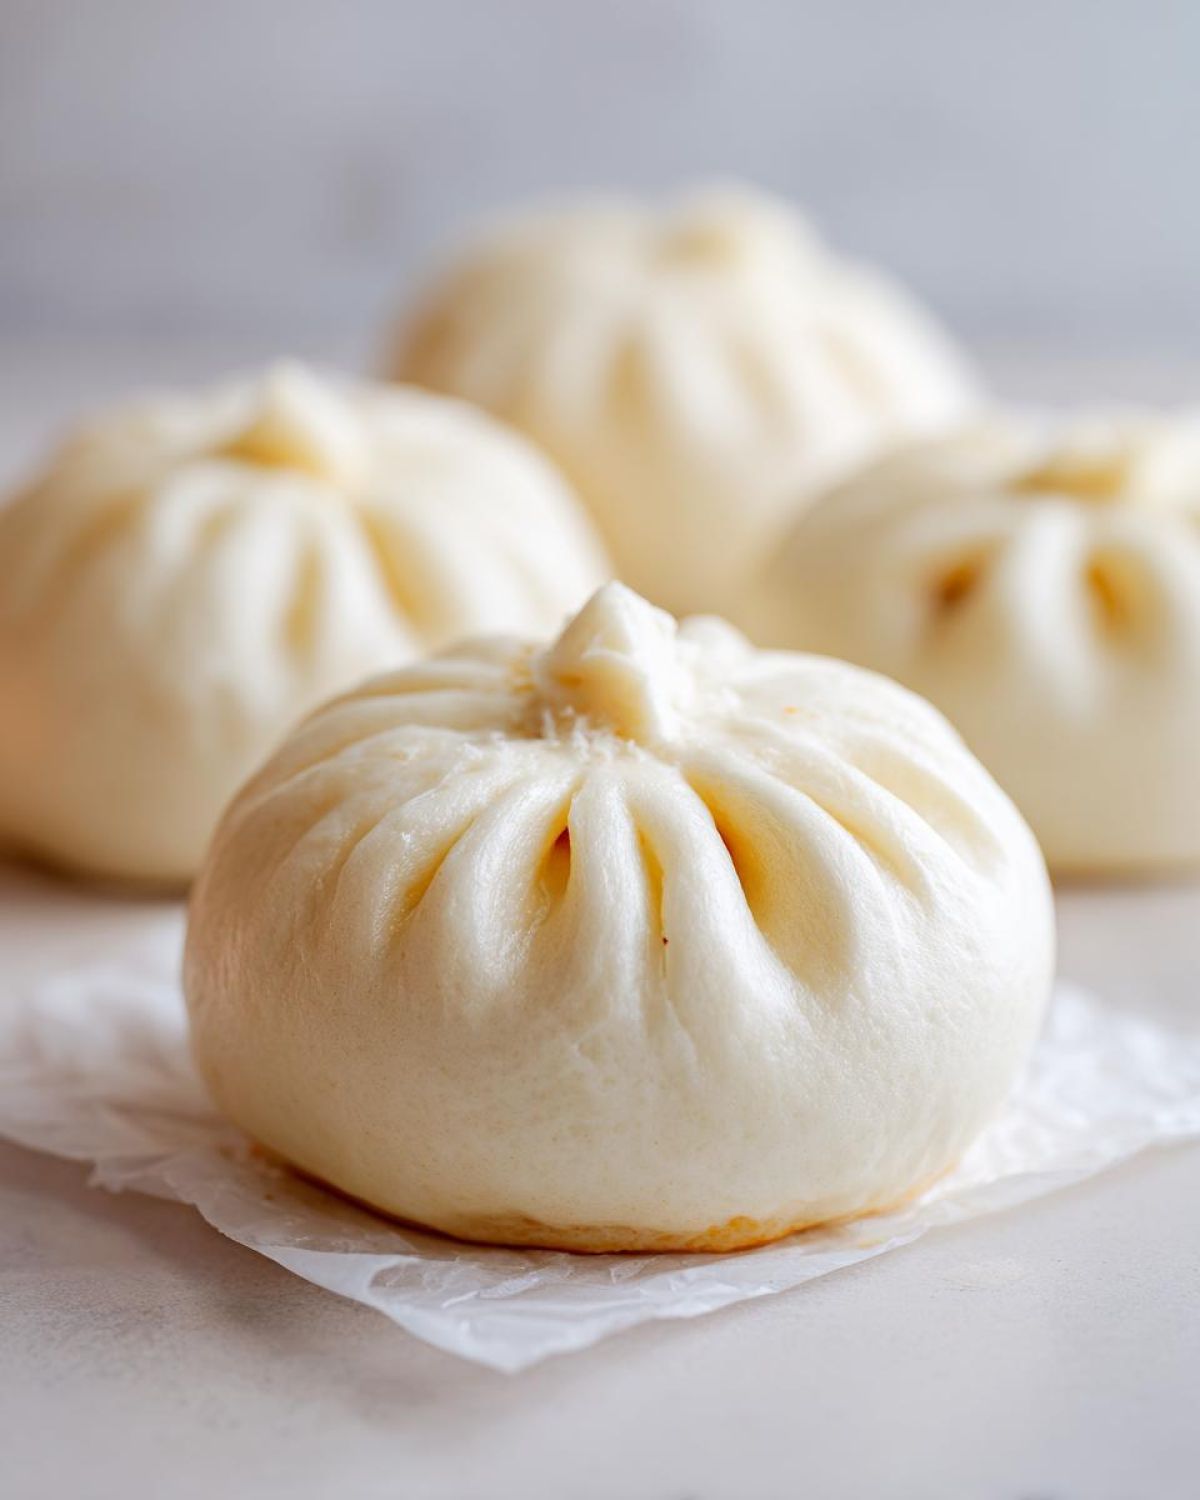
When you’re ready to serve them up, you can enjoy them plain, or if you want that extra shine, brush them lightly with that melted vegan butter mixed with a touch of maple syrup right when they come out of the heat! Need an amazing pairing? Try these buns alongside my recipe for Pecan Pie Muffins if you somehow managed to save room for dessert!
Tips for Success with Your Homemade Mushroom Filled Buns
Making these buns is fun, but I want them to be perfect for you the first time around! Texture is sometimes tricky with steamed dough, so let’s cover a few things based on what I learned while perfecting this recipe. These little adjustments really bump up how professional your final batch looks and tastes.
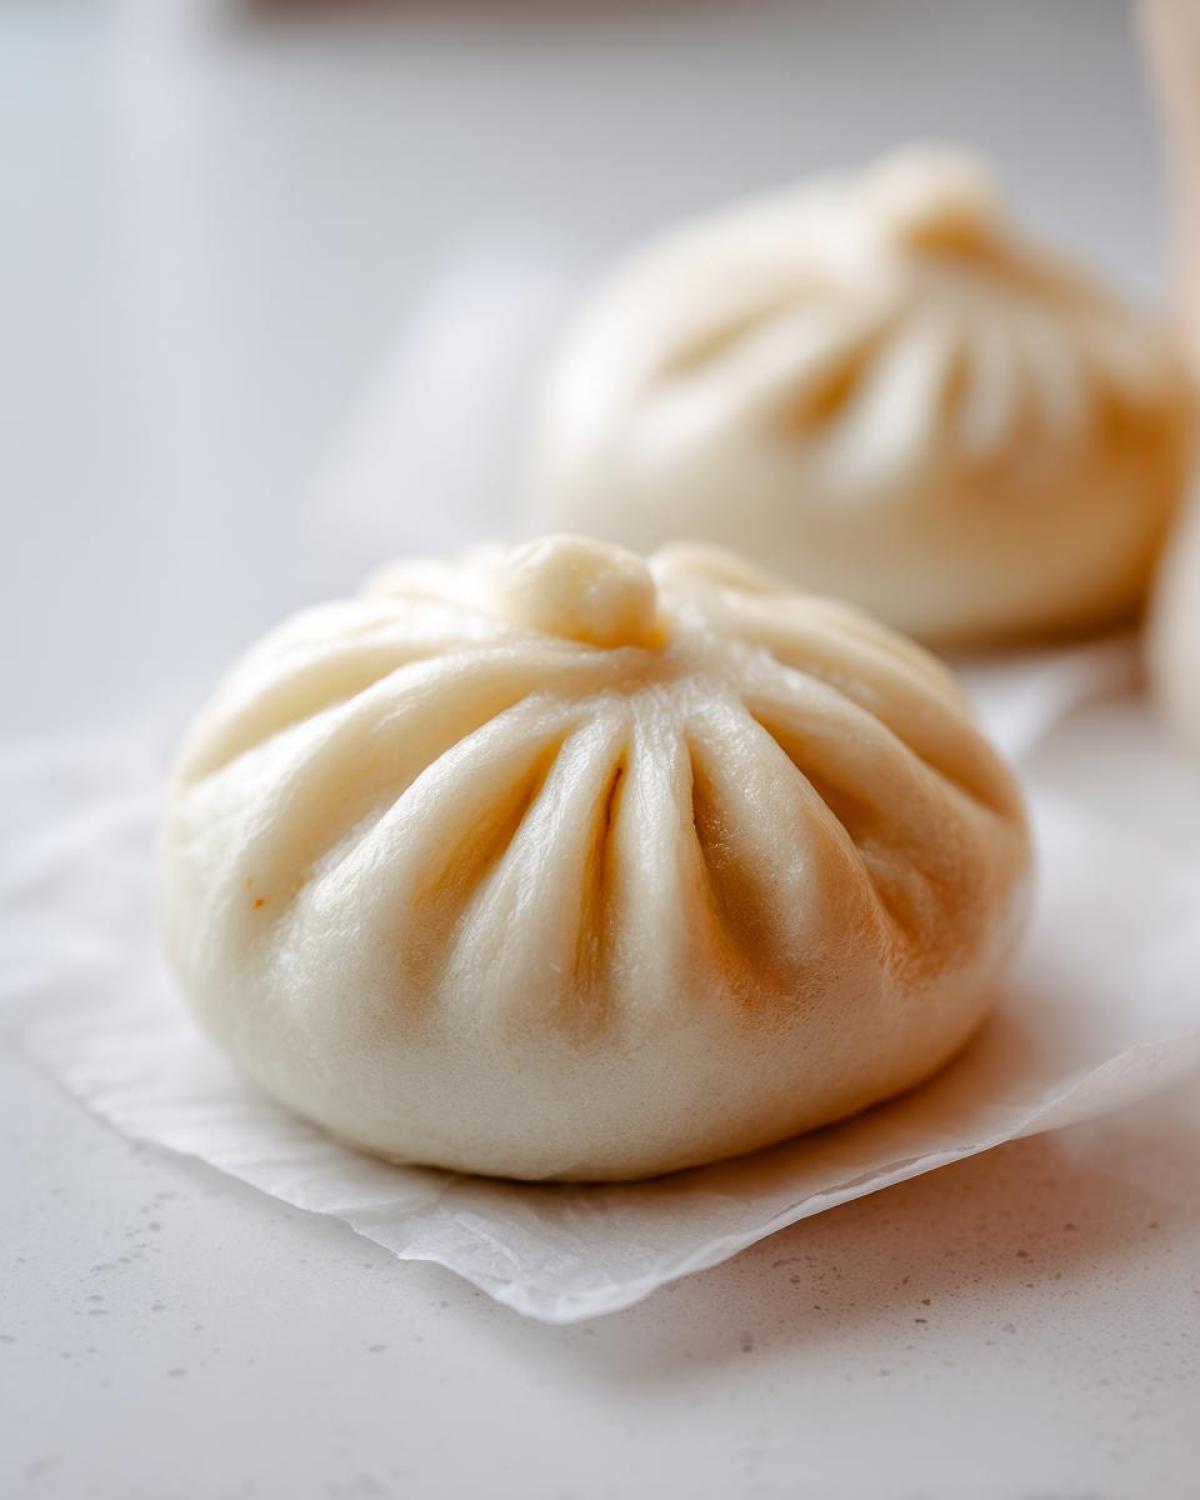
First up, sticking! I mentioned using parchment paper squares, and I really stand by that for easy release. But if you don’t have any, don’t panic. You can line your steamer basket with large cabbage leaves instead, just make sure the leaves are completely dry before placing the buns on top. This prevents sticking and adds a tiny, almost undetectable fresh flavor.
Also, remember how we talked about that beautiful, glossy finish? If you want your buns to look like they just came out of a fancy bakery display, brush them immediately after they exit the steamer. Don’t use plain oil; mix up a tiny bit of melted vegan butter (or regular butter if you aren’t making them fully vegan) with a drizzle of maple syrup. Brush it lightly over the tops while they are piping hot. It sets quickly and gives you that gorgeous sheen!
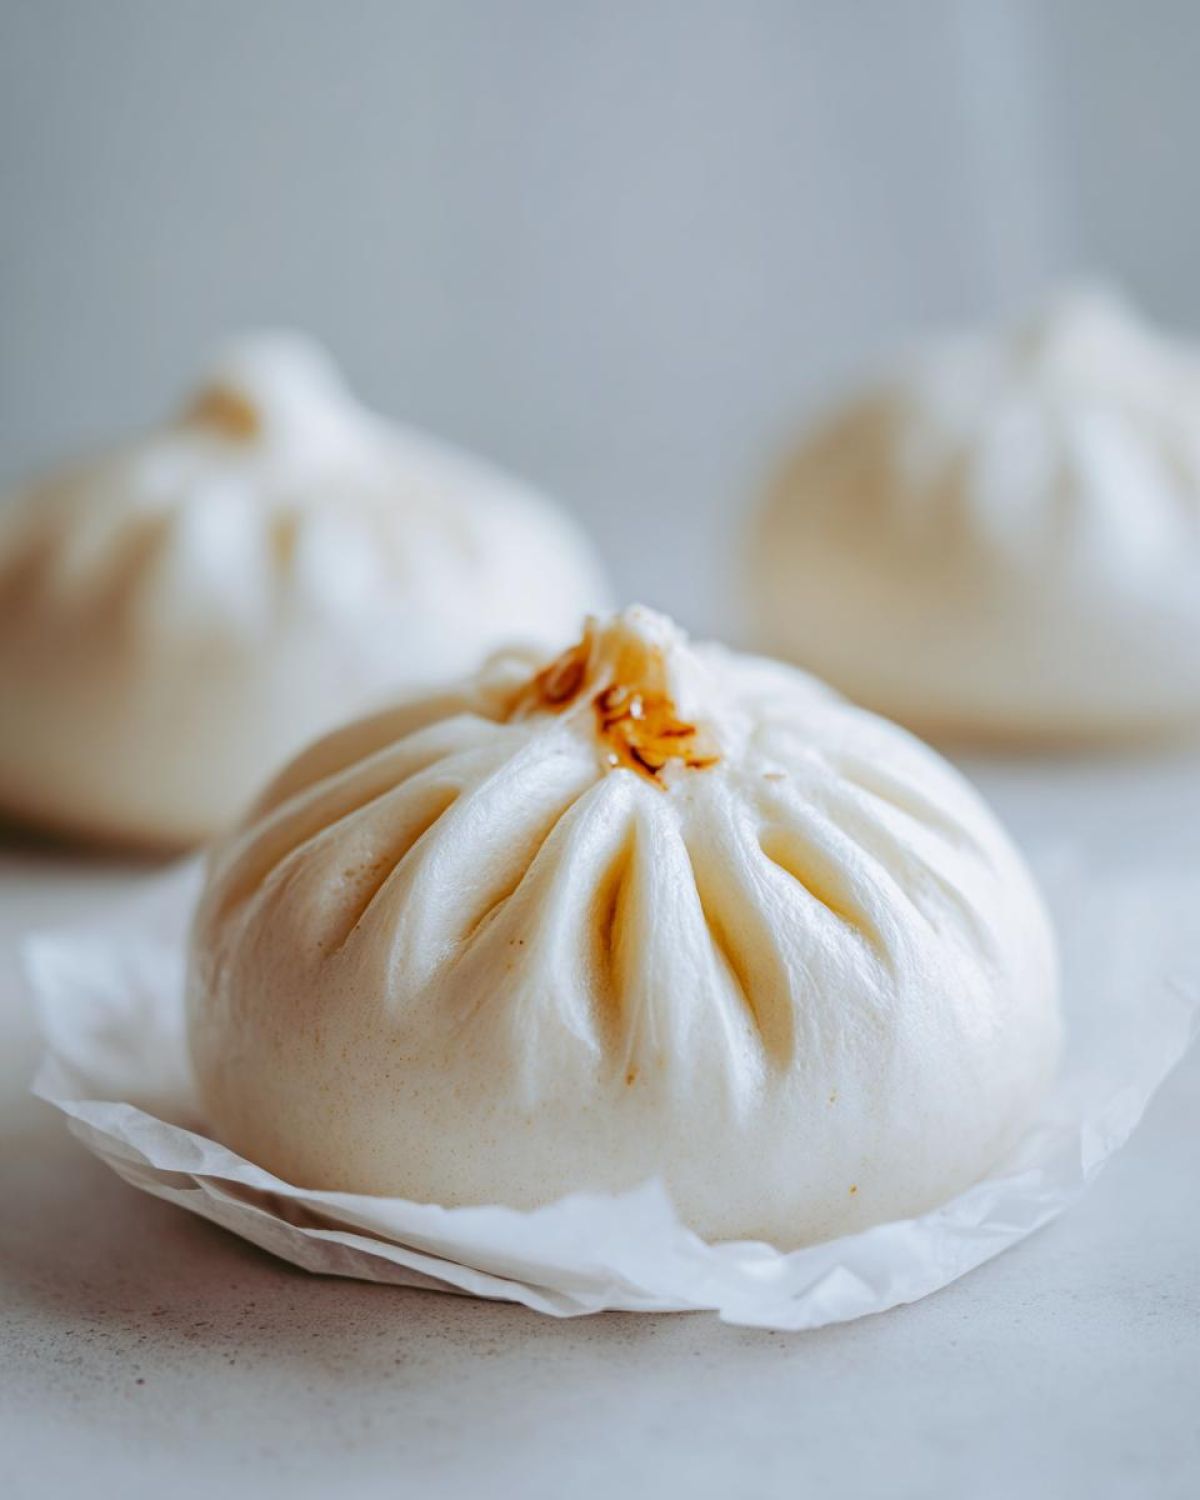
And finally, about the color. Sometimes even with the coloring, they can look a little pale if your filling wasn’t deep brown enough. Really focus on browning those mushrooms in step two of the filling instructions. That dark caramelization stops the overall bun from looking too washed out! If you want more baking inspiration after you’re done with savory fillings, you should definitely try my Cranberry Crumble Bars Recipe—they are amazing for fall!
Serving Suggestions for Your Char Siu Mushroom Bao
Once you pull these beauties out of the steamer, you’ll be tempted to just eat all ten buns right there on the spot. I know I am! But if you’re serving them up as part of a larger meal or you want to make them an appetizer that really shines, you need the right supporting cast.
First, a simple dipping sauce is a must. You don’t need anything complicated! Mix together some light soy sauce, a teaspoon of rice vinegar, a dash of sesame oil, and maybe a tiny bit of grated fresh ginger. That bright, acidic sauce cuts right through the richness of the BBQ filling without overpowering it. Keep it simple so the mushroom flavor can still be the star of the show.
For something crunchy and tangy, quick-pickled vegetables work unbelievably well. Think thinly sliced carrots and daikon radish soaked for just 30 minutes in a quick brine of water, vinegar, and sugar. They add a wonderful textural contrast to the soft bao!
If these are your main course, they pair perfectly with something green and garlicky. A quick sauté of baby bok choy with minced garlic and a splash of water is hearty enough to stand up to the sweet filling but light enough that you don’t feel too heavy afterward. Cooking these savory buns just makes me think about needing something sweet next, and I’ve got the perfect light option—check out my Easy No-Bake Eggnog Pie Recipe if you’re looking for a great finish!
Storage and Reheating Instructions for Char Siu Mushroom Bao
You’re going to make more than you think you can eat, that’s just a fact of life when baking irresistible food! Don’t worry about leftovers; they are actually great the next day if you reheat them correctly. The dough is delicate, so simple mistakes can ruin that fluffy softness we worked so hard to achieve.
If you are storing leftovers for up to three days, put them in an airtight container. If you have room in the freezer, I highly recommend wrapping individual buns tightly in plastic wrap first, then putting them all together in a freezer-safe bag. They keep beautifully for about a month this way!
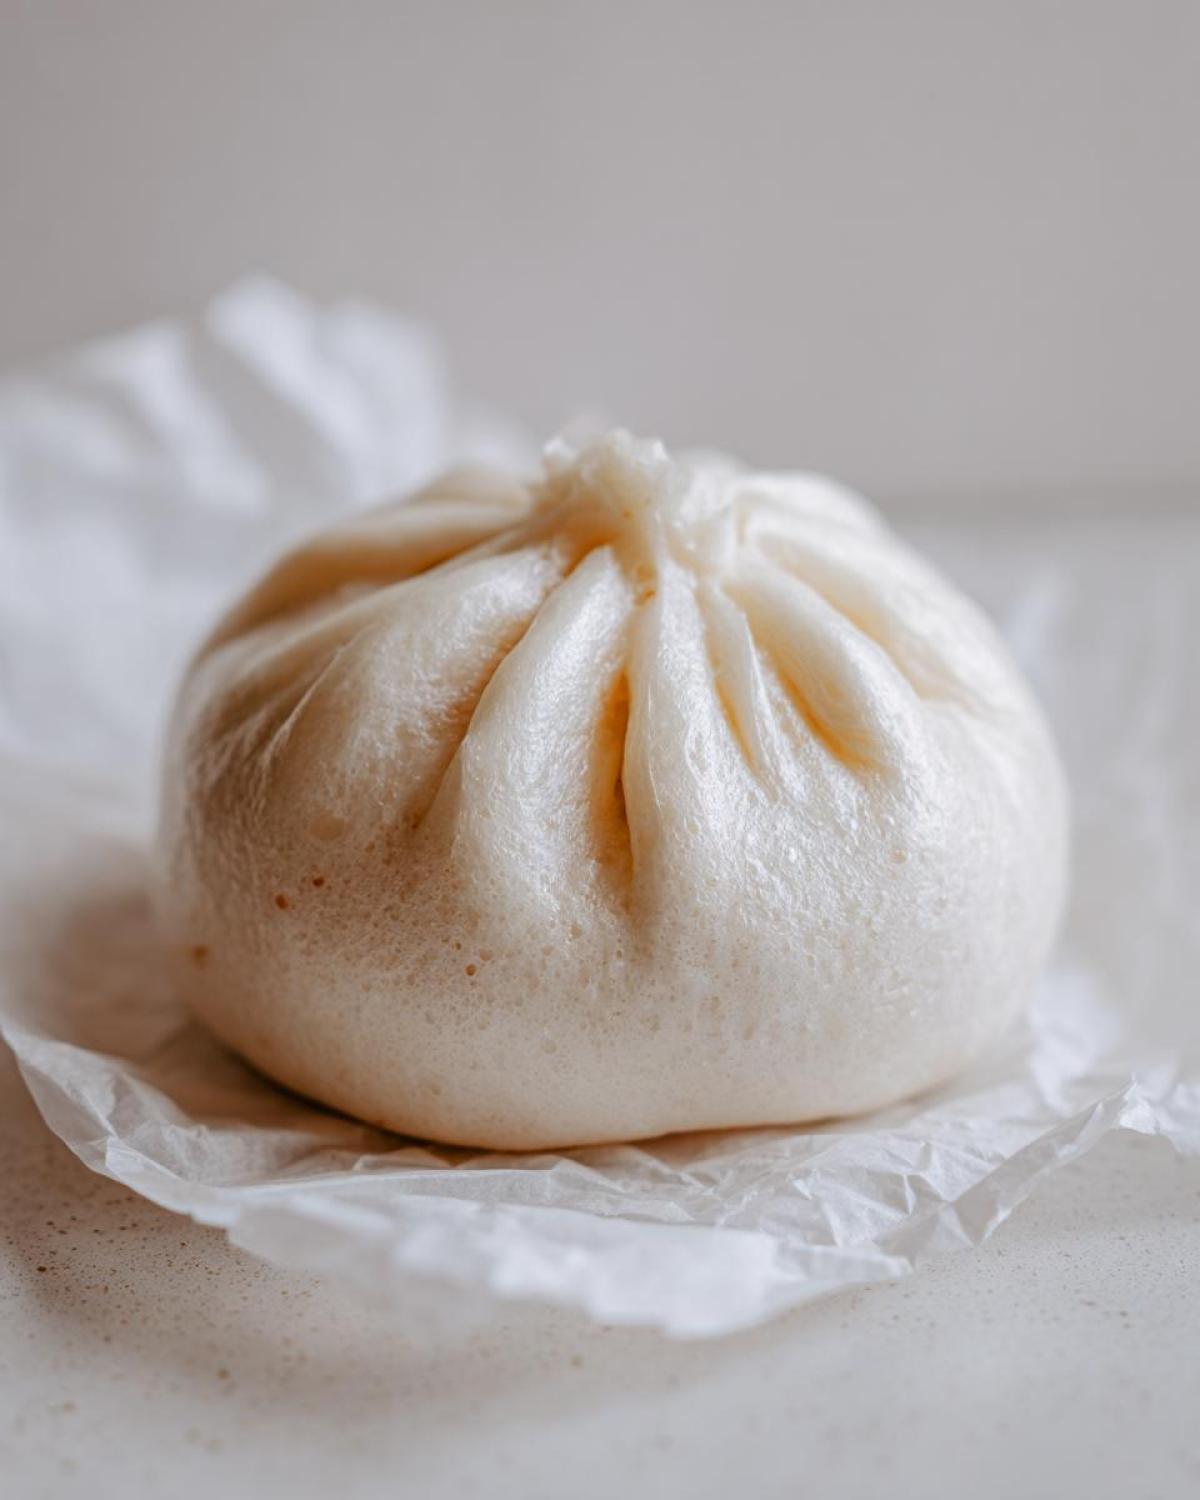
Now, the reheating part is important. The microwave is fast, but it makes the dough rubbery almost instantly. If you’re desperate, wrap the bun in a damp paper towel and microwave it for just 20 seconds, but I really don’t like that texture for these exquisite **Char Siu Mushroom Bao**.
The absolute best way to revive that bakery-fresh quality is back on the steamer! Just place the chilled or frozen buns (no need to thaw if steaming from frozen, just add a few minutes) back onto the parchment squares in your steamer basket. Steam them over medium heat for about 8 to 10 minutes until they are soft and puffy again. It reactivates the dough perfectly without drying them out.
If you managed to save any of that extra drizzle of glaze we talked about, brush them lightly once they are warm. For a different kind of sweet treat after your bao meal, you have to try my ridiculously festive Candy Cane Brownies Recipe!
Frequently Asked Questions About Vegetarian Char Siu Bao Recipe
It’s totally normal to have questions when translating a classic dish! Baking steamed buns and getting that Char Siu flavor just right takes a tiny bit of insider knowledge. I gathered up the most common things people ask me when they tackle these recipes, so hopefully, we can troubleshoot any potential issues before they pop up in your steamer!
If you are looking for more delicious plant-based wonders after you finish these buns, you absolutely must check out my Vegan Pumpkin Pie Recipe—it’s the perfect dessert finish to a savory meal!
Can I make these Char Siu Mushroom Bao vegan?
Yes, you totally can, and it’s super easy! Since we already used maple syrup instead of honey in the filling, the savory part is covered. For the bao dough, the standard ingredients are naturally vegan. The only place we need to check is that optional glossy finish, but just use a vegan butter substitute or skip the final brush entirely. They are still amazing even without that glaze!
What is the best mushroom substitute for the filling?
For the absolute best texture resembling the original filling, don’t just rely on one kind! Use a mix. Shiitake mushrooms bring great chewiness and intense flavor, which is what you want for that deep umami rich mushroom steamed buns experience. Then, mix those with oyster mushrooms or even king oyster mushrooms for sheer bulk and moisture. A combination always wins here!
Why are my bao flat instead of fluffy?
This almost always comes down to two things, so look back at your prep. Did you let the dough rise the full time for the first proof? More importantly, did you let them rest for that crucial 20-minute second proof right before steaming? If your dough isn’t puffy when it goes into the steamer, it can’t become fluffy while cooking. Also, make sure you aren’t lifting the lid during the steaming process!
Can I use store-bought dough instead of making the Soft Steamed Bao Dough Recipe?
Look, I love a shortcut as much as the next home cook, but when it comes to texture, homemade dough wins every single time for these savory filled buns. Store-bought dough is often too dense, and you won’t get that soft, cloud-like result. If you are short on time, I suggest making the filling ahead of time and just focusing on that dough, but I really encourage you to try the full recipe!
PrintChar Siu Mushroom Bao
A recipe for soft, steamed bao buns filled with savory, sweet, and umami-rich Char Siu flavored mushrooms, offering a vegetarian alternative to the classic dish.
- Prep Time: 45 min
- Cook Time: 40 min
- Total Time: 145 min
- Yield: 10 servings
- Category: Main Course
- Method: Steaming
- Cuisine: Chinese
- Diet: Vegetarian
Ingredients
- 1 pound mixed mushrooms (shiitake, oyster), roughly chopped
- 1/4 cup soy sauce
- 2 tablespoons hoisin sauce
- 2 tablespoons maple syrup or brown sugar
- 1 tablespoon Shaoxing rice wine (or dry sherry)
- 1 teaspoon sesame oil
- 1/2 teaspoon five-spice powder
- 1/4 teaspoon white pepper
- 1 teaspoon cornstarch mixed with 1 tablespoon water (slurry)
- 1/4 teaspoon red food coloring (optional, for color)
- 1 tablespoon vegetable oil
- 1 cup all-purpose flour
- 1/2 cup warm water (about 105-115°F)
- 1 teaspoon instant dry yeast
- 1 tablespoon granulated sugar
Instructions
- Prepare the mushroom filling: In a bowl, combine soy sauce, hoisin sauce, maple syrup, rice wine, sesame oil, five-spice powder, white pepper, and food coloring (if using).
- Heat vegetable oil in a pan over medium-high heat. Add the chopped mushrooms and cook until they release their moisture and start to brown, about 5 to 7 minutes.
- Pour the sauce mixture over the mushrooms. Bring to a simmer.
- Stir the cornstarch slurry and pour it into the pan. Cook, stirring constantly, until the sauce thickens and coats the mushrooms well. Remove from heat and let the filling cool completely.
- Prepare the bao dough: In a large bowl, dissolve the yeast and 1 teaspoon of sugar in the warm water. Let stand for 5 minutes until foamy.
- Add the flour and remaining sugar to the yeast mixture. Mix until a shaggy dough forms.
- Turn the dough out onto a lightly floured surface and knead for 8 to 10 minutes until smooth and elastic.
- Place the dough in a lightly oiled bowl, cover, and let it rise in a warm place for 1 to 1.5 hours, or until doubled in size.
- Punch down the risen dough. Divide it into 10 equal pieces. Roll each piece into a ball, then flatten and gently stretch each piece into a 4-inch circle, keeping the edges slightly thinner than the center.
- Place about 2 tablespoons of cooled mushroom filling in the center of each dough circle.
- Gather the edges of the dough up around the filling and pinch them together at the top to seal, forming a pleated bun shape. Place each sealed bao on a small square of parchment paper.
- Arrange the bao in a steamer basket, ensuring they do not touch. Cover the steamer and let the buns rest for a second proof for 20 minutes.
- Steam the bao over boiling water for 12 to 15 minutes. Do not lift the lid during steaming.
- Carefully remove the bao from the steamer and serve warm.
Notes
- For a deeper color without artificial coloring, simmer 1/4 cup of beet juice with the sauce mixture until reduced.
- If you want a very glossy finish, brush the tops of the steamed buns lightly with a mixture of melted vegan butter and a touch of maple syrup immediately after removing them from the steamer.
- Ensure your steamer basket is lined with parchment paper or cabbage leaves to prevent the buns from sticking.
Nutrition
- Serving Size: 1 bun
- Calories: 250
- Sugar: 8g
- Sodium: 450mg
- Fat: 4g
- Saturated Fat: 0.5g
- Unsaturated Fat: 3.5g
- Trans Fat: 0g
- Carbohydrates: 48g
- Fiber: 3g
- Protein: 7g
- Cholesterol: 0mg