

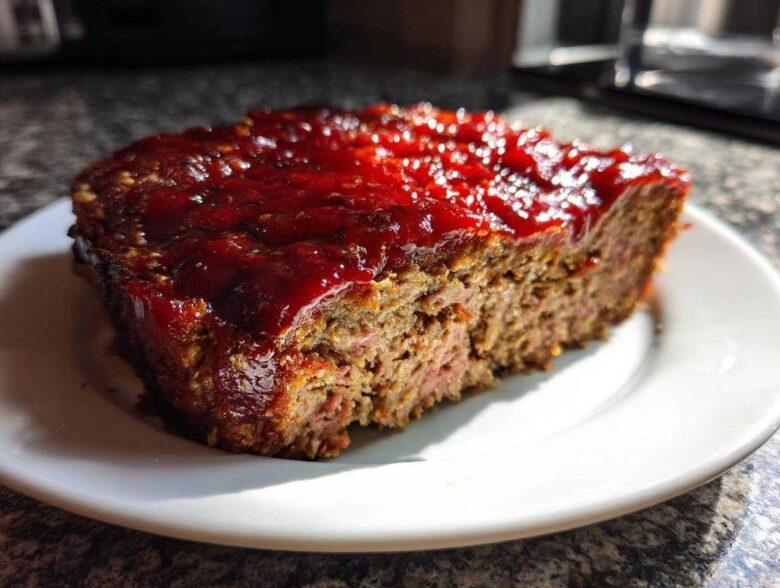
There’s just something magical about coming home after a long day to the smell of a true, old-school comfort meal, isn’t there? Forget those dry, sad brick-of-meat versions you might have had growing up. I spent years trying to nail that perfect, nostalgic flavor without sacrificing moisture. Trust me, my search for the perfect meatloaf is officially over! This recipe, the Classic Juicy Meatloaf with the Best Tangy Glaze, is the one that finally earned the permanent slot on our weekly rotation. It’s tender, it’s packed with flavor, and that glaze? Wow. This isn’t just dinner; it’s a hug on a plate, perfected over many, many family dinners.
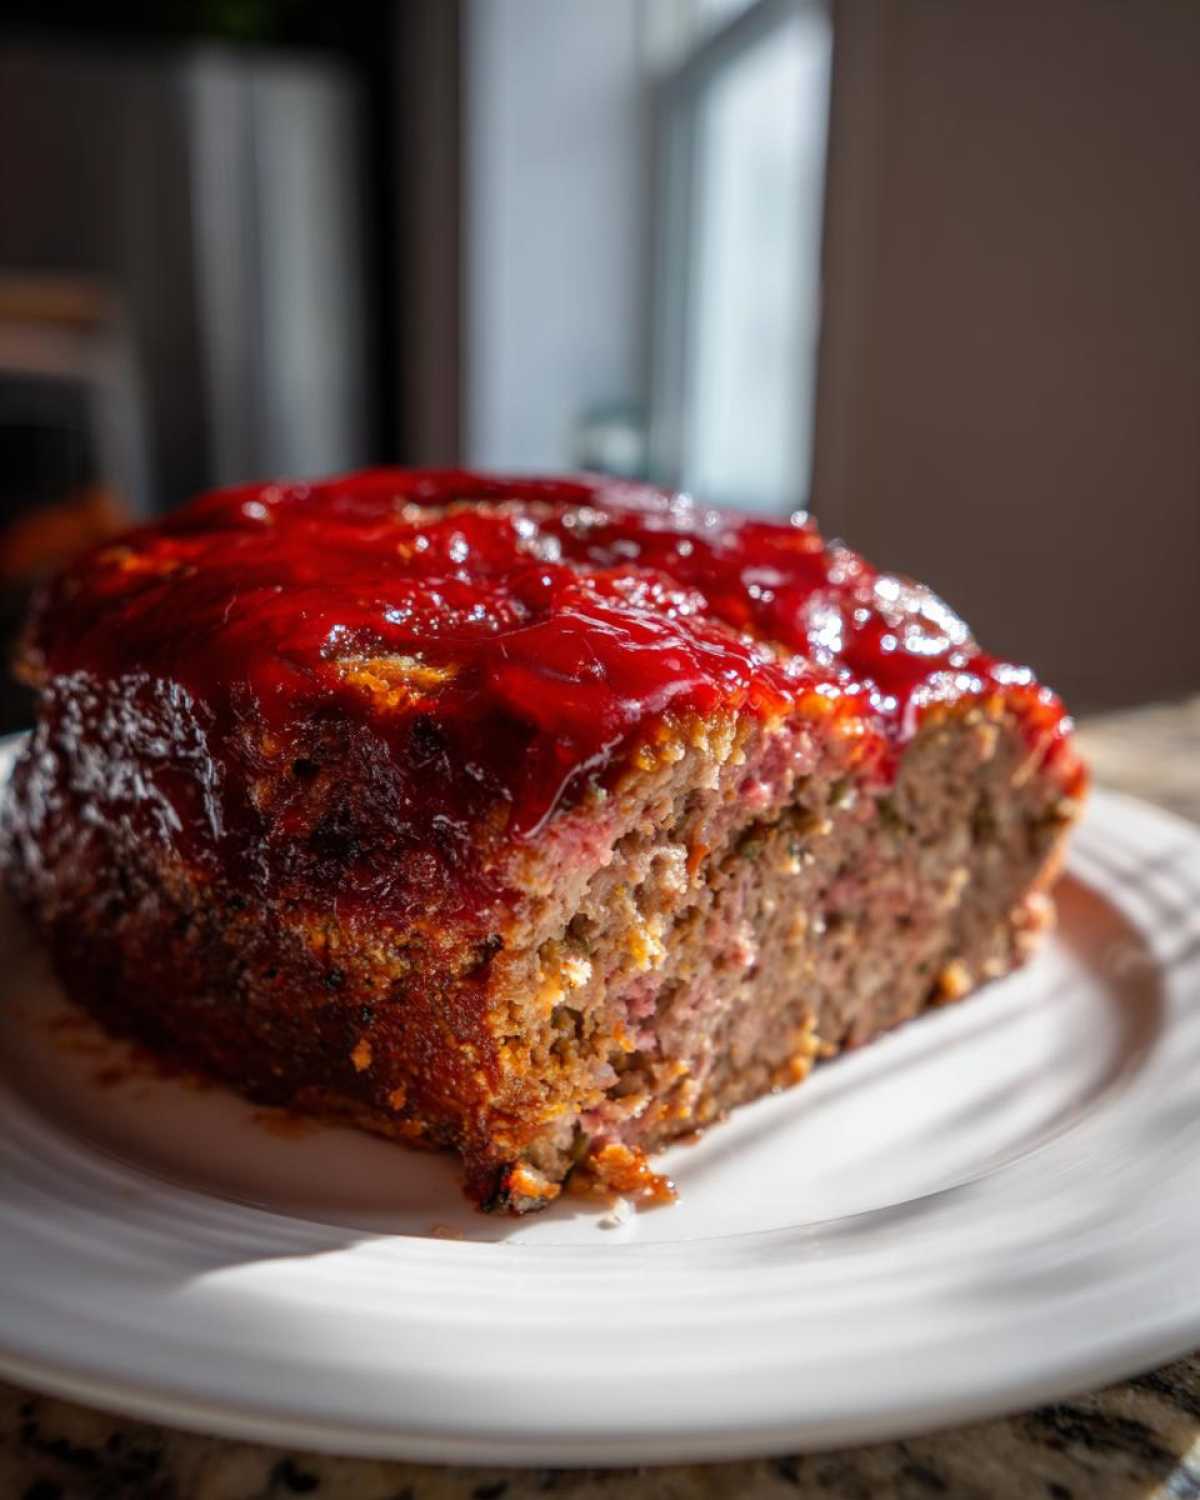
Why This Classic Meatloaf Recipe is a Family Favorite
You might be wondering why you should try yet another meatloaf recipe, right? Well, this one really delivers on its promises. It’s the perfect weeknight dinner solution because it uses simple cupboard staples you probably have right now. Seriously, the prep time is lightning-fast!
- It guarantees that crave-worthy juicy meatloaf texture every single time.
- The ingredients list is short, meaning less fuss and shopping.
- That sweet and tangy glaze brings everything together deliciously!
If you’re looking for a timeless classic that appeals to everyone, you’ve found it. You can check out some other quick ideas over on my main recipe index, but I promise this one is worth bookmarking right away!
Ingredients for the Ultimate Juicy Meatloaf
Look, the secret to a tender meatloaf isn’t fancy techniques; it’s trusting the core ingredients. We keep this list straightforward because when you’re using good quality beef, you don’t need to hide it with a dozen complicated additions. This ingredient breakdown is how we ensure a moist meatloaf every single time. It’s all about getting that balance right between the meat and the binders!
For the Tender Meatloaf Base
- 2 lbs ground beef (I always grab 80/20, it helps keep things juicy!)
- 1 cup dry breadcrumbs (or if you’re feeling quick, use Stove Top Stuffing mix)
- 1/2 cup milk
- 1 large egg, lightly beaten
- 1/2 cup finely chopped onion (Don’t skip this! It adds flavor and moisture.)
- 1/4 cup ketchup (Yes, some goes *in* the mix!)
- 1 teaspoon salt
- 1/2 teaspoon black pepper
- 1/4 teaspoon garlic powder
Crafting the Best Glaze for Meatloaf
This glaze is what separates this family favorite from any other ground beef main dish you’ve tried. It’s tangy, not too sweet, and it sets up beautifully while baking.
- 1/2 cup ketchup
- 1/4 cup brown sugar (This is key for that deep, rich color!)
- 1 tablespoon apple cider vinegar (Yes, use the vinegar—it cuts the sweetness perfectly!)
Step-by-Step Instructions for Perfect Meatloaf
Listen up, because this is where folks go wrong! The method for this tender meatloaf recipe is simple, but you have to respect the ingredients. We want air and tenderness, not dense meat concrete! First things first: get that oven warmed up to 350°F (175°C). You can use a standard loaf pan, but I often use a baking sheet lined with parchment. Why? Because I like my meatloaf shaped nicely, and it lets some of that delicious fat drain away slightly, which I actually prefer for a less heavy feeling.
Preparing the Meatloaf Mixture and Shaping
Start by combining your breadcrumbs and milk and just letting them soak up that liquid for about five minutes. This is our hydration secret! Then, toss in the ground beef, egg, onion, salt, pepper, garlic powder, and the ketchup that goes inside. Now, grip it gently! You just want to mix everything together until you don’t see any more streaks of milk or separate pepper flakes. Seriously, if you keep folding and crushing it, it’ll get tough. You don’t want tough meatloaf!
Baking and Applying the Meatloaf Glaze
Shape your mixture into a nice, neat loaf shape and place it where it’s going to cook. Spread about half of your tangy glaze right over the top. Pop it in the oven for 45 minutes. When that time is up, pull it out—careful, it’ll be hot! Spread that remaining glaze on top, making sure to cover any spots that look dry. Back it goes until an internal thermometer reads 160°F (71°C). This usually takes another 15 to 20 minutes. Don’t forget to stop everything and let it rest on the counter for 10 minutes before slicing. That rest time is non-negotiable for trapping all that wonderful homemade moisture! You can find even more deep dives on how to keep your meatloaf moist on my dedicated page.
Tips for the Most Moist Meatloaf
Okay, we covered the technique, but let’s talk pure moisture extraction, because nobody wants a dry loaf. This is my insider’s pass to always having that unbelievably juicy meatloaf texture, even the next day!
My first big tip, which I mentioned quickly above, is about the beef blend. If you can swing it (and your family doesn’t have strict beef-only rules), replacing just half a pound of the ground beef with ground pork or even ground veal makes a massive improvement. Those other meats carry a bit more natural fat, and that fat equals flavor and moisture insurance in the oven. It really keeps the whole thing tender.
Secondly, think about your binder! While the breadcrumbs and milk work wonders, if you want to ramp up the moisture game, try swapping out half of that milk for buttermilk or sour cream. That little bit of acid tenderizes the meat proteins before they even hit the heat. It sounds wild, but the results are worth it—it yields an incredibly soft, almost creamy interior to your comfort food meatloaf.
Finally, and this is a big one for consistency: Don’t put your meatloaf in a loaf pan unless you really want it to swim in its own juices. If your goal is the *most* moist, you need to let some of that rendered fat escape so the loaf isn’t sitting in it! I always use a rimmed baking sheet, shape the loaf right there, and let it bake naked. That way, the exterior gets slightly firm while the inside steams gently in its own juices. It’s the best way to achieve a genuinely tender meatloaf recipe.
Making Your Meatloaf a Weeknight Dinner Idea
I know, I know. Sometimes, the thought of chopping onions after a long workday makes you just want to order pizza. But honestly, this classic meatloaf recipe is sneaky fast if you use a couple of my little tricks! Since this should be your go-to easy meatloaf dinner, let’s talk speed. The total active prep time is only about 15 minutes. Most of that time is just washing your hands after mixing!
You can cut that prep time down even further, too. If you have a food processor—and believe me, I usually prefer manual chopping—you can pulse your half-cup of onion in there in about ten seconds flat. Just pulse it—don’t turn it into onion soup, okay? A quick pulse gives you that perfect, barely-there chop that blends right into the mixture. Don’t worry about the garlic powder; that’s already fast!
My absolute favorite shortcut for making this a phenomenal weeknight dinner idea is skipping the plain breadcrumbs entirely and grabbing that box of Stove Top Stuffing mix instead. We already listed it as an option in the ingredients, but trust me, it works wonders here. The stuffing mix already has all the necessary seasonings—salt, herbs, maybe even a little onion powder—already blended in! You just swap the required amount of breadcrumbs for the stuffing, and you’ve instantly streamlined your seasoning process. It gives the loaf a slightly richer, more savory flavor, too.
If you’re planning meals for the week, you can always mix the meatloaf the night before! Just wrap the unbaked loaf tightly in plastic wrap and pop it right in the fridge. The next day, just let it sit on the counter for about 20 minutes while the oven preheats, add the glaze, and bake as usual. Honestly, after a long day, having this hearty dinner ready to go is a game-changer. For more super-fast meal ideas, you might like checking out my sheet pan teriyaki chicken post!
Variations on the Classic Meatloaf
While this is my tried-and-true, perfect Traditional Meatloaf recipe, I know sometimes you just need to shake things up a little! It’s fun to play around with this foundation, but we have to be super careful not to ruin that beautiful, tender texture we worked so hard for.
One popular thing people ask about is the Gordon Ramsay style—you know, the really aggressively glazed one. If you want to channel your inner chef, it’s easy! During the last 15 minutes of baking, when you reapply that second layer of glaze, just use the back of a spoon or a spatula to really press that shiny glaze right into the surface of the meatloaf. You’re essentially creating a sweet, caramelized crust right on top. It gives it a little more structural integrity when you slice it, which some folks really prefer in their meatloaf.
Swapping Out Binders and Herbs
If you run out of breadcrumbs or just want a different flavor profile, you can definitely substitute binders, but you have to be smart about it. Instead of plain breadcrumbs, try using crushed crackers—like saltines or Ritz—for a finer crumb. If you use crackers, you might need to slightly reduce the added salt in the base mix because they are usually salty!
For herbs, the original recipe keeps it simple with garlic powder, which I love. But if you’re feeling adventurous, try adding a teaspoon of dried Italian seasoning right in with your dry ingredients. It doesn’t affect the moisture at all! If you go that route, you could even skip the onions and use a tablespoon of dried, minced onion instead if you were in a huge hurry, but fresh onions are always better for moisture retention in my book.
Mixing Up the Meat Blend
I’ve touched on using pork before, but it’s worth repeating for anyone looking for a richer, more intensely flavored hearty dinner recipe. Using an 80/20 ground chuck is fantastic, but if you swap in Italian sausage—the kind that’s already seasoned—you’re going to get a bolder, almost spicy note in your final product. Just be warned: sausage can sometimes be saltier, so always taste your mixture before adding the teaspoon of salt the recipe calls for, okay?
Another fun switch for a less common but delightful take on a simple meatloaf is using ground turkey. If you go turkey, though, you *must* compensate for the lack of fat. Add an extra tablespoon of cooking oil or even a little splash of Worcestershire sauce to the mix. Turkey dries out faster than beef, so we need that backup moisture strategy locked in!
Storing and Reheating Your Tender Meatloaf Recipe
So, you made the most amazing, tender meatloaf recipe ever, and now you have leftovers! Lucky you! This loaf keeps incredibly well, but how you store and reheat it is just as important as how you baked it if you want to preserve that juicy quality.
First things first: storage. You absolutely must let the meatloaf cool down a bit before you wrap it up. If you seal it while it’s scorching hot, you’re trapping steam, and that steam turns into moisture that can make the crust soggy or lead to texture breakdown later on. Once it’s cooled to room temperature—which takes maybe an hour on the counter—wrap the entire remaining loaf tightly in plastic wrap, and then pop that into a sealed, airtight container. It does great in the fridge for about three to four days. We’ve rarely had it last that long, though!
The Best Way to Bring Leftover Meatloaf Back to Life
I know the microwave is fast, but honestly, it zaps the moisture right out of beef products. If you want to maintain the moisture we fought so hard to achieve in the original bake, avoid the microwave unless you are in a massive hurry! Plus, the microwave makes that beautiful glaze all weepy.
My absolute favorite method for bringing back that wonderful classic meatloaf texture is the oven. This works whether you’re reheating a whole slab or just a couple of slices. Wrap the slice (or slices) loosely in foil—don’t seal it completely airtight like you did for storage. Pop it into a 300°F oven for about 15 to 20 minutes. The foil acts like a little steam tent, gently warming the meat through without drying out the exterior. It comes out tasting almost freshly baked!
If you *must* use the microwave, promise me you’ll take one extra step. Place your slice of meatloaf on a microwave-safe plate, and set a tiny glass of water right next to it in the microwave. That water absorbs some of the microwave energy and releases steam, which helps keep the meat from turning into jerky. Watch it carefully—1 minute on medium power is usually enough for a single slice.
Making Extra for Easy Freezing
If you realize you’re definitely not going to finish your family favorite meatloaf within four days, freezing is your best friend. You can freeze the loaf baked or raw, but I prefer baking it first for better texture control later.
Once it’s cooled completely after baking, slice it up first. Then, you can freeze individual slices! That’s perfect for quick lunches later. Wrap each slice individually in plastic wrap first, then slide them all into one large freezer bag. When you reheat those frozen slices using the foil-wrapped oven method described above, they come out fantastic. It makes for the ultimate ready-made weeknight dinner!
Frequently Asked Questions About Meatloaf
I get so many messages asking little tweaks and tips about getting this meatloaf just right, so I figured I’d gather the most common questions right here. It’s all about helping you make sure your comfort food meatloaf comes out perfect!
Can I make this meatloaf ahead of time?
Oh, absolutely! Making things ahead is my favorite kind of planning. You have two options here. If you only want to do the mixing part, go ahead and combine your meatball base just like we discussed and shape the loaf. Wrap it up really tight without the glaze and chill it for up to 24 hours. When you bake it, give it about 10 to 15 extra minutes in the oven since it’s starting cold. If you prefer to bake it completely, let it cool down, slice it, and store it in an airtight container. Reheating slices is my preferred method because it maintains leftovers better!
What is the best way to prevent my meatloaf from drying out?
This seems to be the #1 worry, and I totally get it! If you want that perfect moist meatloaf, you need to focus on two things: the meat blend and the handling. First, use the 80/20 ground beef, or mix in that pork or veal we talked about. Fat is your friend when it comes to moisture retention! Second, and this is crucial: do *not* overmix the ingredients in the bowl. When you mix ground meat too much, those proteins tighten up just like a chewy steak. Mix until the ingredients are just barely combined—you should still see little streaks of milk or pepper flakes floating around. That gentle handling keeps the loaf lovely and tender!
What sides pair well with this Comfort Food Meatloaf?
You really can’t mess with the classics when serving up a dish this good, can you? For the ultimate nostalgic meal, you absolutely need creamy mashed potatoes. They are the perfect fluffy base to soak up any of that extra glaze or meat juices. I’m also a huge fan of simple, slightly crisp steamed green beans tossed with a little butter and salt. If you want something heartier, a classic macaroni and cheese is never a bad idea next to this homemade beef loaf. I’ve even done roasted carrots and onions for an easy side pan that cooks right alongside the meatloaf!
If you need more help navigating my site, please check out my site information page!
Nutritional Estimates for This Meatloaf
Here is a general rundown of the estimated nutrition for one slice of this meatloaf, based on my recipe calculations. Remember, these are just estimates, and they will change based on the exact fat content of your ground beef and how much glaze you lovingly ladle on top!
- Serving Size: 1 slice
- Calories: 350
- Sugar: 15g
- Sodium: 550mg
- Fat: 18g
- Carbohydrates: 20g
- Protein: 28g
Nutritional Estimates for This Meatloaf
Okay, so while we are focused mostly on flavor, tenderness, and making sure this is the ultimate comfort food meatloaf, I always like to give you a general idea of what you’re eating. Please remember that these numbers are just ballpark figures for each serving. The final count changes wildly depending on what brand of beef you use—that 80/20 ratio matters for the fat content, naturally—and exactly how much of that amazing tangy glaze ends up sticking to the slice!
This is based on splitting the whole loaf into 6 generous servings, which is how I usually slice ours for dinner. If you cut it thinner, the numbers shift downward, of course!
- Serving Size: 1 slice
- Calories: 350
- Sugar: 15g
- Sodium: 550mg
- Fat: 18g
- Carbohydrates: 20g
- Protein: 28g
Since this is a traditional recipe, it’s naturally quite hearty, focusing on that great protein punch from the beef. That sugar content is mostly from the brown sugar and ketchup in our fantastic glaze, which is worth every tiny bit, in my honest opinion! If you’re counting macros or watching sodium closely, just remember you can always use lower-sodium salt in your base mixture to keep the numbers in line for your hearty dinner recipes.
PrintClassic Juicy Meatloaf with Tangy Glaze
A simple recipe for a moist and tender classic meatloaf topped with a tangy ketchup-based glaze. This is a straightforward family favorite.
- Prep Time: 15 min
- Cook Time: 65 min
- Total Time: 80 min
- Yield: 6 servings
- Category: Dinner
- Method: Baking
- Cuisine: American
- Diet: Low Lactose
Ingredients
- 2 lbs ground beef (80/20 recommended)
- 1 cup dry breadcrumbs (or Stove Top Stuffing mix)
- 1/2 cup milk
- 1 large egg, lightly beaten
- 1/2 cup finely chopped onion
- 1/4 cup ketchup (for the mix)
- 1 teaspoon salt
- 1/2 teaspoon black pepper
- 1/4 teaspoon garlic powder
- 1/2 cup ketchup (for the glaze)
- 1/4 cup brown sugar (for the glaze)
- 1 tablespoon apple cider vinegar (for the glaze)
Instructions
- Preheat your oven to 350°F (175°C). Lightly grease a loaf pan or line a baking sheet with parchment paper.
- In a large bowl, combine the breadcrumbs and milk. Let stand for 5 minutes to soften the breadcrumbs.
- Add the ground beef, egg, chopped onion, 1/4 cup ketchup, salt, pepper, and garlic powder to the bowl.
- Mix all ingredients gently with your hands until just combined. Do not overmix, as this can make the meatloaf tough.
- Shape the mixture into a loaf shape and place it on the prepared baking sheet or into the loaf pan.
- In a small bowl, whisk together the glaze ingredients: 1/2 cup ketchup, brown sugar, and apple cider vinegar.
- Spread half of the glaze evenly over the top of the meatloaf.
- Bake for 45 minutes.
- Remove the meatloaf from the oven and spread the remaining glaze over the top.
- Return to the oven and bake for another 15 to 20 minutes, or until the internal temperature reaches 160°F (71°C).
- Let the meatloaf rest for 10 minutes before slicing and serving.
Notes
- For an extra moist texture, you can substitute half the ground beef with ground pork or veal.
- If you prefer a firmer loaf, shape it on a baking sheet instead of using a loaf pan, which allows fat to drain away.
- To achieve a Gordon Ramsay style, press the glaze on firmly during the last 15 minutes of cooking.
Nutrition
- Serving Size: 1 slice
- Calories: 350
- Sugar: 15
- Sodium: 550
- Fat: 18
- Saturated Fat: 7
- Unsaturated Fat: 11
- Trans Fat: 0.5
- Carbohydrates: 20
- Fiber: 1
- Protein: 28
- Cholesterol: 90