

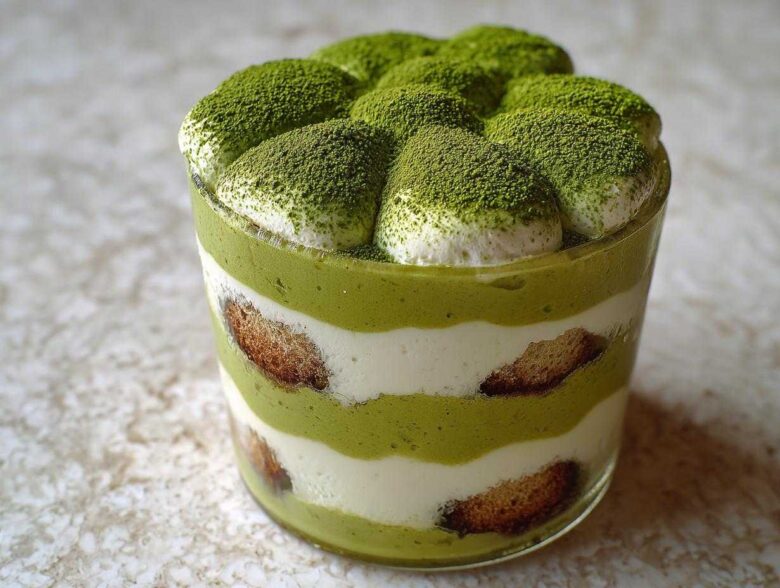
Oh, you know me, I absolutely love taking a classic recipe and giving it a total glow-up! Sometimes an old recipe just needs a little worldly shake-up to become something utterly modern and gorgeous. That’s exactly what happened when I decided to blend Italian tradition with that beautiful, vibrant earthiness from Japan. Trust me when I say that these individual Matcha Tiramisu Cups are the dessert upgrade you didn’t know you needed. I first fell in love with the green tea flavor when I was visiting Kyoto years ago—the way the bitterness perfectly cut through sweet creams was just magic. If you are looking for an even simpler version, you should check out my guide on making a classic no-bake tiramisu recipe! Making this matcha tiramisu recipe in single servings means they’re perfect for parties or just hiding in the fridge for yourself!
Why This Matcha Tiramisu Cups Recipe Works So Well
When you’re deciding on a showstopper dessert, you want something that delivers on looks, flavor, and ease. This recipe hits every mark, which is why I whip these up constantly for gatherings! They just look so much fancier than a standard sheet cake, but really, they are so much less fuss to put together. Seriously, don’t let the layers fool you; this is all about assembly!
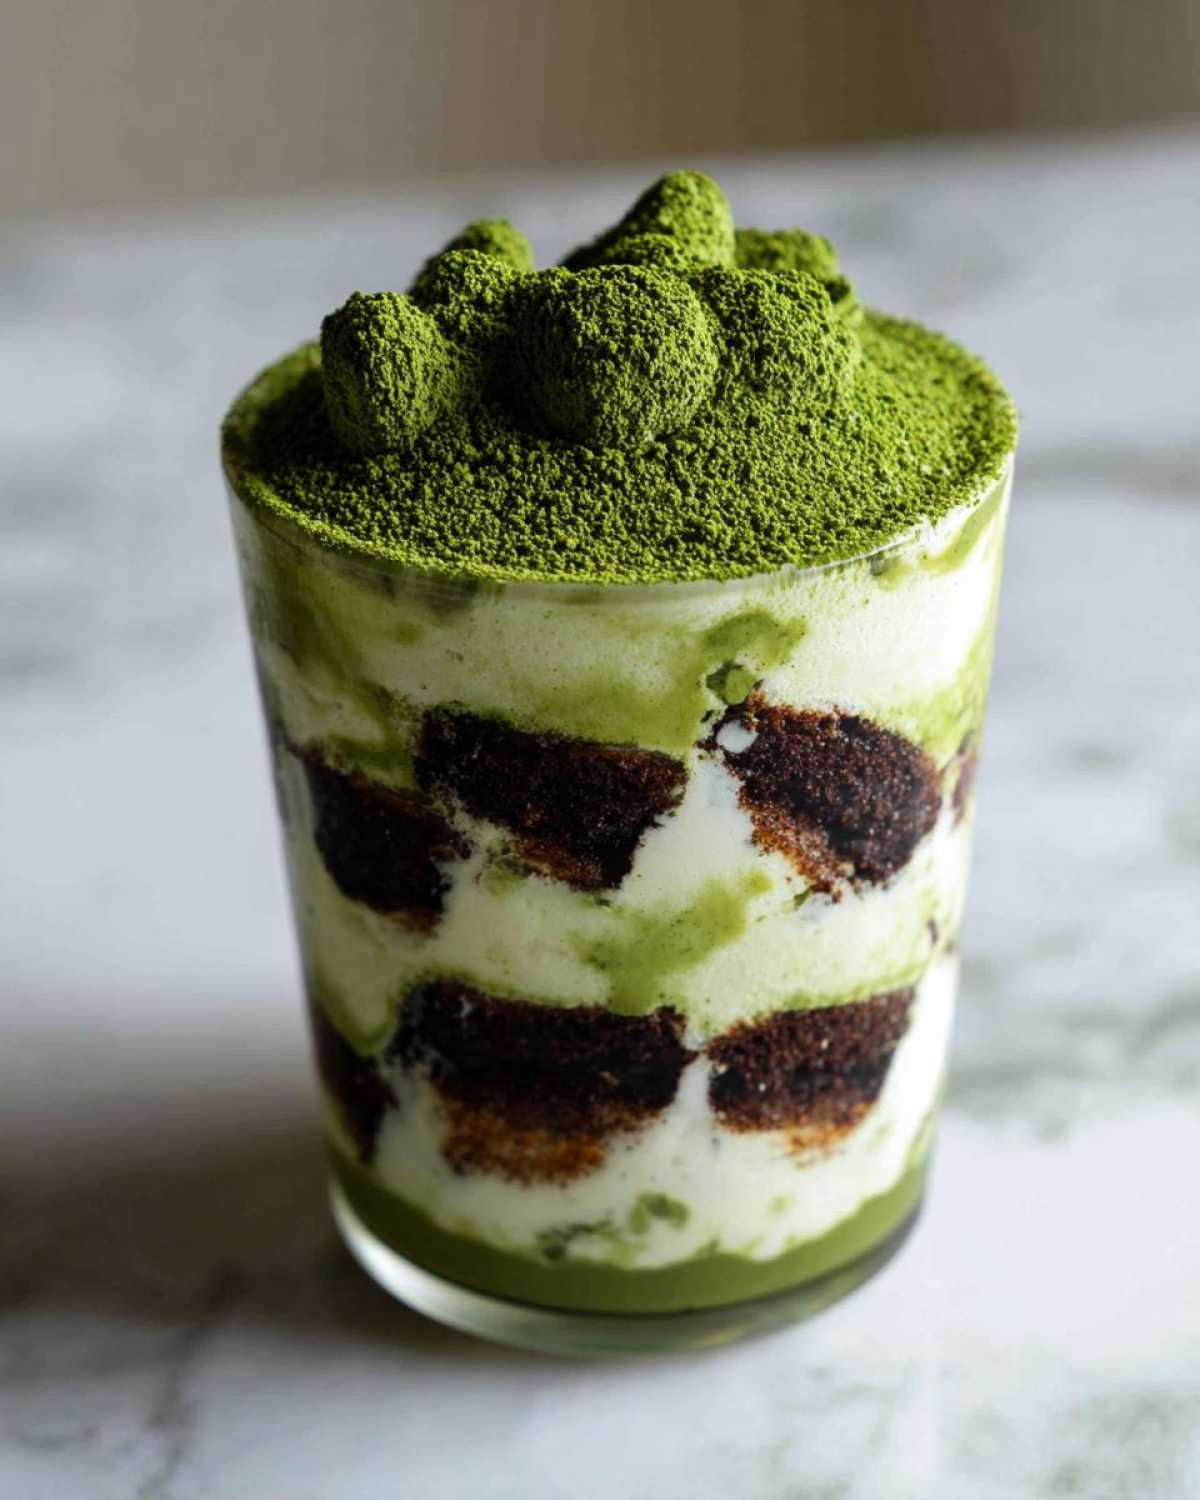
Here’s why these individual servings of green tea goodness are absolute winners:
- Perfect Portion Control: Serving these as individual dessert cups is a game-changer. No slicing, no messy edges, and everyone gets an equal, beautiful layered portion every time. It takes all the stress out of presentation!
- Zero Oven Time Needed: This is a true no bake japanese dessert! You mix, stack, and wait. This frees up your oven for anything else you might be cooking, and those creams set up beautifully in the cold.
- Masterful Flavor Balance: The secret to great matcha desserts is taming the bitterness. My process involves tempering the matcha with sugar in the soak and blending it smoothly into the rich, fatty matcha mascarpone cream. It’s bitter, sweet, and creamy all at once.
- Make-Ahead Marvel: These taste even better the next day! You can assemble the entire batch the night before your party. When everyone else is panicking about last-minute prep, you just pull these beauties out to dust with some powder. Talk about a stress reliever!
Essential Ingredients for Perfect Matcha Tiramisu Cups
Okay, let’s talk about what goes into this stunning, layered treat. When you’re making something that relies on very few flavors, like this matcha tiramisu recipe, the quality of those ingredients really shines through. You can’t hide cheap matcha! For me, the creamy filling needs to be luxurious, and the soaking liquid needs to pack a serious green tea punch. If you’re looking for another excellent recipe that showcases high-quality ingredients, check out my thoughts on the best moist coconut cake recipe. When we assemble these cups, we need structure, flavor, and silkiness, and these few items deliver all three!
You’ll need the following items for six beautiful servings:
Matcha Mascarpone Cream Components
- 6 large egg yolks (these build our rich sabayon base!)
- 3/4 cup granulated sugar (for the yolks)
- 1 1/2 cups cold heavy cream (must be cold to whip right!)
- 16 ounces mascarpone cheese, cold (Don’t substitute this if you can help it—it’s what makes it tiramisu!)
- 2 tablespoons high-quality matcha powder, plus extra for dusting (Seriously, use the good stuff here; it matters!)
Matcha Soak and Base Ingredients for Matcha Tiramisu Cups
- 1/2 cup hot water (for dissolving the matcha)
- 1/4 cup granulated sugar (for the soak)
- 1/4 cup rum or vanilla extract (optional, but the rum adds such a lovely depth!)
- 24-30 ladyfingers or 1/2 inch thick slices of sponge cake (These are your dipping buddies!)
- 6 small serving cups or ramekins (Whatever glass or jar you love for your matcha dessert layering!)
Step-by-Step Guide: How to Make Matcha Tiramisu Cups
This is where the magic happens! While it looks complex with all those gorgeous layers, making Matcha Tiramisu Cups is truly about executing a few simple steps perfectly. Don’t rush the cream base, and whatever you do, don’t leave those ladyfingers swimming in the matcha soak! Keep everything cold until the very last minute, especially the cream components, to ensure you get that gorgeous, high-end texture we all want. We’re going to tackle this in four key stages, starting with our flavorful liquid base.
Preparing the Flavorful Matcha Soak
First thing’s first, we make the liquid that gives these cups their characteristic green tea flavor. You need to dissolve that 2 tablespoons of matcha powder really well, so use hot water—not boiling, just hot enough to help it melt smoothly. Whisk it until there are absolutely no lumps left floating around; we want a smooth green liquid, not a gritty one. After whisking, mix in your 1/4 cup of sugar and the optional rum or vanilla. Set this aside now so it can cool completely before it ever touches our delicate ladyfingers. If it’s warm, it’ll just turn your cookies mushy!
Creating the Smooth Matcha Mascarpone Cream
This part takes the most attention, but it’s critical for that luxurious mouthfeel. We are building a sabayon base first. Set up a double boiler—that means a heat-proof bowl sitting over simmering water, but make sure the water isn’t touching the bottom of the bowl! Whisk your egg yolks and the 3/4 cup of sugar constantly for about 8 to 10 minutes. You are looking for it to get pale, thick, and reach at least 160°F. This step cooks the yolks safely and builds the structure. Once it’s thick, take it off the heat and keep whisking until it cools down. It needs to be cool before it meets the cheese! Next, gently fold that cooled yolk mixture into your cold mascarpone. Then, whip your heavy cream until it has stiff peaks—and I mean stiff. Fold the whipped cream into the mascarpone mixture very gently, like you’re tucking in a baby. We need to keep all that air in there for a light, fluffy matcha mascarpone cream.
Assembling Your Individual Matcha Tiramisu Cups
Now for the real fun! Grab your little cups or jars. We are aiming for the perfect green tea dessert layering technique here. Take a ladyfinger and dip it into your cooled matcha soak—quick dip, one second max—flip it, and dip the other side just as fast! If you leave it in longer than two seconds, you’ll have green sludge instead of cake layers. Place your quickly soaked ladyfingers at the bottom of each cup. Then, pipe or spoon a generous layer of your mascarpone cream on top. Repeat: another layer of dipped ladyfingers, topped again with cream. Always end with a smooth, beautiful cap of cream on the very top layer for the best matcha dessert presentation. This precise matcha dessert layering technique is how you ensure every bite is perfect.
Chilling and Final Presentation
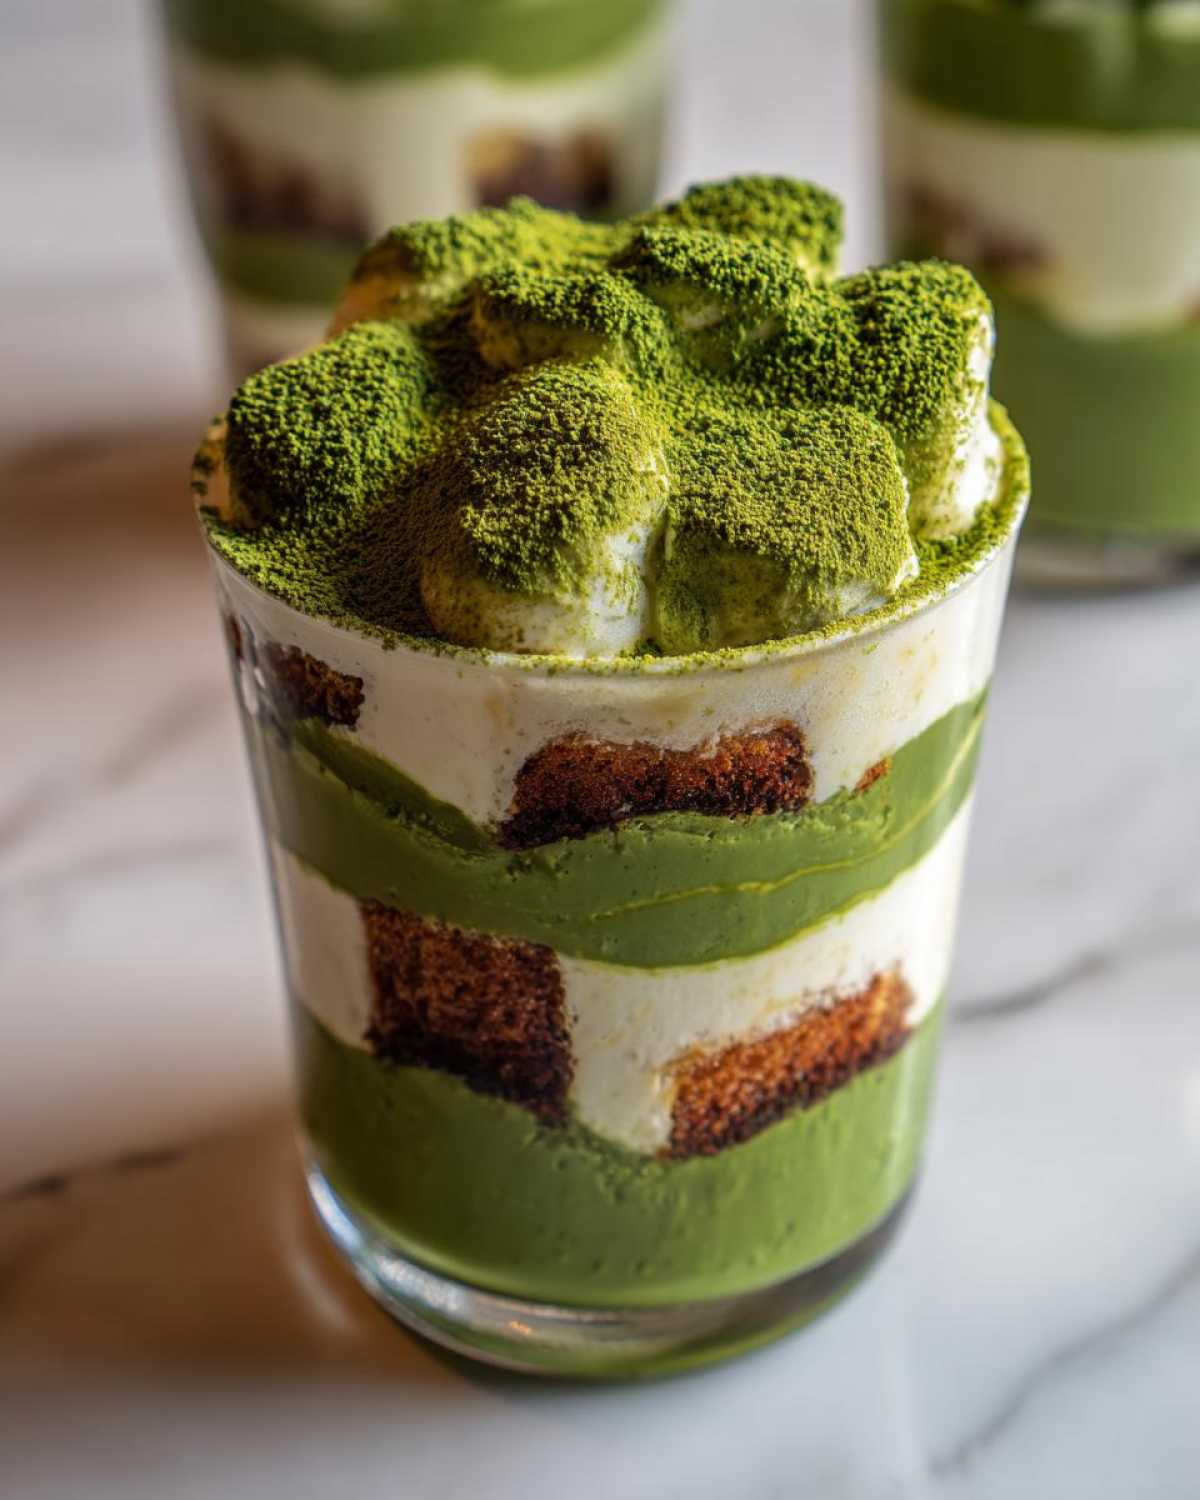
This step is the agony of waiting, but it’s non-negotiable! Cover those cups securely, maybe with cling wrap, and put them straight into the fridge. They need a minimum of four hours to chill so the ladyfingers soften up nicely and the cream sets firm. I promise you, they are 100 times better if you let them chill overnight—all those beautiful matcha and vanilla flavors really get a chance to marry! When you are just about ready to serve them as your elegant tea party sweets, take the reserved extra matcha powder and use a fine-mesh sieve to dust the tops generously. That final dusting is what gives them that authentic, beautiful, deep green contrast.
Tips for the Best Matcha Tiramisu Recipe Results
I’ve learned a few things over the years while testing and perfecting this recipe, especially since I’ve served these beauties at everything from casual Sunday brunches to very fancy work events! I want you to have the absolute best results, so let’s go over the few production details that make the difference between good and *stunning* when making your Matcha Tiramisu Cups.
First off, let’s talk about the star: the matcha powder. If you’re making these for a party—and I hope you are, because they make wonderful matcha dessert ideas for party planning—you simply have to spring for ceremonial grade matcha. It costs a bit more, but ceremonial grade has that vibrant green color and a much smoother, less abrasive flavor. Culinary grade is fine for baking cookies, but for something where the matcha is the main event, you need the top tier. It makes the cream look brighter and taste cleaner!
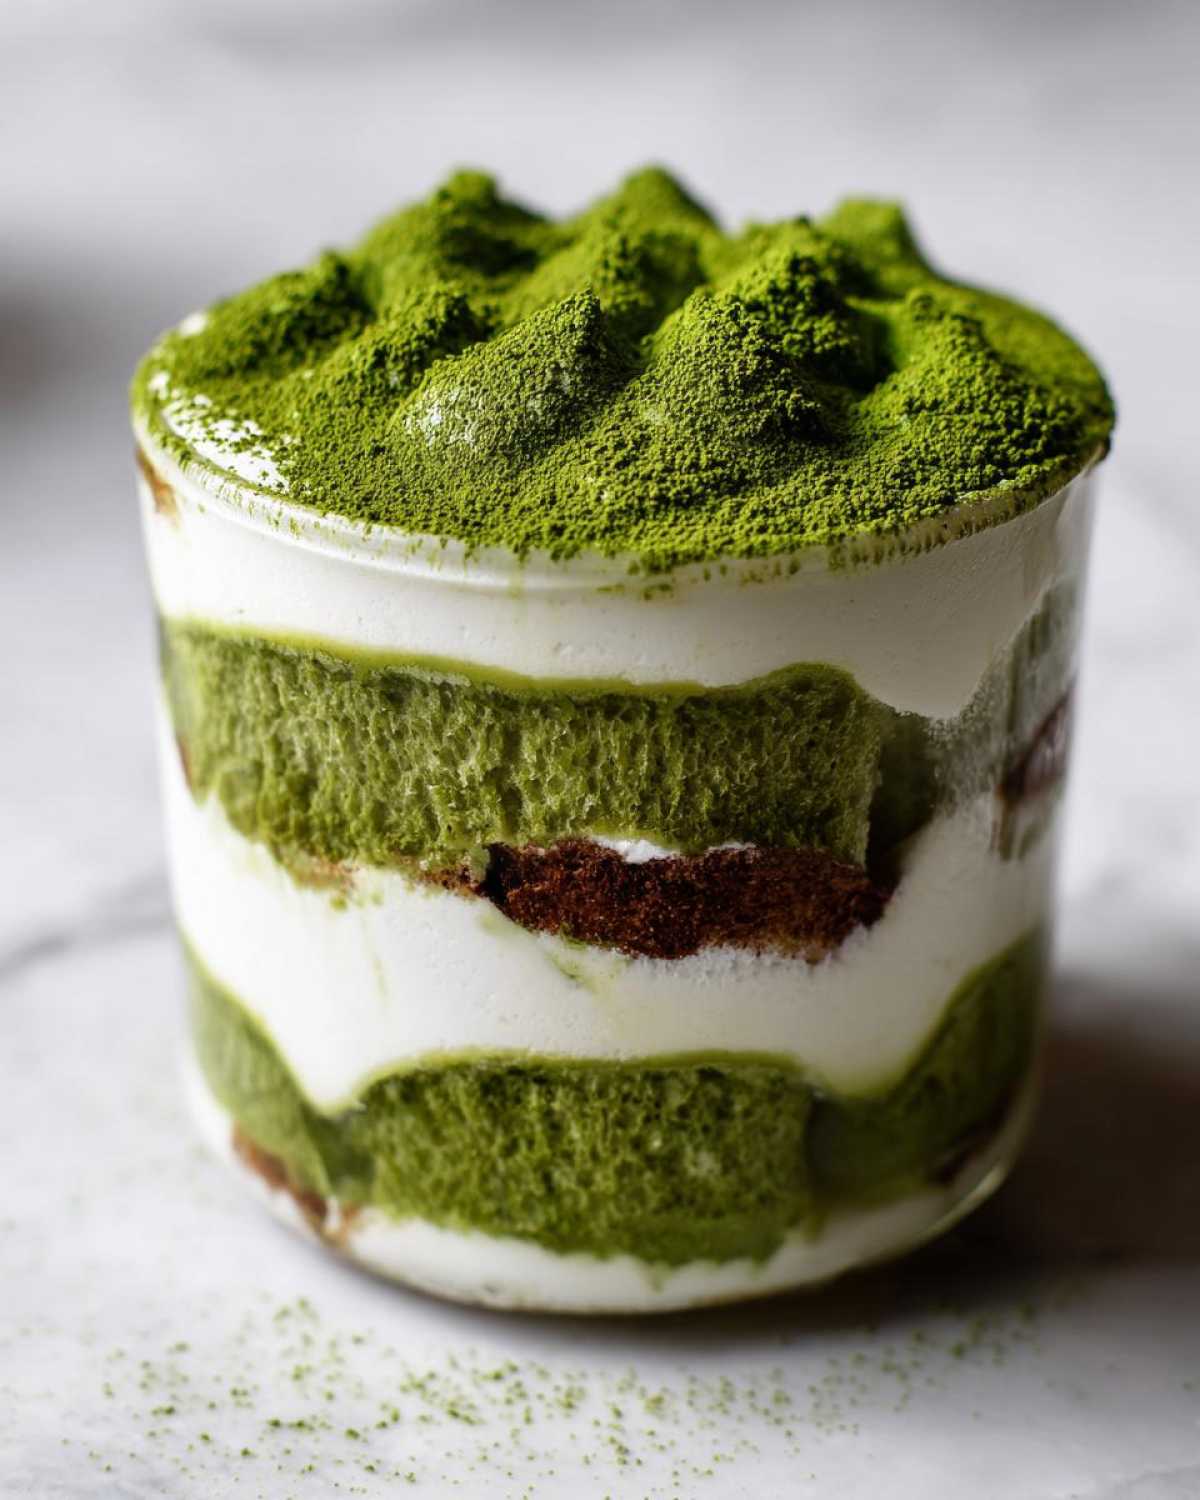
Now, let’s get technical about texture. I mentioned chilling the mascarpone and the heavy cream thoroughly, right? That’s not just filler advice! If your mascarpone is even slightly warm or soft, when you fold in the whipped cream, it just melts into a puddle. You need that cream to be ice-cold so it incorporates beautifully, giving you that structurally sound, yet light, matcha mascarpone cream.
And what if you’re nervous about the yolks? I totally get it! My grandma always taught me that cooking with eggs means cooking them safely. But if you’re just not comfortable making the sabayon base, I have a work-around that still keeps things fluffy. Forget the eggs and the water bath entirely! Instead, simply whip one cup of heavy cream with half a cup of powdered sugar (not granulated!) and a teaspoon of vanilla until you have stiff peaks, and then gently fold that into your mascarpone. You lose a tiny bit of that luxurious richness from the yolks, but you still get a wonderful, stabilized cream for your layers! This modification keeps things super simple for anyone looking for a true no-fuss dessert.
Finally, one last bit of assembly wisdom: when you’re dipping your ladyfingers or matcha sponge cake base, remember that ladyfingers drink liquid up like a thirsty sponge! You are aiming to hydrate them so they are soft, not soak them until they are disintegrating. A quick in-and-out plunge is all you need. Trust me, soggy bottoms ruin a perfect individual dessert cup stack!
Matcha Dessert Presentation for Elegant Tea Party Sweets
Honestly, half the fun of making these Matcha Tiramisu Cups is showing them off! Because they are already in their own containers, these immediately qualify as elegant tea party sweets, but you can totally level up the look with just a few simple choices regarding your serving ware and topping application. Presentation truly matters when you’re dealing with vibrant colors like this deep matcha green—it just pops!
When choosing your vessels, think about visibility. You want something that lets people see those beautiful layers you worked so hard assembling. I personally adore using small, straight-sided glass ramekins or cute little mason jars. Mason jars are fantastic because they feel rustic, yet modern, and they seal up perfectly if you need to make them a day ahead. If you’re making these for a formal event, slightly flared glasses work wonderfully because they show off the thickness of the cream layers brilliantly.
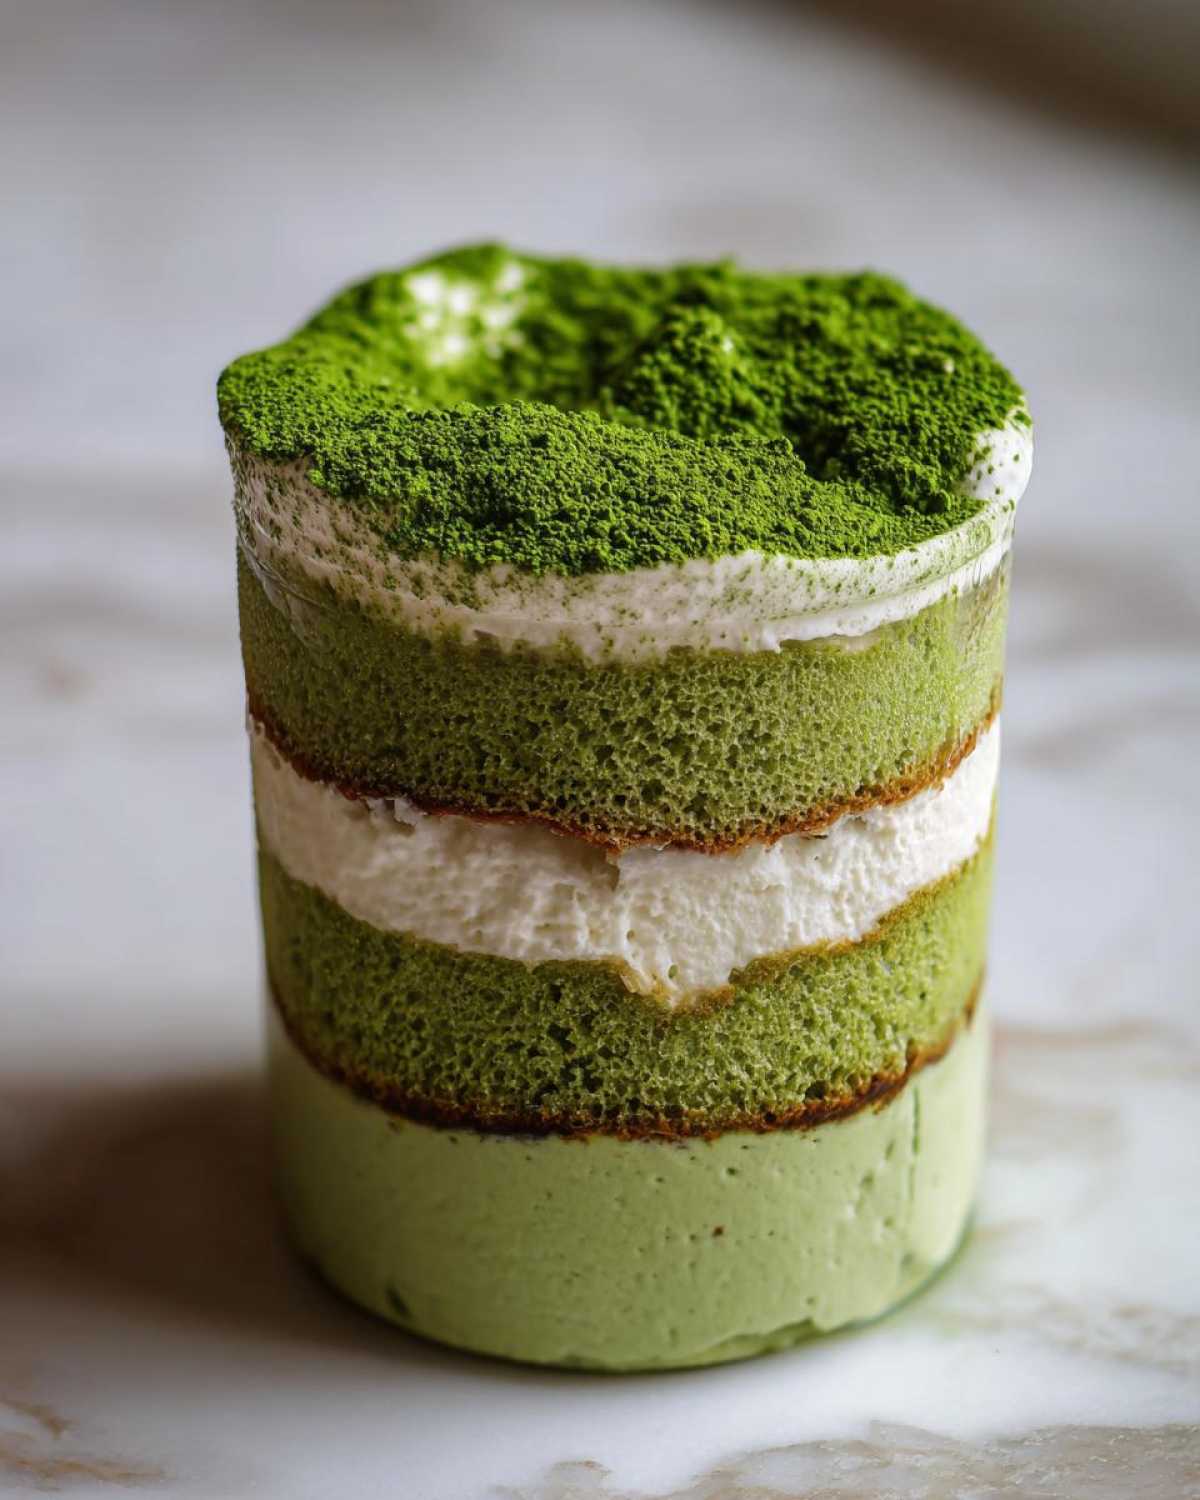
Once you’ve chilled them overnight and they are firm, the final presentation step is that glorious, fluffy dusting on top. This is the key to achieving that superb matcha dessert presentation we talked about. Don’t just dump the powder on from a package! You must use a very fine-mesh sieve—the finer the mesh, the softer and more velvety that dust layer will be. I usually tap the side of the sieve lightly with a spoon to ensure an even blanket of powder covers the entire surface of the cream. It contrasts so beautifully with the white cream underneath!
For a little extra flair, maybe try adding a small garnish just before serving. A single candied ginger piece or a tiny, edible gold sprinkle right in the center of the matcha dust can make these look like they came straight from a high-end patisserie. Remember, presentation is part of the enjoyment, so take a moment to appreciate your handiwork before you hand them out. For more inspiration on making desserts that look spectacular, you should definitely have a look at some of my other ideas for elegant tea party sweets!
Storing and Reheating Matcha Tiramisu Cups
Since these are assembled beauty queens and rely on cold cream and slightly softened ladyfingers, storage is pretty straightforward, but paying attention to time keeps them tasting fresh! Remember, one of the huge perks of these Matcha Tiramisu Cups is that they hold up so well when made ahead. You absolutely want to chill them for that full four hours at a minimum, but honestly, I always find they reach their absolute peak flavor profile after a nice long rest in the fridge overnight. You’re letting those subtle tea notes soak deeper into the structure!
When storing them in the refrigerator, make sure you cover them well. I use plastic wrap pressed lightly against the top layer of cream, and then I’ll seal the whole tray or container. This stops them from picking up any weird fridge smells, and it helps keep that luscious cream from drying out around the edges. If you use individual lids on jars, even better! They should store beautifully cold for up to three days this way. Any longer than that, and the ladyfingers might start to get a little too mushy for my liking, even though this is a no bake japanese dessert.
Now, for the big question about reheating—and this is going to sound crazy for a dessert, but please hear me out: Do not reheat these! Seriously, don’t even try. We aren’t dealing with a baked custard here; we’re dealing with stabilized mascarpone cream. If you try to microwave these even for five seconds, you’ll end up with warm, weeping mascarpone cheese soup and soggy cake bits. These are meant to be luscious, chilled delights, so keep them cold!
But what if you have way too many and the party is next week? Can you freeze your wonderful individual dessert cups? Yes, you absolutely can! Freezing works surprisingly well, provided you prep them correctly. Make sure the tops are well-covered with plastic wrap and then slide the whole container into an airtight, freezer-safe bag or container. This keeps freezer burn away and prevents condensation from ruining that final dusting layer. They freeze beautifully for up to a month.
When you decide it’s time to eat the frozen ones, pull them out of the freezer and immediately put them, still covered, into the refrigerator. Let them thaw slowly in the fridge for about 6 to 8 hours, or just overnight. Once they are fully thawed and cold again, then you can remove the plastic wrap and dust them with that gorgeous reserved matcha powder right before serving. It’s a little extra planning, but it means you can prep these fantastic matcha dessert cups tutorial favorites well in advance!
Frequently Asked Questions About Matcha Tiramisu Cups
I always get so many questions popping up once people start trying out this recipe, which just proves how popular these Matcha Tiramisu Cups are! It’s such a unique dessert, so I gathered up the most common things people ask me about getting that perfect layering and flavor balance right. You’ll find answers here about substitutions, color vibrancy, and why we soak the ladyfingers!
Can I use cream cheese instead of mascarpone in my Matcha Tiramisu Cups?
That’s a very common question, especially if mascarpone is hard to find or expensive where you shop! You *can* substitute cream cheese, but I have to warn you, it won’t be the same texture. Mascarpone is naturally richer, smoother, and fattier, which yields that beautifully light and luxurious matcha mascarpone cream when folded with the sabayon. Cream cheese tends to be tangier and much denser. If you use it, you might want to thin it out slightly with a tablespoon or two of heavy cream before folding everything together, or you might end up with a heavy block instead of a soft cream. If you want to explore cream cheese swaps in other desserts, I have a whole post on matcha cream cheese alternative ideas!
What is the best way to achieve a vibrant green color in the matcha cream?
Vibrancy is all about the powder quality, hands down! I can’t stress this enough: if you want that gorgeous, natural, electric green color in your finished individual dessert cups, you need ceremonial grade matcha powder. Culinary grade matcha is often duller, sometimes yellowish or brownish, because it’s made from older leaves. Ceremonial grade has been processed to retain that stunning jade hue and has a cleaner taste. Also, make sure you dissolve the powder completely in your hot water soak before adding it to the cream—any dry clumps will just look like little dark specks in your otherwise beautiful green mixture.
Do I need to use alcohol in the matcha soak for these individual dessert cups?
Absolutely not! The alcohol—whether it’s rum or even just brandy—is purely optional, and I know many families prefer to keep things alcohol-free, especially when making things like this easy layered dessert for kids or for work events. If you skip the alcohol, you should definitely replace that volume—about 1/4 cup—with something else to keep the soak liquid enough to hydrate your matcha sponge cake base properly. My favorite non-alcoholic swaps are strong, freshly brewed green tea that has been cooled completely, or even a little almond extract mixed into the water for a subtle nutty note that pairs surprisingly well with the matcha!
Estimated Nutritional Data for Matcha Tiramisu Cups
Alright, I know some of you are tracking macros or just curious about what you’re diving into when you make these glorious Matcha Tiramisu Cups! Now, I want to be super clear: since we’re dealing with rich ingredients like mascarpone and egg yolks, these are definitely an indulgence, not a light snack. These numbers are based on the standard recipe measurements I provided, assuming you used ladyfingers and the egg yolk method. If you use the cream cheese alternative or skip the sugar in the soak, things will shift, of course! But for a general idea before you dig in, here’s a ballpark of what one lovely serving looks like.
This estimate is based on serving the recipe yield of six individual dessert cups:
- Serving Size: 1 cup
- Calories: Around 450
- Fat: About 30g (Yes, that’s where the creaminess comes from!)
- Saturated Fat: Roughly 18g
- Carbohydrates: In the neighborhood of 38g
- Sugar: Roughly 35g (That’s a mix of the cream’s natural lactose and added sugar.)
- Protein: About 10g
- Sodium: Usually around 90mg
It’s definitely decadent, but I think that’s what makes an excellent tiramisu so special, right? You’re getting richness from the egg yolks and the high-quality mascarpone. If you’re making these for a party, just know you’re handing out a beautiful, creamy treat! You can find information on other rich desserts, like my chewy old-fashioned fruitcake cookies, on my other posts if you want to compare notes!
Share Your Matcha Dessert Layering Creations
Well, that’s it! You now have everything you need to create the most elegant, vibrant, and utterly delicious Matcha Tiramisu Cups right in your own kitchen. I really hope you give this matcha tiramisu recipe a try, especially if you’ve been wanting to try your hand at a stunning, layered, no-bake dessert. Seriously, every time I make these for a family event, people rave about how beautiful they look in those individual dessert cups.
Once you pull those beauties out of the fridge after their overnight chill and dust them with that final layer of green gold, I want to see them! Don’t be shy! Snap a great picture of your final matcha dessert presentation and tag me on social media! I absolutely live for seeing how my readers put their own spin on my favorite recipes. If you end up making any tweaks—maybe you added cardamom to the cream, or used a different base—let me know what happened in the comments below.
If you loved how easy and impressive these were, please think about leaving a star rating for the recipe right at the top of the page—it truly helps other bakers find this amazing green tea dessert layering method! Happy baking, or, well, happy assembling! Head over to my main blog page for even more fusion desserts and kitchen adventures. Enjoy every single layered bite!
PrintMatcha Tiramisu Cups Recipe
Make individual servings of Matcha Tiramisu Cups, a layered no-bake dessert combining creamy mascarpone with strong matcha-soaked sponge.
- Prep Time: 30 min
- Cook Time: 10 min
- Total Time: 40 min
- Yield: 6 servings
- Category: Dessert
- Method: No Bake
- Cuisine: Japanese Fusion
- Diet: Vegetarian
Ingredients
- 6 large egg yolks
- 3/4 cup granulated sugar
- 1 1/2 cups cold heavy cream
- 16 ounces mascarpone cheese, cold
- 2 tablespoons high-quality matcha powder, plus extra for dusting
- 1/2 cup hot water
- 1/4 cup granulated sugar
- 1/4 cup rum or vanilla extract (optional)
- 24-30 ladyfingers or 1/2 inch thick slices of sponge cake
- 6 small serving cups or ramekins
Instructions
- Prepare the matcha soak: Whisk 2 tablespoons of matcha powder with 1/2 cup hot water until fully dissolved. Stir in 1/4 cup sugar and the rum or vanilla, if using. Set aside to cool completely.
- Make the sabayon base: In a heatproof bowl set over a saucepan of simmering water (do not let the water touch the bowl), whisk the egg yolks and 3/4 cup sugar constantly until the mixture is pale, thick, and reaches 160°F (about 8-10 minutes). Remove from heat and continue whisking until cool.
- Prepare the mascarpone cream: In a separate bowl, whip the cold heavy cream until stiff peaks form. Gently fold the cooled sabayon mixture into the cold mascarpone cheese until just combined. Then, gently fold in the whipped cream until the mixture is uniform.
- Assemble the cups: Quickly dip each ladyfinger or sponge piece into the cooled matcha soak for just a second or two; do not over-soak.
- Layer the dessert: Place a layer of soaked ladyfingers at the bottom of each serving cup. Top with a layer of the matcha mascarpone cream. Repeat the layers, ending with a layer of cream on top.
- Chill: Cover the cups and refrigerate for at least 4 hours, or preferably overnight, to allow the flavors to meld and the cream to set.
- Serve: Just before serving, dust the top of each Matcha Tiramisu Cup generously with reserved matcha powder.
Notes
- Use ceremonial grade matcha for the best color and flavor in the cream and soak.
- If you prefer not to use raw egg yolks, you can substitute the sabayon base with 1 cup of heavy cream whipped with 1/2 cup powdered sugar and 1 teaspoon vanilla extract, then folded into the mascarpone.
- For a firmer cream, chill the mascarpone and cream thoroughly before whipping.
- If using sponge cake, cut it to fit the base of your chosen cups before dipping.
Nutrition
- Serving Size: 1 cup
- Calories: 450
- Sugar: 35
- Sodium: 90
- Fat: 30
- Saturated Fat: 18
- Unsaturated Fat: 10
- Trans Fat: 0.5
- Carbohydrates: 38
- Fiber: 2
- Protein: 10
- Cholesterol: 250