

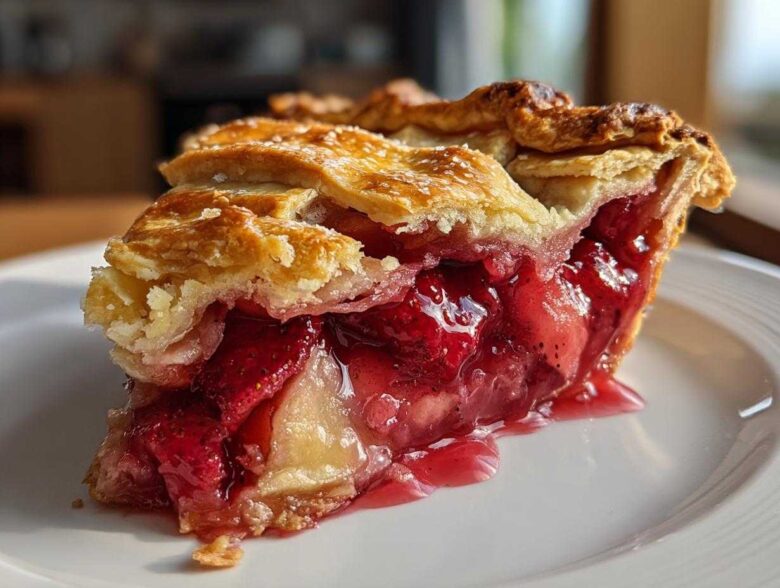
Oh my gosh, is there anything better than that very first taste of summer? For me, it’s all wrapped up in a slice of warm, gooey fruit pie. But not just any fruit pie—we’re talking about the true champion of springtime gatherings and long, lazy afternoons: the strawberry rhubarb pie. Forget fussy desserts; this is the ultimate sweet and tart experience, and when you get that balance just right? Heaven!
I’ve been chasing that perfect flavor combination for years, honestly. I think I had a couple of soggy bottoms when I was first learning. But trust me when I say this specific strawberry rhubarb pie recipe is the one that finally cracked the code. It’s solid, it’s reliable, and it delivers that perfect, flaky crust every single time. Once you try it, you’ll know why it’s become our go-to for every celebration. If you’re looking for other great centerpiece meals, check out my general dinner roundup!
Why This is the Best Strawberry Rhubarb Pie Recipe (E-E-A-T Focus)
So, you’ve come looking for the absolute best strawberry rhubarb pie, and who can blame you? This isn’t just another fruit pie recipe floating around the internet. This one is different because we nail the two things that ruin most homemade attempts: a soggy bottom crust and a filling that either tastes like pure candy or pure sour shock!
This strawberry rhubarb pie recipe has been fine-tuned over seasons of spring baking experiments. I promise you, the results speak for themselves. If you want to see the magic elsewhere in my baking, you can check out how I handle my ultimate chewy chocolate chip cookies—precision in baking always pays off!
Achieving the Perfect Sweet Tart Dessert Balance
The magic here is in the ratio we use. Rhubarb is naturally very tart, and strawberries are sweet, but they need a little nudge to become that incredible sweet tart dessert flavor we crave. I use a generous amount of rhubarb—about 6 cups—and balance that against 4 cups of strawberries. The sugar content is adjustable, but the secret weapon is that tablespoon of fresh lemon juice. It brightens everything up so you get that signature tangy bite that makes everyone ask for seconds.
Secrets to a Flaky Pie Crust Tutorial
Truly, the crust is non-negotiable for a great pie. I know making pastry crust can feel intimidating, but it boils down to one word: COLD. Cold butter, absolutely ice-cold water. That separation of fat creates those flaky layers; warm butter melts into the flour, and you get a tough, cookie-like texture instead of a gorgeous, shatteringly flaky result. If you follow the chilling tips I outline later, you’ll nail this flaky pie crust tutorial on your very first try, I guarantee it.
Ingredients for Your Homemade Strawberry Rhubarb Pie
Okay, let’s talk supplies! This is the part where you get everything lined up so the actual assembly flows like a dream—because the less rushing we do, (especially in pie making), the better our results will be. If you want the best strawberry rhubarb pie, you need to make sure you have these foundational items on hand before you even think about turning on the oven.
When you get to this list, I highly recommend writing it out and checking things off. It feels so satisfying! If you also love baking up little treats with seasonal fruit, you have to try my apple cinnamon streusel muffins sometime, too. They use similar seasonal logic!
Here is exactly what you need for both the crust and that amazing fruit filling for your homemade strawberry rhubarb pie:
- 2 1/2 cups all-purpose flour
- 1 teaspoon salt
- 1 cup (2 sticks) cold unsalted butter, cut into cubes
- 1/2 cup ice water, plus more if needed
- 6 cups fresh rhubarb, cut into 1-inch pieces
- 4 cups fresh strawberries, hulled and halved or quartered
- 1 1/2 cups granulated sugar (adjust to taste)
- 1/4 cup cornstarch
- 1 tablespoon lemon juice
- 1/4 teaspoon ground cardamom (optional)
- 1 large egg, beaten with 1 teaspoon water (for egg wash)
See? Nothing too crazy, but using cold butter and fresh fruit makes all the difference here. Don’t substitute that butter! We need the real deal for the flakiness!
How to Prepare the Flaky Crust for Your Strawberry Rhubarb Pie
Let’s get into the actual technique because, honestly, the crust is where we earn our stripes as pie bakers. This part of making our strawberry rhubarb pie is all about speed and temperature control. You want everything—your flour, your butter, even your hands if you’re feeling dedicated—to be as cold as possible. Warm butter melts before it can form steam pockets, and steam pockets are the secret sauce to a truly flaky texture, so we cannot let that happen!
Grab your largest mixing bowl. We whisk the flour and salt together first—just a quick marriage of the dry parts. Then comes the satisfying part: cutting in that beautiful, cold butter. I prefer using my pastry blender because it keeps my fingers from warming things up too much, but if you like, you can just use your fingertips! Work quickly until the butter looks like coarse crumbs, but make sure you still see some pea-sized chunks. Those chunks are gold, they turn into airy layers!
The water needs to go in slowly, just a tablespoon at a time. You listen for the dough to *just* come together. Seriously, stop adding water the second it clumps. You’re not kneading bread here; overmixing develops gluten and makes the crust tough. Once it forms dough, divide it exactly in half. Wrap those two disks tightly and push them into the fridge. If you need extra guidance on managing the hydration in your fillings later on, my general baking tips for pie fillings might help you visualize dough readiness!
Chilling Time: Non-Negotiable for the Best Strawberry Rhubarb Pie
I know, I know, waiting is the worst when you have sweet fruit sitting out waiting to be baked. But you absolutely must chill the dough for at least one full hour. One hour is the bare minimum, and honestly, two hours is even better if you can manage it. This resting period allows the gluten you developed during mixing to relax, ensuring your crust rolls out smoothly instead of snapping back at you like a rubber band. More importantly, it chills the butter back down to a solid state. When those cold butter pieces hit the oven’s heat, they create the steam necessary for lift and gorgeous flakiness. This rest period is what separates a decent crust from the crust on the best strawberry rhubarb pie.
Assembling the Perfect Strawberry Rhubarb Pie Filling
Alright, now that our rock-solid, icy dough is chilling happily, we get to play with the star of the show: the fruit! This part is actually kind of simple, which is perfect because we want the complexity of flavor to shine, not overly complicated technique.
In a big bowl—use one bigger than you think you need, trust me, those fruits are bulky!—gently toss together your pre-cut rhubarb and your hulled, halved strawberries. We want to keep them happy and intact for now, not mash them into a pink sludge.
Next up: the dry flavor agents and the thickener. Pour in your granulated sugar and the cornstarch. The cornstarch is vital; it’s what turns what would be a very juicy, watery mess into that glorious, thickened, spoonable filling that oozes perfectly when you slice into your strawberry rhubarb pie. Don’t forget that bright hit of lemon juice, and if you’re feeling adventurous like I was last week, toss in that optional cardamom. It’s truly a game-changer for a floral note!
Now for the most crucial expert tip—and this is straight from my trial-and-error notebook from years ago practicing for the best strawberry rhubarb pie. Before you even think about pouring this into your bottom crust, you need to taste it! Scoop out a tiny bit of that raw filling onto a clean spoon. Does it make you pucker a little? Is it just sweet enough? You are aiming for that ideal sweet tart dessert profile right now, because once it’s baked, you can’t go back and adjust the sugar. If it’s too tart, add a tablespoon more sugar now. If it seems flat, add a tiny splash more lemon. This little taste test will guarantee that sublime filling!
Once it tastes perfect, give it one final, very gentle stir to make sure that cornstarch coating is even, and get ready to move it over to the waiting crust. For a little more insight into managing those liquids and thickeners in fruit bakes, check out my general baking tips for pie fillings—they cover all the bases!
Mastering the Lattice Pie Crust Topping for Your Strawberry Rhubarb Pie
Okay, dough is rested, filling is ready—now we decide on the look! For me, nothing screams summer baking louder than a beautiful, woven lattice pie crust atop a strawberry rhubarb pie. It looks fancy, but really, it’s just a fun pattern you weave together!
Pull out your second chilled disk of dough. On a lightly floured surface, roll it out carefully into a circle that’s about 12 inches across. Don’t rush this; if the dough starts fighting you, just let it sit on the counter for five minutes to warm up just a hair, then go back to rolling.
Weaving the Lattice Pie Crust
Once rolled out, grab a sharp knife or—even better—a pizza cutter for nice, clean lines. Cut the dough into strips that are roughly three-quarters of an inch wide. You’ll need an odd number of strips, like five or seven, for an easy weave. Lay half of the strips parallel across the top of your filled pie. These are your foundation strips!
Now, take one strip and fold back every *other* strip over it. Place a strip perpendicular across those folded strips, then unfold the original strips back over it. It’s like weaving a basket! You are essentially lifting and alternating strips to create that classic checkerboard look. It sounds complicated when I write it down, but once you do the first one or two intersections, your hands will just know!
Once your lattice is woven over the entire pie, trim the strips and crimp the edges together with the bottom crust overhang. You want a really good seal here so the filling doesn’t sneak out the sides while it bubbles away. For an even prettier finish, you can brush that lattice lightly with your egg wash—which gives us that gorgeous golden sheen—and maybe toss a sprinkle of coarse sugar over the top for crunch. If you decide you really can’t handle the lattice this time, don’t panic! Just roll out the second disk to cover the whole pie, but you MUST cut several steam vents in the top. I usually just do three or four slits right down the middle. The steam needs a way out, or your crust will puff up like a giant balloon, and nobody wants that sad, cracked top on their beautiful strawberry rhubarb pie.
If you’re looking for other ways to decorate or construct your fruit pies, I always find inspiration in my post about cheesecake-stuffed-strawberries—sometimes the best pie toppings are secretly just other desserts!
Baking Instructions for a Golden, Bubbly Strawberry Rhubarb Pie
The moment of truth! We’ve got our cold crust and our perfectly balanced fruit filling inside, looking gorgeous, especially if you managed a nice lattice pie crust. Now we have to bake it correctly so that crust gets golden brown and crisp, but the fruit has enough time to cook down and thicken up nicely. You see, just slapping it in the oven at one temperature rarely works for a deep-dish fruit pie like our strawberry rhubarb pie!
We are starting hot! Preheat your oven to 400 degrees Fahrenheit. That initial blast of high heat is what sets the bottom crust really fast, helping us avoid that dreaded soggy bottom. So, carefully slide your pie onto a baking sheet (I like to use a sheet pan underneath just in case any of that glorious filling decides to bubble over—it makes cleanup SO much easier!). Bake it at 400°F for exactly 20 minutes.
After those first 20 minutes, it’s time to gently lower the heat. Don’t open the oven door too fast after that initial high heat blast! Reduce the temperature down to 375 degrees Fahrenheit. This is where the slow, steady work happens. We let the filling cook through without burning the delicate edges of our crust.
Now, keep an eye on the edges. If you see that beautiful crust starting to turn a deep, rich golden brown before the baking time is up—and this happens frequently!—you need to protect it. Grab a piece of aluminum foil and gently wrap it around the rim of the pie, creating a protective ‘shield’ for the edges. This keeps them from turning black while the center finishes cooking. If you need more inspiration for quick, fail-proof bakes, take a peek at my no-bake chocolate peanut butter oat bars—sometimes you just need speed!
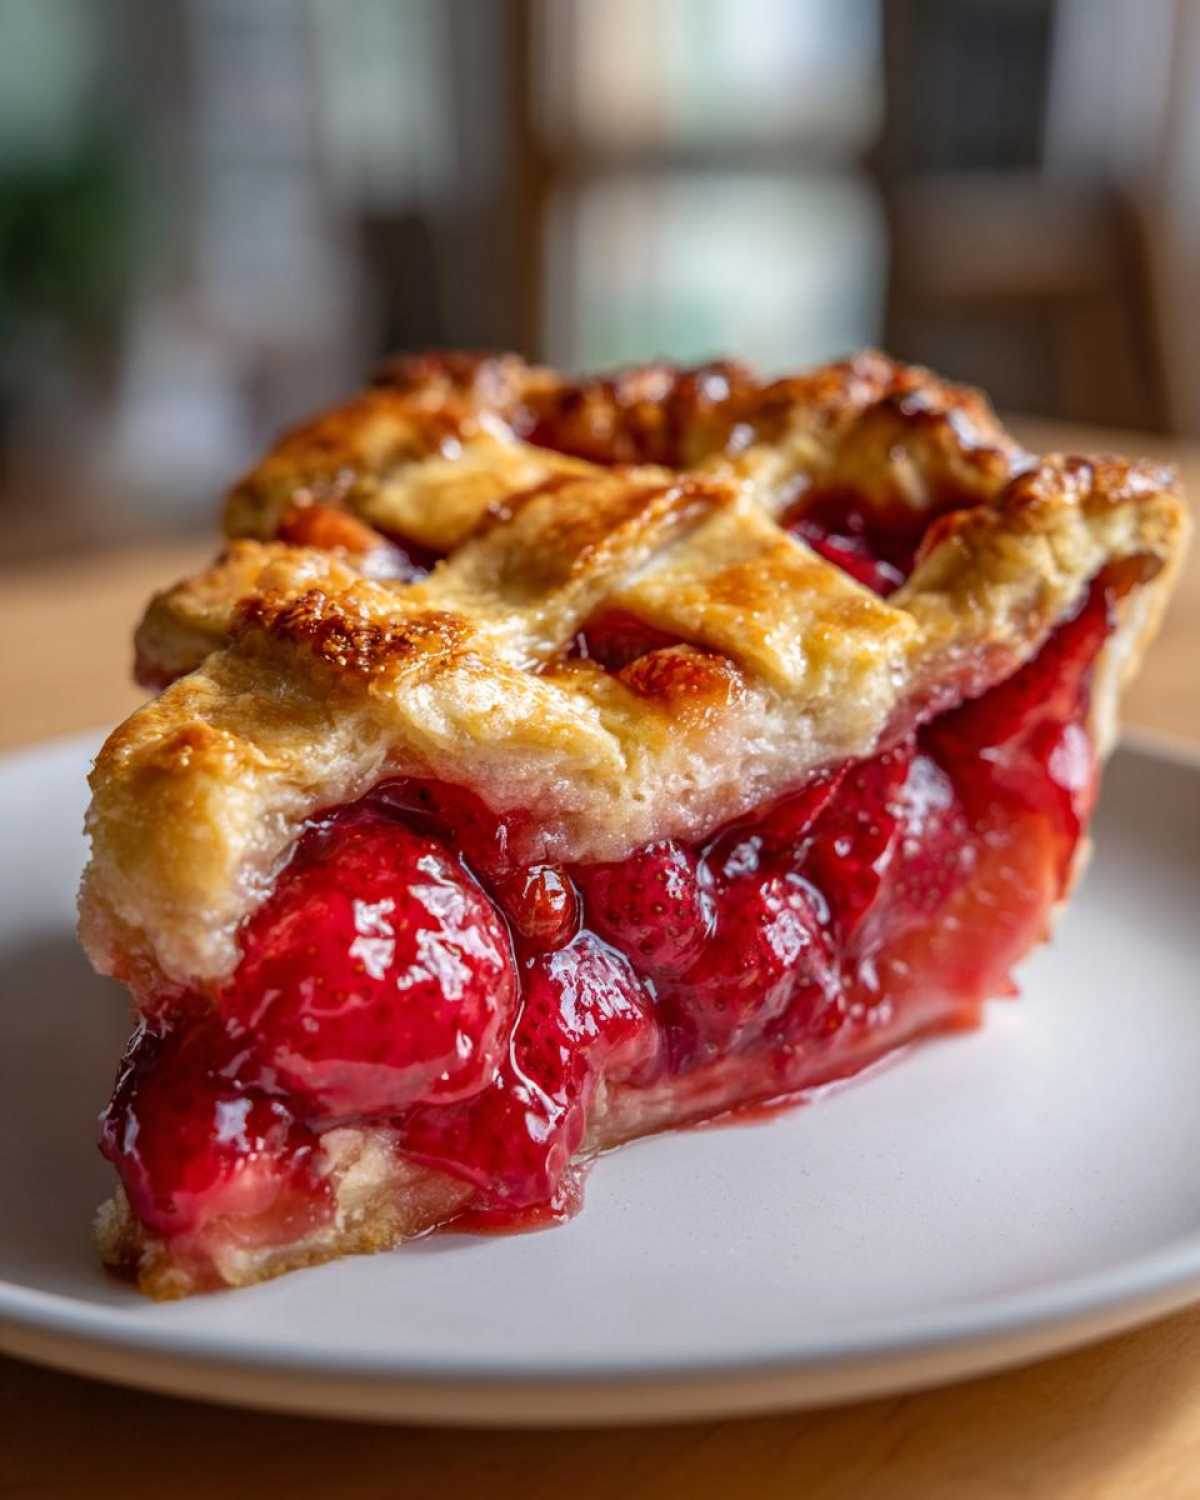
The total baking time after dropping the heat will be another 35 to 45 minutes. How do you know it’s done? You’re looking for two things: a deep, golden brown or even slightly amber color on the crust, and critically, the filling must be bubbling thickly. I mean really boiling and stewing in the center vents! If you only see a few lazy bubbles, it needs more time. You want that cornstarch to activate fully so that gorgeous fruit sets up perfectly. That thick, rich bubbling is your signal that this strawberry rhubarb pie is ready to come out and rest!
Tips for Success: Making the Ultimate Strawberry Rhubarb Pie
We’ve conquered the crust and perfected the filling, but I have a few little tricks up my sleeve that always take this dessert from a nice pie to the best strawberry rhubarb pie you’ve physically ever eaten. These tips mostly focus on patience—which, as we both know, is the hardest ingredient to measure!
If you want an incredibly easy transition to other sweet bakes, check out my fun red velvet brookie mashup. Sometimes, getting that perfect texture just requires knowing a couple of simple insider secrets, and that applies to pie just as much as it applies to cookies!
Cooling Time: The Most Overlooked Step
Seriously, if you take away only one piece of advice today, make it this one. You must let this pie cool down. I know seeing that gorgeous, golden, bubbly top makes you want to grab a knife and serve it immediately, but please don’t do it! Think of the filling right now as a very enthusiastic, hot liquid that needs time to calm down and solidify.
If you slice into this pie when it’s piping hot, the filling will run right out onto the plate, leaving you with a sad, soupy slice. We need at least three to four full hours on a wire rack for that cornstarch base to fully set up. When you wait that long, every slice comes out perfectly square, holding its shape beautifully because those strawberries and rhubarb pieces are suspended in a thick, gorgeous jelly. Trust me, the wait is worth the reward when you get that perfect slice.
Variations: Crumble Topping and Flavor Twists
While I am obsessed with the lattice top for presentation, if you are short on time or just really love crunchy toppings, this recipe is incredibly welcoming to substitutions. If you skipped making the second dough disk, you can replace it entirely with a rich streusel topping. Just use about a cup and a half of your favorite crumble recipe—oats, brown sugar, butter, and flour—and sprinkle that over the filling instead of weaving strips. It turns it into something closer to a strawberry rhubarb crumble pie!
Flavor-wise, our recipe calls for optional cardamom, which I love because it adds a sophisticated warmth. But if you’re feeling experimental, try a tiny pinch of freshly cracked black pepper hidden in that fruit mixture along with the cardamom. It doesn’t make the pie spicy, it just adds a phenomenal depth that makes people pause and wonder what *that* subtle flavor note is! Sometimes the best summer pie recipes are the ones you make your own.
Frequently Asked Questions About Strawberry Rhubarb Pie
I know you might still have a few little lingering questions floating around after reading all about the crust and the filling secrets. That’s totally normal when tackling a classic like this! I’ve gathered the most common things people ask me when they’re about to bake their first batch of strawberry rhubarb pie. Hopefully, this clears everything up so you can get baking!
If you’re looking for other easy, fun, fruit-based treats after you master this pie, you have to try my layered strawberry pretzel dessert jars. Sometimes you just need something cute and individual!
Can I use frozen fruit in this strawberry rhubarb pie recipe?
That’s such a good question, especially if you’re trying to use up what was left in the freezer! Yes, you absolutely can use frozen strawberries and rhubarb, but you have to adjust things slightly. Frozen fruit is going to release a lot more liquid than your fresh haul, so you need to compensate. I recommend adding at least an extra tablespoon, maybe even two, of cornstarch to your filling mixture to help manage that extra water. And please, don’t thaw the fruit first! Toss it right into the bowl while it’s still frozen stiff, mix it gently with the sugar/cornstarch, and proceed. You might need to add 5 to 10 minutes to your baking time, but the principle of the easy rhubarb pie recipe still holds true.
How far in advance can I assemble this pie?
This is where we talk about the difference between assembled and baked. For the absolute flakiest crust result? You should assemble your strawberry rhubarb pie right before you plan to bake it, ideally within an hour or two of pulling the dough from the fridge. If you assemble it too far in advance (say, the night before), the moisture from that lovely filling starts to wick into the bottom crust, and even with the cornstarch, you risk a softer bottom.
However, if you’re planning ahead for a big gathering, I have a great trick: you can assemble the entire pie (bottom crust, filling, lattice top) and then wrap the whole thing tightly in plastic wrap and freeze it solid. When you’re ready to bake, you just brush the top with the egg wash, add the sugar, and bake it straight from frozen—though you’ll need to add about 20 to 30 minutes to the total bake time. That way, you get a piping hot, freshly baked pie without all the morning prep!
Is this recipe simple enough if I haven’t made a fruit pie before?
Oh, absolutely! This is why I wrote it this way. Yes, we are mastering a homemade, flaky crust, but I’ve broken down the steps so clearly that it’s a fantastic starting point. If you can manage cold butter and accurate measuring, you can pull this off. This recipe cuts out the extras that slow beginners down, focusing purely on the buttery crust and the balanced fruit. It’s truly one of the most reliable summer pie recipes out there for a first-timer who wants impressive results!
Storage and Reheating Instructions for Leftover Strawberry Rhubarb Pie
Well, if you manage not to eat the entire strawberry rhubarb pie in one sitting—which is a real challenge, trust me—you’ll need to know how to store those gorgeous leftovers. Fruit pies are a bit different than, say, a brownie or cookie stash! Don’t just wrap it up and shove it in the fridge immediately; we need to protect that precious crust we worked so hard on.
If you have leftovers, the best approach is to let the pie cool completely on the counter until the filling is fully set. If you try to cover it while it’s still warm, you trap steam, and that steam *will* turn your flaky crust gummy. Once it’s totally cool, which takes a few hours after baking, you have a choice.
For short-term storage (up to two days), leaving it covered loosely on the counter is generally fine, especially if your kitchen isn’t crazy hot. The sugar content acts as a natural preservative. However, if you have a humid environment or you plan to keep it longer than two days, I always recommend covering it tightly with plastic wrap or placing the remnants in an airtight container in the refrigerator. It stays good for about four or five days this way.
Speaking of storing things perfectly, I have a great recipe for crunchy maple pecan granola clusters if you want something genuinely shelf-stable! But back to pie!
The Secret to Reheating for Maximum Flakiness
When you go to reheat a slice of this amazing strawberry rhubarb pie, the microwave is your enemy! The microwave heats the water molecules in the fruit filling, and that steam absolutely wrecks your crisp bottom crust. We want that buttery flakiness back, right?
So, skip the microwave entirely. The best way to reheat a slice is either right on the counter if it’s been refrigerated for just a day and you want it room temperature, or, my favorite way, in a toaster oven or a regular oven set to a low temperature—think 300 degrees Fahrenheit. Pop the slice on a little sheet of foil or directly on the rack and let it bake for about 8 to 10 minutes. This gently warms the filling back up while drawing any residual moisture out of the crust, returning that satisfying crispness. It’s like getting a second fresh slice!
Estimated Nutritional Data for This Classic Fruit Pie
Now, I always feel a little strange talking numbers when we should be talking about pure, nostalgic summer flavor, but I know some of you lovely readers want the full picture when you’re baking up a classic fruit pie like this one. Remember, every perfect slice of this strawberry rhubarb pie is packed with fruit, sugar, and that lovely all-butter crust, so these numbers reflect everything!
Please keep in mind these are just estimates. I’m not a certified nutritionist, and depending on how much butter you sneak into the edges or how much sugar you decide to use in your fruit blend, things can shift a little. Use this as a general guideline for when you’re tracking ingredients for your big summer pie recipes adventure!
Here’s what you can generally expect from one generous slice of our delightful pie:
- Calories: 420
- Sugar: 35g
- Fat: 22g (with 14g as Saturated Fat)
- Carbohydrates: 55g
- Protein: 5g
If you’re looking for another impressive dessert that’s just as fun to look at but maybe a little lighter on the crust requirements, you should definitely try my recipe for orange creamsicle pie in jars. It’s bright, it’s summery, and it pairs so well with the tartness of rhubarb if you ever want to switch things up next season!
Share Your Perfect Strawberry Rhubarb Pie Experience
See? I told you this strawberry rhubarb pie was worth the little bit of extra effort! Whether you managed a tight, perfect lattice pie crust or decided a simple vented top was more your speed, I genuinely want to hear how it turned out for you. This is why we share these recipes—to see them come alive in your kitchens!
Baking is all about community, and I love seeing the gorgeous results you all create. Did your filling set up perfectly this time? Did you go spicy with black pepper, or stick to the classic cardamom? Let me know!
Head down to the comments section below and let me know what you thought. Seriously, give this recipe a rating—five stars if you agree it’s the best strawberry rhubarb pie ever made! If you’re having trouble, please leave a question; I try to answer every single one to help you master that flaky crust.
And hey, if you snapped a picture of your beautiful golden creation, tag me on social media! I always love featuring reader photos! Thanks for trusting me with your classic fruit pie baking today. If you want to read more about the folks behind this kitchen, check out my About Us page for more stories; happy baking!
PrintThe Best Strawberry Rhubarb Pie with Flaky Crust

Follow this recipe for a classic homemade strawberry rhubarb pie featuring a perfectly balanced sweet and tart filling and a reliably flaky crust.
- Prep Time: 45 min
- Cook Time: 60 min
- Total Time: 105 min
- Yield: 8 servings
- Category: Dessert
- Method: Baking
- Cuisine: American
- Diet: Vegetarian
Ingredients
- 2 1/2 cups all-purpose flour
- 1 teaspoon salt
- 1 cup (2 sticks) cold unsalted butter, cut into cubes
- 1/2 cup ice water, plus more if needed
- 6 cups fresh rhubarb, cut into 1-inch pieces
- 4 cups fresh strawberries, hulled and halved or quartered
- 1 1/2 cups granulated sugar (adjust to taste)
- 1/4 cup cornstarch
- 1 tablespoon lemon juice
- 1/4 teaspoon ground cardamom (optional)
- 1 large egg, beaten with 1 teaspoon water (for egg wash)
Instructions
- Prepare the crust: In a large bowl, whisk together the flour and salt. Cut in the cold butter using a pastry blender or your fingers until the mixture resembles coarse crumbs with some pea-sized pieces of butter remaining. Gradually add the ice water, one tablespoon at a time, mixing until the dough just comes together. Divide the dough in half, form each half into a disk, wrap in plastic, and chill for at least 1 hour.
- Prepare the filling: In a separate large bowl, gently combine the rhubarb, strawberries, granulated sugar, cornstarch, lemon juice, and cardamom, if using. Let the mixture sit while you roll out the dough.
- Preheat your oven to 400 degrees Fahrenheit (200 degrees Celsius).
- Roll out one dough disk and carefully place it into a 9-inch pie plate. Trim the edges, leaving a 1-inch overhang.
- Pour the fruit filling into the bottom crust. Dot the top of the filling with a few small pieces of leftover butter, if desired.
- Roll out the second dough disk. You can cover the pie completely or cut strips to create a lattice top. Place the top crust or lattice over the filling. Trim and crimp the edges to seal. Cut several slits in the top crust to allow steam to escape.
- Brush the top crust lightly with the egg wash and sprinkle with a little extra sugar.
- Bake for 20 minutes at 400 degrees Fahrenheit. Then, reduce the oven temperature to 375 degrees Fahrenheit (190 degrees Celsius) and continue baking for another 35 to 45 minutes, or until the crust is golden brown and the filling is bubbling thickly. If the edges brown too quickly, cover them with foil.
- Let the pie cool on a wire rack for at least 3 to 4 hours before slicing. This allows the filling to set properly.
Notes
- For the flakiest crust, keep all ingredients, especially the butter and water, very cold.
- If your strawberries are very sweet, reduce the sugar slightly. Taste the raw filling mixture before pouring it into the crust to check the sweet-tart balance.
- If you prefer a crumble topping instead of a top crust, omit the second dough disk and use 1 1/2 cups of a standard streusel topping mixture.
Nutrition
- Serving Size: 1 slice
- Calories: 420
- Sugar: 35g
- Sodium: 250mg
- Fat: 22g
- Saturated Fat: 14g
- Unsaturated Fat: 8g
- Trans Fat: 0g
- Carbohydrates: 55g
- Fiber: 3g
- Protein: 5g
- Cholesterol: 55mg