

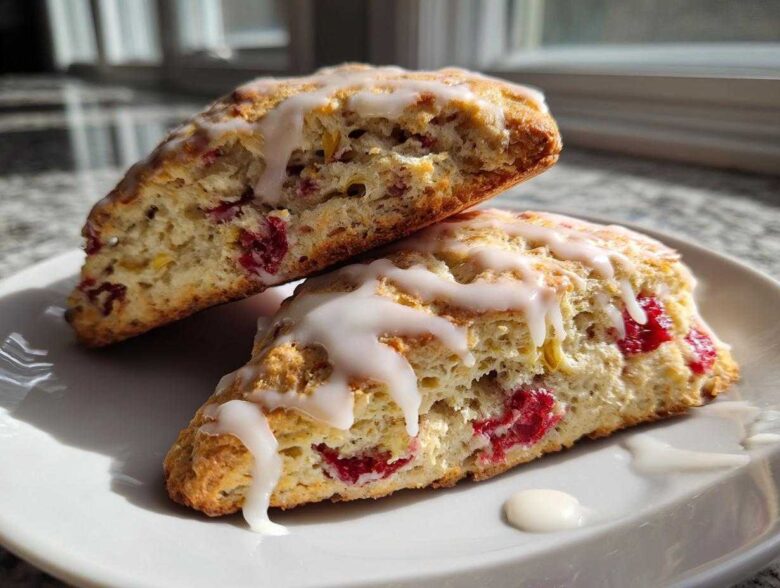
Forget those dry, crumbly things you sometimes get at the coffee shop! When I tell you I finally perfected my recipe for White Chocolate Raspberry Scones, I want you to believe me. These aren’t just good; they taste like they came straight from a glass display case, the kind you just have to order because they look so inviting. Our secret weapon is pairing them with a simple, bright lemon glaze that cuts right through the sweetness. I must have made twenty batches just trying to get that perfect texture—you know, where you bite in and it shatters just a little bit into flaky layers? Trust me, once you nail the cold butter technique, you’re set.

Why These White Chocolate Raspberry Scones Are Your New Favorite Sweet Breakfast Pastries
You need these White Chocolate Raspberry Scones in your life. They transform a regular morning into something special, honestly. They’re the ultimate homemade pastry because they deliver so much flavor without demanding all day in the kitchen. They are utterly irresistible.
- The texture is incredibly tender—none of that heavy, dry stuff here!
- That perfect marriage of sweet white chocolate and tart, bursty raspberries sings beautifully.
- They come together fast enough to be your new favorite sweet breakfast pastries for weekend brunch.
Achieving Flaky Raspberry Scones Every Time
The entire secret to getting those magnificent layers and beautiful lift in your scones boils down to preparation. You have to treat your butter like gold! Keep everything—the butter, the cream, even the bowl if you have time—ice cold. When the cold butter hits that hot oven, those little pieces melt, creating pockets of steam that push up the dough, giving you stunning flakiness. It’s pure baking science!
Gathering Ingredients for Perfect White Chocolate Raspberry Scones
Okay, ingredient gathering is where the preparation starts, and I really mean it—don’t substitute the cold elements! If you follow my White Chocolate Raspberry Scone Recipe, you’ll need to make sure your butter is rock hard and fresh ingredients are ready to go for the best result. Don’t worry, the ingredient list isn’t scary long; most of this is pantry standard!
For the Tender White Chocolate Scones
We need some basic dry goods mixed with two superstars: the white chocolate and the berries. Remember, the butter needs to be cut up into small, pea-sized cubes before you even start mixing!
- 2 cups all-purpose flour
- 1/4 cup granulated sugar
- 1 tablespoon baking powder
- 1/2 teaspoon salt
- 1/2 cup (1 stick) cold unsalted butter, cut into small cubes
- 1/2 cup white chocolate chips
- 3/4 cup fresh or frozen raspberries
- 1 large egg
- 1/2 cup heavy cream, plus 1 tablespoon for brushing
- 1 teaspoon vanilla extract
For the Bright Lemon Glaze
The glaze is non-negotiable, folks. That little bit of citrus really wakes up the sweetness of the chocolate and the raspberry flavor. You just need these three things, and you mix them right at the end.
- 1 cup powdered sugar
- 2 tablespoons fresh lemon juice
Step-by-Step Instructions for Bakery-Style White Chocolate Raspberry Scones
Alright, now for the fun part! Baking these scones is surprisingly quick, which is why I love them for an impromptu brunch. Just remember that every minute counts, especially when you’re managing ingredient temperatures. We need that oven hot and ready to go before we even touch the dough!
Preparing the Dough for Flaky Raspberry Scones
First things first: get your oven fired up to 400°F (200°C) and line that baking sheet with parchment paper. No sticking allowed! In your big bowl, we’re whisking the dry stuff—flour, sugar, baking powder, and salt. Next, grab that *ice-cold* butter you cubed earlier. Using a pastry blender (or your very cold fingertips, if you’re feeling brave like I usually am!), cut that butter right into the flour until it looks like coarse crumbs with some tiny, pea-sized chunks still visible. That’s where the flakiness hangs out!
Gently stir in your white chocolate chips. If you’re using fresh raspberries, toss them with just a teaspoon of flour first—this stops them from sinking to the bottom, sneaky things! Then, fold them in gently. In a separate small bowl, whisk your egg, the main portion of heavy cream (that’s 1/2 cup!), and vanilla. Pour all that wet mixture into the dry stuff and mix with a fork until it’s *just* combined. Seriously, stop mixing when you still see a few dry streaks. Overmixing dough is the cardinal sin of scone making, trust me! For pointers on this tricky technique, check out my guide on how to make perfect scones.
Cutting and Baking Your White Chocolate Raspberry Scones
Now turn that shaggy dough onto a lightly floured counter. Don’t knead it like bread! Just press it gently with your hands until it forms a thick circle or rectangle about 3/4 inch high. Pat it down—don’t roll it. Then, pull out your knife or round cutter and slice the dough into 8 nice, even pieces. Place them on your prepared sheet, leaving just a little space between them for them to puff up.
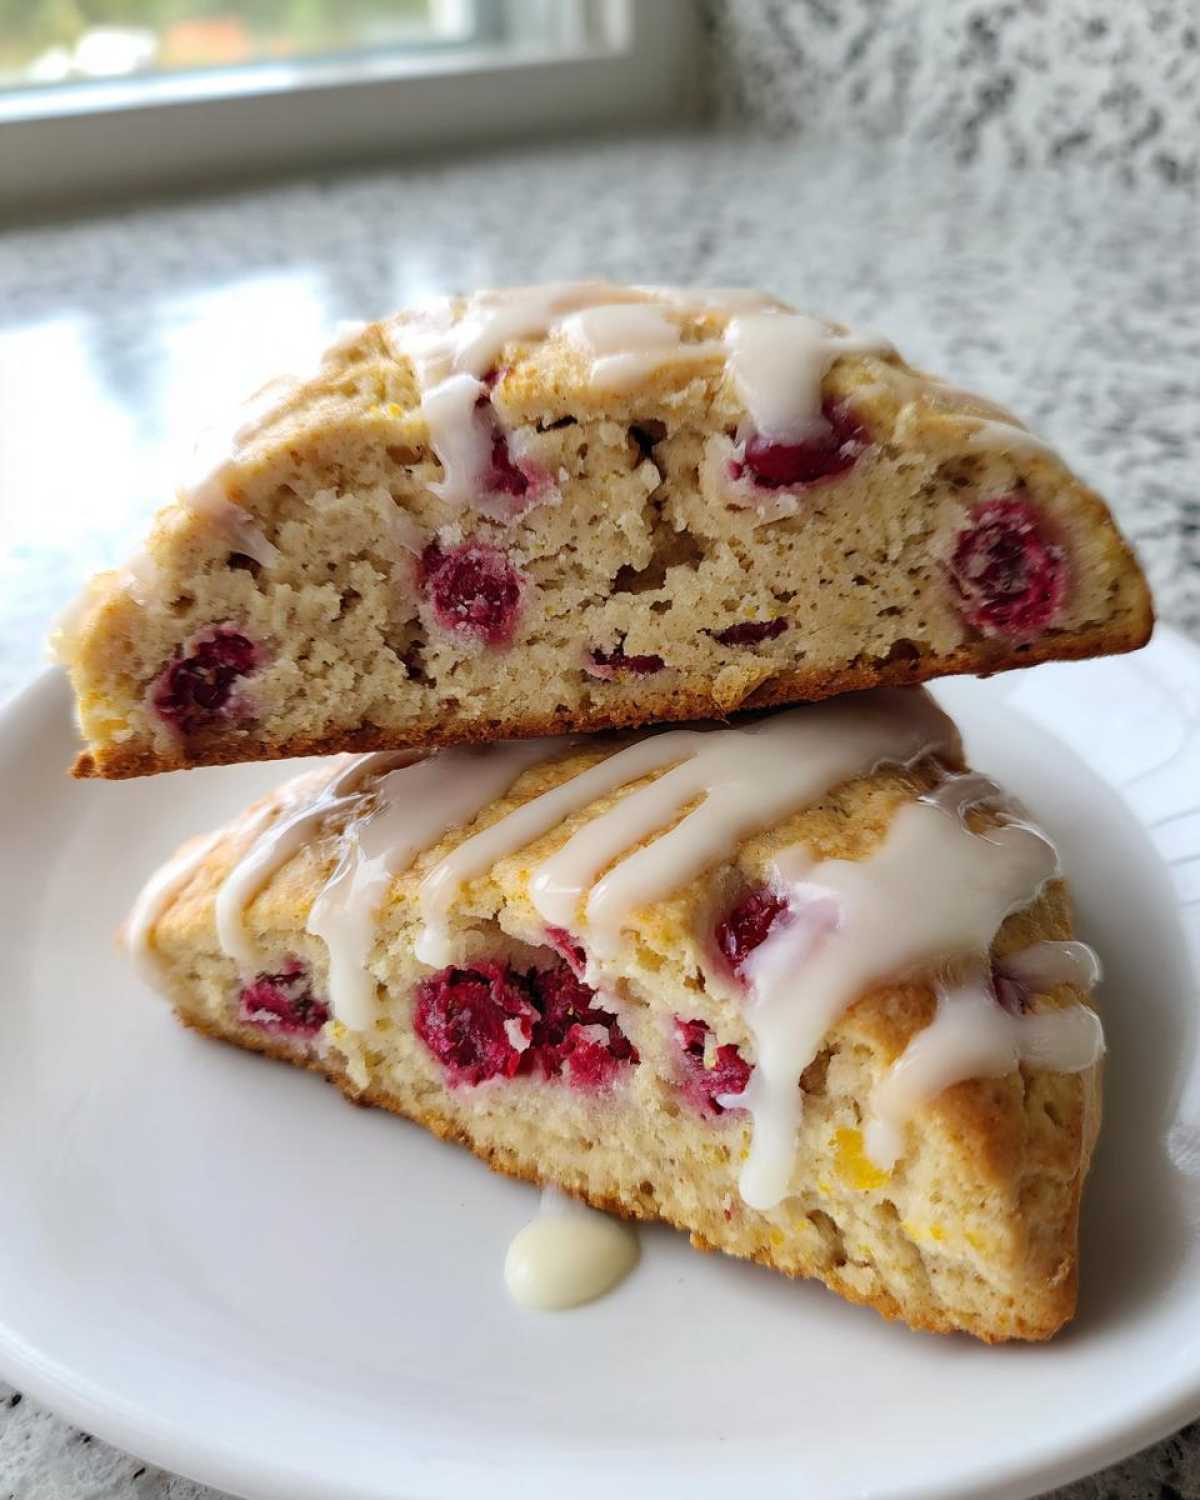
Take the last tablespoon of heavy cream we saved and brush just the tops of the scones. This gives them that gorgeous golden-brown bakery look after baking. Pop them into that hot oven for about 15 to 18 minutes. You’ll know they are done when the tops look golden and a toothpick stuck right in the middle comes out clean. Let them hang out on the hot pan for five minutes before moving them to a wire rack to cool completely. Quick warning: glazing hot scones is just asking for a melted mess!
Finishing with the Lemon Glaze
While they are cooling down—and this is important, they need to be totally cool—we make the magic topping. Whisk that cup of powdered sugar together with the lemon juice. If it seems stubbornly thick, add just a few more drops of lemon juice until it drizzles nicely off your spoon. Once the scones feel cool to the touch, just drizzle that bright glaze all over them. It sets up fast, and voila! You’ve done it.
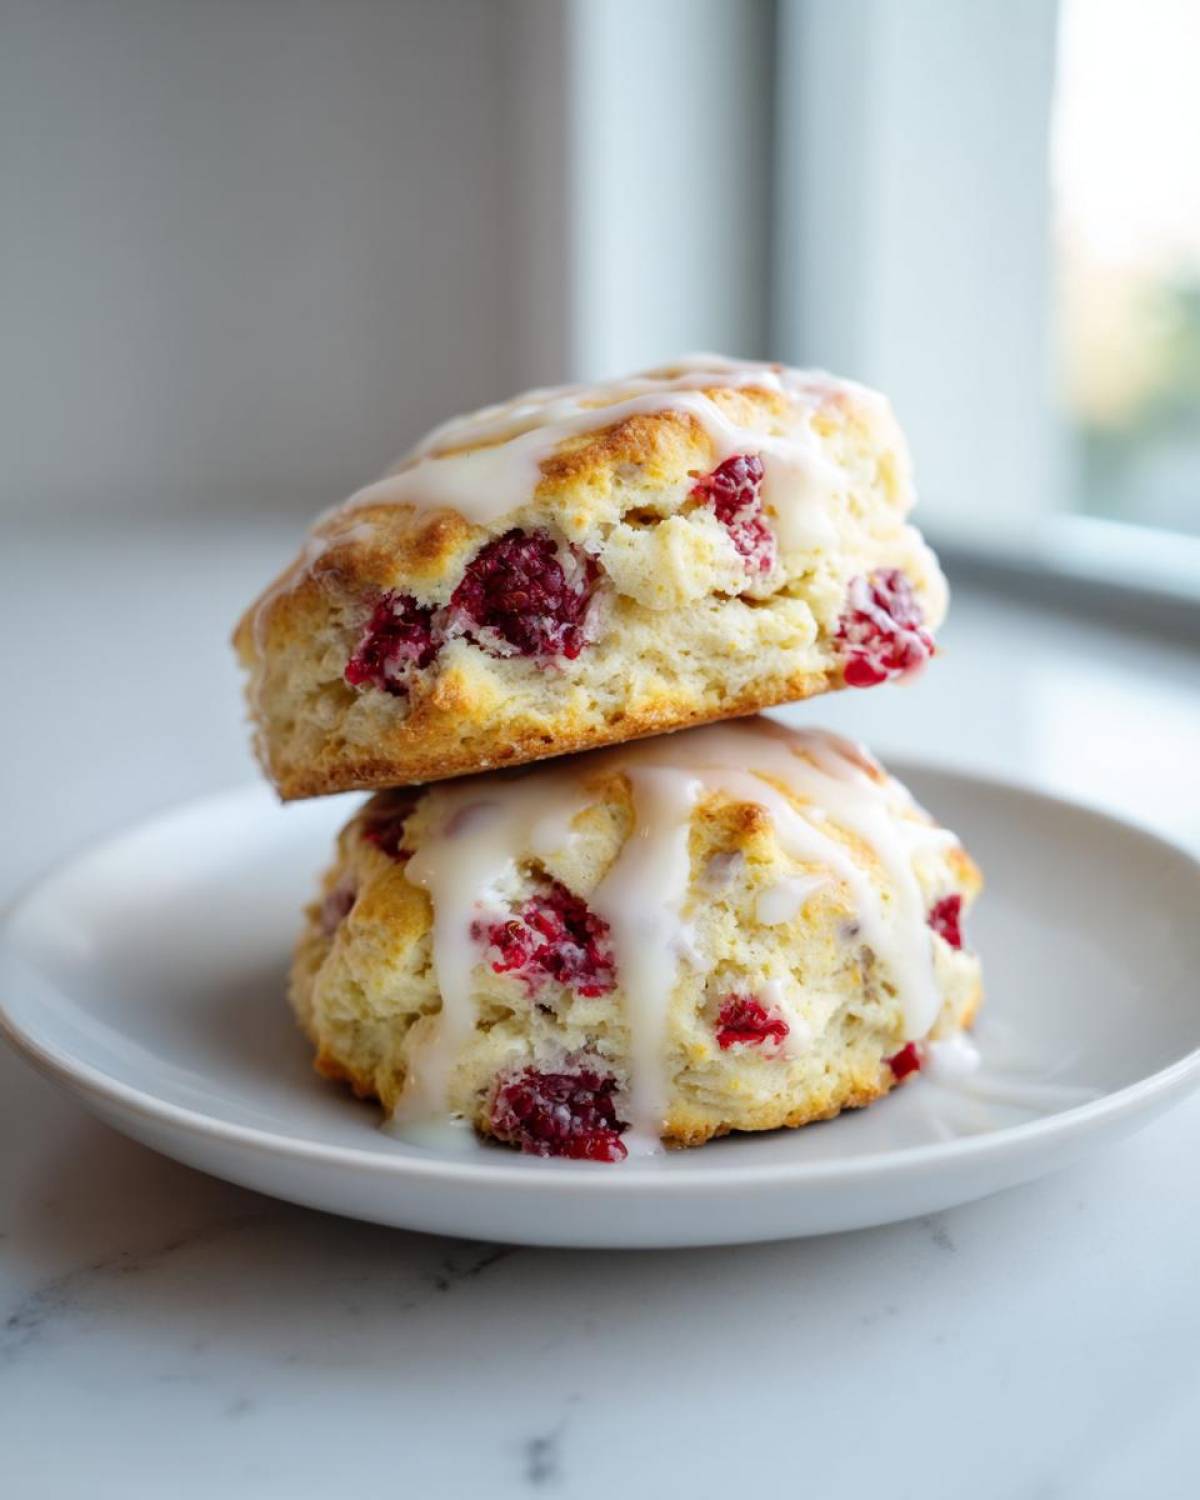
Tips for Success When Making White Chocolate Raspberry Scones
I know baking can feel intimidating sometimes, but honestly, mastering these White Chocolate Raspberry Scones is all about temperature control. Don’t skip the chilling step for your butter; that’s non-negotiable for that perfect lift! Cold butter creates steam, steam creates layers. It’s that simple, and it’s how you get those amazing flaky results every time.
When it comes to the berries, use what you have! If you grab frozen ones, please, please do not let them thaw before mixing them in. If they get mushy, they bleed color everywhere and ruin the beautiful pockets of white chocolate. If you want more tips on getting that perfect texture, swing over and read my best advice on making best homemade scones.
Also, promise me you won’t touch that dough more than you have to! The minute you start overworking it, those flaky layers you worked so hard to create get squished right out. Keep the handling minimal!
Ingredient Notes and Substitutions for Your Scones
Sometimes you’re midway through baking and realize you’re out of heavy cream, or maybe you just don’t like cream! Don’t panic; we can always pivot. A good cook knows how to adjust based on what they have on hand while keeping the structural integrity of the pastry intact. That’s the beauty of simple recipes like these.
The number one thing I constantly get asked about is the fat content. If you’re out of heavy cream, there are some solid swaps you can try. I actually tested this out last Christmas when the stores were running low!
Swapping Out the Heavy Cream
If you reach for buttermilk instead of the heavy cream in the actual dough mixture, you are in for a treat! Buttermilk tends to create a slightly richer, tangier crumb. It works wonderfully because the acid in the buttermilk reacts nicely with the baking powder. If you do use it, be careful not to overmix, as buttermilk can make the dough stickier faster. You can find a whole run-down on using it properly in my buttermilk scone recipe guide.
You can safely use whole milk if you absolutely have to, but your scones might be a little less rich. If you use milk, make sure it is as cold as the heavy cream was supposed to be!
Adjusting That Zesty Lemon Glaze
The glaze mixture is super forgiving, which is great news for us home bakers. I put in 2 tablespoons of lemon juice, but honestly, that’s just a starting point. If you like a thin, almost transparent coating that just barely sets on top, you’ll need to add a touch more lemon juice.
If you want a really thick, opaque layer of glaze—the kind that looks gorgeous and almost chalky once it hardens—then just use less juice! You want it just thick enough to hold its shape for a second when you drizzle it. Taste as you go is the rule here. Don’t worry if it looks too messy; once it dries, it looks perfectly rustic!
Using Frozen vs. Fresh Raspberries
We covered this a bit, but let me stress it: if you are using frozen raspberries, do not thaw them. Ever! They need to go straight from the freezer into the dry ingredients. Thawed berries release too much water into your dough way too early, leading to a dull grey color and a heavy, dense scone instead of a light one. Keep ‘em frozen!
Serving Suggestions for Your White Chocolate Raspberry Scones
Now that you’ve got these incredible, bakery-quality scones cooling down, you need the perfect moment to enjoy them! They are absolutely divine served slightly warm, maybe cut in half and just barely toasted if they’ve cooled completely.

These aren’t just breakfast, either. Imagine setting these out for an afternoon tea gathering! They pair perfectly with a crisp, bright black tea or even a lighter herbal blend. If you’re doing brunch, a fresh pot of strong coffee is mandatory to balance that richness. For more ideas on making your next tea spread amazing, check out my tips for afternoon tea recipes. You deserve a moment of sweet, flaky indulgence!
Storage and Reheating Instructions for Leftover White Chocolate Raspberry Scones
Don’t you dare let these delicious White Chocolate Raspberry Scones go stale! They are almost always best the day you bake them, but they are still fantastic the next day if you store them right. Keep any leftovers tucked away in a truly airtight container at room temperature. That keeps the moisture where it belongs—inside the scone!
If you’ve got more than two days’ worth, pop them in a freezer bag; they freeze beautifully for up to a month. When you’re ready to bring one back to life, skip the microwave if you can! Pop the scone onto a baking sheet for about five minutes at 350°F (175°C). This crisps up the outside and melts that white chocolate just a tiny bit again. Perfection!
Frequently Asked Questions About Making Scones From Scratch
I always get so many questions when people try scones for the first time! It’s completely normal to wonder about swaps or techniques, especially when people swear by their own special methods. Don’t stress if you’ve never tried making scones from scratch before; these answers should clear up any confusion so your next batch of sweet breakfast pastries turns out just right.
Can I use frozen raspberries in this recipe?
Absolutely, you can! In fact, sometimes I think frozen raspberries are even easier when you’re making flaky raspberry scones. The biggest rule, and I mean the biggest rule, is that they have to go from the freezer straight into the dough mixture. Do not thaw them out! If they start to get soft, they release too much liquid into your dough, and that always results in a denser, sadder pastry instead of the light, fluffy ones we want.
How do I prevent my scones from spreading too much?
Spreading is the enemy of a beautiful, tall scone! This usually happens for two reasons, and both involve heat. First, your butter wasn’t cold enough to begin with. It melts before it can create those steam pockets, and the dough just flattens out when it bakes. Second, you handled the dough too much. Every time your warm hands touch the butter chunks, you’re melting the structure. So, keep that butter rock hard, cut it in fast, and try not to pat or press the dough more than necessary!
Can I make the dough ahead of time?
Yes, you totally can, and this is a lifesaver if you want easy brunch recipes with berries ready to go! Once you’ve patted your dough into that circle or rectangle and cut the wedges out, line them up on your baking sheet, cover it loosely with plastic wrap, and pop the whole tray in the fridge for up to 24 hours. This makes them extra cold, which is great for texture. When you’re ready to bake, brush them with cream and toss them right into the preheated oven. You might need to add just two or three extra minutes to the baking time since they start out colder than room temperature.
Estimated Nutritional Data for White Chocolate Raspberry Scones
Okay, let’s talk numbers, just so we know what we’re diving into with these incredible breakfast treats! It’s important to remember that these figures are just an estimate based on the ingredients I list. Since we use heavy cream and a good amount of butter to make them so tender, they are certainly an indulgence, but totally worth the occasional morning delight!
I’ve broken down the general overview based on yield (8 lovely scones). Remember, if you swap out the heavy cream for buttermilk, these numbers will shift slightly. Enjoy knowing exactly what you are getting!
- Serving Size: 1 scone
- Calories: 350
- Fat: 19g (That’s where the richness comes from!)
- Saturated Fat: 12g
- Trans Fat: 0g (We love to see that zero!)
- Cholesterol: 60mg
- Sodium: 210mg
- Carbohydrates: 42g
- Fiber: 1g
- Sugar: 25g (The white chocolate is the main driver here!)
- Protein: 5g
See? A wonderful morning treat packed with flavor. Don’t worry too much about the sugar content; these are special occasion sweet breakfast pastries, after all. They’re much better than anything you’d grab pre-packaged!
PrintBakery-Style White Chocolate Raspberry Scones with Lemon Glaze

Follow this recipe to make tender, flaky scones filled with white chocolate chips and fresh raspberries, topped with a bright lemon glaze.
- Prep Time: 20 min
- Cook Time: 18 min
- Total Time: 38 min
- Yield: 8 servings
- Category: Breakfast
- Method: Baking
- Cuisine: American
- Diet: Vegetarian
Ingredients
- 2 cups all-purpose flour
- 1/4 cup granulated sugar
- 1 tablespoon baking powder
- 1/2 teaspoon salt
- 1/2 cup (1 stick) cold unsalted butter, cut into small cubes
- 1/2 cup white chocolate chips
- 3/4 cup fresh or frozen raspberries
- 1 large egg
- 1/2 cup heavy cream, plus 1 tablespoon for brushing
- 1 teaspoon vanilla extract
- For the Glaze: 1 cup powdered sugar
- For the Glaze: 2 tablespoons fresh lemon juice
Instructions
- Preheat your oven to 400°F (200°C). Line a baking sheet with parchment paper.
- In a large bowl, whisk together the flour, sugar, baking powder, and salt.
- Cut the cold butter into the flour mixture using a pastry blender or your fingertips until the mixture resembles coarse crumbs with some pea-sized pieces of butter remaining.
- Gently stir in the white chocolate chips. If using fresh raspberries, lightly toss them with 1 teaspoon of flour to prevent sinking, then fold them into the mixture. If using frozen, do not thaw them first.
- In a small bowl, whisk the egg, 1/2 cup of heavy cream, and vanilla extract until combined.
- Pour the wet ingredients into the dry ingredients. Mix gently with a fork until just combined; do not overmix. The dough will be shaggy.
- Turn the dough out onto a lightly floured surface. Gently pat or press the dough into a 3/4-inch thick circle or rectangle.
- Cut the dough into 8 equal wedges or use a round cutter for individual scones. Place the pieces onto the prepared baking sheet, leaving about 1 inch between them.
- Brush the tops lightly with the remaining 1 tablespoon of heavy cream.
- Bake for 15 to 18 minutes, or until the tops are golden brown and a toothpick inserted into the center comes out clean.
- Let the scones cool on the baking sheet for 5 minutes before transferring them to a wire rack to cool completely.
- While the scones cool, prepare the glaze: Whisk together the powdered sugar and lemon juice until smooth. Add more lemon juice, a few drops at a time, if the glaze is too thick.
- Drizzle the lemon glaze over the cooled scones before serving.
Notes
- Keep your butter and cream very cold for the flakiest results.
- If you use frozen raspberries, do not thaw them before adding them to the dough.
- For a richer flavor, you can substitute buttermilk for the heavy cream in the dough mixture.
- If you prefer a thicker glaze, use less lemon juice.
Nutrition
- Serving Size: 1 scone
- Calories: 350
- Sugar: 25
- Sodium: 210
- Fat: 19
- Saturated Fat: 12
- Unsaturated Fat: 7
- Trans Fat: 0
- Carbohydrates: 42
- Fiber: 1
- Protein: 5
- Cholesterol: 60