

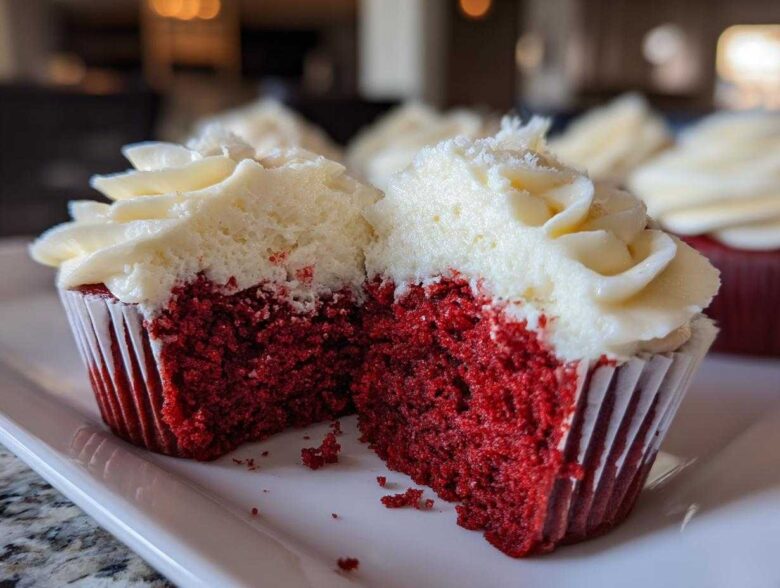
Oh my goodness, there’s just something magical about a dessert that feels both utterly indulgent and timeless, isn’t there? We all chase that perfect classic treat, but often, homemade versions end up a bit dry or crumbly. Well, forget all that fuss! I’ve finally cracked the code to making the most incredibly moist red velvet cupcakes you will ever taste. I spent ages tweaking different methods because I absolutely needed that soft, melt-in-your-mouth, bakery-style texture we all dream about.
This isn’t just another recipe; it’s *the* keeper for achieving the perfect velvety crumb dessert every single time. The secret isn’t just the food coloring, trust me! It’s all about the buttermilk and a little bit of kitchen science. You absolutely must give these red velvet cupcakes a try; they are the showstoppers for any occasion.
Why This is the Best Red Velvet Cupcake Recipe (Moist Red Velvet Cupcakes)
What makes this recipe stand out above all the others? It’s the absolute dedication to moisture! When I first started playing around with red velvet, I got so many dry, disappointing results. That stops right here. This is easily the best red velvet cupcake recipe because we respect the science.
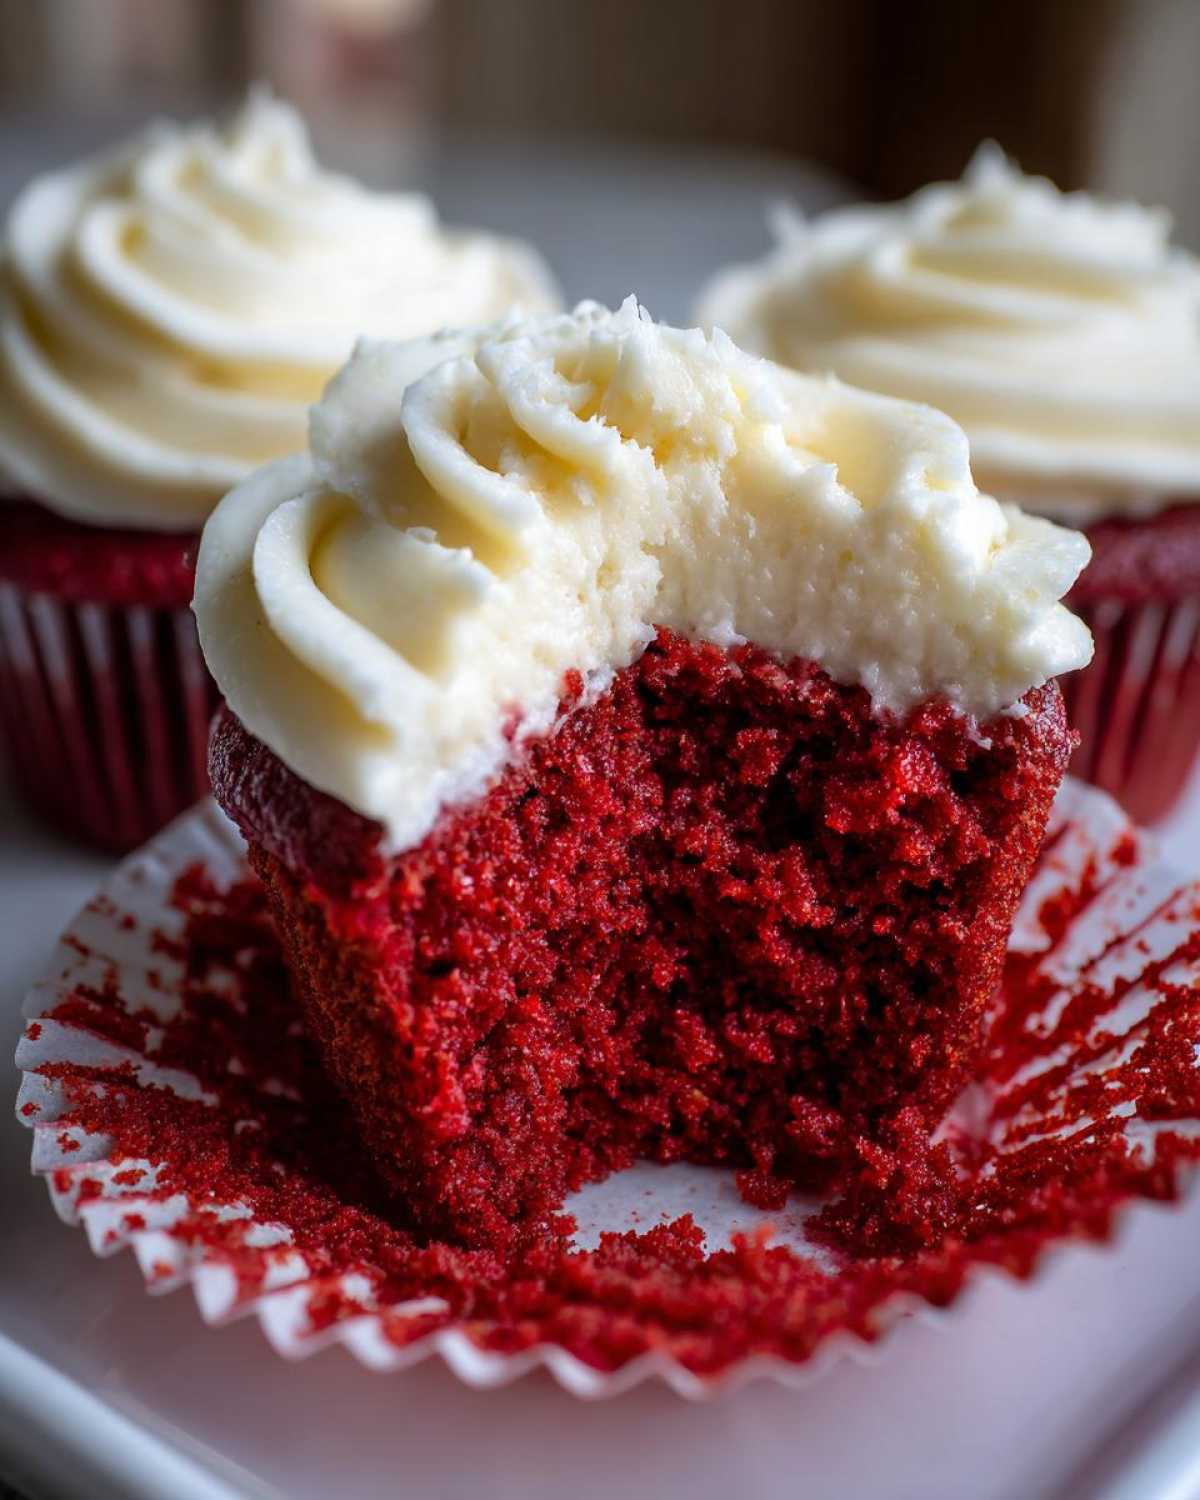
The magic totally hinges on using room-temperature buttermilk—it reacts perfectly with the baking soda to give you lift and that essential slight tang. Secondly, we don’t skimp on the cocoa; it’s just enough to give you that classic flavor without turning the whole thing brown. That balance is what guarantees the super soft, moist red velvet cupcakes we want. If you hate dry cakes, this is your new go-to!
Ingredients for Your Ultimate Red Velvet Cupcakes
Okay, gathering your supplies is my favorite part! Getting everything ready before you start mixing is half the battle won. For these truly decadent red velvet cupcakes, you need two main groupings of ingredients. Make sure your butter and cream cheese are truly softened, not melted—that’s a crucial texture tip I learned the hard way!
I’ve gathered all the ingredients from my detailed guide, so you just need to check your pantry. If you’re stocking up on baking staples, check out these no-bake chocolate peanut butter oat bars for inspiration on simple pantry sweets!
For the Classic Red Velvet Cupcake Batter
- 1 1/2 cups all-purpose flour
- 1 teaspoon baking soda
- 1 teaspoon unsweetened cocoa powder
- 1/2 teaspoon salt
- 1 cup granulated sugar
- 1/2 cup unsalted butter, softened
- 2 large eggs
- 1 teaspoon vanilla extract
- 1 cup buttermilk, room temperature
- 1 tablespoon red food coloring (liquid or gel works!)
- 1 teaspoon white vinegar
For the Tangy Cream Cheese Frosting
- 1/2 cup cream cheese, softened (super important!)
- 1/4 cup unsalted butter, softened
- 2 cups powdered sugar, sifted
- 1/2 teaspoon vanilla extract
Step-by-Step Instructions for Easy Homemade Red Velvet Cupcakes
Now for the fun part—putting it all together! Since these are amazing *easy homemade red velvet cupcakes*, we’re going to keep the process straightforward but effective. Remember that success is all in the mixing technique here; patience pays off immensely when you want that signature soft texture.
If you are looking for even more fail-proof baking ideas, you absolutely should browse my collection of easy baking recipes!
Preparing the Red Velvet Cupcake Batter
First things first, get that oven preheated to 350°F (175°C) and line your muffin tin. We need to handle the dry stuff separately: whisk the flour, cocoa, soda, and salt together. In a completely separate big bowl, this is where we aerate things!
Cream that sugar and your softened butter until it gets genuinely light and fluffy—this takes a minute or two longer than you think, but it creates air pockets! Add your eggs one by one, mixing well after each one, then stir in that vanilla.
Now, mix your buttermilk, food coloring, and vinegar in a small cup. This is the trick for that red velvet look! We add the dry mix and the buttermilk mix alternately to the main bowl, always starting AND ending with the dry ingredients. Mix only until you see no streaks. Seriously, stop mixing when you see just a few little dry spots left! Overmixing brings out toughness.
Baking and Cooling Your Red Velvet Cupcakes
Spoon the batter into your liners, making sure they’re only filled about two-thirds full—we don’t want little red hats spilling over the top! They bake fast, usually between 18 to 20 minutes. Pop a toothpick in the center; if it comes out clean, you’re golden.
Let them relax in the tin for about five minutes, then move them straight onto a wire rack. And listen closely: they MUST be stone cold before you even think about piling that frosting on. If they are even slightly warm, you will end up with a melted, sad puddle of cream cheese goo!
Creating the Fluffy Red Velvet Frosting
While those beauties cool, we whip up that tangy topping. Beat your softened cream cheese and softened butter together until they are completely smooth and lump-free. This is non-negotiable for the best texture—no chunks allowed!
Turn the mixer down low and slowly introduce that sifted powdered sugar. Once it’s mostly mixed in, turn the speed up to medium and whip it for a good minute or two. Adding the vanilla right at the end brightens everything up, and you’ll have a gorgeous, fluffy red velvet frosting ready to decorate.
Tips for Achieving Bakery Style Red Velvet Cupcakes
If you’re aiming for those perfect, tall-crowned, professional-looking bakery style red velvet cupcakes, you need to pay attention to a few tiny things. Trust me, I’ve learned these the hard way over the years!
First, ingredient temperature is everything here for achieving that incredible soft, velvety crumb. Your eggs and that buttermilk absolutely have to be at room temperature. Cold ingredients won’t emulsify properly with the creamed butter, and that’s when things start to get dense!
Also, don’t be scared by the vinegar! That little bit of acid mixed with the baking soda causes a reaction that helps give our cupcakes their signature tender texture and also brightens the red coloring. If you want that really deep, gorgeous color that screams “best dessert to bake,” skip the regular liquid dye and use a concentrated gel coloring instead. It gives you intense color saturation without adding extra liquid to your perfectly balanced batter.
Ingredient Notes and Substitutions for Red Velvet Cupcakes
Listen, I know sometimes you open the fridge and realize you are totally out of buttermilk. Don’t panic! You do not have to run to the store just for this recipe. That buttermilk is essential—it’s what combines with the baking soda to give us that light, fluffy lift that keeps these from being heavy bricks, and it helps activate that beautiful red color.
Buttermilk is acidic, and that acid is what tenderizes the crumb. If you have plain regular milk, you can make a quick substitute. Just take 1 cup of whole milk—and please use whole milk, don’t go low-fat here!
Add one tablespoon of white vinegar or lemon juice to it, give it a quick stir, and let it sit on the counter for about five minutes. It will curdle slightly—that’s exactly what you want! That soured milk acts just like buttermilk in your red velvet cupcakes, ensuring you still get that wonderful tenderness.
Now, let’s talk about the cocoa powder. You might wonder why we even bother adding cocoa when the whole thing is going to be red anyway, right? The small amount of cocoa powder (just 1 teaspoon here) is crucial because it provides that signature subtle, slightly acidic, almost chocolatey background flavor that makes classic red velvet cupcakes taste authentic, especially when paired with that tangy cream cheese frosting.
If you leave it out, you just end up with a slightly sweet vanilla cake with red dye, which simply won’t do! It’s all about building those deep, dark flavors beneath the surface. If you love that chocolate-meets-red flavor combo, you should definitely check out my recipe for my red velvet brookies soon!
Making Red Velvet Cupcakes with Cream Cheese Frosting for Holidays
You know, these rich red velvet cupcakes are just perfect for turning any ordinary Tuesday into a celebration! Since they already feature that stunning deep color paired with the tangy cream cheese frosting, they are instant holiday stars. Think about Valentine’s Day ideas—these practically scream romance! They are stunning on their own for that big day.
But they don’t stop there. For Christmas cupcake recipes, all you need to do is add a tiny pop of green or silver sprinkles right on top of the white frosting. It takes literally two seconds, but it elevates them right up to festive perfection! They are one of the best make-ahead cupcakes for high-traffic seasonal parties because everyone gravitates toward them.
For a little extra decoration, you can grate some good quality dark chocolate right over the top of the frosting—it adds bitterness that beautifully cuts through the sweetness. If you are looking for other fun holiday decorating ideas, I have some adorable spooky ones over there, too! Check out my glow-in-the-dark ghost cupcakes for Halloween inspiration!
Storage and Make Ahead Cupcakes Guidance
One of the best things about these treats is that they are fantastic make ahead cupcakes! You can absolutely bake the little cakes a day ahead of time, no problem at all. Just store them in a sealed container at cool room temperature, and they stay perfectly moist. Don’t frost them yet though!
Once they are all piled high with that rich cream cheese frosting, that’s where we need to be a little smarter with storage. Because of the dairy, they really need to live in the fridge. But here’s the real pro tip for serving your red velvet cupcakes: take them out about 30 minutes before you serve them. That lets the cake soften up again and softens the frosting just enough for the best bite!
Frequently Asked Questions About Classic Red Velvet Cupcakes
I know when you’re following a detailed recipe like this for the first time, you always run into a few sticking points or need a quick reminder. Don’t worry a bit! I gathered up the most common questions I get about making these classic red velvet cupcakes so you can bake with total confidence.
Can I make these red velvet cupcakes without buttermilk?
Oh, this comes up all the time! The buttermilk is super important for that soft, velvety crumb dessert texture because of the acid it carries, but yes, you can definitely substitute it! Just like I mentioned in the notes, grab 1 cup of regular whole milk and mix in 1 tablespoon of white vinegar or lemon juice. Give it a quick stir and just let it sit on the counter for about five minutes.
It will start to look a little funny, kind of curdled, but that’s exactly what you’re aiming for! That homemade substitute works just as beautifully in this recipe, so you absolutely do not need to run out mid-baking session to grab the real thing.
How do I get a soft, velvety crumb dessert texture?
This is the million-dollar question for any baker working with red velvet! It really boils down to two things that we covered in the instructions, but they are worth repeating because they are make-or-break moments. First, you must use room temperature ingredients—that means your eggs and your buttermilk need to be warm, not straight from the fridge. This helps everything blend together smoothly!
Second, and maybe even more critical, is the mixing! When you introduce the dry ingredients into the wet, you absolutely must mix only until you see the flour streaks disappear. Do not keep mixing just because you feel like you should! Overmixing develops gluten, and gluten makes cakes tough, not velvety. Stop when it’s *just* combined for that perfect result.
What is the best way to frost these homemade cupcakes for birthdays?
For birthdays or any big celebration, you definitely want that classic professional look, right? Piping is the way to go! Once your cream cheese frosting is light and fluffy (make sure you whipped it long enough after adding the powdered sugar!), load it into a piping bag fitted with a large star tip, like a Wilton 1M.
Start by circling the outside edge of the cooled cupcake and then work your way into the center, swirling the frosting up high. This ensures you get a gorgeous height on your homemade cupcakes. Because the frosting has a slightly softer set than a straight buttercream, it looks naturally luxurious when piped high.
If you’re feeling extra festive, you can always use a small offset spatula to create dramatic swoops instead of piping, which looks really rustic and lovely for a birthday spread too!
If you want to check out some of the legal notes about the information here, you can look at the disclaimer page, but let’s get back to baking!
Estimated Nutritional Information for Red Velvet Cupcakes
When you are making something this absolutely decadent, you know you are in for a treat, but I always like to give you a realistic picture of what’s in that beautiful little cake!
Keep in mind, since these red velvet cupcakes are made completely from scratch and we are using real butter and cream cheese in that signature frosting, the numbers swing a bit higher than a store-bought mix. These counts are just an estimate based on the exact ingredients I listed, so treat them as a ballpark guide for your indulgent sweet treats!
- Serving Size: 1 cupcake
- Calories: 350
- Sugar: 40g
- Sodium: 250mg
- Fat: 18g
- Saturated Fat: 10g
- Carbohydrates: 45g
- Protein: 4g
Honestly, when it tastes this good, I try not to worry too much about the fine print! These are meant to be enjoyed, especially when celebrating holidays or birthdays!
Share Your Ultimate Red Velvet Cupcakes Experience
I truly hope you enjoyed making these! If you followed these steps, you should have the most incredible, moist red velvet cupcakes with cream cheese frosting sitting on your counter right now.
If you made them, please, please come back and hit that 5-star rating button for me! Let me know in the comments how moist they turned out, and snap a picture to share! You need to try this classic red velvet cupcakes recipe soon!
If you want to know more about me and why I love baking these treats, you can always check out my About Us page!
PrintThe Ultimate Moist Red Velvet Cupcakes with Tangy Cream Cheese Frosting
Follow these steps to make soft, moist, bakery-style red velvet cupcakes topped with classic cream cheese frosting.
- Prep Time: 20 min
- Cook Time: 20 min
- Total Time: 40 min
- Yield: 12 cupcakes
- Category: Dessert
- Method: Baking
- Cuisine: American
- Diet: Vegetarian
Ingredients
- 1 1/2 cups all-purpose flour
- 1 teaspoon baking soda
- 1 teaspoon unsweetened cocoa powder
- 1/2 teaspoon salt
- 1 cup granulated sugar
- 1/2 cup unsalted butter, softened
- 2 large eggs
- 1 teaspoon vanilla extract
- 1 cup buttermilk, room temperature
- 1 tablespoon red food coloring (liquid or gel)
- 1 teaspoon white vinegar
- 1/2 cup cream cheese, softened
- 1/4 cup unsalted butter, softened
- 2 cups powdered sugar, sifted
- 1/2 teaspoon vanilla extract
Instructions
- Preheat your oven to 350°F (175°C). Line a 12-cup muffin tin with paper liners.
- In a medium bowl, whisk together the flour, baking soda, cocoa powder, and salt. Set this dry mixture aside.
- In a large bowl, beat the granulated sugar and 1/2 cup softened butter with an electric mixer until light and fluffy. Beat in the eggs one at a time, mixing well after each addition. Stir in 1 teaspoon vanilla extract.
- In a small bowl, mix the buttermilk, red food coloring, and white vinegar.
- Alternate adding the dry ingredients and the buttermilk mixture to the wet ingredients, beginning and ending with the dry ingredients. Mix only until just combined; do not overmix.
- Divide the batter evenly among the prepared cupcake liners, filling each about two-thirds full.
- Bake for 18 to 20 minutes, or until a toothpick inserted into the center comes out clean. Let the cupcakes cool in the pan for 5 minutes before transferring them to a wire rack to cool completely.
- To make the frosting, beat the 1/2 cup cream cheese and 1/4 cup softened butter together until smooth. Gradually add the sifted powdered sugar, mixing on low speed until incorporated. Add 1/2 teaspoon vanilla extract and beat on medium speed until light and fluffy.
- Once the cupcakes are completely cool, pipe or spread the cream cheese frosting onto each cupcake.
Notes
- For a deeper red color, use gel food coloring instead of liquid.
- Buttermilk is necessary for the texture; if you do not have any, mix 1 cup of whole milk with 1 tablespoon of white vinegar or lemon juice and let it sit for 5 minutes before using.
- You can make these cupcakes one day ahead and store them covered at room temperature. Frost them just before serving for the best texture.
Nutrition
- Serving Size: 1 cupcake
- Calories: 350
- Sugar: 40g
- Sodium: 250mg
- Fat: 18g
- Saturated Fat: 10g
- Unsaturated Fat: 8g
- Trans Fat: 0.5g
- Carbohydrates: 45g
- Fiber: 1g
- Protein: 4g
- Cholesterol: 60mg