

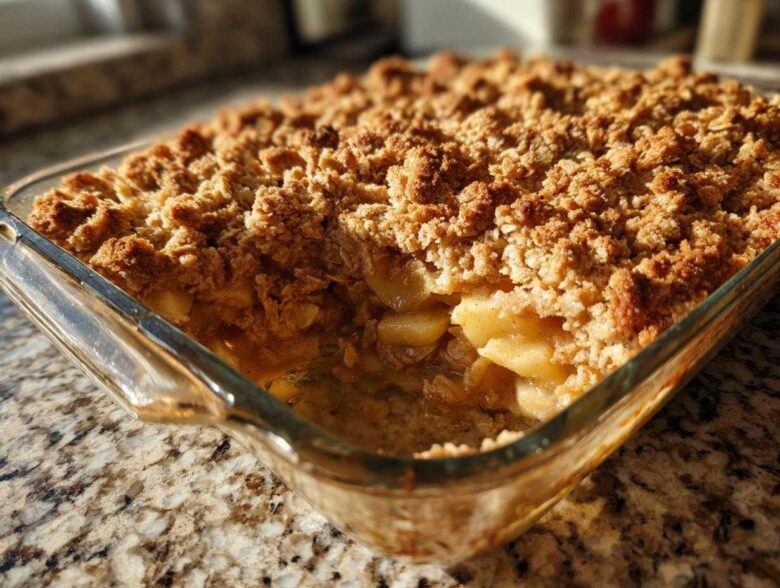
There is just something magical about the smell of baked apples and cinnamon filling your kitchen, isn’t there? It’s the scent of autumn, warmth, and pure, uncomplicated happiness. Forget fussy pie crusts and complicated steps; when I need real comfort food dessert, I turn straight to a crisp. And believe me, after trying dozens of methods, I settled on one. This is my ultimate easy & classic apple crisp recipe, and honestly, it’s the only *apple crisp recipe* I bother making now.
I perfected this specific version years ago when I needed a quick, stunning dessert for an impromptu fall gathering. It delivers that perfect textural contrast: stewed, tender apples underneath a gloriously golden, buttery oat topping. Trust me when I say this best apple crisp recipe will ruin all others for you. Plus, the prep takes barely 15 minutes, so you can get that amazing aroma going fast!
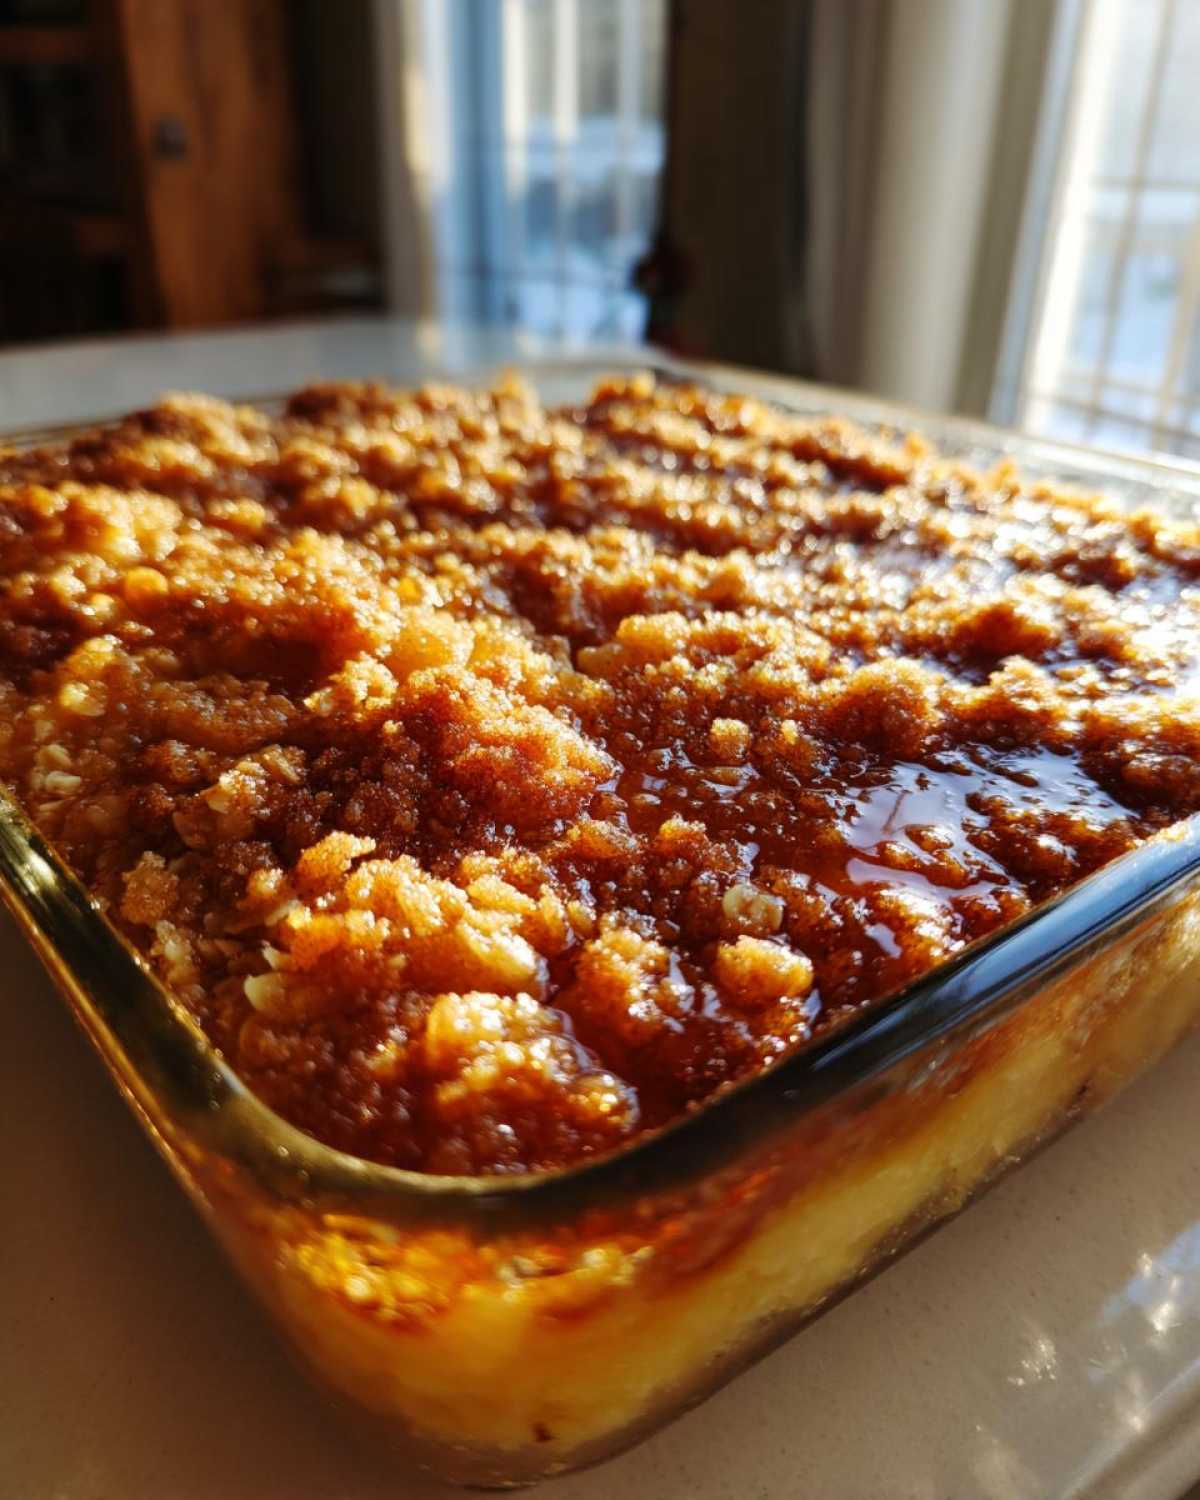
It’s the perfect simple apple dessert, especially when that craving hits right before dinner. You can even check out my tips for making apple butter snickerdoodles if you’re ready for another fall favorite!
Why This Is the Best Apple Crisp Recipe You Will Ever Make
When it comes to an apple crisp recipe, you need two things: apples that melt in your mouth and a topping that actually stays crisp. This version nails both, which is why I keep coming back to it, season after season.
- It’s wonderfully forgiving! Even for a beginner, this turns out perfect every time.
- The flavor profile is pure nostalgia—lots of cinnamon and rich, brown sugar goodness.
- It’s one of our favorite fall baking recipes because it’s so quick to assemble.
Achieving the Perfect Buttery Oat Topping
The secret here is truly the buttery oat topping. I never skimp on the butter, and it has to be ice-cold when you cut it in! Those little frozen butter chunks melt slowly in the oven, creating pockets of steam that make the oats puffy and unbelievably crunchy. That’s the texture you are chasing!
Simple Steps for a Foolproof Apple Crisp
You absolutely cannot beat the speed of this dessert. We’re talking about 15 minutes of hands-on time to finish this easy apple crisp recipe. You toss the apples, you mix the topping, you bake. That’s it! It’s the ultimate weeknight comfort food dessert.
Ingredients for the Ultimate Easy & Classic Apple Crisp Recipe
Listen, when you’re making baked fruit desserts, the ingredients list needs to be crystal clear. Since this is a classic apple crisp, there’s no need for fancy extras, just good quality basics handled right. I’ve broken this down so you can grab exactly what you need for each part of the dish. For these apples, I usually grab Granny Smiths for tartness or Honeycrisp if I want something a bit sweeter—don’t use Red Delicious, they just turn to mush!
If you are looking for something you can set and walk away from, check out my recipe for slow-cooker cinnamon apples—it’s almost just as easy!
Here is exactly what you need for a perfect 6-serving batch:
For the Spiced Apple Filling
- 6 medium apples (like Granny Smith or Honeycrisp), peeled, cored, and sliced
- 1/4 cup granulated sugar
- 1 tablespoon all-purpose flour
- 1 teaspoon ground cinnamon
- 1/4 teaspoon ground nutmeg
- 1 tablespoon lemon juice
For the Buttery Oat Topping
This is the star, so please read carefully:
- 1 cup all-purpose flour
- 3/4 cup rolled oats (and make sure they are rolled, not the instant kind! We need that texture!)
- 1/2 cup packed light brown sugar
- 1/2 teaspoon ground cinnamon
- 1/4 teaspoon salt
- 1/2 cup (one full stick!) cold unsalted butter, cut into tiny cubes. Seriously, cold!
Step-by-Step Instructions for Your Homemade Apple Crisp Recipe
Okay, this is where the magic happens! While gathering ingredients is half the battle, putting them together for the best apple crisp is straightforward, but you have to follow the sequence. If you follow these steps exactly, you’ll have the most satisfying apple crisp recipe ready for dessert!
If you want to bake something similar but maybe a little less crisp and more fluffy, try my apple cinnamon streusel muffins next time!
Preparing the Apple Filling and Baking Dish
First things first for this quick apple dessert: get that oven heating up to 375 degrees F (190 degrees C). Grab your 8×8 inch baking dish and give it just a light grease so nothing sticks. Now, for the apples! Put your sliced fruit into a big bowl. Add the granulated sugar, that initial tablespoon of flour, cinnamon, nutmeg, and the lemon juice. You have to toss this very *gently* so you coat everything evenly without bruising the apples. Mushy apples are the enemy!
Once they look nicely spiced up, just spread them out in a single, flat layer in that prepared dish.
Creating the Signature Buttery Oat Topping
In a separate bowl—don’t mix this with the fruit!—we whisk together the dry topping ingredients: the cup of flour, the rolled oats, brown sugar, cinnamon, and salt. Now comes the crucial part: the butter. Remember those little cubes of cold butter? Drop them into the dry mix. You need to cut that butter in using your fingertips or a pastry blender. Stop mixing when it looks like coarse crumbs, kind of like sunflower seeds, and you can still spot some pea-sized chunks of butter floating around. That’s how you guarantee that wonderfully crispy topping!
Once it’s crumbly perfection, sprinkle that whole topping evenly over your apples in the baking dish.
Baking and Serving the Warm Apple Dessert
Into the oven she goes! You’ll bake this for about 35 to 45 minutes. You’re looking for two signs that it’s done: the topping should be richly golden brown, and you should see the filling actively bubbling up around the edges. If you poke a fork into the apples and they are tender, you’re good to go. The hardest part? You must let this warm apple dessert rest for at least 15 minutes after it comes out. If you cut it too soon, the filling will run everywhere. Patience pays off, I promise!
Expert Tips for the Perfect Apple Crisp Recipe Every Time
Making a great apple crisp recipe isn’t just throwing things together; it’s about knowing a few little tricks that take it from ‘good’ to ‘must-make-again’ status! These small adjustments have been game-changers for me, ensuring my homemade apple crisp looks and tastes spectacular every single time. Don’t skip these little bits of wisdom I’ve gathered over the years!
First off, if you want that topping truly shatteringly crisp, try this: after you mix up the topping, pop the bowl into the freezer for about 10 minutes while your oven heats up. Chilling that cold butter just a touch longer helps it resist melting too quickly when it hits the heat, which really locks in that crunch.
Also, remember that sugar ratio in the apples? If you happen to grab apples that are naturally super tart—like maybe you only found firm Granny Smiths—don’t be afraid to add an extra tablespoon of that lovely brown sugar right into the fruit mix. It balances everything out beautifully.
And here’s my addition: always try to use a mix of apples if you can! Granny Smith gives you that necessary tartness, but adding something like a Fuji or Honeycrisp gives you those softer, sweeter bites. Variety is the spice of life, even in an apple crisp recipe!
If you’re ever looking for a way to use up leftover apples without turning on the oven, you absolutely have to try my cinnamon sugar apple chips—they are addicting!
Variations on the Classic Apple Crisp Recipe
Even though this apple crisp recipe is truly the gold standard, I love shaking things up a little bit, especially when I’m featuring it as part of my wider collection of fall baking recipes. You don’t have to stick to just apples and cinnamon, you know! These simple changes can give you a whole new experience while keeping that fantastic, crunchy base we worked so hard to achieve.
If you’re feeling adventurous, I highly recommend adding crunch to the topping! Throw in about a half cup of chopped pecans or walnuts when you are mixing the oats and flour. Toasting them slightly in the oven really brings out their flavor. Talk about an upgrade to your homemade apple crisp!
Spice swaps are fun too. Cinnamon is classic, but sometimes I want something a little warmer. Try swapping out two tablespoons of the ground cinnamon for one tablespoon of five-spice powder, or use a little bit of ground cardamom mixed in with the nutmeg. It gives the baked apples a really earthy, sophisticated layer of flavor.
And if you are out of apples—oops! Happens to the best of us. You can actually use this topping mixture over almost any sturdy fruit. Pears work beautifully; the flavor is more mellow. Frozen blueberries or blackberries, tossed with a little cornstarch before topping, make for an incredible summer-to-fall hybrid crisp. It’s so versatile!
If you enjoy that nutty, crunchy flavor combination, you simply must check out my recipe for maple pecan granola clusters. They use some of the same techniques for getting that perfect crisp texture!
Serving Suggestions for Your Baked Apple Dessert
Okay, you’ve waited (the 15 minutes of resting time, which feels like an eternity, right?), your baked apple dessert is out of the oven, and the steam is coming off it in gorgeous little clouds. Now, the question is: How do we eat this masterpiece?
There is zero shame in just taking a spoon straight to the baking dish while it’s still warm. I do it all the time when no one is looking! But if you are serving this up to guests, or maybe just treating yourself properly, you have to go big.
The number one, absolute must-have companion for this crisp is ice cream. It doesn’t even have to be fancy! A big scoop of good quality vanilla ice cream melting slowly down the side of the hot fruit? That hot/cold contrast is just unbeatable. It’s worth the effort just for that moment.
If you’ve really got your game face on, you can elevate this even further with a gooey topping. Forget the stuff in a jar, make your own caramel sauce! It’s shockingly simple and tastes heaven-sent drizzled over the cinnamon apples. If you’re feeling extra ambitious, I have this incredible salted honey ice cream recipe that pairs perfectly if you want to make your own amazing frozen component!
Sometimes, especially if I’ve made the crisp for breakfast (don’t judge!), a dollop of cool, thick Greek yogurt works wonders. It cuts through the sweetness and brown sugar richness just enough to make it feel slightly less like dessert and slightly more like a hearty autumn treat.
Storing and Reheating Your Homemade Apple Crisp Recipe
If by some miracle you have leftovers of this amazing apple crisp recipe, you need to know how to keep that topping right! My rule is simple: if you plan to eat it all within the first 12 hours, leaving it covered on the counter at room temperature is fine. But if you expect it to last longer, it needs the fridge.
When reheating, avoid the microwave if you can because it turns the topping soft super fast. Pop a serving back into a toaster oven or a regular oven at about 350 degrees F until the fruit is warm and the topping is crunchy again. That’s the absolute best way to enjoy your homemade apple crisp the next day!
Frequently Asked Questions About the Apple Crisp Recipe
When diving into a new apple crisp recipe, I always find I have questions bubbling up, especially about texture and timing. You want it fast, you want it crispy, and you want the apples perfect! Here are the top things people always ask me about achieving the *best* outcome with this recipe.
How do I keep the oat topping super crispy after baking?
This is the #1 question for any homemade apple crisp! The key is twofold, really. First, make sure your topping mixture has plenty of cold butter when you sprinkle it on—those little cold clumps create the crunch. Second, as I mentioned earlier, if you have leftovers, skip the microwave! Reheating in a conventional oven or toaster oven for just a few minutes at 350 makes that buttery oat topping crisp right back up. Don’t forget to let it rest after the initial bake, too!
Can this be considered a quick apple dessert?
Oh, absolutely! If you are speedy, you can have this assembled in under 15 minutes, which makes it an incredibly quick apple dessert. The total time, including baking, is just under an hour, which for a rich, satisfying warm apple dessert feels lightning fast to me. It’s a lifesaver when company shows up unexpectedly!
What apples should I avoid using in my apple crisp recipe?
Stick to firmer apples that hold their shape when cooked. Granny Smith and Honeycrisp are my favorites for the ultimate easy & classic apple crisp recipe because they balance sweet and tart, and they don’t dissolve into mush. You should really try to avoid soft varieties like Red Delicious or McIntosh if you want that tender-but-not-soupy filling. Firmness matters!
Can I make this apple crisp recipe ahead of time?
You have two options here! You can assemble the entire thing—apples mixed, topping sprinkled—and cover it tightly, keeping it in the fridge for up to a day before baking. Just add about 10 minutes to your baking time since it will be cold. Some people even mix the topping ahead and keep it frozen! If you prefer making a perfect apple crisp with no fuss, check out my tips on making quick apple dessert variations!
Is this really the best apple crisp recipe for fall baking?
In my opinion, yes! It hits every note required for quintessential fall baking recipes: cinnamon, warm sugar, baked fruit, and that perfect buttery crunch. It’s straightforward enough that you can get it into the oven even on a chaotic Sunday afternoon, and it always delivers that unbeatable feeling of cozy comfort.
Estimated Nutritional Data for This Apple Crisp Recipe
Now, I know we aren’t baking this because we are looking for a diet food, right? This is pure, unadulterated autumn joy in a dish! But because so many of you ask about the breakdown, I pulled the numbers together for you. Remember, these are just estimates based on the ingredients listed above for one generous serving, since this recipe yields 6 perfect portions.
Things like how much butter soaks into the apples versus staying in the topping, or exactly how big your ‘generous scoop’ of ice cream is when you serve it, can change these numbers slightly. Consider this your helpful guide, not strict math!
- Serving Size: 1 serving
- Calories: About 380 (Wow, I need a scoop of ice cream to counteract that!)
- Fat: Roughly 18g (That’s all that glorious cold butter doing its job!)
- Carbohydrates: Around 55g
- Protein: About 5g
You can see the sugar content is up there because we use both granulated and brown sugar, but that’s what gives it that deep, comforting sweetness. If you are counting macros, the fiber from the oats and apples helps balance things out nicely. Enjoy every bite!
Share Your Experience Making This Apple Crisp Recipe
Seriously, I hope you loved baking this apple crisp recipe as much as I love eating it! Once you’ve tucked into that warm apple dessert, please come back and leave a rating. Tapping those five stars tells me you nailed it, and it helps other folks find this classic apple crisp recipe too.
I always want to see how you served yours—did you go for the ice cream? Tag me on social media so I can share your stunning results! If you want to learn more about how I bake, check out my About Us page. Happy baking!
PrintThe Ultimate Easy & Classic Apple Crisp Recipe with Buttery Oat Topping

Make this easy homemade apple crisp featuring tender, spiced apples beneath a rich, buttery oat topping. This is a classic fall comfort food dessert best served warm.
- Prep Time: 15 min
- Cook Time: 40 min
- Total Time: 55 min
- Yield: 6 servings
- Category: Dessert
- Method: Baking
- Cuisine: American
- Diet: Vegetarian
Ingredients
- 6 medium apples (like Granny Smith or Honeycrisp), peeled, cored, and sliced
- 1/4 cup granulated sugar
- 1 tablespoon all-purpose flour
- 1 teaspoon ground cinnamon
- 1/4 teaspoon ground nutmeg
- 1 tablespoon lemon juice
- 1 cup all-purpose flour (for topping)
- 3/4 cup rolled oats (not instant)
- 1/2 cup packed light brown sugar (for topping)
- 1/2 teaspoon ground cinnamon (for topping)
- 1/4 teaspoon salt
- 1/2 cup (1 stick) cold unsalted butter, cut into small cubes
Instructions
- Preheat your oven to 375 degrees F (190 degrees C). Lightly grease an 8×8 inch baking dish.
- In a large bowl, combine the sliced apples, granulated sugar, 1 tablespoon flour, 1 teaspoon cinnamon, nutmeg, and lemon juice. Toss gently to coat the apples evenly.
- Spread the apple mixture into the prepared baking dish in an even layer.
- In a separate medium bowl, whisk together the 1 cup flour, rolled oats, brown sugar, 1/2 teaspoon cinnamon, and salt for the topping.
- Cut in the cold butter cubes using a pastry blender or your fingertips until the mixture resembles coarse crumbs with some pea-sized pieces of butter remaining. Do not overmix.
- Sprinkle the oat topping evenly over the apples in the baking dish.
- Bake for 35 to 45 minutes, or until the topping is golden brown and crisp, and the apple filling is bubbly and tender when pierced with a fork.
- Let the crisp cool for at least 15 minutes before serving warm, preferably with vanilla ice cream.
Notes
- For a crispier topping, chill the topping mixture for 10 minutes before sprinkling it over the apples.
- If your apples are very tart, you may add an extra tablespoon of brown sugar to the filling.
- You can substitute half of the all-purpose flour in the topping with whole wheat flour for a nuttier flavor.
Nutrition
- Serving Size: 1 serving
- Calories: 380
- Sugar: 30g
- Sodium: 150mg
- Fat: 18g
- Saturated Fat: 11g
- Unsaturated Fat: 7g
- Trans Fat: 0.5g
- Carbohydrates: 55g
- Fiber: 5g
- Protein: 5g
- Cholesterol: 45mg