

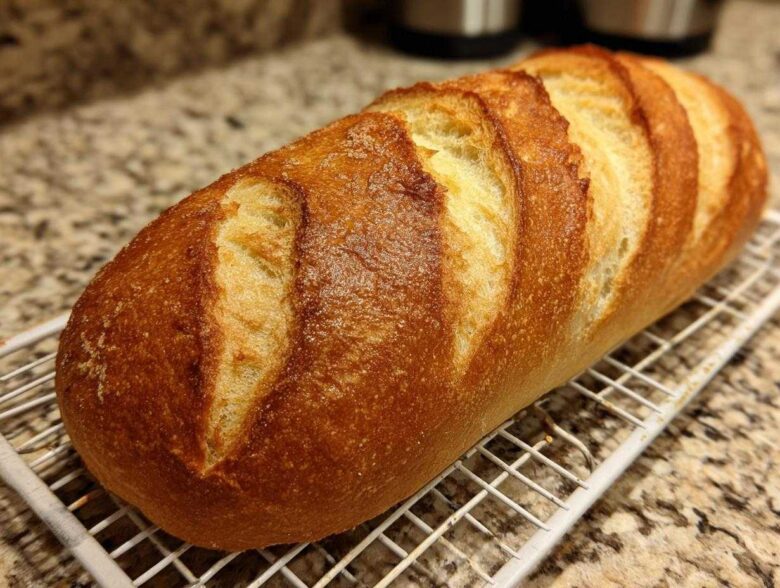
Oh, that smell! If you could bottle up the scent of yeast blooming and warm flour baking, I swear we could sell it for millions. That wonderful aroma tells you right away: homemade bread is happening! David and I, we adore that smell, especially when it’s our Easy Homemade Soft and Crusty French Bread filling our kitchen. You see, for us, baking this particular french bread isn’t just about dinner sides; it’s about bringing home that comforting, familiar feeling. We’ve worked hard to nail the balance—you get that satisfying, shattering crust on the outside, but when you slice it, the inside is impossibly soft and fluffy. Trust me, this is the simple recipe that will make you forget you ever needed to buy a loaf again! For more snapshots from our daily kitchen fun, make sure you check out our main blog page.
Why You Will Bake This Easy French Bread Recipe
I know there are a million bread recipes out there, but this one hits all the happy spots we look for when we’re craving something real and delicious. You need this recipe because it promises exactly what you want without any fuss. Seriously, it delivers!
- Soft and fluffy texture inside—that tender crumb feeling that melts in your mouth.
- A satisfyingly crusty exterior that gives you that perfect bakery crunch when you bite in.
- Simple ingredients you likely have in your pantry right now.
- It’s shockingly fast! Ready in under two hours, which is fantastic for a simple yeast bread.
Ingredients for Your Homemade French Bread Recipe
The most important thing I want you to know about these ingredients is that they are basic. No fancy starters or weird flours needed here! Because we aren’t using complicated techniques, the quality of what you put in matters. I always keep my spices fresh, but for this loaf, flour, salt, and yeast are the stars. Having everything measured out before you start is key, especially so you don’t get distracted when the yeast needs attention later. Don’t forget that egg white wash at the end; that’s where the pretty, shiny crust comes from!
- 1 packet active dry yeast (that’s about 2 1/4 teaspoons if you buy it in bulk)
- 1 teaspoon granulated sugar (just to wake up that yeast!)
- 1 cup warm water (and please, check that temperature! You want it nice and warm, between 105°F to 115°F, so you don’t shock the yeast. If it’s too hot, you’ll kill it dead!)
- 2 3/4 cups all-purpose flour, plus more for dusting the counter later
- 1 teaspoon salt (don’t skip this, flavor needs salt!)
- 1 tablespoon olive oil (just a touch for softness)
- 1 egg white, beaten with 1 teaspoon water (this is our secret for getting that gorgeous golden shine)
If you’re looking for something lovely to serve this amazing bread alongside, check out our recipe for French Onion Pasta. That pasta loves a good swipe of this crusty loaf!
Step-by-Step Instructions to Make Soft French Bread at Home
The process of making bread from scratch can seem intimidating, but trust me, this is perfect for Beginner Bread Baking! We break it down into manageable chunks. The secret to getting that wonderful soft interior is paying attention to the feel of the dough during the kneading and rising stages. We aren’t rushing the dough; we’re telling it nicely to get ready for its big moment in the oven. And remember that steam we build? That’s essential hydration we need for a great crust!
Activating the Yeast and Mixing the French Bread Dough
Grab your biggest bowl! First thing, we need happy yeast. Gently stir your yeast and that teaspoon of sugar into the warm water—it absolutely must be between 105°F and 115°F. If you don’t have a thermometer, aim for water that feels warm to your wrist, but not too hot to comfortably dip your finger in. Wait about 5 to 10 minutes until it looks foamy and bubbly on top; that’s a sign your yeast is alive and ready to work its magic on our french bread.
Once it’s foamy, toss in your flour, salt, and that olive oil. Mix it with a sturdy wooden spoon until everything just barely comes together into what we call a “shaggy dough.” Don’t worry if it looks messy; that’s exactly how it should look before we get our hands in there!
Kneading and First Rise for Your Fluffy Loaf Recipe
Now it’s time to get cozy with the dough! Turn that shaggy mass out onto a lightly floured surface. We need to knead this for a solid 6 to 8 minutes until it feels smooth and springy. I always tell people, you’re looking for true elasticity—it should hold its shape without drooping immediately. Once it feels lovely and smooth, just like a perfect pillow, lightly oil a clean bowl, pop the dough inside, give it a little turn to coat, and cover it up. Stick it somewhere warm, away from any drafts, for at least 60 to 75 minutes until it’s doubled. That long rest time is what builds the flavor for this Fluffy Loaf Recipe.
Shaping and Preparing the Quick French Bread Recipe for Baking
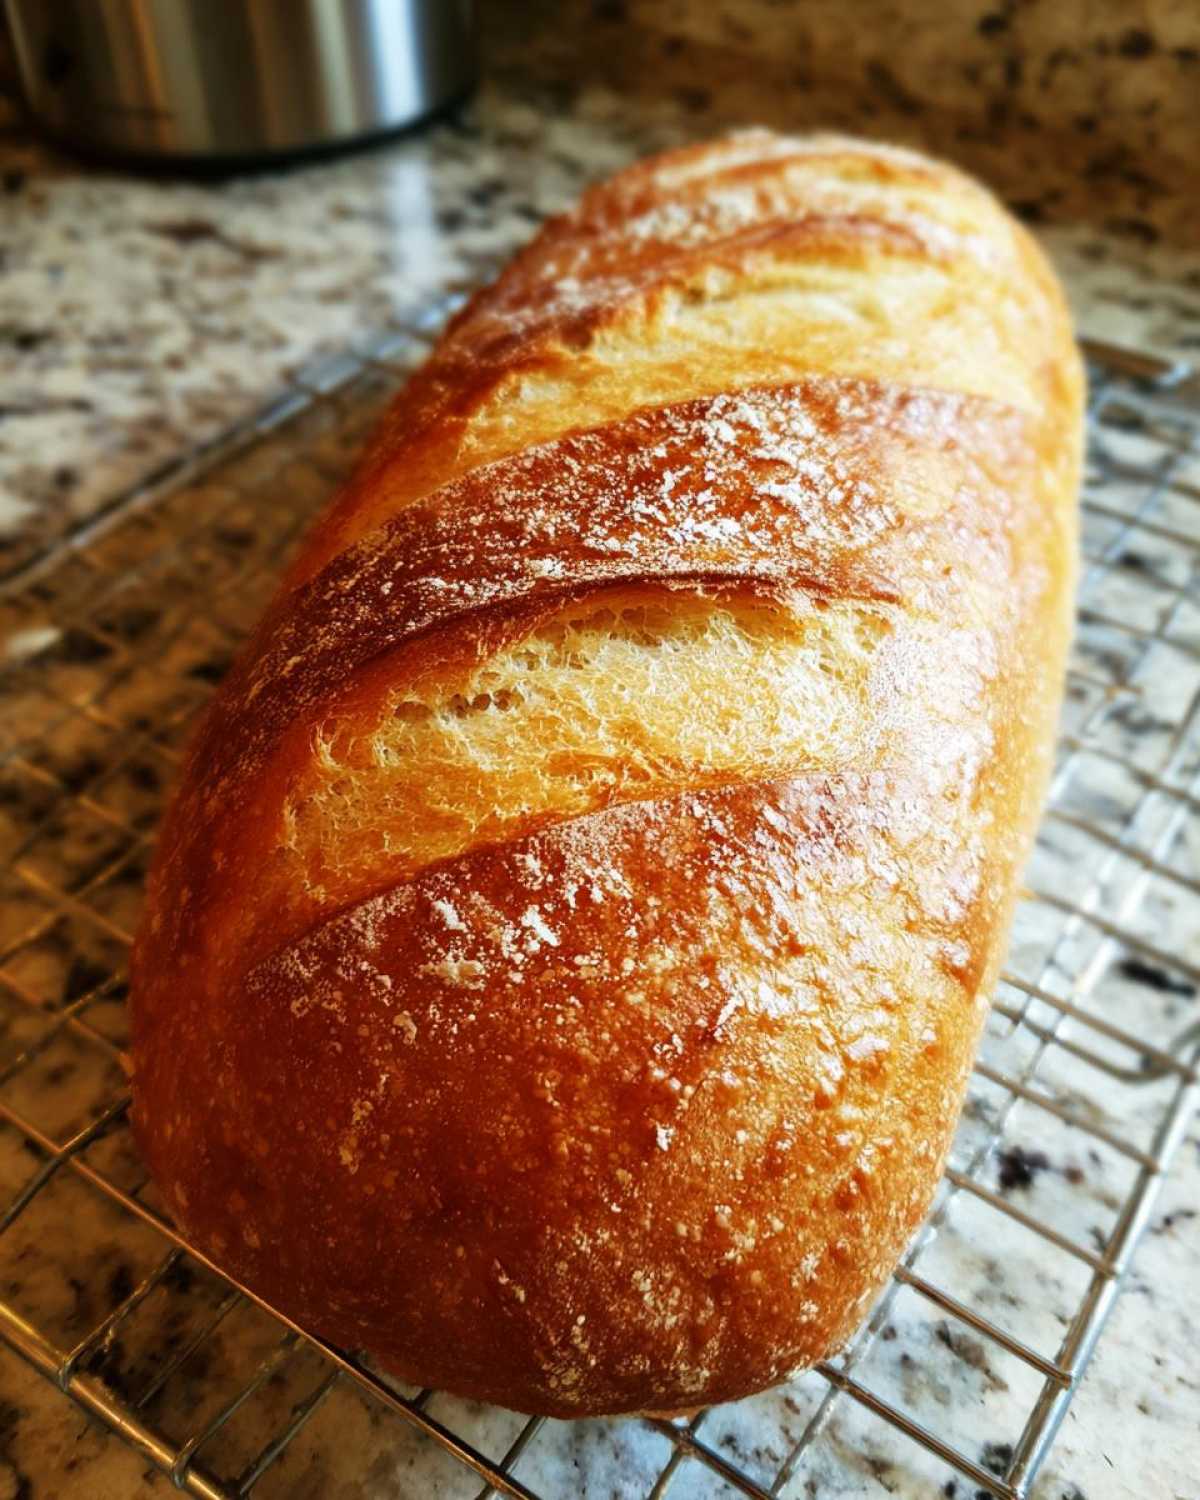
When it’s beautifully puffed up, give it a gentle punch right in the center to release the air—don’t be aggressive! Turn the dough onto your counter again. We want a long loaf, about 14 inches is a good target. Gently roll and tuck it under itself to smooth out the surface tension—this helps structure the loaf for that crusty exterior. Place it on parchment paper. Let it rest again for 20 minutes while your oven preheats to 400°F. Just before it goes in, brush it with the egg wash and use a super sharp knife to slash three diagonal lines across the top. Then, here’s the trick for that amazing crust on your french bread: pour about half a cup of hot water into a pan you set on the bottom rack while you slide the bread in!
Baking Your Bakery Style Bread
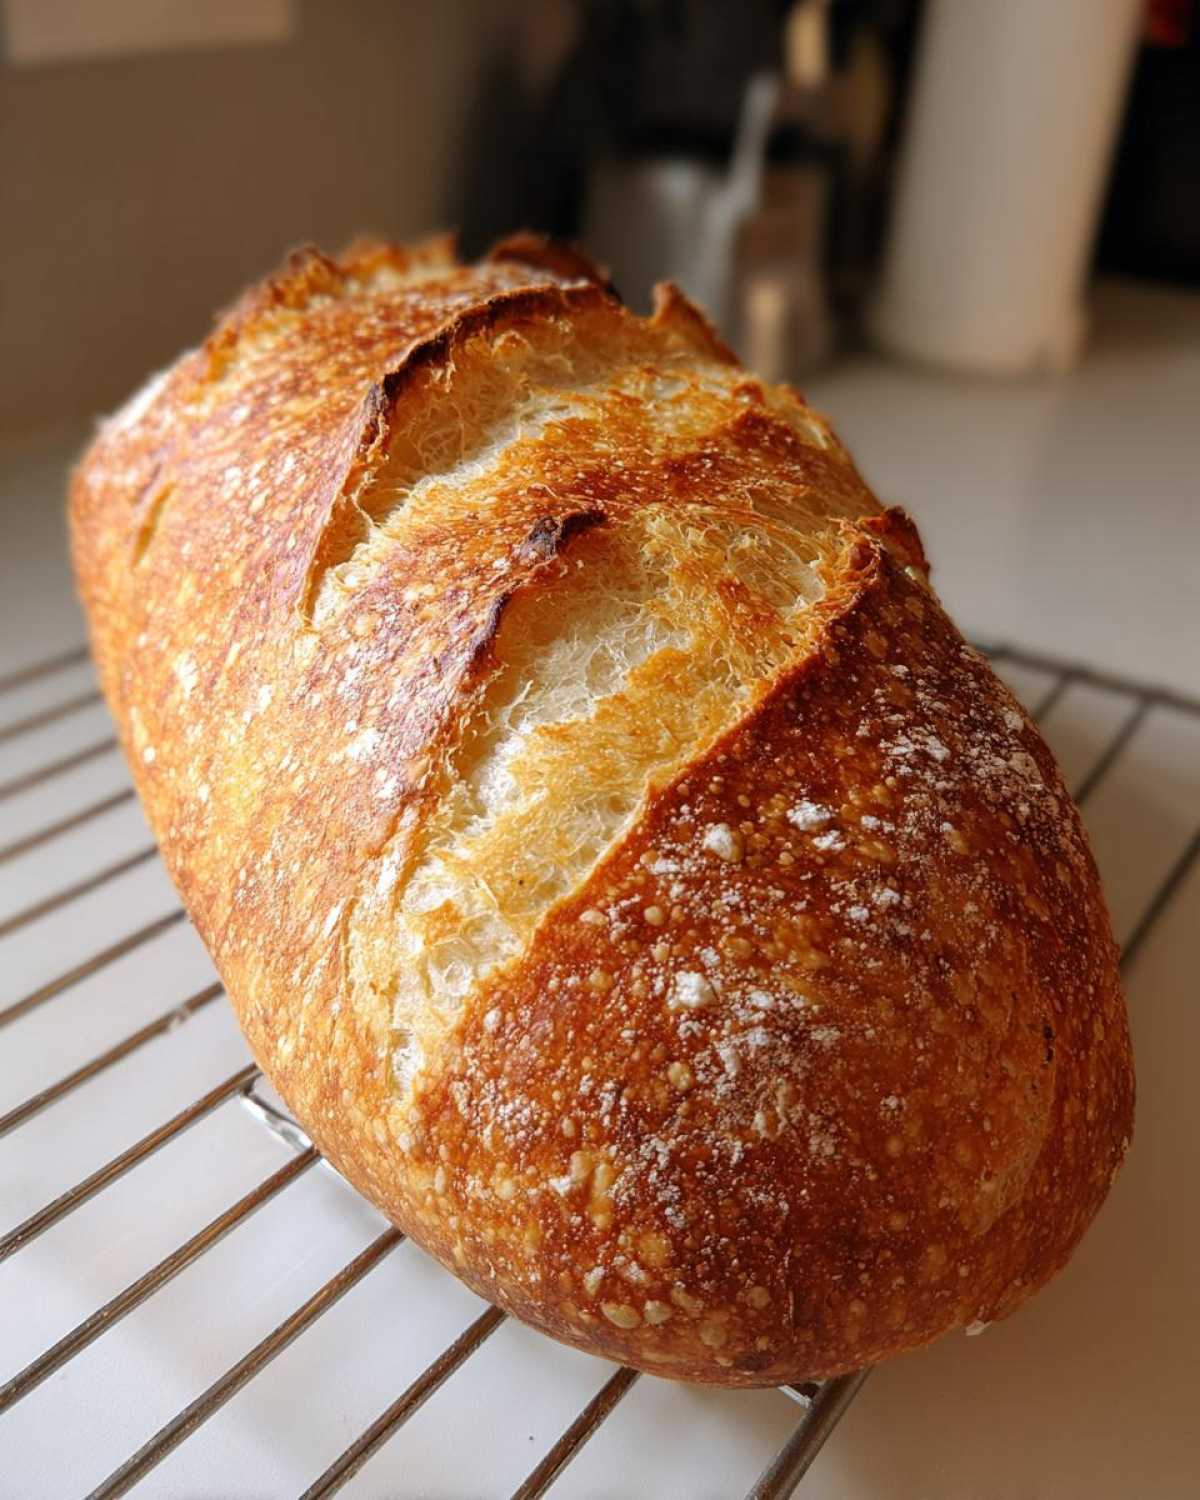
Bake that beauty for 25 to 30 minutes. Keep an eye on it after the 20-minute mark. You want it deeply golden brown—darker than you think! When it’s done, pull the loaf out and tap the bottom. If it sounds hollow, you have succeeded! You’ve managed to create incredible Bakery Style Bread right in your own home. Let it cool completely on a wire rack; resist slicing it hot, or you’ll mess up that tender crumb we worked so hard to create. For more tips on making sure all your baking turns out perfectly, check out my post on Baking Homemade Bread Tips.
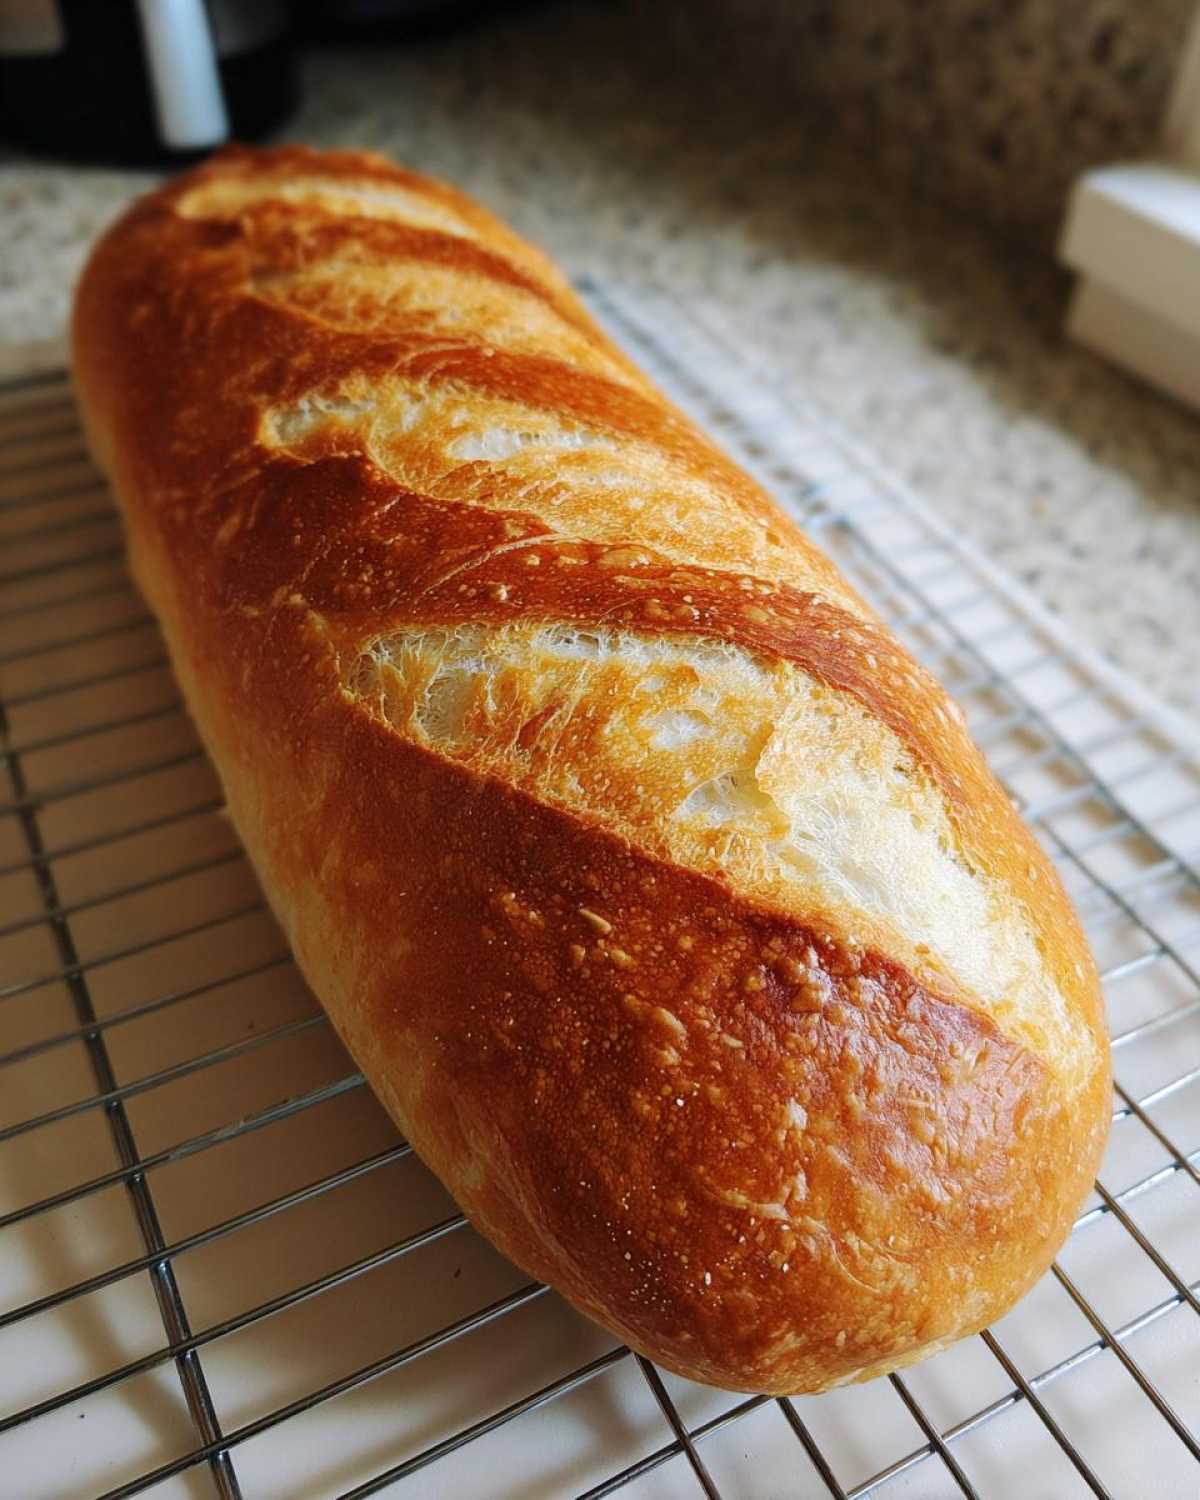
If you followed the timing and are curious about slightly faster versions, you can check out this Easy 2-Hour French Bread Recipe, but I truly think this method gives the best texture!
Expert Tips for Perfect Crusty Artisan Bread
Now that you know the steps for this Crusty Artisan Bread, I want to share the little secrets David always nags me about—the details that shift your loaf from good to absolutely unforgettable. The steam we create in the oven is non-negotiable! That blast of moisture keeps the surface of the dough soft for those critical first few minutes, allowing it the space to puff up beautifully before the crust sets. If you skip the steam, the crust sets too fast, resulting in a flatter, softer loaf.
Also, I have to mention one of the notes from the recipe: for an *extra* shattering exterior, you can lightly spritz the loaf with water from a clean spray bottle a few times during the first 10 minutes of baking, even if you’re using the hot water pan for steam. It really pushes that crust development!
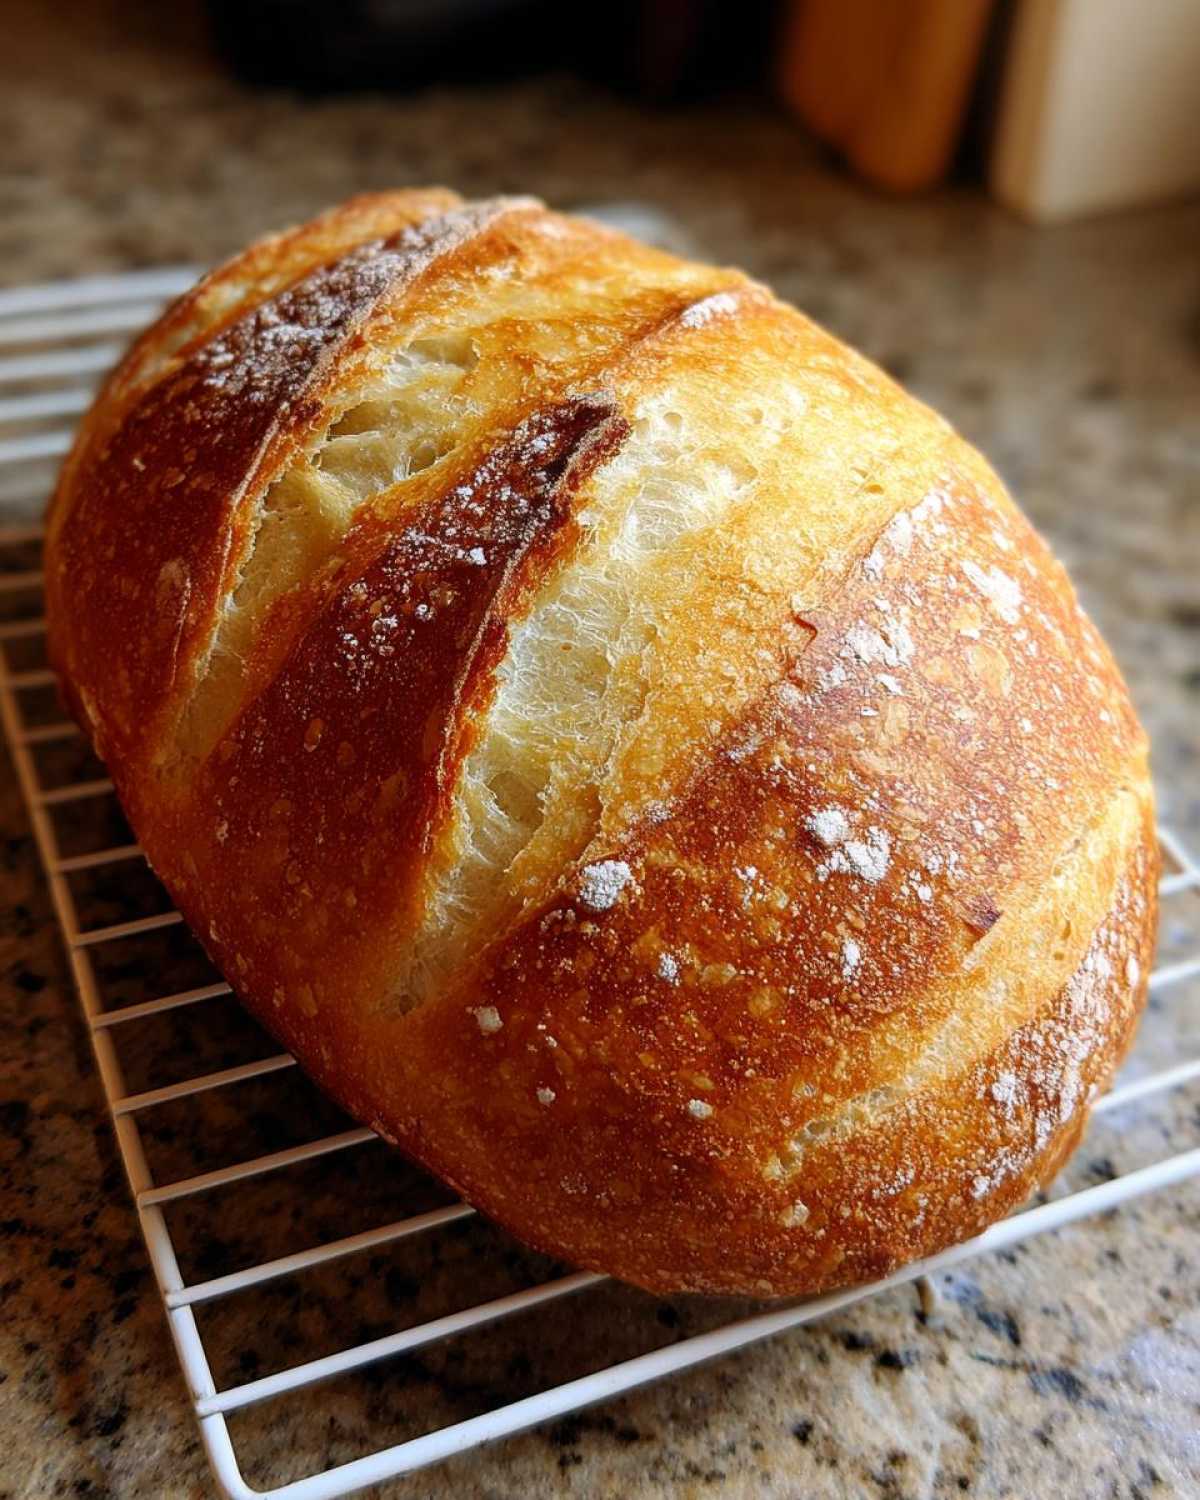
To keep that inside wonderfully tender, remember where we talked about cooling? Don’t place it directly on a counter. Always transfer it to a wire rack or something elevated. This lets air circulate underneath, preventing the bottom steam from making your perfect crust soggy. For more deeper dives into getting your dough just right, check out my list of Baking Homemade Bread Tips. If you are fascinated by crust texture, some folks obsess over their mini baguettes; you can read about their techniques here: Crusty Mini Baguettes prep tips!
Ingredient Notes and Substitutions for French Bread
Let’s talk specifics because those little components make all the difference when handling yeast. The temperature of your water when you activate the yeast is absolutely crucial. If it’s too cold—below 100°F—the yeast just sleeps and nothing foams up. If it gets up over 120°F, you actually cook the yeast, and then it’s game over before you even start kneading! We need that happy zone between 105°F and 115°F so our yeast wakes up happy and bouncy, ready to give us that amazing rise.
What if you opened up your pantry looking for all-purpose flour but only found bread flour? Don’t panic! Bread flour has a slightly higher protein content than all-purpose, which usually means a chewier crumb, but it works beautifully here too. For this recipe, if you use bread flour instead of the all-purpose, you might need just a tiny bit less liquid overall. I’d suggest starting with 2 1/2 cups of the bread flour and then adding the remaining flour slowly if the dough still feels sticky. It usually turns out wonderfully for a slightly chewier loaf.
Another point I get asked about is the olive oil. You really need some healthy fat in here for that soft interior texture we are chasing. If you are completely out of olive oil, melted coconut oil works in a pinch, or even a neutral vegetable oil will do the job. Just make sure whatever you use is measured correctly!
Serving Suggestions for Your Dinner Side Bread
Okay, now that you have this perfectly crusted, soft-on-the-inside loaf, what are you going to do with it? Honestly, I could just eat a whole heel buttered, but this Dinner Side Bread shines best when it helps soak up amazing sauces. It’s our absolute favorite thing to serve alongside any saucy, savory meal. Think rich stews, big bowls of chili, or my quick French Onion Pasta—you need something sturdy to scoop up all that goodness!
But don’t stop there! Because the texture is so tender, this bread makes the most fantastic Bread for Sandwiches you can imagine. It holds up beautifully to heavier fillings without getting soggy right away. Make a killer Italian sub or use slices brushed with garlic butter to make the best cheesy bread for movie night!
Storage and Reheating Instructions for Homemade French Bread
This is where people often mess up their beautiful fresh loaf! If you want to keep your french bread tasting incredible the next day, you have to treat that crust right. Store it cut-side down on a cutting board, loosely wrapped in a paper bag. If you use plastic wrap or shove it into a sealed plastic bag, I promise you, that gorgeous, crispy exterior will turn soft and leathery overnight—and we absolutely cannot have that!
The paper bag lets the surface moisture escape just enough to keep that lovely crunch, while slightly shielding the interior from drying out too fast. It usually stays pretty good for a full day or two this way.
Now, if you want to bring that perfect texture back—that moment when the loaf is fresh out of the oven—you need to briefly reheat it. Don’t microwave it unless you enjoy chewy bread regrets! Instead, wrap your slightly stale loaf loosely in foil and pop it into a 350°F oven for about 8 to 10 minutes. This gentle heat warms the interior back up, and if you pull the foil off for the very last two minutes, that crust will snap right back to life. It smells just like you pulled it out of the oven for the first time! For more in-depth instructions on making bread from scratch, check out this easy guide on Homemade French Bread.
Frequently Asked Questions About Making French Bread
Even when a recipe seems straightforward, questions always pop up! I love hearing from you all because it shows you’re getting your hands dirty and trying this at home. Baking any Simple Yeast Bread requires understanding a few little quirks, mainly around time and temperature. Here are some of the things I hear most often about achieving that perfect loaf!
Can I make this French Bread recipe faster than 1 hour 50 minutes?
Oh, I totally get the rush! Sometimes you need that warm, crusty bread *right now*. You might see other recipes online bragging about being a One Hour Bread Recipe—and those recipes are great for when you need something fast! However, for this specific loaf—you know, the one with the beautifully soft, fluffy interior—the time is really important. That slower, longer first rise is what develops the flavor and that tender crumb. If you rush the rises too much, you risk denser bread, even if it technically bakes fast. For this recipe, the full time guarantees that soft result.
What if I don’t have a baking stone? Can I still get a good crust on my french bread?
No stone? No problem! David sometimes forgets to pull the stone out, and we just use a regular sturdy baking sheet, and honestly, the bread is still fantastic. The most important part for getting that shatteringly crusty exterior is creating steam when the bread goes into the oven. That hot water trick we talked about—using a shallow metal pan—is your best friend here if you don’t have a stone. Just make sure that pan is already in the oven while the oven preheats so the water instantly turns to steam when you pour it in. That intense blast of moisture is what matters most for the crust!
How do I ensure my loaf has a tender crumb and not a dense texture?
Texture tension! That’s the biggest battle in bread making, right? You want it airy but not floppy, chewy but certainly not dense. It comes down to two main things we focused on heavily in the instructions. First, you must properly knead the dough until it passes the elasticity test—that means you’ve developed enough gluten structure to hold up the air. Second, don’t cheat the rise! If your kitchen is cold, find a warmer spot—maybe on top of the fridge, or stick the oven on the proof setting just until it warms up slightly, then turn it off before putting the dough in. Good rising equals a soft, tender crumb every time.
Estimated Nutrition for This Simple Yeast Bread
Because we are all about transparency here on Spoonful Snap, I wanted to give you a rough breakdown of what’s in a slice of this wonderful bread. Keep in mind, since this is homemade, the exact numbers can vary based on the brand of flour you use or how much you slice it! These figures are based on my average yield of 16 slices.
- Serving Size: 1 slice
- Calories: 150
- Fat: 2g
- Protein: 4g
- Carbohydrates: 29g
- Sugar: 1g
- Sodium: 180mg
Share Your Homemade French Bread Creations
I genuinely hope you feel inspired to get this recipe made this week! Seriously, there is no greater joy than pulling your own gorgeous, crusty loaf of french bread out of the oven. When you do bake it, please let me know how it turned out! Did you manage to keep the crust crunchy? Was the inside as soft as promised? Leave your rating and any notes down below in the comments section so other bakers can see your success. If you take a picture of your beautiful loaf ready for dinner, I’d love to see it—you can always tag us or reach out via my contact page! Happy baking, friends!
Estimated Nutrition for This Simple Yeast Bread
Because we are all about transparency here on Spoonful Snap, I wanted to give you a rough breakdown of what’s in a slice of this wonderful bread. Keep in mind, since this is homemade, the exact numbers can vary based on the brand of flour you use or how much you slice it! These figures are based on my average yield of 16 slices. I always tell David these are just guidelines, but they help when you’re counting things up!
- Serving Size: 1 slice
- Calories: 150
- Fat: 2g
- Protein: 4g
- Carbohydrates: 29g
- Sugar: 1g
- Sodium: 180mg
Share Your Homemade French Bread Creations
I genuinely hope you feel inspired to get this recipe made this week! Seriously, there is no greater joy than pulling your own gorgeous, crusty loaf of french bread out of the oven. When you do bake it, please let me know how it turned out! Did you manage to keep the crust crunchy? Was the inside as soft as promised? Leave your rating—five stars if you loved it!—and any notes down below in the comments section so other bakers can see your success. If you take a picture of your beautiful loaf ready for dinner, I’d love to see it; you can always tag us or reach out via my contact page. Happy baking, friends!
PrintEasy Homemade Soft and Crusty French Bread
Bake bakery-style French bread at home that is soft and fluffy inside with a satisfyingly crusty exterior. This simple recipe is perfect for beginners and ready in under two hours.
- Prep Time: 20 min
- Cook Time: 30 min
- Total Time: 1 hour 50 min
- Yield: 1 large loaf
- Category: Baking
- Method: Baking
- Cuisine: French
- Diet: Vegetarian
Ingredients
- 1 packet active dry yeast (about 2 1/4 teaspoons)
- 1 teaspoon granulated sugar
- 1 cup warm water (105°F to 115°F)
- 2 3/4 cups all-purpose flour, plus more for dusting
- 1 teaspoon salt
- 1 tablespoon olive oil
- 1 egg white, beaten with 1 teaspoon water (for egg wash)
Instructions
- In a large bowl, dissolve the yeast and sugar in the warm water. Let this mixture sit for 5 to 10 minutes until it becomes foamy. This shows your yeast is active.
- Add the flour, salt, and olive oil to the yeast mixture. Mix with a wooden spoon until a shaggy dough forms.
- Turn the dough out onto a lightly floured surface. Knead for 6 to 8 minutes until the dough is smooth and elastic. You want a soft, workable dough.
- Lightly grease a clean bowl with oil. Place the dough in the bowl, turning to coat. Cover the bowl with plastic wrap or a clean kitchen towel.
- Let the dough rise in a warm spot for 60 to 75 minutes, or until it has doubled in size. This first rise develops the flavor.
- Gently punch down the dough. Turn it onto a lightly floured surface and shape it into a long, even loaf, about 14 inches long. For a classic look, gently roll the dough to create a slightly tighter surface.
- Place the shaped loaf on a baking sheet lined with parchment paper or on a pizza stone. Cover loosely and let it rest for a second rise for 20 minutes.
- While the dough rests, preheat your oven to 400°F (200°C). Place a shallow pan on the bottom rack to create steam later.
- Just before baking, brush the top of the loaf evenly with the egg white wash. Use a sharp knife to make three diagonal slits (about 1/2 inch deep) across the top of the loaf.
- Carefully pour about 1/2 cup of hot water into the preheated shallow pan on the bottom rack to create steam. Immediately place the baking sheet with the bread into the oven.
- Bake for 25 to 30 minutes, or until the crust is deep golden brown and the bread sounds hollow when tapped on the bottom.
- Remove the bread from the oven and transfer it to a wire rack to cool completely before slicing. Enjoy your homemade French bread!
Notes
- For an extra crusty exterior, you can lightly spritz the loaf with water a few times during the first 10 minutes of baking, in addition to using the steam pan.
- If you want a softer crust, skip the egg wash entirely.
- This bread is perfect for making sandwiches or serving warm with butter alongside dinner.
Nutrition
- Serving Size: 1 slice
- Calories: 150
- Sugar: 1
- Sodium: 180
- Fat: 2
- Saturated Fat: 0.5
- Unsaturated Fat: 1.5
- Trans Fat: 0
- Carbohydrates: 29
- Fiber: 1
- Protein: 4
- Cholesterol: 0