

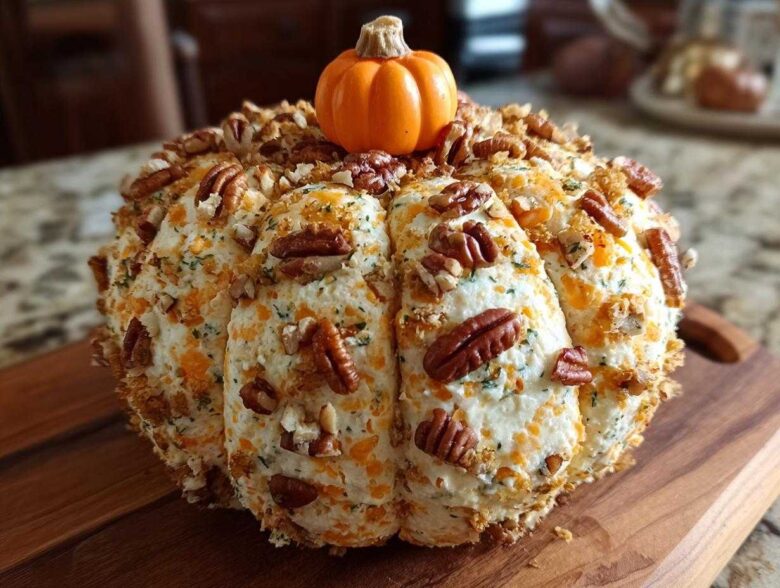
Listen, when the leaves start changing, the only thing I want near my coffee table are appetizers that scream ‘fall’ without requiring me to actually turn on the oven for hours. This year, you absolutely have to make my **pumpkin cheese ball**. Trust me, I’ve tried every fancy dip known to humankind, but nothing gets the comments this one does. It’s savory, ridiculously creamy, and shaped like a real pumpkin! It’s the ultimate **Halloween Party Food** centerpiece that tastes even better than it looks. You can mix it up the day before, and that’s why this specific fall appetizer recipe is my secret weapon for stress-free seasonal entertaining.
Why This Pumpkin Cheese Ball is Your Best Fall Appetizer Recipes Choice
I know you see a lot of pretty pictures online, but this isn’t just about looks—this is about serving food that actually works when you’re hosting! If you need a reliable standout for your next potluck, this is it. It checks every single box required for a perfect **Thanksgiving Cheese Ball** or any spooky gathering.
- Make-Ahead Magic: I literally make the cheese mixture up to two days ahead. Seriously, this is one of my favorite easy make ahead appetizers because the chilling time firms it up perfectly for shaping.
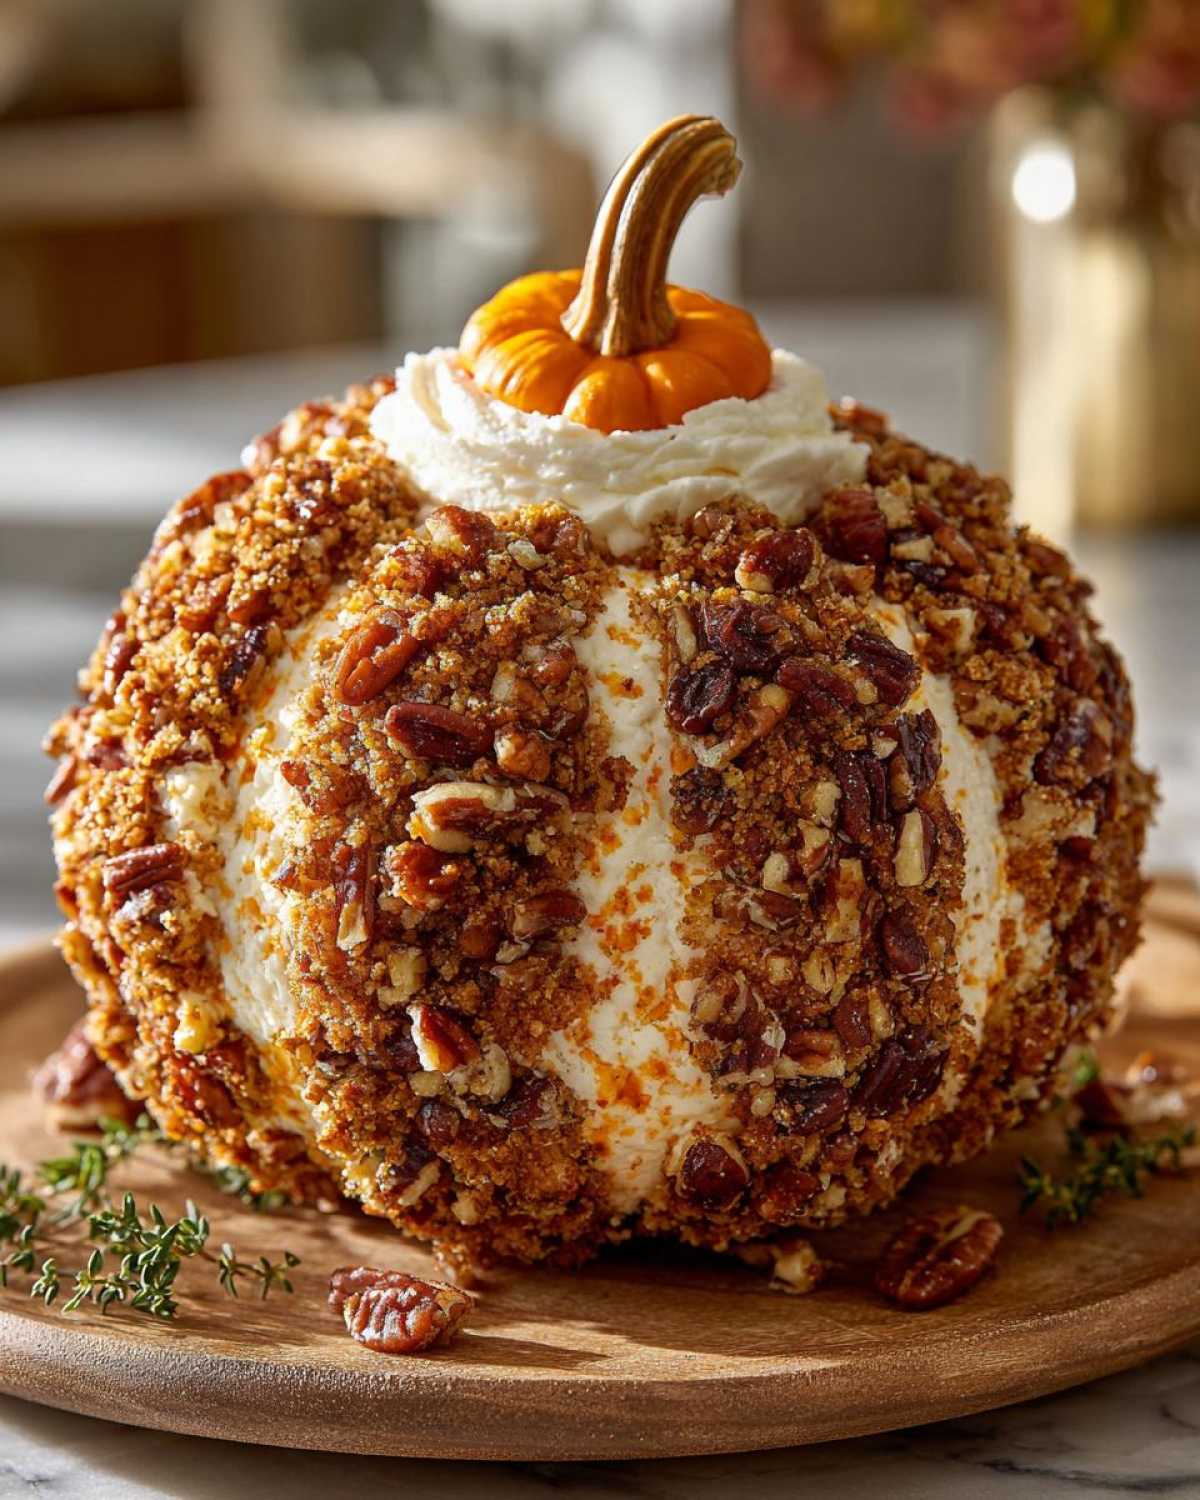
- Visual Impact: It genuinely looks like a tiny, delicious pumpkin sitting on your charcuterie board. People always ask how I got the lines so perfect!
- Crowd-Pleaser Flavor: It’s totally savory. We’re talking sharp cheddar and tang—no weird sweet pumpkin spice here, though you could certainly add some if you wanted! It’s perfect for folks who don’t want sweet dips at their **Halloween Party Food** table.
- Low Stress Serving: Since it’s served cold and is so sturdy, you don’t have to worry about keeping it warm or stirring it. Set it out and forget it until everyone devours it!
Ingredients for the Perfect Pumpkin Cheese Ball
When you gather supplies for this amazing **pumpkin cheese ball**, remember we are building flavor first, texture second, and presentation third! Everything needs to be ready to go so you can mix it fast after you’ve let your cheeses warm up just a bit. We need three main groups of items: the cheesy filling, the crunchy exterior coating, and those key decorative touches to make it look like a gourd.
The Creamy Cheese Base Ingredients
You’ll need eight ounces of cream cheese, and please, please make sure it’s fully softened on the counter first—no shortcuts here or you’ll get lumps! Then grab eight ounces of sharp cheddar, shredded fine, and if you want to get really fancy, another four ounces of blue cheese or goat cheese crumbled in there. For seasoning, we’re keeping it savory with just a dash of Worcestershire sauce, garlic powder, onion powder, that warm smoked paprika, and just a tiny pinch of cayenne to wake things up!
Coating and Presentation Elements for Your Pumpkin Cheese Ball
For the beautiful orange coating, you want about a half cup of finely chopped pecans or walnuts ready to go. This gives it that perfect, slightly gritty exterior that keeps the shape intact. Then, for the stem, I usually grab a small piece of celery stalk or a bit of orange bell pepper—whichever looks the most vibrant. And here’s the trick for the ridges: you’ll need some kitchen twine or thin string. It’s the only way to get those classic pumpkin lines!
How to Prepare Your Shaped Pumpkin Cheese Ball Step-by-Step
Putting this together is the fun part, but the chilling is non-negotiable if you want that perfect shape. Don’t rush the process; a slightly firmed-up cheese ball is much easier to handle and decorate. The whole process is surprisingly fast once you have the ingredients mixed. If you love working with different cheesy spreads, you might enjoy checking out some other goat cheese balls recipes too!
Mixing the Creamy Cheese Ball Recipe Base
Grab your bowl and let’s get mixing! I usually use a sturdy wooden spoon for this because I can really feel when it’s smooth, but if you have a lot of cheese, an electric hand mixer on low speed works wonders to break everything down evenly. You want every bit of that cheddar blended with the softened cream cheese and seasonings. Keep mixing until it looks homogenous—no streaks of white cream cheese or visible lumps of cheddar. Once it’s perfectly smooth, cover that bowl tightly and pop it in the fridge for at least one full hour. Trust me, chilling helps it keep its shape later!
Shaping and Decorating the Pumpkin Cheese Ball
Okay, this is where the magic happens for your beautiful **pumpkin cheese ball**! After chilling, scrape the mixture out onto some plastic wrap or parchment paper. Now, shape it into a round ball—try to make it look generally round, like a small pumpkin, not a perfect sphere. Next, set up a shallow dish with those chopped nuts and roll your cheese ball gently all over until it’s totally coated. 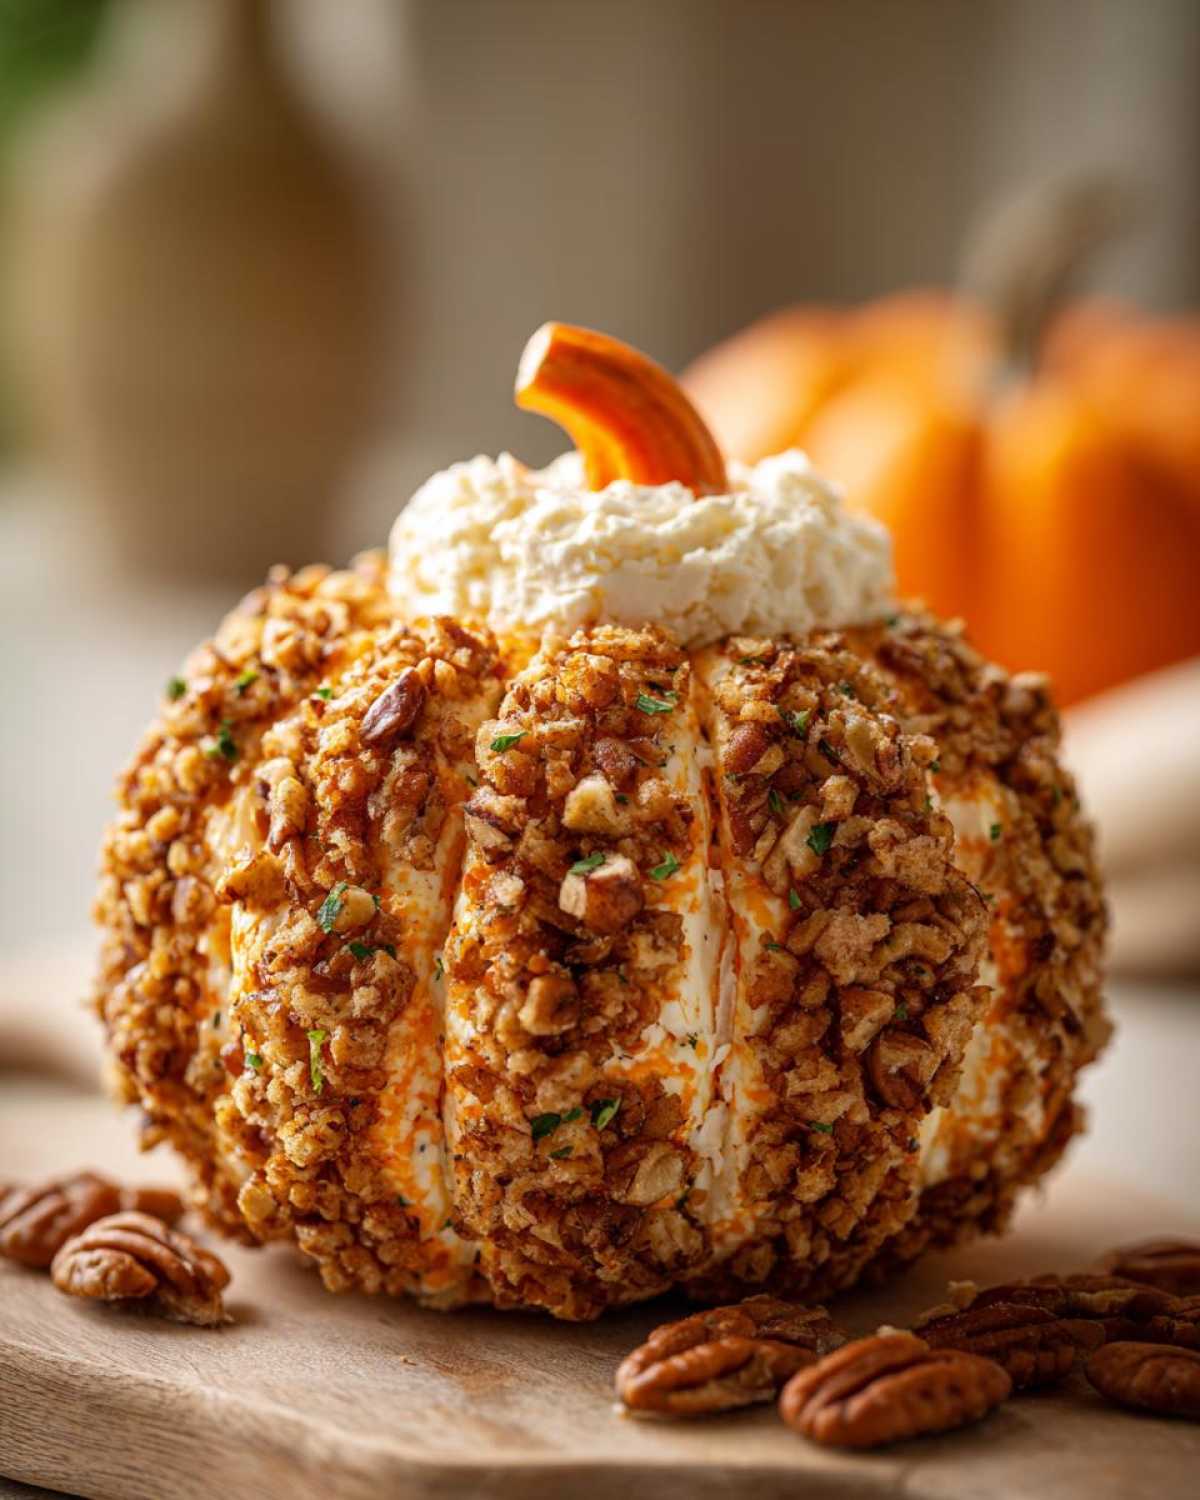 Now for the ridges! You have two choices here: you can either take the dull side of a butter knife and gently press vertical lines into the coating, or, for the look I prefer, wrap kitchen twine around the ball at four or five spots like ribbons and press lightly. Once you remove the twine, you have perfect, natural-looking grooves! Finally, poke your celery or pepper stem right in the top center. Easy peasy!
Tips for Success Making the Best Fall Party Recipes Pumpkin Cheese Ball
You want this **pumpkin cheese ball** to look professional, right? It’s all about those little details that seasoned hosts always know! My biggest tip, which I mentioned before but can’t stress enough, is ingredient temperature. If your cream cheese is too cold, you can’t mix it smooth. If your cheddar is too oily because it sat out too long, the whole ball might get greasy and won’t hold its shape.
What if you messed up and your mixture is too soft after mixing? Don’t panic, we’ve all been there! Just pop the whole thing back in the fridge for another 30 minutes. A slightly firmer base means those ridges you press in won’t collapse right away. If you skip the nuts for any reason—maybe someone has an allergy—don’t just serve the plain cheese! Use finely chopped fresh parsley or a mix of dried herbs like thyme and sage. It keeps that lovely green/orange contrast we want, turning it into a great alternative for a savory pumpkin appetizer.
Make-Ahead & Storage Instructions for Your Pumpkin Cheese Ball
If you’re anything like me, hosting means you want to spend time with your guests, not scrambling in the kitchen five minutes before everyone arrives. That’s why this recipe shines as one of the best easy make ahead appetizers out there! The good news is you can totally split this process up over a couple of days, making your party day super relaxed.
I want you to know there are two stages of make-ahead here. Stage One is the actual cheese filling. You can absolutely mix up all the cream cheese, cheddar, and spices completely—just don’t shape it yet! Cover that bowl tightly with plastic wrap and stick it in the main part of your fridge. It holds up beautifully for a full two days before you need to roll it out. This gives you plenty of wiggle room!
Stage Two is when you’ve finished the whole **pumpkin cheese ball**—coated in nuts and everything. Once it looks exactly like a tiny gourd with its little stem, you need to wrap it snugly in plastic wrap again, making sure those pretty ridges don’t get smashed. I usually chill the fully decorated pumpkin for at least four hours before serving. This keeps it firm, especially if your house gets warm while everyone is chatting and eating. It stays perfect in the fridge for about 24 hours after you’ve decorated it, but honestly, I think it tastes best within 12 hours!
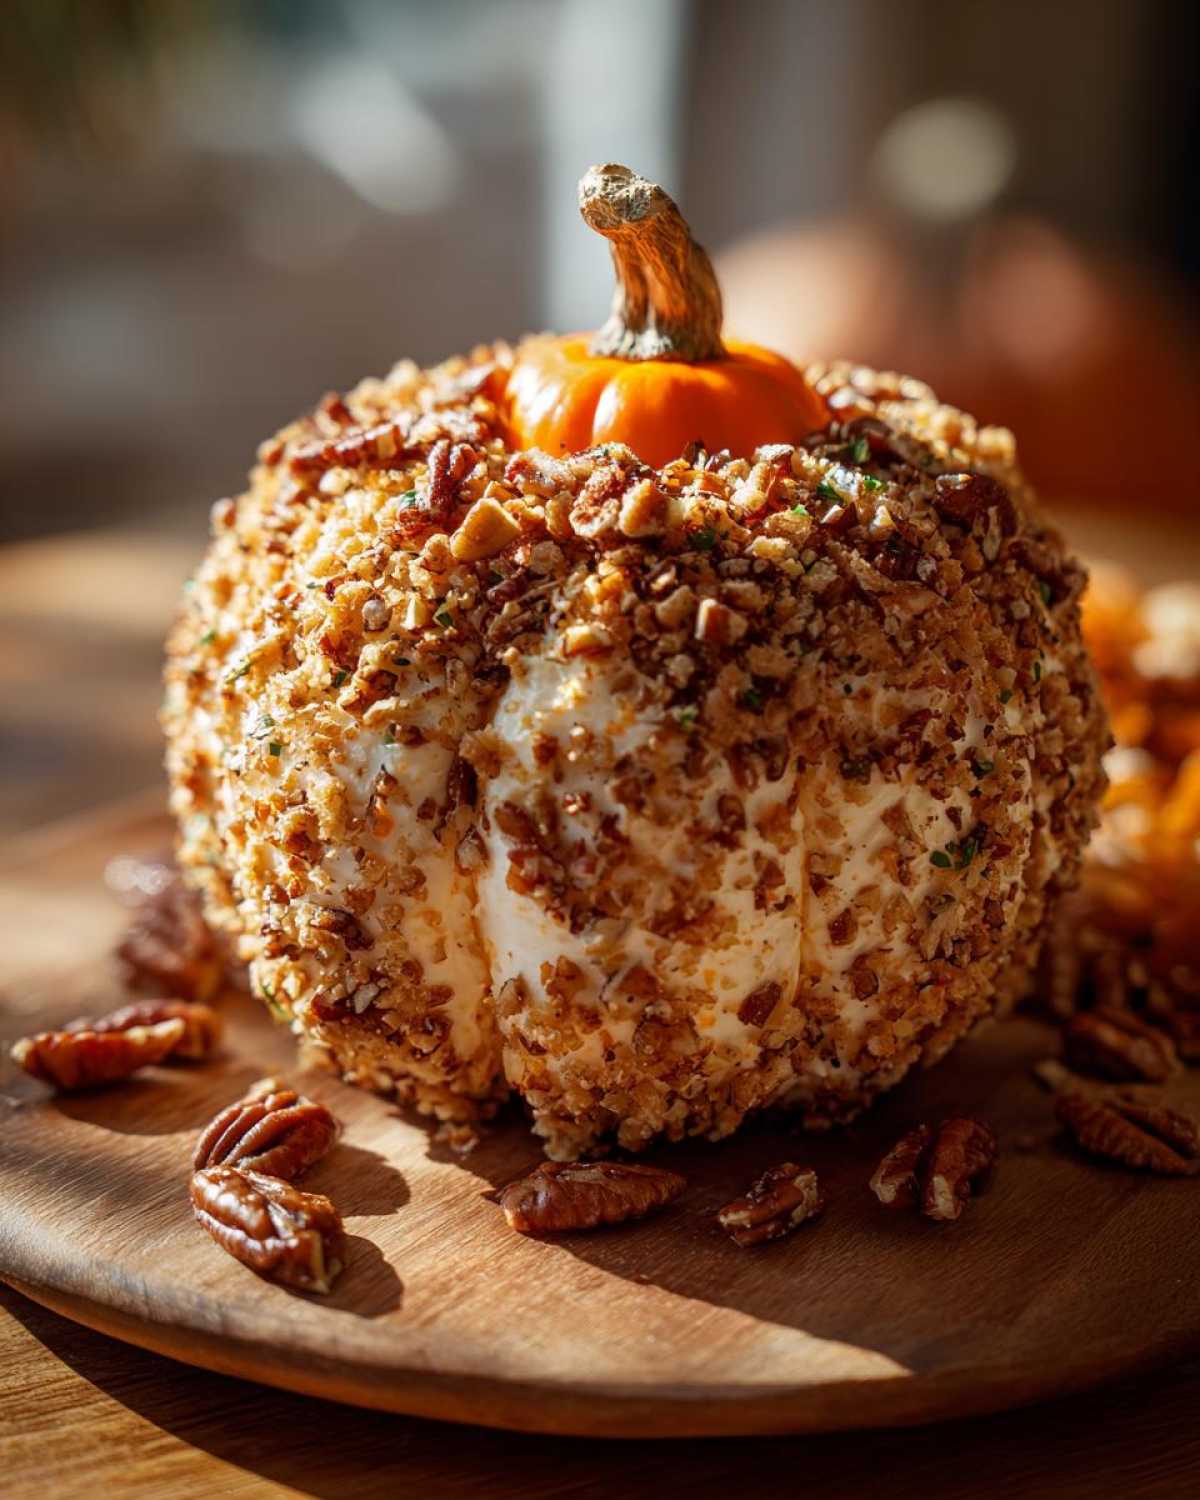
When it’s time to serve, just pull it out of the fridge about 10 to 15 minutes before you plan to put it out. You don’t want it rock hard; a little softening time makes it easier for people to scoop onto their crackers and releases just a bit more of that wonderful savory flavor!
Serving Suggestions for This Festive Holiday Spread
Your incredible **pumpkin cheese ball** isn’t just a snack; it’s an **appetizer centerpiece**! You’ve put in the work to make it look like a beautiful little pumpkin, so we need to make sure the things you serve alongside it are worthy of that effort. When people see this on the table, they are going to be scooping it by the spoonful, so you need sturdy vehicles ready to go!
For **Autumn Entertaining Ideas**, I always lean toward a mix of textures. Forget those flimsy chips that break off in the dip. You want things that can really handle this thick, savory spread. A basket with sturdy whole-wheat crackers, some thick pretzel crisps, and maybe even some bagel chips is always a winner.
But let’s not forget the veggies! This is a great way to sneak some greenery onto the table. Cut carrots into sticks that resemble little orange twigs, and slice celery thinly. You can also slice up different colored bell peppers—red, yellow, and green—for a wonderful burst of color surrounding your orange cheese pumpkin. If you’ve got any leftover dipping inspiration, don’t forget to check out my recipe for Cowboy Caviar; it’s another guaranteed crowd-pleaser for game day!
Remember, since this is a savory spread, you might want to balance it out with something slightly sweet nearby, like thinly sliced apples or pears if you are feeling fancy! But honestly, just load up that platter with crackers and watch it disappear faster than you can pour the next round of cider.
Frequently Asked Questions About the Pumpkin Cheese Ball
When you’re making something this fun for a crowd, you probably have a few last-minute questions! It’s totally normal. I’ve collected the ones I get asked most often when I serve this **Thanksgiving Cheese Ball** so you can feel confident bringing it to your next potluck. If you’ve been wanting to try a new show-stopper, check out my other great savory pumpkin appetizer ideas too!
Can I make this pumpkin cheese ball without nuts?
Absolutely! Nuts are great because they give that perfect bumpy texture, but if you have allergies or just don’t like them, you have great options. You can skip the pecans entirely and roll your shaped ball in finely chopped, fresh parsley—it gives it a really nice, deep green contrast to the orange cheese underneath. Alternatively, for an extra pop of flavor, you can coat it in crumbled, crispy bacon bits! That makes it incredibly delicious, though no longer vegetarian, of course.
What is the best cheese to use for a savory pumpkin appetizer?
For a truly great **Cheddar Cheese Ball**, you need that sharp flavor to punch through all the creaminess. I swear by sharp cheddar—it’s non-negotiable for that cheesy bite! The cream cheese gives you the binding creaminess, and then that optional blue cheese or goat cheese adds a beautiful tang. If blue cheese gives you the creeps, goat cheese is a wonderful, softer substitute that blends in beautifully without overpowering the flavor profile of this **savory pumpkin appetizer**.
How long does the finished pumpkin cheese ball last in the fridge?
This keeps so well, which is huge for party planning! If you make the cheese mixture but don’t shape it, it stays good for up to two days wrapped tightly in the fridge. Once you’ve shaped and coated your whole **pumpkin cheese ball** (with the string ridges and stem in place), I recommend serving it within 24 hours for the absolute best texture. It’s safe for up to three days, but after that, the coating can start to look a little tired, and you might lose some of that fresh, springy texture.
Estimated Nutritional Data for This Crowd Pleasing Appetizers
Okay, so we know this **pumpkin cheese ball** is a guaranteed hit, but I always get asked about the nutrition, especially since it’s so rich! I ran the numbers based on the ingredients—and remember, these are just estimates! Once you start adding the nuts or using different kinds of gourmet cheese, things shift around a bit.
This data is based on splitting the entire finished cheese ball into 12 equal servings, so keep that in mind when you’re serving up those big scoops. If your guests are using heaps of sweet crackers, those numbers will go up fast, but for the ball itself, here’s the general breakdown for one serving:
- Serving Size: Roughly 1/12 of the ball
- Calories: Around 140 per serving
- Fat: Typically 12 grams total
- Saturated Fat: About 7 grams
- Protein: A solid 7 grams, thanks to all that cheese!
- Carbohydrates: Very low, usually just 2 grams
- Sugar: Under 1 gram—it’s wonderfully savory!
- Sodium: About 280 mg
I always tell people, this is a **crowd pleasing appetizers** staple, not a diet food, ha! But seriously, because it’s so flavorful, a little bit goes a long way. The values can change based on whether you use light cream cheese or the exact percentage of sharpness in your cheddar. Always view this chart as a helpful guide rather than gospel when you’re planning your holiday menu!
Share Your Festive Pumpkin Cheese Ball Creations
Seriously, that’s all I have for you regarding the recipe and the decorating secrets! I’ve shown you how to make this the easiest, prettiest **pumpkin cheese ball** on the block for your next party, but now the fun part starts for you—watching people freak out when they realize it’s cheese!
I would absolutely love, love, love to hear how your **Autumn Entertaining Ideas** turned out. Did you use the celery stem or go rogue with a pretzel stick? Did your twine technique give you those perfect ridges?
Don’t be shy! Head down to the comments section below and tell me everything. Rate this recipe if you tried it—even if it’s just four stars because you hated the paprika (though I’d be shocked!). If you ended up taking fantastic pictures of your **festive holiday spread** as an appetizer centerpiece, feel free to tag me on social media! I love seeing my recipes out in the wild, especially when they look this gorgeous. If you’re looking for even more last-minute inspiration before your big get-together, you can always browse my general collection of new recipes for even more fun snacks!
Happy cooking, and may your fall gatherings be filled with delicious, perfectly shaped cheese!
PrintEasy Make-Ahead Pumpkin Shaped Cheese Ball (Savory Cheddar & Cream Cheese)

Make this savory cheddar and cream cheese spread into the shape of a pumpkin for a festive fall appetizer centerpiece. It is simple to prepare ahead of time for your Halloween or Thanksgiving gathering.
- Prep Time: 20 min
- Cook Time: 0 min
- Total Time: 20 min
- Yield: 12 servings
- Category: Appetizer
- Method: No Bake
- Cuisine: American
- Diet: Vegetarian
Ingredients
- 8 ounces cream cheese, softened
- 8 ounces sharp cheddar cheese, shredded
- 4 ounces blue cheese or goat cheese, crumbled (optional)
- 1 teaspoon Worcestershire sauce
- 1/2 teaspoon garlic powder
- 1/4 teaspoon onion powder
- 1/4 teaspoon smoked paprika
- Pinch of cayenne pepper
- 1/2 cup chopped pecans or walnuts (for coating)
- 1 small piece of orange bell pepper or celery stalk (for the stem)
- Kitchen twine or thin string (for shaping lines)
Instructions
- In a medium bowl, combine the softened cream cheese, shredded cheddar cheese, crumbled blue or goat cheese (if using), Worcestershire sauce, garlic powder, onion powder, smoked paprika, and cayenne pepper. Mix until completely smooth and well combined.
- Cover the cheese mixture and chill in the refrigerator for at least 1 hour to firm up slightly, making it easier to shape.
- Once chilled, remove the mixture from the bowl. Shape the cheese mixture into a round ball, resembling a pumpkin shape.
- Place the chopped nuts on a shallow plate. Roll the cheese ball in the nuts until the entire surface is coated.
- To create the pumpkin ridges, gently press lines into the cheese ball using the edge of a butter knife or by wrapping kitchen twine around the ball at even intervals and pressing lightly.
- Insert the piece of orange bell pepper or celery stalk into the top center of the ball to serve as the stem.
- Refrigerate the finished cheese ball until ready to serve. Serve with crackers, pretzels, or vegetable sticks.
Notes
- You can prepare the cheese mixture up to two days in advance and store it covered in the refrigerator before shaping.
- If you do not want to use nuts, coat the ball with finely chopped fresh parsley or dried herbs for color.
- For extra visual appeal, use a small piece of dried chili pepper or a small piece of pretzel stick as the stem instead of bell pepper or celery.
Nutrition
- Serving Size: 1/12 of ball
- Calories: 140
- Sugar: 1
- Sodium: 280
- Fat: 12
- Saturated Fat: 7
- Unsaturated Fat: 5
- Trans Fat: 0
- Carbohydrates: 2
- Fiber: 0
- Protein: 7
- Cholesterol: 35