

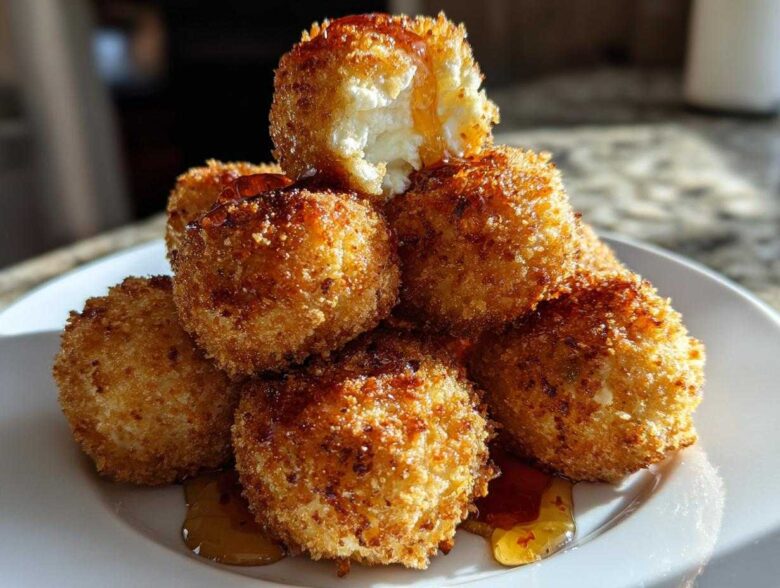
If you’re anything like me, the first thing you look for when planning a get-together is a show-stopping appetizer that people rave about—but doesn’t take all day to make! Forget those dry, crumbly cheese platters; we are aiming for crispy perfection here. I finally nailed the technique for the crispiest, creamiest **goat cheese balls** you will ever taste, and the secret really comes down to patience during the freezing step before breading.
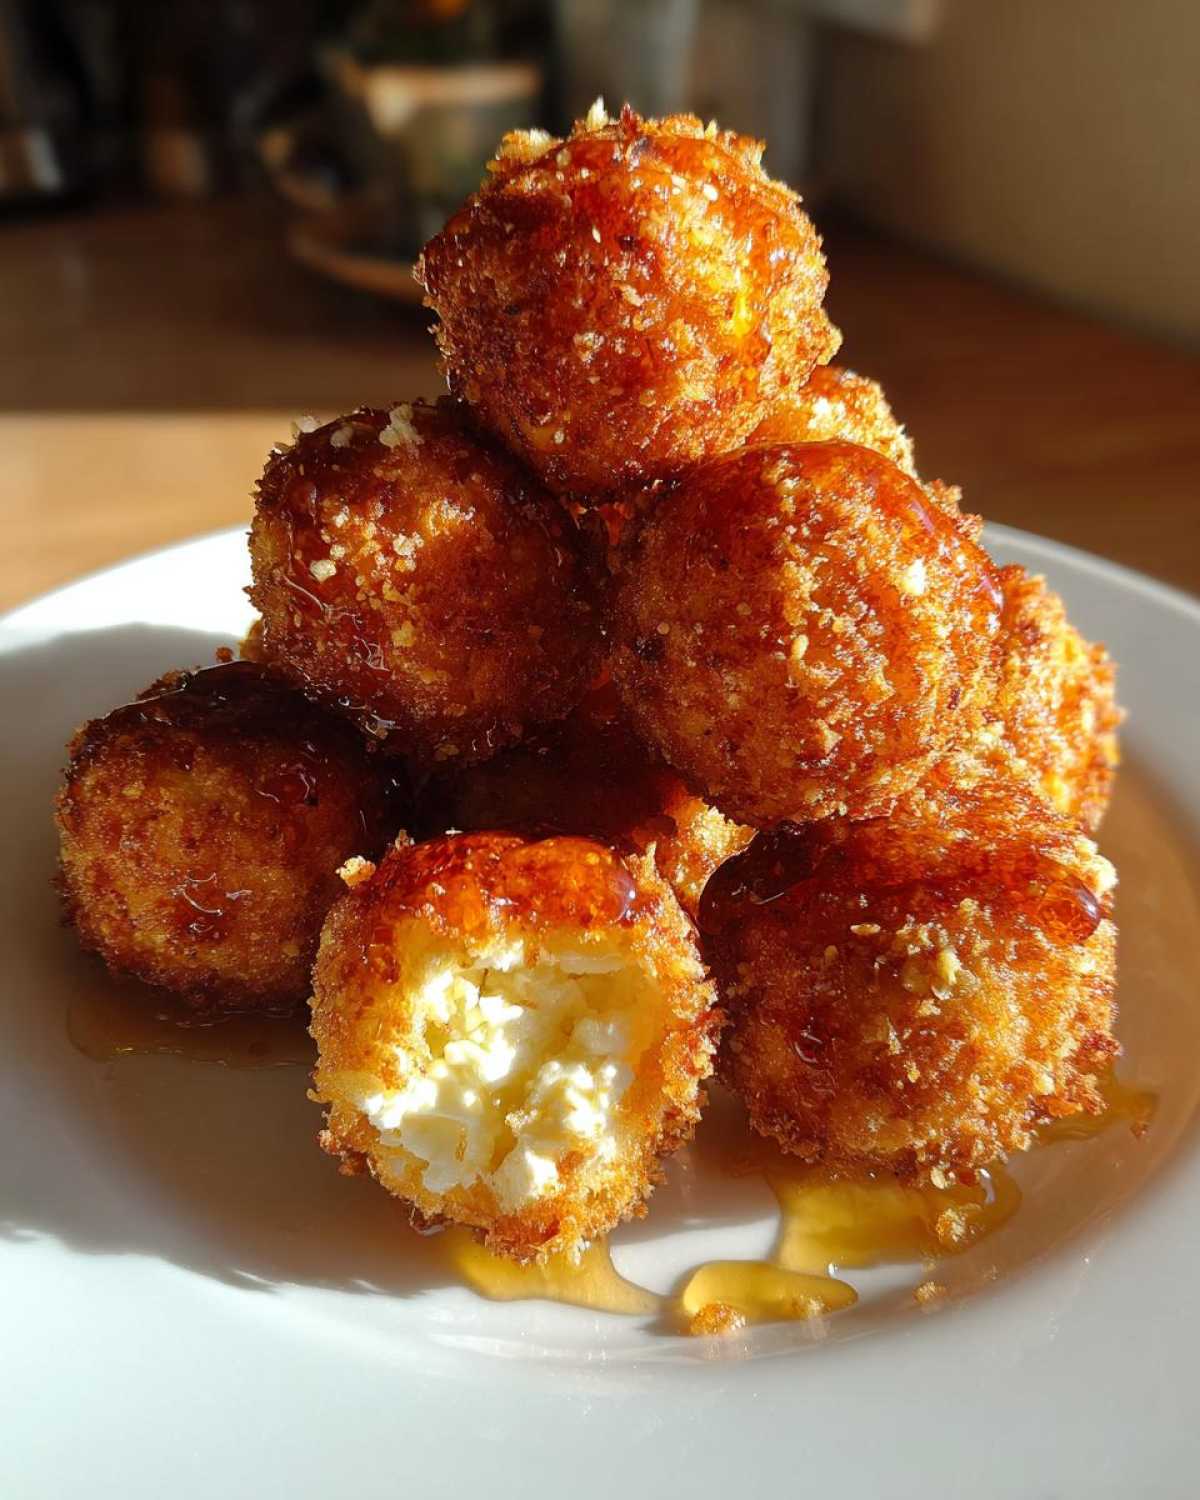
Trust me, mastering the chill factor means the difference between gooey cheese soup erupting in hot oil and these perfectly contained, golden-brown bites. Once you get that technique down, pulling off gourmet entertaining food becomes ridiculously easy. You’ll want to bookmark this recipe for every holiday and game day! For more quick inspiration, you can always check out the latest happenings on my main blog page.
Why You Will Love These Crispy Fried Goat Cheese Balls
- They feature that perfect textural contrast: shatteringly crisp Panko crust giving way to a warm, velvety interior.
- This recipe is fantastic for entertaining finger foods—they look so elegant on the platter!
- The filling is loaded with fresh chives and thyme, taking this beyond a simple cheese ball.
- They are surprisingly fast to prepare if you stick to the freezing schedule. You can find more great ideas for entertaining finger foods here.
Honestly, these appetizers are always the first thing to disappear when I bring them out. They just scream ‘special occasion’ without requiring hours of slave labor in the kitchen!
Essential Ingredients for Perfect Goat Cheese Balls
When we talk about making truly incredible **goat cheese balls**, the quality of what goes into the filling really matters. We aren’t just throwing cheese in a bowl; we are building flavor layers. You absolutely need soft goat cheese, but here’s my trick: always make sure that goat cheese is chilled when you start mixing it!
That chill factor helps it hold its shape when you roll it later. I pair it with just a little bit of softened cream cheese because that makes the inside extra luxurious and easy to scoop. For flavor, we’re using fresh herbs—don’t substitute dried here, okay? You want the bright pop of fresh chives and thyme leaves. And finally, to get that gourmet cheese appetizer texture, we need our breading station components: all-purpose flour, two large eggs beaten until they are light and frothy, and, most importantly, Panko breadcrumbs for that signature crispness.
Don’t forget the honey for drizzling later; it’s the perfect sweet counterpart to the tangy cheese!
Step-by-Step Instructions for Making Fried Goat Cheese Balls
Alright, this is where the magic happens, but listen closely—timing is everything, especially the chilling part! If you rush this, you end up with a mess, not an appetizer. We are going to break this down into three crucial phases: the base mix, the coating, and the final fry. You can read a few more detailed tips about the frying process over here on my guide to fried goat cheese appetizers.
Preparing the Creamy Goat Cheese Balls Base
First things first: get your chilled goat cheese, softened cream cheese, chives, thyme, and pepper together in a bowl. You only want to mix this until it’s *just* uniform. Over-mixing warms up the cheese, and we don’t want that! Once combined, grab a small spoon or a tiny scoop and roll them into little balls, about one inch in diameter. You should get around 18 to 20 perfect little spheres. Pop these onto a tray lined with parchment paper and stick them right into the freezer for at least 30 minutes. They need to be rock solid before we even think about breading these **goat cheese balls**.
The Crucial Freezing and Breading Process
While those are firming up, set up your inevitable breading station. You need three shallow dishes: first, your flour; second, your eggs beaten well; and third, your Panko breadcrumbs. Once your cheese balls are frozen solid, work quickly so they don’t warm up on you. Give each ball a dusting in the flour—shake off any extra! Then dip it completely into the egg wash. The final, most important step is pressing it firmly into the Panko. I mean *really* press it on so you get a thick, beautiful coat. After they are fully breaded, put them *back* into the freezer for another 15 minutes. This second chill locks that coating on tight!
Frying Your Goat Cheese Balls to Golden Perfection
Now we fry! Heat up about two inches of oil in a deep pot until it hits exactly 350°F (175°C). If you don’t have a thermometer, you’ll know it’s ready when a sprinkle of Panko sizzles vigorously but doesn’t instantly burn. Gently lower just 4 or 5 **goat cheese balls** into the oil at a time—do not overcrowd the pot, or your oil temperature will crash! They only need about 1 to 2 minutes. They go fast! As soon as they are deep golden brown, yank them out immediately with a slotted spoon and let the excess oil drip onto a rack over paper towels. Don’t wait; get them on the platter and drizzle with warm honey right away!
Variations: Baked and Air Fryer Goat Cheese Bites
Okay, so I know frying is the absolute best for that restaurant-style crunch—I mean, who doesn’t love it? But sometimes, you need something a little lighter, or maybe you just don’t want to deal with oil cleanup. Don’t worry, I always have your back when it comes to making these crispy treats fit your lifestyle!
These **goat cheese bites** transition beautifully into the oven or the air fryer. It really just comes down to adjusting the cooking environment. I’ve tested these methods repeatedly, so you don’t have to guess when they’re done. Before we jump in, if you are looking for more streamlined appliance cooking, check out my tips on air fryer cheese balls!
Baking Your Cheese Bites
If you’re going the traditional oven route, you need to crank up the heat a bit to combat the lack of hot oil submersion. Preheat your oven to a nice hot 400°F (200°C). Lay those breaded balls out on a baking sheet that you’ve sprayed generously with cooking oil—this is crucial for browning! Bake them for about 10 to 12 minutes total. You must flip them halfway through; otherwise, the bottom will stick or just stay pale. They’re done when they look golden and feel slightly firm to the touch.
Using the Air Fryer for Quick Snacks
The air fryer is my go-to when I need these fast for a last-minute crowd. It gives you that great crisp without any preheating time messing with your schedule. Set your air fryer to 375°F (190°C). You will need to spray the coated balls lightly with oil spray before you put them in the basket—don’t skip that oil, or they’ll dry out! They cook super quick in here, only about 6 to 8 minutes. Give the basket a good shake halfway through so everything browns evenly. These **air fryer cheese balls** come out fantastic!
No matter which method you choose, remember that the insides are still that lovely, tangy, herby cheese mix, so they will warm through gently while the outside gets that beautiful, crispy shell.
Tips for Success When Making Gourmet Goat Cheese Appetizers
Look, these aren’t just *any* appetizer; these are showstoppers! So, to really elevate them into true **gourmet cheese appetizers**, you need a few tricks up your sleeve. The biggest tip I can give you, besides the double-freezing thing we already talked about, is customizing that outer crust. Don’t just stick to plain Panko!
For a killer fall or holiday vibe, finely chop some pecans or dried cranberries and mix them right into your Panko before you start breading. The texture contrast is unbelievable. If you’re serving these right away, that’s perfect! But if you need them to wait 20 minutes, here’s my quick trick to keep them warm: set them on a wire rack over a baking dish filled with just an inch of *very* warm (not simmering!) water. It keeps the heat gentle underneath.
If herbs aren’t your thing, try swapping the chives and thyme for a tiny pinch of smoked paprika in the cheese mix. It gives it a totally different smoky profile that pairs wonderfully with the honey drizzle. For more creative cheese ideas, you should totally check out my recipe using caramelized figs and goat cheese—it’s amazing!
Serving Suggestions for Your Party Appetizer Recipes
We can’t just serve up these gorgeous golden orbs plain, can we? The honey drizzle is non-negotiable, but it’s simple to make! Just take your 1/4 cup of honey and gently warm it—I usually microwave it for about 10 seconds—until it’s runny and easy to drizzle. Add a tiny pinch of salt, mix it up, and get ready to pour.
These are prime **party appetizer recipes**, so presentation matters! Arrange them warm on a platter and drizzle that honey right before serving. For a nice balance of flavor, try setting out a small bowl of something zesty nearby. A bit of peppery arugula tossed lightly with lemon juice or maybe even a homemade spicy dip—like my absolute favorite spicy peach BBQ sauce that’s linked here—cuts through the richness perfectly. They are seriously the ultimate satisfying bite!
Storage and Make Ahead Tips for Goat Cheese Balls
I know, I know, these are best served moments after they come out of the oil, piping hot and crispy. But let’s be real—when you’re hosting a big event, you need **make ahead appetizers**, and these are surprisingly fantastic starters!
The absolute best part you can make ahead is the cheese filling itself. Mix that goat cheese and herb mixture completely, roll them into balls, put them on that parchment-lined tray, and freeze them until they are hard little nuggets. They hold wonderfully like that for weeks in the freezer! If you want to get even further ahead, you can actually bread them completely while they’re frozen, and then freeze them again. That second freeze is what locks everything in place perfectly.
If you’ve got the fully breaded, frozen **goat cheese balls** tucked away, you have saved yourself so much time on party day. You just pull them out of the freezer and cook them straight from frozen—no need to thaw! Thawing them first is what leads to the cheese getting soft and leaking out during the fry or bake process. Trust me, I learned that the hard way when I forgot to take a batch out early one year!
Now, if you’ve already cooked them and you have leftovers (lucky you!), the biggest enemy is moisture. Don’t store savory fried things in an airtight container; they will steam and get soggy fast. Store any leftovers in the fridge in a container lined lightly with paper towels. To reheat and bring back that glorious crispness, skip the microwave entirely! Pop them back into a hot oven (about 375°F) or your air fryer for just a few minutes until they are hot all the way through and crispy again. For more great ideas on planning ahead for events, hop over to my guide on make ahead campfire breakfast burritos—some of those storage tricks translate perfectly here!
Frequently Asked Questions About Creamy Goat Cheese Snacks
You’ve learned the frying magic, but I know you might have a few lingering questions about making these the absolute best, especially when you’re aiming for top-tier **creamy goat cheese snacks** for your guests. It’s totally normal! I’ve gathered the questions I get asked most often about whipping up these little bites. If you’re looking for more general info on cheese balls, my guide on easy cheese ball recipes covers a ton of ground!
Can I substitute the goat cheese in these goat cheese balls?
Oh, you totally can experiment, but you have to be mindful of the intended texture! Goat cheese is tangy and softens beautifully, which is what we want. If you absolutely must substitute, use a very soft, mild cheese like plain cream cheese or Boursin cheese. The key is that it needs to be soft enough to mix well but firm enough straight from the fridge to hold its spherical shape. If you use mozzarella or cheddar right out of the block, it’s too hard and won’t give you that creamy melt we are looking for in these **goat cheese balls**.
What is the best oil temperature for frying?
This is the keeper question! The precise temperature is 350°F (175°C). Why does that matter so much? Think of it as a race! You need the oil to be screaming hot so that the Panko crust immediately crisps up and seals itself before the heat has time to fully penetrate the frozen center and melt the cheese completely. If your oil is too cool—say, under 325°F—the coating soaks up too much oil and gets greasy, and the cheese inside will ooze out before the crust even browns. Keep that thermometer handy!
Estimated Nutritional Data for Fried Goat Cheese Balls
Now, I know a lot of you are focused on making things look fancy for your guests, but we should also talk fuel! Because we are frying these beauties, the numbers are going to be a bit higher than if you baked them, but wow, are they worth every bite for a party appetizer.
Keep in mind this breakdown is just an estimate based on the core ingredients for three balls per serving. If you go heavy on the honey drizzle, or if you decide to try one of the air fryer cheese balls methods I mentioned earlier, your final stats might shift a little bit! But roughly speaking, here’s the deal:
- Serving Size: 3 balls
- Calories: 280
- Fat: 22g (with 13g of that being saturated fat—remember real butter and oil add up!)
- Carbohydrates: 14g (most of this comes from the Panko coating and that sweet honey)
- Protein: 7g
- Sugar: 5g
- Sodium: 250mg
I always tell people, when you’re making **gourmet cheese appetizers** for a special gathering, you focus on the wow factor, and these deliver! Enjoy them while they’re hot and crispy!
Share Your Experience Making These Appetizers
Okay, friend, that’s the entire method for creating the crispiest, tangiest **goat cheese balls** you’ll ever need in your entertaining arsenal! Now that you have the secrets to the freezing, the triple-coating, and the perfect flash-fry, I absolutely need to know how they turned out for you.
Did you try mixing in those pecans I mentioned, or did you go for a festive cranberry crunch? Maybe you decided to serve them with a spicy drizzle instead of the honey? Whatever twist you put on this classic, please tell me about it in the comments below! I always love seeing how you adapt these recipes for your own family gatherings or game days.
If you followed the steps and these were a total hit, please smash that five-star rating button right above this section! It truly helps other cooks find this foolproof recipe. And if you ended up taking some amazing pictures of your finished appetizer platter dotted with them, I’d love to see it! You can always send me a note or a snap through my contact page. Happy cooking, and enjoy serving up these amazing little flavor bombs!
PrintCrispy Fried Goat Cheese Balls with Honey Drizzle

Prepare impressive, crispy fried goat cheese balls with a creamy herb center, served with a simple honey drizzle. This recipe is suitable for parties and gatherings.
- Prep Time: 25 min
- Cook Time: 15 min
- Total Time: 40 min
- Yield: 18 servings
- Category: Appetizer
- Method: Frying
- Cuisine: American
- Diet: Vegetarian
Ingredients
- 8 oz soft goat cheese, chilled
- 1/4 cup cream cheese, softened
- 2 tablespoons fresh chives, minced
- 1 teaspoon fresh thyme leaves
- 1/2 teaspoon black pepper
- 1 cup all-purpose flour
- 2 large eggs, beaten
- 2 cups panko breadcrumbs
- Vegetable oil, for frying
- 1/4 cup honey
- Pinch of salt
Instructions
- In a medium bowl, combine the chilled goat cheese, softened cream cheese, chives, thyme, and pepper. Mix until just combined and uniform.
- Roll the cheese mixture into small balls, about 1 inch in diameter. You should get about 16 to 20 balls. Place the balls on a parchment-lined tray and freeze for at least 30 minutes until very firm.
- Set up a standard breading station: place flour in one shallow dish, beaten eggs in a second, and panko breadcrumbs in a third.
- Working quickly, roll each frozen cheese ball first in the flour, shaking off excess. Dip into the egg wash, allowing excess to drip off. Finally, press firmly into the panko breadcrumbs to coat completely. Return the coated balls to the freezer for another 15 minutes.
- Heat about 2 inches of vegetable oil in a deep pot or Dutch oven to 350°F (175°C).
- Carefully lower 4 to 5 cheese balls into the hot oil. Fry for 1 to 2 minutes, turning occasionally, until golden brown and crispy. Do not overcrowd the pot.
- Remove the fried balls with a slotted spoon and place them on a wire rack set over paper towels to drain excess oil.
- Gently warm the honey with a pinch of salt in a small saucepan or microwave until slightly runny.
- Arrange the warm goat cheese balls on a serving platter and drizzle generously with the warm honey before serving immediately.
Notes
- For a baked version, preheat your oven to 400°F (200°C). Place coated balls on a baking sheet sprayed with cooking oil. Bake for 10 to 12 minutes, flipping halfway, until golden.
- For an air fryer method, preheat the air fryer to 375°F (190°C). Spray the coated balls lightly with cooking oil. Air fry for 6 to 8 minutes, shaking the basket halfway through.
- You can substitute pecans or dried cranberries mixed into the panko coating for added texture and flavor.
Nutrition
- Serving Size: 3 balls
- Calories: 280
- Sugar: 5
- Sodium: 250
- Fat: 22
- Saturated Fat: 13
- Unsaturated Fat: 9
- Trans Fat: 0.1
- Carbohydrates: 14
- Fiber: 1
- Protein: 7
- Cholesterol: 45