

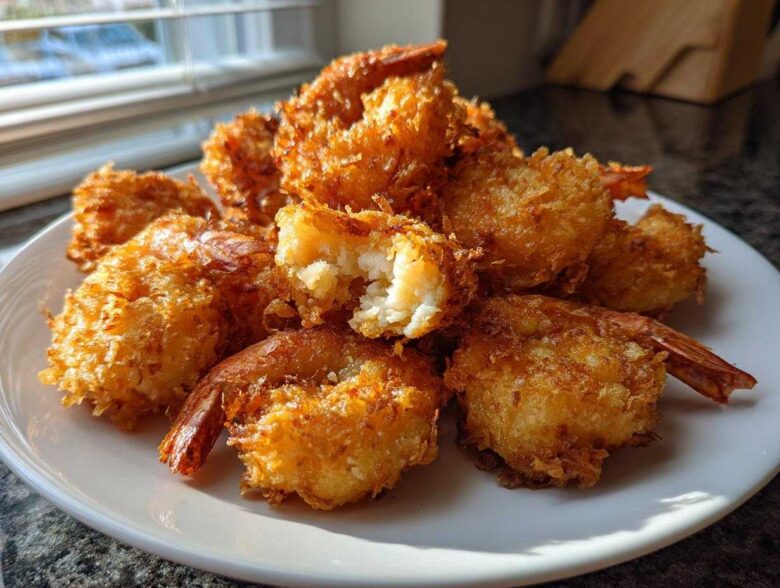
Oh, you want crunch? Not just a little crunch, but that loud, satisfying shatter when you bite into perfectly seasoned, golden-brown seafood? I hear you! For years, I chased that elusive, perfect texture, wasting countless pounds of shrimp trying to nail that ‘seafood shack style shrimp’ taste right here in my own kitchen. Well, friends, after probably a hundred batches, I’ve cracked the code. This isn’t just any recipe; this is my ultimate guide to making the best fried shrimp you’ve ever tasted, deep in that comforting Southern fried shrimp tradition. Trust me, when you follow these steps, you’ll never look back. This fried shrimp recipe brings the boardwalk home, and it is seriously addictive!
If you’re looking for other easy summer seafood ideas, make sure you check out how I wrap up my shrimp boils in foil packets—it’s zero-mess cooking!
Why This Is the Best Fried Shrimp Recipe for Maximum Crispiness
The thing that separates good fried shrimp from legendary fried shrimp is the texture contrast. We are aiming for that beautiful shattering crust that somehow stays impossibly light, protecting the sweet, juicy fried shrimp inside. That golden shell doesn’t happen by accident! It all comes down to that buttermilk soak. That slight acidity is what gives the seasoned flour something amazing to cling to, creating that thick, delicious coating we want.
I remember one disastrous Fourth of July party where I skipped the soak because I was rushing. The coating looked fine going in, but it slid right off in the oil! What a mess! Ever since then, I never skip that step. It’s the non-negotiable secret to truly crispy fried shrimp.
Achieving Non-Greasy Fried Shrimp Every Time
A big fear for everyone making a seafood fry recipe is ending up with soggy, oil-logged food. Gross! The trick to getting non-greasy fried shrimp is purely temperature management. If your oil is too cold, the coating soaks up fat before it sets properly. You absolutely have to keep that oil steady right around 360°F. Seriously, use a thermometer, or you’ll regret it later. That quick, hot blast sets the crust instantly!
Ingredients for Perfect Southern Fried Shrimp
Okay, now that we know the secrets to crispiness, let’s talk about what you need to pull this off. Remember, for the best coating for fried shrimp, you need two separate flavor stations: the wet soak and the dry dredge. Don’t skimp on the quality here, especially the size of your shrimp! We’re using pound of large shrimp for this batch, but you can adjust as needed. I lay out exactly what you need below. Having everything measured and ready to go before you heat the oil is crucial for an easy shrimp fry!
For the Buttermilk Marinade
This is where the marriage of moisture and flavor begins. You’ll need one cup of good, thick buttermilk. It acts like a magnet for our next layer! We mix in a teaspoon of salt, half a teaspoon of black pepper, and just a whisper of cayenne pepper to give it that gentle Southern warmth. Whisk that up, dump in your shrimp, and let them chill out for a bit. The quality of your spices really shines through here, so use the paprika and powders you love!
For the Seasoned Flour Coating (The Best Coating for Fried Shrimp)
This dry mix is what gives us that deep, unmistakable crust that screams southern fried shrimp. You’ll need two cups of plain old all-purpose flour—no need for fancy stuff here! Then we load it up: a tablespoon of paprika for that gorgeous color, a teaspoon of garlic powder, and half a teaspoon of onion powder. Mix this dry blend really well. The paprika is key; it helps achieve that perfect golden fried shrimp color when it hits the hot oil!
Step-by-Step Instructions for Making Crispy Fried Shrimp
Alright, this is where the magic happens, and believe me, flow is everything for this easy shrimp fry. You don’t want to get caught holding a wet shrimp when the oil is yelling hot! Follow these steps exactly, and you’ll be serving up this incredible homemade fried shrimp in no time.
Preparing the Shrimp and Buttermilk Soak
First things first: water is the enemy of crispiness! After you rinse your shrimp, you absolutely must pat them bone-dry with paper towels. Don’t skimp here; moisture equals steam, and steam fights the crust! Once dry, toss them into your bowl with the spiced buttermilk mixture. Stir them around so every piece gets coated. Now, tell them to go relax in the fridge for at least 30 minutes. An hour is even better if you have the time. This soak tenderizes them beautifully and gets them ready to hold onto all that glorious flour.
Mastering the Dredging Technique for Golden Fried Shrimp
While the shrimp are marinating, mix up your seasoned flour coating in a wide, shallow dish. When the timer goes off, you need a system! Pull a piece out of the buttermilk, letting the very worst of the drips fall back into the bowl. Then, you need to really work that flour in. Press it onto the shrimp! If you want that next-level crunch, remember the double-dip trick: quick dip back into the buttermilk, followed by another heavy coat of flour. Before sending them to the oil, shake off any massive clumps of dry flour—we want a light but sturdy crust, not sticky dough balls.
Frying Technique for Perfect Fried Shrimp
Time check! Is your oil at or hovering right around 360°F? If not, wait! You need about two inches of vegetable oil in a heavy pot. When that temperature is locked in, you work fast but smart. Drop the coated shrimp in carefully, making sure they aren’t touching. Do not overcrowd! Overcrowding drops the oil temp too fast, and boom—greasy food. They only need about 2 to 3 minutes total. You are looking for that deep, rich golden brown color all over. Once they look perfect, use a slotted spoon to pull them out and put them immediately on a wire rack, not paper towels! This lets air circulate beneath them, keeping the bottoms crunchy. You might want to check out my tips for making spicy Cajun dishes while you wait for the oil to reheat between batches!
Tips for Success: How to Make Crispy Shrimp
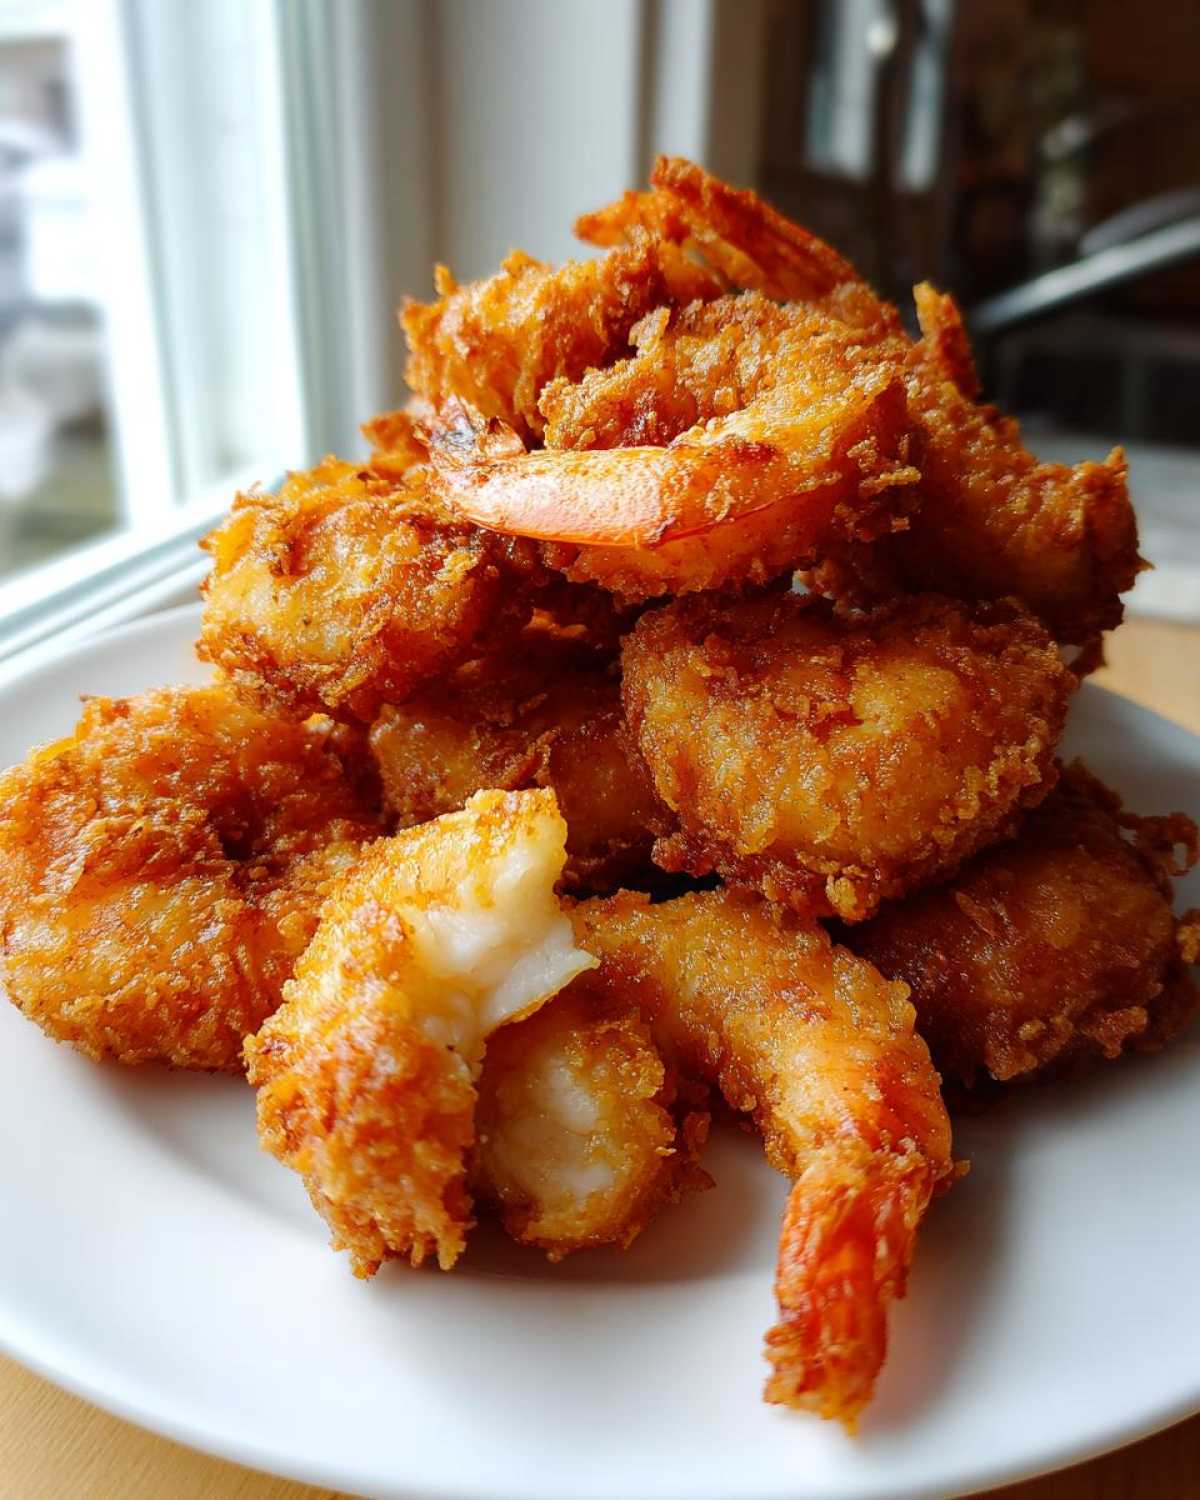
We’ve covered the main steps, but if you want to secure that championship-level crunch every single time you attempt how to make crispy shrimp, I have a couple of final nuggets of wisdom for you. First up, forget using a flimsy saucepan for frying! You need a heavy-bottomed pot—cast iron is my absolute favorite—because it holds its heat so much better. That heat stability is crucial when you drop in cold shrimp.
Second, please listen to me on one thing: draining on paper towels is a trap! As soon as they hit that limp paper, the steam gets trapped underneath, and your beautiful crust starts to steam itself soggy. Always, always use a wire cooling rack set over a baking sheet. This lets the air flow underneath and allows any excess oil to drip away cleanly. It’s the secret move that separates the pros from the amateurs when mastering any seafood fry recipe.
If you’re trying to keep the crunch without the deep fryer, you might want to check out my take on that amazing air fryer bloomin’ onion method; it uses similar principles for getting maximum crispiness without submerging everything in oil!
Serving Suggestions for Your Homemade Fried Shrimp
Whew! They look gorgeous on that cooling rack, don’t they? But what do you do with this perfect batch of fried shrimp once they’re ready? You have options! You can pile them high on a platter with some lemon wedges for a show-stopping appetizer—perfect for parties. Or, pile them next to creamy coleslaw and hushpuppies for a proper, satisfying quick shrimp dinner, Southern style!
No matter how you serve them, the sauce is almost as important as the shrimp itself. People get very opinionated about their fried shrimp dipping sauces, so I always make at least two options available!
Classic Fried Shrimp Dipping Sauces
If I am making a big platter, you absolutely need a tangy tartar sauce ready! The acidity cuts right through the richness of the fry. A classic cocktail sauce, maybe spiced up a bit with extra horseradish, is essential too. If you’re feeling fancy or just want something creamy and savory, you might want to check out my recipe for a killer crab rangoon dip—it’s amazing for dipping almost anything savory, not just shrimp!
Storing and Reheating Your Fried Shrimp
So, what if you actually have leftovers? (It happens, but I seriously doubt it with this recipe!). You want to store them in an airtight container, but here’s the crucial part: don’t put them in the fridge until they’ve cooled down completely, or condensation will ruin that lovely crust. I learned that the hard way!
When you go to reheat them, forget the microwave—it just brings back sogginess. For the best results that bring back that golden fried shrimp crunch, you need dry heat. Pop them on a wire rack in a 400°F oven for about 8 minutes, or if you have one, an air fryer on high for 4 minutes works like magic. If you’re looking for a lighter side dish to go with them next time, you should totally try my garlic parmesan zucchini noodles!
Frequently Asked Questions About Fried Shrimp
I know sometimes things still aren’t crystal clear, or maybe you’re wondering if you can tweak this recipe for different situations. That’s normal! Cooking is all about experimentation once you have a solid foundation. I’ve collected some of the questions I get asked the most about making this seafood fry recipe perfect every time.
Can I make this fried shrimp recipe in an air fryer?
Oh, the air fryer craze! Yes, you totally can adapt this! You’ll still want that full buttermilk soak because that part is essential for flavor and helping the coating stick. But here’s the trick: after you dredge your shrimp, give them a quick, light spray with oil—don’t drown them, just a light mist! Then you set your air fryer to about 380°F (195°C) and cook them in a single layer for about 8 to 10 minutes total, flipping halfway. They won’t be quite as deeply browned as deep-fried, but they come out wonderfully crunchy!
What is the best type of shrimp size for this fry recipe?
For this style of frying, I always recommend using large shrimp, about 21/25 count per pound, or even jumbo size if you can find them! The reason size matters so much in a quick fry like this is simple: thickness equals protection. If you use tiny salad shrimp, they cook through in about 60 seconds, and they burn before the coating even gets golden. Using large shrimp gives you that sweet spot—the coating has time to become deeply golden fried shrimp while the inside stays perfectly tender and juicy.
If you’re looking for other ways to make healthier swaps in the kitchen, you might want to see how I use cauliflower instead of rice in my cauliflower fried rice!
Estimated Nutritional Data for This Fried Shrimp
I’ve tried to keep this fried shrimp recipe as lean as possible while still delivering that amazing seafood shack flavor, but you know the drill: frying changes the game! The values below are estimates based on the ingredients list I gave you, assuming you are using standard vegetable oil for the fry section. Please keep in mind that actual values can jump around a little bit depending on the exact brand of buttermilk you use or how much oil your coating soaks up during the process.
When I look at these numbers, I’m honestly happy for a truly decadent, quick shrimp dinner! The protein count is fantastic, and it’s worth the splurge for a satisfying meal now and then.
- Calories: 350 per serving
- Protein: 22g
- Fat: 18g (Remember, much of this is from the frying oil!)
- Carbohydrates: 25g
As always, these numbers are just guides! If you skip the heavy dredge, switch to an air fryer method, or serve it with a lighter sauce than the traditional ones, your final count will look different. But for that classic, crispy experience, this is what you’re looking at for one serving size!
Share Your Perfect Fried Shrimp Results
Now that you’ve mastered the buttermilk soak and the hot fry—and hopefully achieved that loud, crispy crunch—I really want to know how it went for you! Don’t be shy! Did you try the double-dip trick? What dipping sauce ended up being your favorite pairing for this homemade fried shrimp?
Please take a moment to drop a rating right below this post. Star ratings help so many other folks on their journey to making the best fried shrimp, and I love reading your feedback on how you tackled this easy shrimp fry!
If you snapped a picture of your beautiful golden fried shrimp, I’d adore seeing it! Tag me on social media—it always makes my day when I see my recipes turning into someone else’s favorite family meal. You can find me over on my main blog page for tons more inspiration!
PrintCrispy Southern Fried Shrimp
Follow this recipe to make perfectly crispy, golden-brown fried shrimp with juicy insides using a buttermilk soak and seasoned flour coating.
- Prep Time: 15 min
- Cook Time: 10 min
- Total Time: 55 min
- Yield: 4 servings
- Category: Main Dish
- Method: Deep Frying
- Cuisine: American
- Diet: Low Calorie
Ingredients
- 1 pound large shrimp, peeled and deveined (tail on or off)
- 1 cup buttermilk
- 1 teaspoon salt
- 1/2 teaspoon black pepper
- 1/4 teaspoon cayenne pepper
- 2 cups all-purpose flour
- 1 tablespoon paprika
- 1 teaspoon garlic powder
- 1/2 teaspoon onion powder
- Vegetable oil, for frying
Instructions
- Rinse the shrimp and pat them very dry with paper towels. Place the dried shrimp in a bowl.
- Pour the buttermilk over the shrimp. Add the salt, pepper, and cayenne pepper to the buttermilk and stir to combine. Let the shrimp soak for at least 30 minutes in the refrigerator.
- In a shallow dish, whisk together the flour, paprika, garlic powder, and onion powder. This is your seasoned flour coating.
- Heat about 2 inches of vegetable oil in a heavy-bottomed pot or deep fryer to 360°F (182°C).
- Working in small batches, remove the shrimp from the buttermilk, allowing excess to drip off. Dredge each shrimp thoroughly in the seasoned flour, pressing the flour onto the shrimp to create a thick coating.
- Carefully place the coated shrimp into the hot oil, ensuring you do not overcrowd the pot.
- Fry for 2 to 3 minutes, turning once, until the coating is deep golden brown and crisp.
- Remove the shrimp with a slotted spoon and place them on a wire rack set over a baking sheet to drain excess oil.
- Serve the crispy fried shrimp immediately with your preferred dipping sauce.
Notes
- For extra crispiness, you can double-dip the shrimp: coat in flour, dip quickly back into the buttermilk, and then coat again in the flour mixture.
- Maintain the oil temperature between 350°F and 365°F for the best results and to prevent greasy shrimp.
- Serve with classic tartar sauce or a spicy cocktail sauce for dipping.
Nutrition
- Serving Size: 1/4 of recipe
- Calories: 350
- Sugar: 2
- Sodium: 650
- Fat: 18
- Saturated Fat: 4
- Unsaturated Fat: 14
- Trans Fat: 0
- Carbohydrates: 25
- Fiber: 1
- Protein: 22
- Cholesterol: 180