

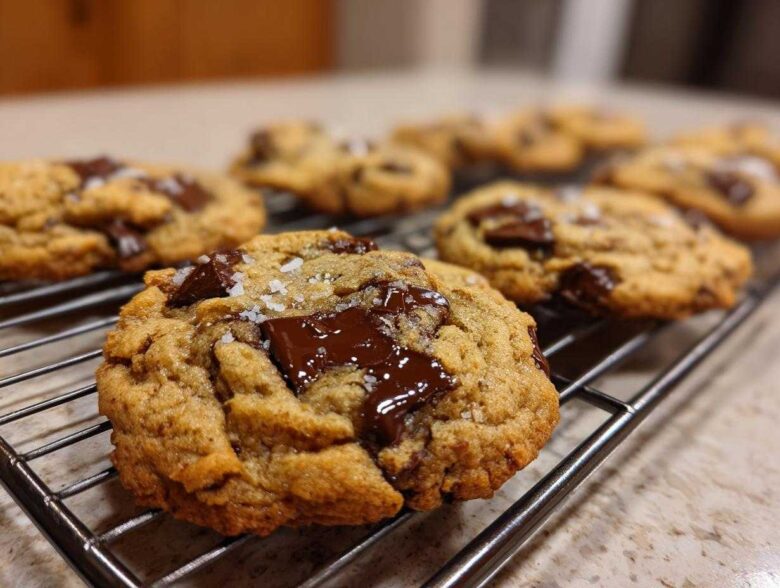
Listen, I love a classic chocolate chip cookie like anyone else, but sometimes you just need to take things up a serious notch, right? I’ve made hundreds of batches over the years, and I finally cracked the code for cookies that taste truly gourmet without being fussy. The absolute game-changer? Browning the butter first. Trust me on this one; the first time I pulled a batch of these brown butter chocolate chip cookies out of the oven, the smell nearly stopped me in my tracks! That deep, nutty, toffee scent instantly told me I’d found the ultimate standard. They’re chewy, deeply flavorful, and frankly, they spoil you for any other version. My standard batch around here has officially been retired!
Why These Brown Butter Chocolate Chip Cookies Are the Best
When you’re reaching for that bag of flour and sugar, you want to know you’re making something truly special. These aren’t just any cookies; they are **gourmet chocolate chip cookies** that deliver on every promise. The flavor payoff from browning the butter is just unbelievable—it pulls out this rich, toasty background note that you just can’t fake.
- They develop an unmatched **deep flavor cookie** profile derived from the toasted milk solids in the butter.
- We get those famously crisp, shatteringly delicate edges that hug a ridiculously **soft and chewy cookie** center.
- The dough sets up beautifully because the browned butter is less liquid than regular melted butter, meaning less spreading!
- They genuinely taste like they came straight from a high-end bakery, but you made them in your own kitchen.
The Secret to Nutty Butter Cookies
It all comes down to transformation, really! When you heat butter until those little milk solids start to toast, you are essentially creating instant caramel and toffee notes right in your bowl. That smell while it cooks? That’s pure magic. It deepens the sweetness of the sugars we use, giving you those incredible **nutty butter cookies** without adding any actual nuts. It’s a classic cookie with a brilliant twist!
Achieving the Perfect Soft and Chewy Cookies Texture
Texture is everything, isn’t it? Nobody wants dry cardboard. We nail that perfect contrast by using a higher ratio of brown sugar to white sugar. The brown sugar keeps things moist and favors chewiness. Then, you absolutely must chill the dough. Chilling lets the flour fully hydrate and lets those wonderful flavors—especially the brown butter—really saturate the dough. This stops the **brown butter chocolate chip cookies** from flattening out too much in the oven, ensuring you get that soft, gooey middle everyone fights over.
Gathering Ingredients for Perfect Brown Butter Chocolate Chip Cookies
Okay, time to get organized! Since the brown butter process is so important, we need our other ingredients ready to go as soon as that butter cools down a little. Precision matters here, but don’t worry, the list isn’t scary! Just make sure you grab everything before you start melting that butter.
- 1 cup (2 sticks) unsalted butter (which we will brown!)
- 1 cup packed light brown sugar
- 1/2 cup granulated sugar
- 2 large eggs, room temperature
- 1 tablespoon vanilla extract
- 2 1/4 cups all-purpose flour
- 1 teaspoon baking soda
- 1/2 teaspoon salt
- 1 1/2 cups semi-sweet chocolate chips or chunks
- 1/2 cup milk chocolate chips or chunks
- Flaky sea salt, for topping (optional)
Ingredient Notes and Substitutions
A few quick pointers to guarantee success in your **brown butter chocolate chip cookies**. First, those eggs? They absolutely need to be room temperature. Cold eggs can cause the beautiful creamed mixture to seize up when you add them, which messes with the air pockets we need. Second, please don’t skimp on the chocolate! I love using a mix of semi-sweet and milk chocolate chunks because when they melt, they get extra gooey. The texture is just superior to just using standard chips. Oh, and that flaky sea salt for sprinkling on top? It really bumps up the flavor complexity, making these taste like true treats. Don’t skip that little bit of sparkle if you can!
Step-by-Step Instructions for Brown Butter Chocolate Chip Cookies
Okay, this is where the real fun begins! If you’ve never browned butter before, don’t stress! It’s shockingly easy, but you do need to pay attention because you can go from perfection to burnt in about ten seconds flat. We are turning boring old butter into liquid gold that gives these cookies their incredible depth.
Mastering the Art of Browning Butter
First, just pop your butter into a light-colored pan—this helps you see the color change. Medium heat is perfect. You’ll watch it melt, and then it will start to foam up like crazy. That’s the water content evaporating! Once that foam dies down, you’ll start hearing tiny crackling sounds. Keep swirling the pan gently. You need to look for little brown specks forming at the bottom, and the whole kitchen should suddenly smell wonderfully nutty, kind of like toffee. When you hit that point, pull the pan off the heat instantly! Pour that gorgeous stuff right into your mixing bowl, making sure you scrape every browned bit in there—that’s the flavor! Now, you MUST let it cool for about 15 minutes. If you add sugar to super-hot butter, you’ll end up with melted butter cookies, and that’s not what we want for these **brown butter chocolate chip cookies**.
Mixing the Dough and Essential Chilling Time
Once the butter is just warm—not hot!—throw in both sugars and whisk like crazy until it gets smooth and glossy. Then, whisk in your room temperature eggs one at a time, then the vanilla. In a separate bowl, lightly toss your flour, baking soda, and salt together. Now, add your dry ingredients to the wet mixture. Please, don’t turn that mixer on high speed here! Mix it on low or just use a wooden spoon until you *almost* don’t see any more dry streaks. Overmixing the flour develops gluten, and we want tender, not tough, cookies! Fold in all those wonderful chocolate chips and chunks. Now comes the hardest part, but listen to me: you have to chill this dough! Cover it and stick it in the fridge for at least two hours, but honestly, overnight is my secret weapon. You can check out my recipe for edible brownie batter dip if you can’t wait, but for these cookies, chilling deepens the flavor profile immensely!
Baking and Finishing Your Bakery Style Cookies at Home
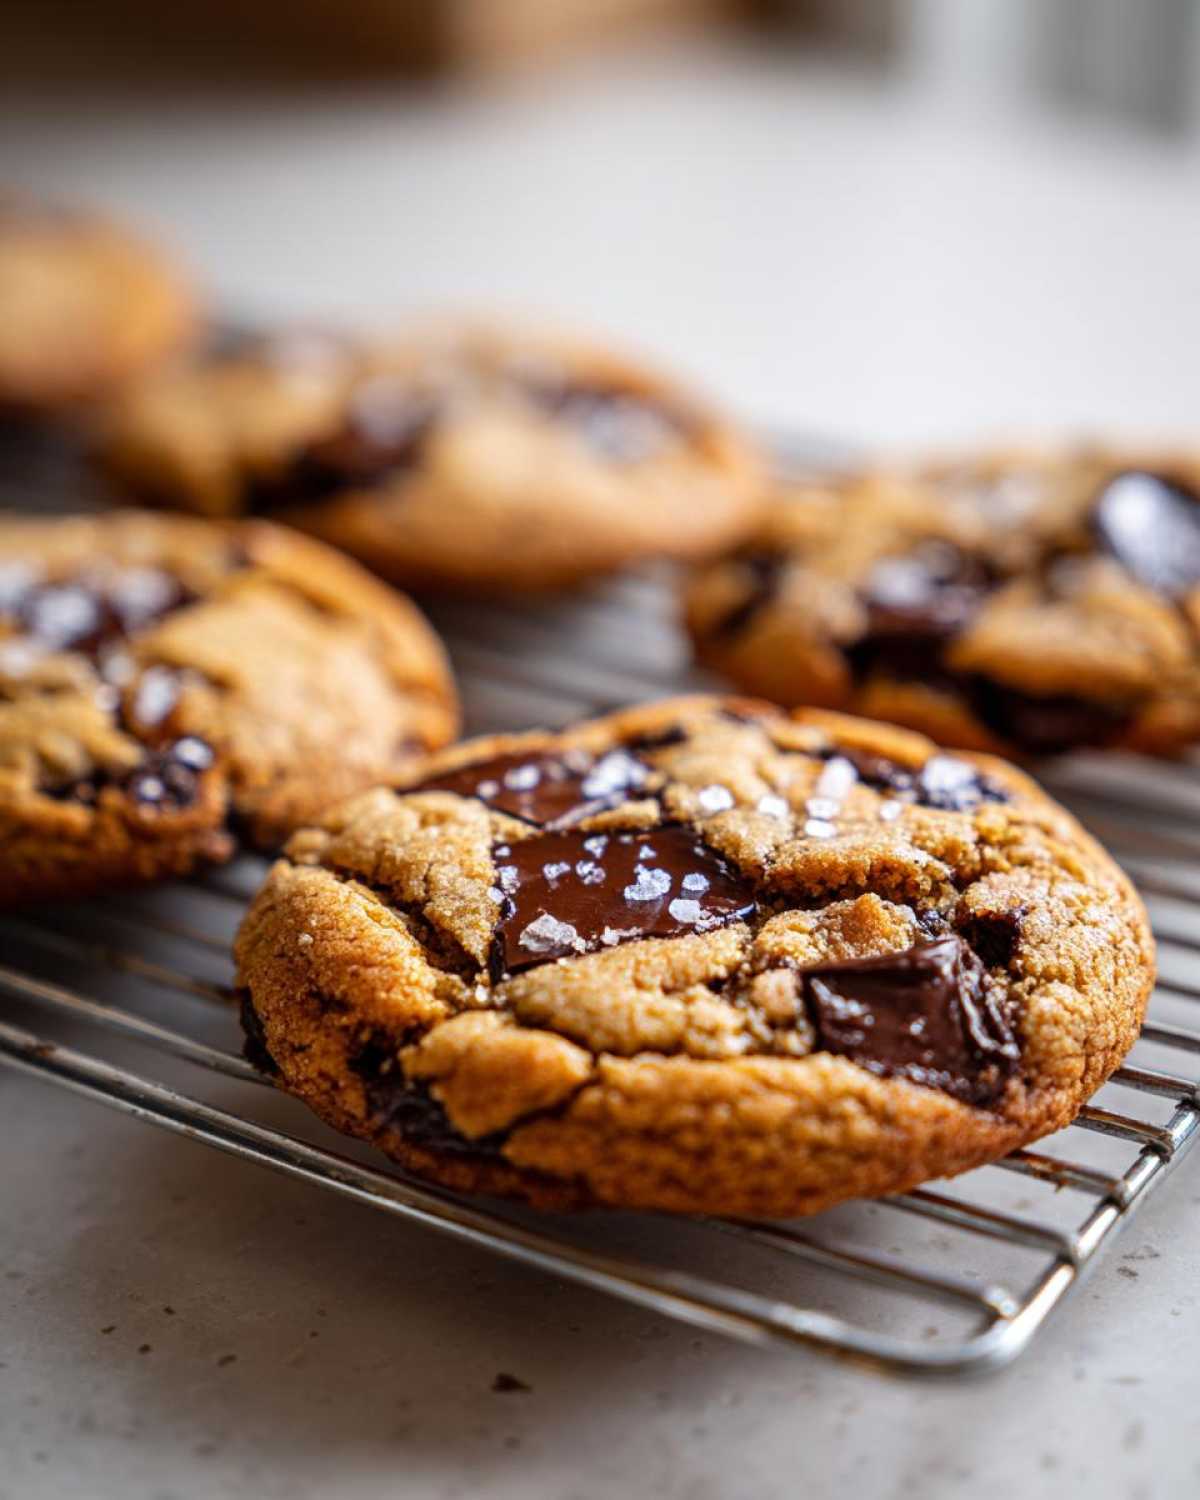
When you’re ready to bake, preheat your oven to 375 degrees Fahrenheit. Get those baking sheets lined with parchment paper—always parchment! Scoop tablespoon-sized balls of dough onto the sheets, leaving plenty of room between them, maybe two inches apart. We are aiming for **bakery style cookies at home**, so we need space to spread! Bake them for 10 to 13 minutes. The key here is to pull them out when the edges are golden brown but the very center still looks a tiny bit soft and underdone. They are still cooking on the pan! As soon as they come out, if you’re feeling fancy, immediately sprinkle a little flaky sea salt over the top. Let them sit on that hot pan for a solid five minutes to set up before you try moving them to a cooling rack. Watch them firm up into the most gorgeous, **caramel flavored cookies**!
Tips for the Ultimate Chewy Brown Butter Chocolate Chip Cookies
Even with the best recipe, sometimes you need that little nudge to go from great to absolutely legendary status. These final tips are how I ensure my **brown butter chocolate chip cookies** are a guaranteed hit every single time. Think of these as my little secrets to making this a truly **no-fail cookie recipe**!
First up: the oven temperature. Oven thermometers are such a worthy investment, trust me. I learned this the hard way. One batch I made seemed to spread way too much, and when I checked my oven temperature, it was running almost 25 degrees cooler than it should have been! That slight temperature difference meant the cookies didn’t set fast enough in the center. Always check that your oven is truly ready before you drop in your dough scoops.
And speaking of chilling—I cannot stress this enough. I once got impatient because I wanted cookies immediately after mixing, so I only chilled the dough for 30 minutes. Disaster! They spread into thin, oily puddles. They still tasted okay because of that gorgeous brown butter, but the texture was totally flat. When I returned to chilling the dough overnight, the difference was night and day! The overnight chill lets the flour absorb all that nutty, complex moisture, which prevents spreading and maximizes that desirable chewiness. For the best results, sleep on it!
If you’re looking for an even easier way to deal with big batches, especially on a rainy day, sometimes I just dump the whole dough mass into a greased 9×13 inch pan and bake it that way! It turns into a giant skillet cookie that’s easier to scoop when warm. Either way, using quality chocolate that holds its shape during baking is key to getting those those beautiful pockets of melted chocolate in every bite.
Storage and Reheating Instructions for Deep Flavor Cookies
The great thing about these **brown butter chocolate chip cookies** is that, unlike some delicate drop cookies, they actually taste even better the next day! That’s because the flavors, especially that toasted butter goodness, have time to settle in and meld. If you have leftovers—which I rarely do, ha!—storing them is super easy.
For baked cookies, just pop them into an airtight container at room temperature. Seriously, don’t bother with the fridge! The fridge tends to suck the moisture right out of cookies, and we worked so hard to make them perfectly chewy! They should stay fantastic for a good four or five days stored this way.
Warming Up Your Cookies for That Fresh-Baked Feel
If they’ve been sitting out for a couple of days and you want that glorious, just-out-of-the-oven experience again, you only need thirty seconds. A quick 15 to 20 seconds in the microwave will soften the chocolate back up nicely and give you that incredible melt. If you’re warming up a bigger batch, I prefer to put them on a baking sheet for about five minutes at 300 degrees Fahrenheit until the edges are just barely crisp again. That gentle heat revitalizes the entire cookie.
Keeping the Brown Butter Chocolate Chip Cookie Dough Fresh
Now, if you managed to resist eating all the dough—kudos to you! This dough freezes like a dream, which is excellent for instant gratification later on. You can scoop the dough balls right onto a chilled baking sheet, freeze them solid (this only takes an hour or so), and then transfer them to a heavy-duty freezer bag. They should last beautifully for up to three months. When you’re ready to bake from frozen, just place the frozen balls on your prepared sheet and add about 3 to 5 minutes to the baking time. They hold their shape so well because of that chilling process we did first!
Frequently Asked Questions About Brown Butter Chocolate Chip Cookies
I totally get it; when you’re trying a big flavor upgrade like using brown butter, you’re going to have questions! It’s totally normal, and I want to make sure every batch of your homemade cookie recipes is perfect. Here are the things people ask me most often about achieving these incredible **brown butter chocolate chip cookies**.
Can I use salted butter in this brown butter recipe?
That’s a great question, especially since we top these with flaky sea salt! When you brown butter, you have no way of knowing exactly how much salt transfers along with those dark milk solids. Since this recipe calls for a specific amount of added salt for the leavening reaction, I really, *really* recommend sticking to unsalted butter for the initial browning step. If you absolutely only have salted butter, just skip the 1/2 teaspoon of salt we add in with the flour until you taste the final cookie. If you still think they need a little kick, you can add a tiny pinch!
How long do I really need to chill the dough for the best brown butter chocolate chip cookies?
If you are desperate, 30 minutes in the fridge will stop them from turning into pancakes, but that’s truly the bare minimum, and you sacrifice a lot of flavor development. For the absolute best results—for that deep, rich flavor and that amazing chewy texture—you should chill it for at least 12 hours, preferably overnight. The longer it chills, the more those **caramel flavored cookies** notes deepen, and the less they spread into thin discs. Plan ahead, and you’ll have the **best chocolate chip cookies** you’ve ever made!
What if my brown butter solidified too fast?
Oh, that happens if you let it cool down too much before you add your sugars! Don’t worry, it doesn’t ruin anything. Just place the bowl with the solidified brown butter and sugars back into a warm oven (like 200 degrees) for just a few minutes, or use a hairdryer briefly on a low setting, just until it softens up enough to whisk until smooth again. You just need it warm enough to incorporate the sugars properly before adding the eggs. It’s an easy fix for those **toasted butter cookies**!
Estimated Nutritional Data for Brown Butter Chocolate Chip Cookies
Now, I know some of you are focused purely on the amazing taste—and you absolutely should be!—but sometimes we like to peek behind the curtain at the numbers, too. Since these are made with real butter and plenty of deliciousness, they are certainly a treat!
Keep in mind that these values are estimates for just one of my **brown butter chocolate chip cookies**, based on the exact measurements in the recipe. If you use organic sugar or one brand of chocolate over another, your final tally might shift a tiny bit! This information is just here to give you a general idea of what you’re enjoying.
- Serving Size: 1 cookie
- Calories: About 220
- Sugar: 18g
- Fat: 13g (That’s the lovely brown butter doing its job!)
- Carbohydrates: 25g
- Protein: 2g
- Sodium: 110mg
See? Totally worth it! This is a classic American treat made with deep flavor, and while it’s not exactly diet food, enjoying one or two of these rich cookies is really a necessary part of life. Don’t feel guilty—just savor every single bite!
Share Your Caramel Flavored Cookies Experience
Honestly, that’s the best part for me—seeing you all loving these cookies as much as my family does! I put so much effort into perfecting these **brown butter chocolate chip cookies**, and seeing your results makes all the careful timing worth it.
Did you try the overnight chill? Did you go heavy on the flaky sea salt? Please tell me! I truly want to hear all about how they turned out for you. If you made any little tweaks to your favorite way to bake **caramel flavored cookies**, let me know that too; we cooks are always learning from each other.
If you loved the combination of chewy, gooey centers and that deep, nutty flavor imparted by the toasted butter, give this recipe a rating below! And if you snapped a picture of your golden-edged beauties, don’t keep them to yourself! Tag me on social media or just leave a comment telling me they were a hit. I’m always hanging around the comments section over at the main blog page, just waiting to hear your feedback. Happy baking, friends!
PrintThe Ultimate Chewy Brown Butter Chocolate Chip Cookies: Rich, Nutty, and Perfectly Gooey
Make the best chocolate chip cookies by browning the butter first. This technique adds a deep, nutty, caramel flavor, resulting in a cookie with chewy centers and crisp, golden edges.
- Prep Time: 20 min
- Cook Time: 13 min
- Total Time: 2 hours 33 min
- Yield: About 24 cookies
- Category: Dessert
- Method: Baking
- Cuisine: American
- Diet: Vegetarian
Ingredients
- 1 cup (2 sticks) unsalted butter
- 1 cup packed light brown sugar
- 1/2 cup granulated sugar
- 2 large eggs, room temperature
- 1 tablespoon vanilla extract
- 2 1/4 cups all-purpose flour
- 1 teaspoon baking soda
- 1/2 teaspoon salt
- 1 1/2 cups semi-sweet chocolate chips or chunks
- 1/2 cup milk chocolate chips or chunks
- Flaky sea salt, for topping (optional)
Instructions
- Melt the butter in a light-colored saucepan over medium heat. Continue cooking, swirling the pan occasionally, until the butter foams, then subsides, and brown bits form at the bottom. The butter will smell nutty. This takes about 5 to 8 minutes. Immediately pour the brown butter into a large heatproof bowl, scraping in the browned bits. Let it cool for 15 minutes.
- Add the brown sugar and granulated sugar to the slightly cooled brown butter. Whisk vigorously until the mixture is smooth and well combined.
- Whisk in the eggs one at a time, mixing well after each addition. Stir in the vanilla extract.
- In a separate bowl, whisk together the flour, baking soda, and salt. Gradually add the dry ingredients to the wet ingredients, mixing on low speed or by hand until just combined. Do not overmix.
- Fold in the chocolate chips and chunks.
- Cover the bowl and chill the dough for at least 2 hours, or preferably overnight. Chilling improves flavor and texture.
- Preheat your oven to 375 degrees Fahrenheit. Line baking sheets with parchment paper.
- Scoop rounded tablespoons of dough onto the prepared sheets, spacing them about 2 inches apart.
- Bake for 10 to 13 minutes, or until the edges are golden brown and the centers still look slightly soft.
- Remove from the oven. Immediately sprinkle the tops with flaky sea salt, if using. Let the cookies cool on the baking sheet for 5 minutes before transferring them to a wire rack to cool completely.
Notes
- Browning the butter is key; watch carefully to avoid burning the milk solids.
- Use high-quality chocolate chunks or a mix of chips for the best melt and flavor.
- For extra chewy cookies, slightly underbake them; they will set as they cool.
Nutrition
- Serving Size: 1 cookie
- Calories: 220
- Sugar: 18g
- Sodium: 110mg
- Fat: 13g
- Saturated Fat: 8g
- Unsaturated Fat: 5g
- Trans Fat: 0.3g
- Carbohydrates: 25g
- Fiber: 1g
- Protein: 2g
- Cholesterol: 40mg