

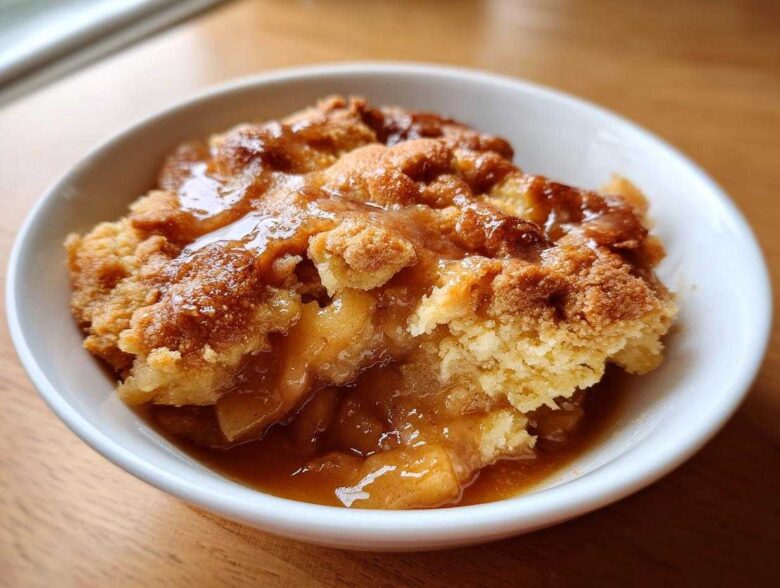
Oh, when that first chilly breeze hits in September, my kitchen immediately starts smelling like cinnamon and melted butter, because that means it’s time for a real, honest-to-goodness comfort food dessert. If you’ve been searching for the ultimate easy apple cobbler recipe that tastes like Grandma made it, well, stop looking right now! Seriously, this classic apple cobbler is my absolute staple every fall, and trust me, it’s the simplest way to get that wonderfully warm, bubbling filling topped with the best buttery biscuit topping you can imagine. Forget complicated layers; we’re keeping this no-fuss so everyone can enjoy it!
Why This Easy Apple Cobbler Recipe Works Every Time
I am telling you, this isn’t just another recipe; it’s a reliable fallback plan for when you need a crowd-pleasing dessert fast. It’s why I call it my easy apple cobbler recipe—it just never lets me down! We have two main things going for us here that make this the best apple cobbler around. If you need more spiced goodness, you should check out my recipe for apple cinnamon streusel muffins, too!
- It sets up fast because we start with our filling ready to go in under 20 minutes.
- The structure holds up perfectly because of that incredible buttery cobbler topping.
Perfect Apple Texture and Flavor Balance
Choosing the right apples is everything! I always grab Granny Smith or Honeycrisp for this classic apple cobbler because they hold their shape beautifully when baked underneath all that dough. You don’t want mushy apples, right? The mix of sugar, cinnamon, and just a kiss of nutmeg really brings out the perfect balance of bright tartness and cozy sweetness.
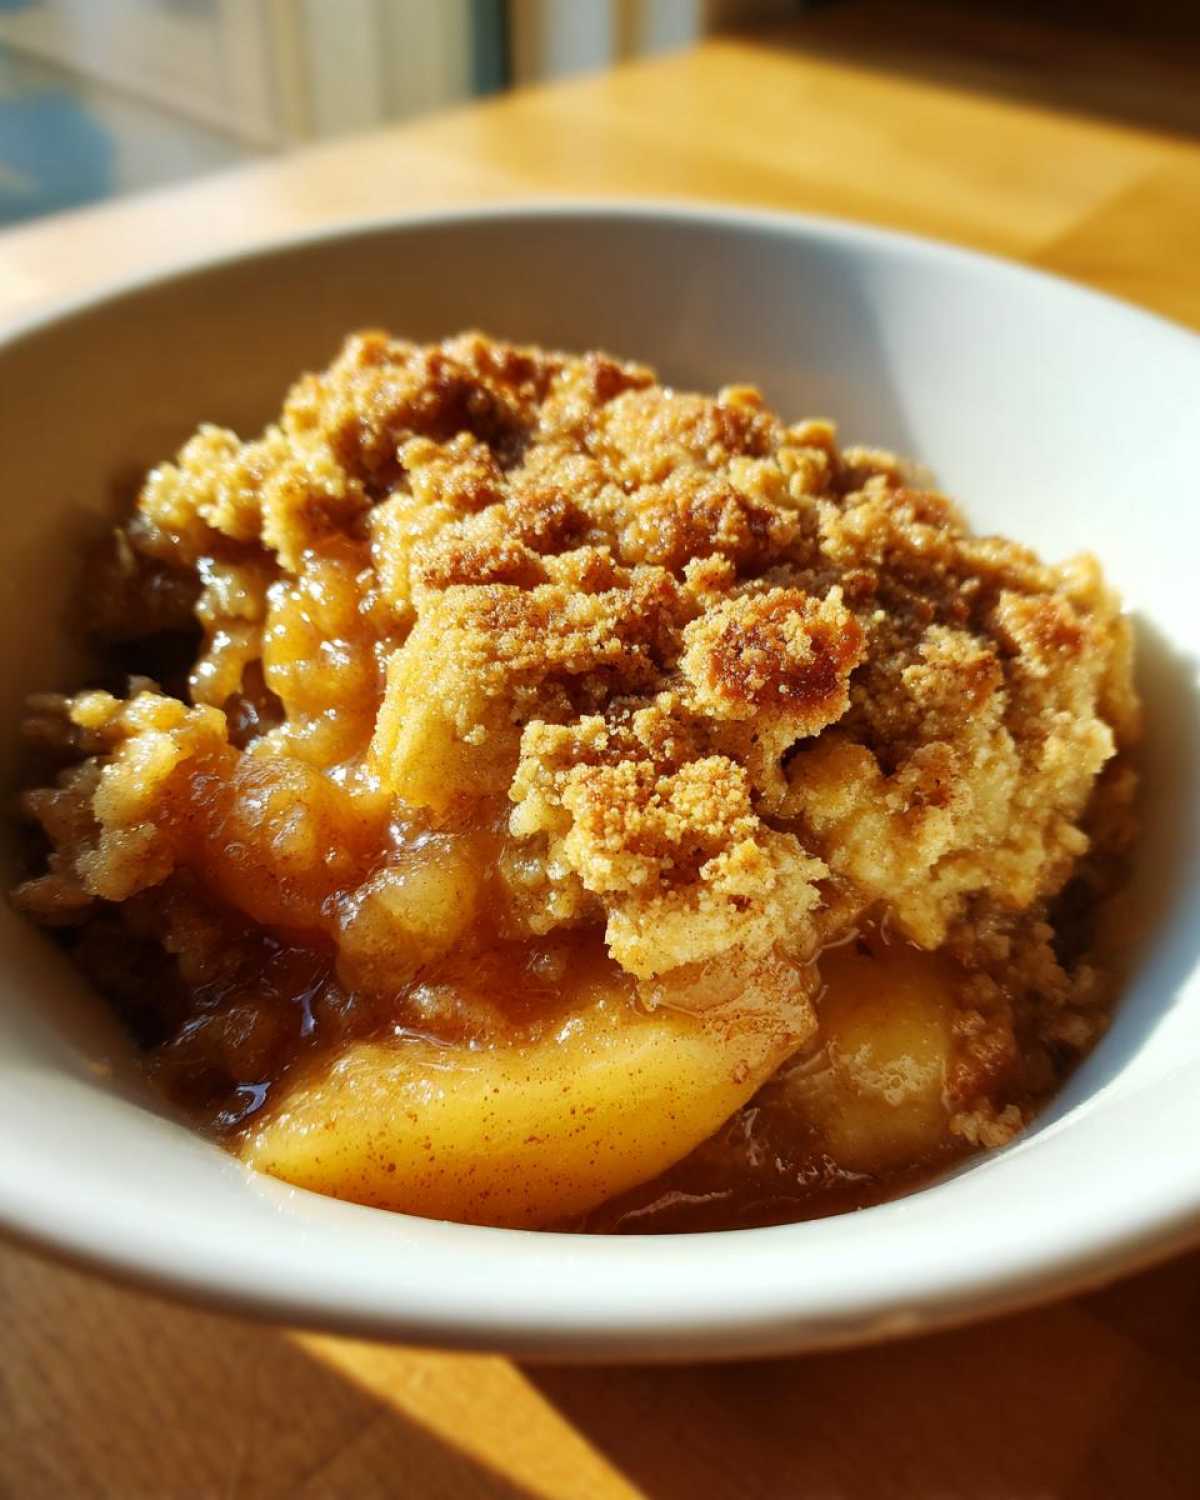
The No-Fuss Buttery Cobbler Topping
This topping is where the magic happens, and trust me, there’s no electric mixer involved. I just use my fingers to work the cold butter into the flour until it looks like rough crumbs. It bakes up perfectly flaky and biscuit-like, not dense and cakey at all. That means you get that ideal apple dessert with biscuits texture every single time, without the fuss!
Gathering Ingredients for Your Classic Apple Cobbler
Okay, the best part about this being my go-to apple cobbler recipe is that you probably have most of this stuff hanging out in your pantry already! We aren’t using any weird, hard-to-find items today. This is all about simple, reliable ingredients that make a massive difference when baked all golden and bubbly under that buttery topping.
Apple Filling Components
For the fruit base, you absolutely must use firm apples that can keep their shape—I insist on Granny Smith or Honeycrisp, peeled, cored, and sliced about a quarter-inch thick. Toss those slices with the sugar, just a tiny bit of flour to help thicken the juices, your cinnamon and nutmeg, and don’t forget that splash of lemon juice! That bright acidity is key to balancing the sugar and keeps those beautiful apples from turning grey.
Preparing the Buttery Cobbler Topping
For the topping, we need the dry ingredients whisked up first: that’s flour, two tablespoons of sugar, baking powder, and salt. The trick here is using very cold, unsalted butter, cut into little cubes. You want to make sure that butter stays ice cold when you blend it in; that’s how we get those little pockets of fluffiness in our final apple dessert with biscuits topping!
Step-by-Step Instructions for the Best Apple Cobbler
I know reading instructions can sometimes feel like reading a textbook, but I promise these steps for our apple cobbler are totally straightforward. We are going to move quickly here because the filling doesn’t need much cooking time before we cover it up. Once you see that filling bubbling, you’ll know you nailed it! If you want to try some slow cooker results first, you can check out how I do my spiced apples here.
Preparing the Fruit Base and Baking Dish
First things first: crank that oven up to 375 degrees Fahrenheit and make sure you’ve lightly greased that 8×8 dish. Now, take your apple mixture—all tossed with sugar and spice—and pour it in evenly. I like to give the dish a little gentle shake to level everything out. This step is crucial for that gorgeous presentation: take those little cubes of cold butter you prepared and dot them all over the top of the apples. They’ll melt down and make the filling so rich!
Mixing and Placing the Cobbler Topping
Time for the topping dough! If you’ve already mixed your dry ingredients, now you cut in the cold butter using your fingers or a pastry blender until it genuinely looks like coarse crumbs—like tiny pebbles. Then, pour in the cold milk. This is the most important advice: stir it *just* until those dry spots disappear and you have a shaggy dough. Seriously, do not overmix! You just want to combine it. Then, grab two spoons and drop rough spoonfuls of that dough right over the apples, leaving little gaps so that delicious filling can escape and bubble up around the biscuits.
Baking Time and Resting Period for Apple Cobbler
In she goes! Bake this beauty for about 40 to 45 minutes. You’re looking for a topping that’s deeply golden brown and the apple filling underneath should be vigorously bubbly. When you test it with a fork, the apples should be completely tender. But please, please, *please*, let that apple cobbler rest for at least 15 minutes after it comes out. Patience! This resting time lets those hot juices settle down just enough so you aren’t serving soup for dessert. Scoop it up warm, and you’re golden!
Tips for Making a Perfect Homemade Apple Cobbler
Even though this is already such a straightforward recipe, I’ve picked up a few tricks over the years that elevate this into the absolute best apple cobbler you’ll ever make. Anyone can throw apples and flour together, but these little adjustments ensure you get that show-stopping, comfort food dessert experience every single time. It’s my goal that your homemade apple cobbler comes out perfectly crisp on top and deeply luscious underneath! If you love this spice pairing, you absolutely have to try my apple butter snickerdoodles!
Ingredient Substitutions for Your Apple Cobbler
Listen, if you’re feeling fancy, you can absolutely swap out the cold milk in the topping for heavy cream! It makes the biscuits taste unbelievably rich and tender—it’s worth the extra calories, trust me. If you’re tired of the usual spices, a tiny pinch of cardamom mixed in with the cinnamon is a wonderful twist that pairs beautifully with apples. It gives the whole dish an elegant scent.
Troubleshooting a Soggy Bottom
Ah, the dreaded soupy apple bottom! It happens, especially if your apples were extra juicy that day. If you notice your topping is getting golden way ahead of the filling—or if you’re nervous about sogginess—try this: pop your dish onto a baking sheet that’s already in the oven when you preheat it. That immediate heat hitting the bottom of your dish helps set the juices faster. Or, just slide the whole thing onto a lower rack for the first 20 minutes. That simple trick has saved so many of my baked apple dessert efforts!
Serving Suggestions for This Warm Apple Dessert
You’ve done the hard work, now it’s time to eat! Nothing makes this warm apple dessert shine like letting it sit for just a moment so it’s hot but not molten. While the classic pairing is always my favorite—a big scoop of creamy vanilla ice cream melting slowly over the warm biscuit topping—don’t stop there!
If you want to get really decadent, I love drizzling a tiny bit of homemade caramel sauce over the top. If you happen to have some amazing homemade salted honey ice cream on hand, that salty-sweet crunch against the cinnamon apples is just heavenly. Serving it scoopy-style right from the baking dish is the best way to keep that homey, casual vibe!
Storage and Reheating Instructions for Apple Cobbler
You made a big batch because, let’s be honest, who can stop at one slice of this apple cobbler? Good news: leftovers hold up wonderfully. If you have some left over, don’t sweat it! Keep it covered tightly at room temperature for about a day, especially if you used up all the filling and the topping is already firm. But for anything longer than that, you absolutely must pop it into the fridge. I’d say it stays perfectly delicious for three to four days in the refrigerator when covered well.
Now, reheating is where a lot of people mess up a perfectly good baked apple dessert! If you try the microwave, you’ll end up with a soggy, steamy topping, and we absolutely cannot have that after all the work we put into keeping it biscuit-y. Instead, grab a small piece and wrap it loosely in foil. Pop that foil packet into a toaster oven or a regular oven set to about 300 degrees Fahrenheit for about 10 or 15 minutes. That gentle heat warms the apples through and brings back just a little bit of that glorious, crisp texture to the buttery topping. It tastes almost brand new!
Frequently Asked Questions About Apple Cobbler
I know you might have a few lingering questions when you’re looking to make the absolute best homemade apple cobbler! Honestly, once you master this classic apple cobbler, you’ll be asked for the recipe every single time you bring it out. We want to ensure you serve up the perfect comfort food dessert every time, so here are the things readers ask me most often. By the way, if after this dessert you still have room, check out how I tackle my dinner recipes!
Can I use frozen apples in this apple cobbler recipe?
Oh, I really, really wouldn’t recommend it if you can avoid it! Frozen apples are loaded with extra water because of the freezing process. If you dump them right in, that excess liquid is going to seep out while baking and make your beautiful buttery biscuit topping totally soggy. If you absolutely must use them because you’re in a pinch, you have to thaw them completely and then press them between a few layers of paper towels until they feel seriously dry before adding them to the sugar and spice mix. But fresh is always, always the way to go for this simple fruit cobbler!
What is the difference between apple cobbler and apple crisp?
This is a great question that I get all the time! It really comes down to structure. Think of the apple cobbler as the sister who wears a nice, thick, slightly sweet biscuit or batter topping—it’s soft, it bakes fluffy, and you eat it with a fork. An apple crisp, on the other hand, has that crunchy, crumbly topping, usually made with oats, flour, and butter, kind of sprinkled loosely over the fruit. Both are amazing, but for that truly classic, warm apple dessert experience, the cobbler is the star!
How far in advance can I assemble this dessert?
To keep it easy, you can definitely prep ahead, but I have a specific way I like to do it to guarantee a crispy top. I’ll toss the apples with the spices and keep them tightly covered in the fridge for up to 24 hours. The topping is even better if you make it ahead! Mix the dry ingredients and cut in the butter, then store that shaggy topping mix in a sealed bag in the fridge for up to two days. Then, when you’re ready to bake, assemble everything fresh and pop it into the oven. That way, you get the freshest possible results from your easy apple cobbler recipe!
Estimated Nutritional Data for This Apple Cobbler
Now, I have to give you a quick heads-up before you dive into this wonderfully satisfying comfort food dessert. I’ve pulled the typical nutrition estimates right from my standard ingredient measurements, but you know how it is—baking isn’t always exact science, especially when we’re improvising! These numbers are just a ballpark figure for a single serving of this apple cobbler; they are not lab-tested, so please take them with a grain of sugar.
- Calories: Around 380
- Fat: About 18 grams
- Carbohydrates: Roughly 55 grams
- Protein: About 4 grams
Remember, if you skip the optional egg wash, amp up the cinnamon, or use lighter apples, those numbers might shift a tiny bit! But really, when something tastes this good, who is checking the exact grams of fat? Just enjoy that warm apple dessert with a big scoop of ice cream!
Share Your Thoughts on This Simple Fruit Cobbler
Alright, that’s it! We’ve made the best, easiest apple cobbler imaginable, and now it’s time for you to get in the kitchen and see for yourself. I am so proud of this recipe, and I truly hope it becomes a fixture in your fall rotation!
Once you try this simple fruit cobbler, please pop down to the comments below and let me know what you thought! Did you stick to Granny Smiths, or did you try something new? If you made it, honestly, rate it for me—if it earned five stars in your house, tell everyone! And if you happen to snap a picture of that beautiful, bubbly, golden top, tag me! I absolutely love seeing your creations and hearing about how recipes like this bring people together. If you want to learn more about how I test all these recipes, you can read about my kitchen philosophy on my About page!
PrintEasy Classic Apple Cobbler
A simple recipe for a comforting apple cobbler featuring cinnamon-spiced apples topped with a buttery biscuit topping, perfect for any occasion.
- Prep Time: 20 min
- Cook Time: 45 min
- Total Time: 65 min
- Yield: 6 servings
- Category: Dessert
- Method: Baking
- Cuisine: American
- Diet: Vegetarian
Ingredients
- 6 medium apples (like Granny Smith or Honeycrisp), peeled, cored, and sliced
- 1/2 cup granulated sugar (for apples)
- 1 tablespoon all-purpose flour (for apples)
- 1 teaspoon ground cinnamon
- 1/4 teaspoon ground nutmeg
- 1 tablespoon lemon juice
- 1/2 cup (1 stick) cold unsalted butter, cut into small pieces
- 1 1/2 cups all-purpose flour (for topping)
- 2 tablespoons granulated sugar (for topping)
- 1 tablespoon baking powder
- 1/2 teaspoon salt
- 1/2 cup cold milk
- 1 large egg, beaten (for egg wash, optional)
Instructions
- Preheat your oven to 375 degrees Fahrenheit. Lightly grease an 8×8 inch baking dish.
- In a large bowl, combine the sliced apples, 1/2 cup sugar, 1 tablespoon flour, cinnamon, nutmeg, and lemon juice. Toss gently until the apples are evenly coated.
- Pour the apple mixture into the prepared baking dish and spread it into an even layer. Dot the top of the apples evenly with the cold butter pieces.
- In a separate medium bowl, whisk together the 1 1/2 cups flour, 2 tablespoons sugar, baking powder, and salt for the topping.
- Cut in the cold butter using a pastry blender or your fingers until the mixture resembles coarse crumbs.
- Pour in the cold milk and stir just until a shaggy dough forms. Do not overmix.
- Drop spoonfuls of the dough mixture over the top of the apples, leaving small gaps between the mounds so the filling bubbles up.
- If desired, brush the tops lightly with the beaten egg for extra browning.
- Bake for 40 to 45 minutes, or until the topping is golden brown and the apple filling is bubbly and tender when pierced with a fork.
- Let the cobbler cool for at least 15 minutes before serving warm, preferably with vanilla ice cream.
Notes
- Use firm, slightly tart apples for the best texture and flavor balance.
- For a richer topping, substitute half the milk with heavy cream.
- If the topping browns too quickly, loosely cover the dish with aluminum foil for the last 15 minutes of baking.
Nutrition
- Serving Size: 1 serving
- Calories: 380
- Sugar: 35
- Sodium: 250
- Fat: 18
- Saturated Fat: 11
- Unsaturated Fat: 7
- Trans Fat: 0.5
- Carbohydrates: 55
- Fiber: 3
- Protein: 4
- Cholesterol: 55