

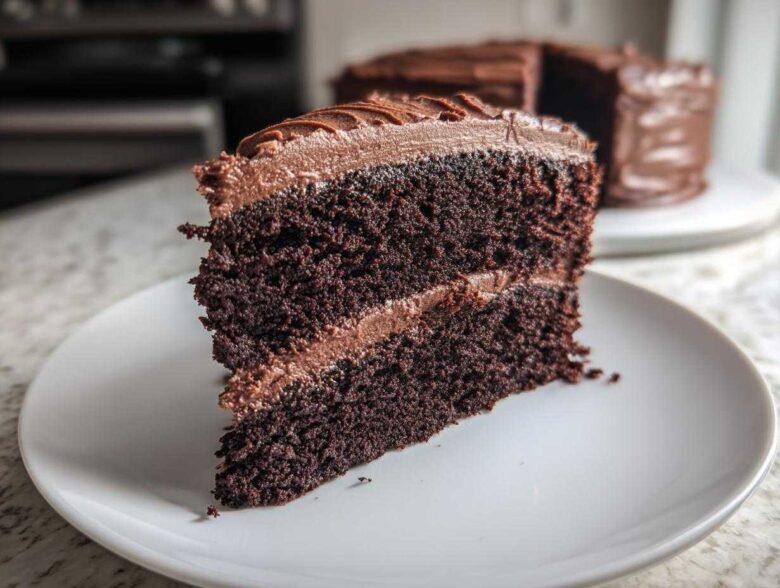
Listen, finding the perfect chocolate cake recipe is like searching for buried treasure—you try a million dusty maps until you finally strike gold. So many recipes promise decadent flavor but end up dry, or they call for a whisking marathon that leaves you exhausted. Trust me on this one: after years of testing and tasting, this one-bowl method is my absolute favorite for a truly homemade chocolate cake. It’s foolproof, ridiculously moist, and delivers that deep, rich chocolate dessert flavor we all crave, especially when you need something special for a birthday. It’s the only one I use now!
Why This One-Bowl Recipe Makes the Best Homemade Chocolate Cake
I know, I know, there are a million ways to make a chocolate cake, but honestly, this is the one that works every single time. If you’re looking for an easy homemade chocolate cake that tastes like you slaved over it for hours, this is it. The magic is in the simplicity—just one large bowl! We skip the mess and still get that beautiful, deeply flavored, moist chocolate cake recipe result that people ask me for constantly.
I actually whipped this up last week when a friend swung by unexpectedly; it proves you don’t need fancy equipment or hours of prep to make something truly spectacular. And trust me, if I can do this after chasing toddlers all morning, anyone can master this batter! It’s the same simple approach I use for my one-bowl fudgy brownie cookies—quick, minimal cleanup, maximum flavor.
Secrets to Achieving a Super Moist Homemade Chocolate Cake
The texture here is everything, and it comes down to two secret weapons: buttermilk and hot coffee. The slight acidity in the buttermilk reacts perfectly with the baking soda, giving us lift without drying things out. And that hot coffee? It doesn’t make the cake taste like coffee, no way! It just dissolves the cocoa powder so deeply that the chocolate flavor blooms. If you’re out of buttermilk, don’t panic! Just stir one tablespoon of cooking vinegar into a cup of regular milk and let it sit for five minutes. Instant ‘sour milk’ for the win!
Ingredients for Your Ultimate Homemade Chocolate Cake Recipe
Okay, now that we know *why* this cake works, let’s talk about what you need to put in that magical bowl. When I say best chocolate cake recipe from scratch, I mean using real ingredients handled with a little bit of care. Nothing fancy, but the measurements need to be spot-on, especially for the leavening agents. I keep all my baking supplies organized, kind of like how I stash my no-bake bars for emergency snacking!
We’ll tackle the cake batter first, which combines all the dry stuff and then the wet stuff—super straightforward. Then, we save the best part for last: the fluffy, decadent frosting to top this already incredible homemade chocolate cake.
Cake Batter Ingredients for the Homemade Chocolate Cake
For the cake itself, you’re going to need precise amounts of flour, sugar, and that wonderful deep cocoa powder we talked about. Pay close attention to the baking soda and baking powder; these twin agents work together to give this cake its signature lift, so measure them carefully! Here is your list for the rich chocolate dessert base:
- 1 3/4 cups all-purpose flour
- 1 3/4 cups granulated sugar
- 3/4 cup unsweetened cocoa powder
- 1 1/2 teaspoons baking soda
- 1 1/2 teaspoons baking powder
- 1 teaspoon salt
- 2 large eggs
- 1 cup buttermilk (or milk mixed with 1 tablespoon white vinegar)
- 1/2 cup vegetable oil
- 2 teaspoons vanilla extract
- 1 cup hot brewed coffee
Rich Chocolate Buttercream Frosting Ingredients
For the frosting, we need really nice, properly softened butter—not melted mush, but soft enough to leave a gentle dent when you poke it. This is crucial for that smooth, luxurious texture when we whip it up! Notice we use less cocoa powder here than in the cake batter, which keeps the frosting balanced and sweet for your chocolate cake with homemade frosting.
- 1 cup (2 sticks) unsalted butter, softened
- 3 cups powdered sugar
- 1/2 cup unsweetened cocoa powder (for frosting)
- 1/2 cup milk or heavy cream
- 1 teaspoon vanilla extract
Step-by-Step Instructions for Your Homemade Chocolate Cake
Okay, friends, this is where we stop worrying and start baking! Even if you’ve never made a layer cake before, this process is smooth sailing because it’s all one bowl for the cake batter. We move fast, but carefully, because we want that famously light texture for our homemade chocolate cake. Remember, baking is just following simple instructions really well! We’ll get those beautiful deep layers ready for frosting in no time.
Preparing the Pans and Mixing the Homemade Chocolate Cake Batter
First things first, let’s get that oven preheated to 350°F (175°C). You need to grease and flour your two 9-inch round pans really well, or you’ll be peeling cake off the bottom later! Now, grab your huge bowl. Whisk all your dry ingredients together—the flour, sugar, cocoa, baking soda, baking powder, and salt. You want this mixed up well before anything wet touches it.
Next, add the eggs, buttermilk, oil, and vanilla right into that dry mixture. Use your electric mixer on medium speed for exactly two minutes. Don’t over-mix here, we’re just combining! The grand finale is the one cup of hot brewed coffee. Pour that in slowly while you mix on low speed, just until everything comes together. It will look super thin, almost like soup—that’s exactly what you want for a truly decadent chocolate cake batter!
Baking and Cooling the Decadent Chocolate Cake Layers
Divide that thin batter evenly between your two prepared pans. Pop them into the oven and set your timer for 30 minutes. They should be done around the 30 to 35-minute mark. To check, use a wooden pick—if it slides out clean or with just a few moist crumbs clinging to it, you’re done! Don’t let it stay in longer than necessary, or you’ll lose that moisture we worked so hard to build.
Here is a critical step: Let the cakes cool in their pans for a full 10 minutes. Seriously, don’t touch them! If you try to flip them out too soon, they might crack. After ten minutes, gently flip them out onto a wire rack to cool completely. I mean it—they have to be stone cold before you try to frost them, or you’ll end up with a melted chocolate mess.
Whipping the Homemade Chocolate Frosting
While the cakes are cooling, get started on your chocolate cake with homemade frosting. Make sure that butter is truly softened, or the frosting texture will be lumpy. Start by beating the butter by itself until it looks light and creamy, which takes a minute or two.
Now, gradually add that powdered sugar and the cocoa powder right into the butter. Alternate adding those ingredients with splashes of your milk or cream. Keep beating until it starts coming together smoothly. Once it looks like icing, turn your mixer up high and add that last teaspoon of vanilla. Whip it on high speed for a good solid minute until the whole batch is light, fluffy, and ready for your chocolate layer cake tutorial!
Assembling Your Perfect Chocolate Layer Cake Tutorial
The moment of assembly is so exciting, right? We’ve got a moist cake and fluffy frosting, and now we turn it into a showstopper, perfect for any celebration, maybe even your next birthday chocolate cake ideas bake! Getting those layers stacked straight takes just a little finesse, but don’t stress—this is still the simple chocolate cake for beginners recipe, even when it’s stacked high!
If your layers domed a little bit in the oven, you might need to level them. If you’ve never done this, it’s easy: just use a long, serrated knife and gently saw off the top dome until the layer is perfectly flat. A flat top means no sliding when we add that frosting!
Once your layers are flat and completely, totally cool, put the first layer down on your serving plate or cake stand. Next, put a generous dollop of that gorgeous frosting right on top. Spread it evenly to the edges. Then, carefully place the second layer on top. It’s like playing with giant chocolate pancakes!
For the final outside coat, use an offset spatula to cover the top and sides. Don’t worry about making it look museum-perfect yet. Just get the whole cake covered. If you want the really smooth finish like you see in professional photos, check out my tips on easy cake decorating; it’s all about using a bench scraper!
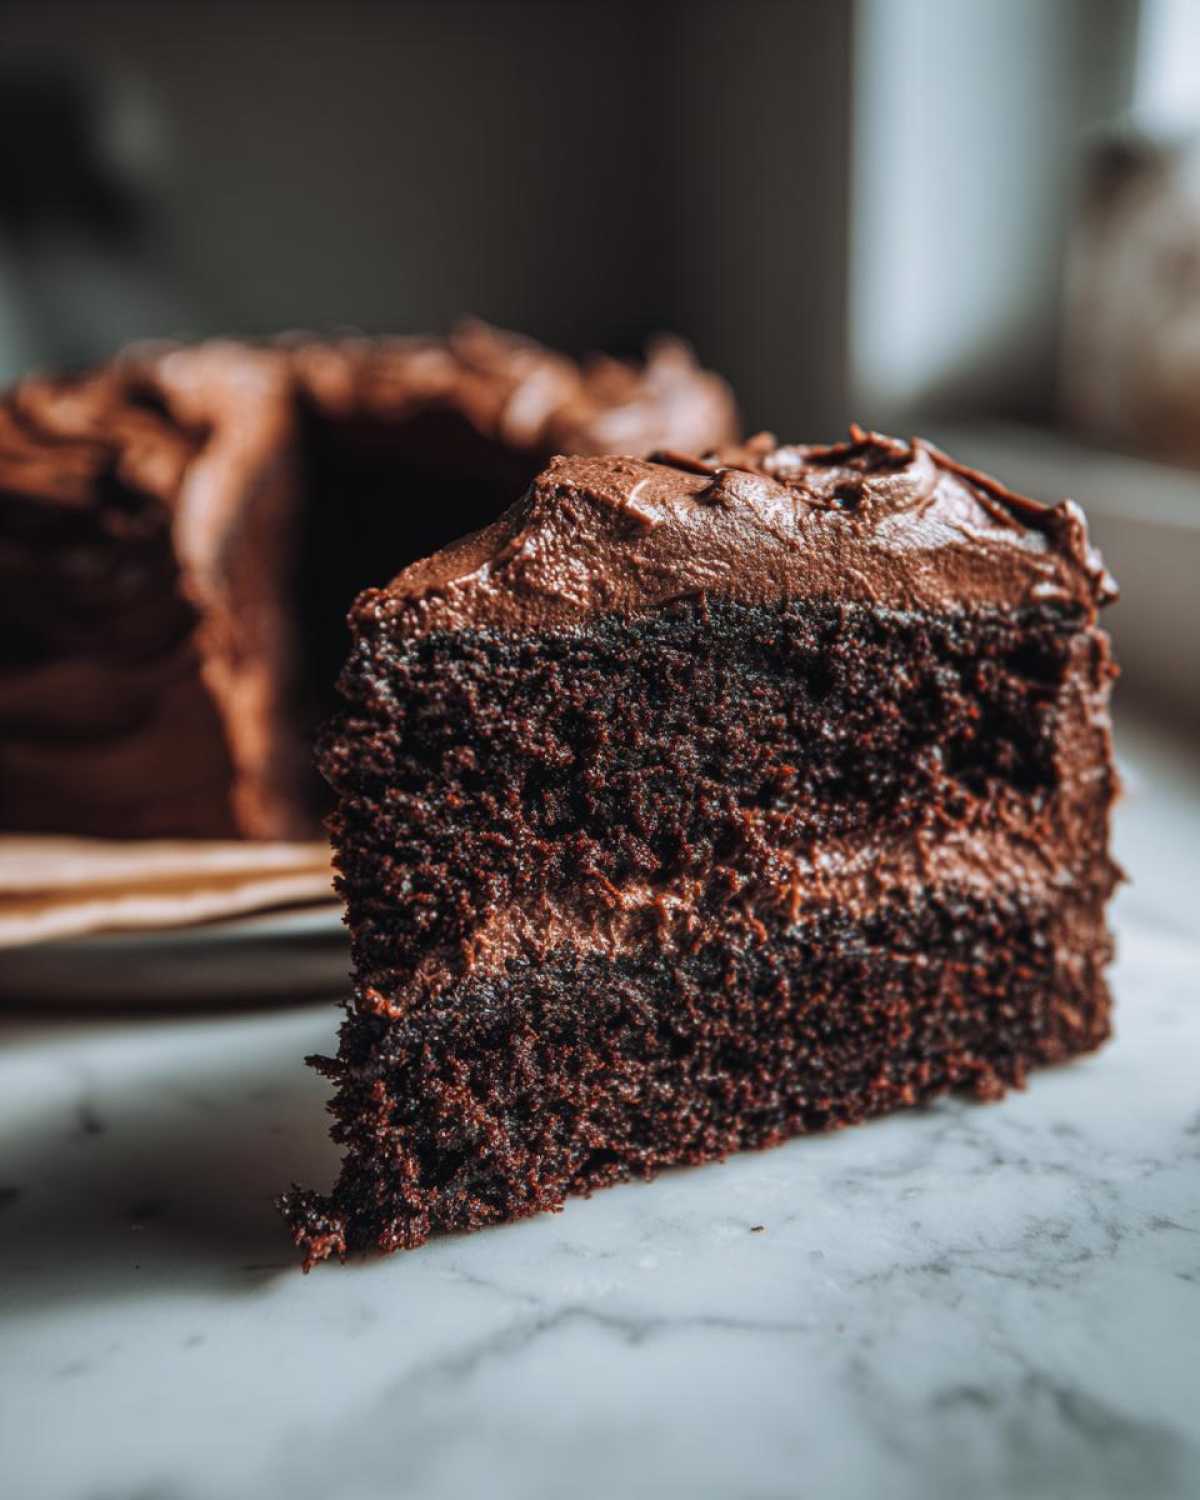
If you want a really rustic, beautiful look that hides any wobbles, make some swoops and swirls in that frosting after you cover it. Sometimes the less perfect it looks, the more homemade and delicious it seems! This process easily turns out an ultimate chocolate cake recipe presentation.
Tips for Success with Your Homemade Chocolate Cake
Making this a truly exceptional homemade chocolate cake is easier than you think, but a couple of little checks beforehand will guarantee you end up with a show-stopping, moist chocolate cake recipe every time. If you follow these quick tips, you’re going to nail the texture and flavor profile that makes this the best chocolate cake recipe from scratch, bar none.
First, let’s talk ingredients temperature. I mentioned using room temperature eggs and buttermilk for the batter, and I really can’t stress that enough! Room temperature ingredients incorporate way better into the batter than cold ones straight from the fridge. Cold eggs and cold buttermilk shock the creamed fats, which can lead to a dense, slightly curdled batter. For the absolute best results when baking a rich chocolate dessert, pull those eggs and the buttermilk out about 45 minutes before you plan to start mixing.
Second, about that hot coffee—please use it! That’s my biggest secret for intense flavor. You can even use hot, strong brewed tea if coffee absolutely isn’t your thing, but you need that high heat to bloom the cocoa. When cocoa powder mixes with hot liquid, its flavor molecules open right up, giving you that incredible, intense, dark color and flavor. Never skip that step if you want a truly decadent cake.
Finally, when you’re mixing, remember the golden rule of any good cake: stop mixing as soon as the flour disappears. That’s the key to keeping this a simple chocolate cake for beginners and not accidentally making it tough! Overbeating after you add the flour starts developing gluten, and we want tender cake, not chewy bread. Scrape down the bowl well, but as soon as you see the last streak of flour vanish, turn the mixer off. For more ideas on keeping your cakes light and tender, check out my best moist cake secrets!
Variations for Your Simple Chocolate Cake for Beginners
One of the things I absolutely love about this recipe is how adaptable it is. It’s the perfect blank canvas for a simple chocolate cake for beginners because it handles little changes so well. You don’t always need to make a towering layer cake, and sometimes you just want a quick, satisfying home-baked treat. It’s so forgiving!
If you’re short on time or just want a more rustic, cozy bake, definitely try making this as a single layer chocolate cake instead of stacking two rounds. Just pour all the batter into a greased 9×13 inch pan. Since the batter is deeper, you have to bake it a bit longer—I usually stick it in for 40 to 45 minutes, but always use that toothpick test. It’s easier to frost too, needing just one good layer of that homemade buttercream!
Another favorite weekend variation is turning it into a chocolate bundt cake recipe. Pour the batter into a thoroughly greased and floured bundt pan. Bundt pans are gorgeous, but they have deep crevices, so make sure you get the batter right into every little swirl! Since the shape is unique, it usually needs a little extra time to bake through, maybe 45 to 55 minutes depending on how deep your pan is. The best part about a bundt is you can often skip thick frosting and just dust the top with powdered sugar or drizzle it with a simple glaze.
For a little extra texture inside that rich chocolate dessert, try folding in about a cup of semi-sweet chocolate chips right before you pour the batter into the pans—this gives you those gooey pockets of melted chocolate that just make everything better. You can find some other fun flavor mashups over on my cookie and brownie adventures if you’re feeling extra creative!
Storage and Reheating Instructions for Homemade Chocolate Cake
It’s almost as important to know how to keep this beautiful homemade chocolate cake fresh as it is to bake it right! The great news is that this recipe is actually one of the better ones for staying moist after a day or two. But you still need to store it properly, especially since we went to the trouble of making that glorious chocolate cake with homemade frosting.
If you frosted the cake, keep it at room temperature—don’t stick it right in the fridge unless your kitchen is extremely hot or humid. The butter in the frosting firms up and can actually dry out the cake crumb when refrigerated. Cover the cake loosely with a cake dome or an inverted large bowl. Stored this way, your decadent chocolate cake should stay perfectly fresh and moist for about 3 to 4 days. If you used milk in the frosting, definitely play it safe and keep it chilled, but let it sit out for about an hour before serving so the cake softens up again.
Now, what if you have leftovers later in the week, or if you just want that amazing, just-baked experience again? Here’s my favorite trick for bringing that slice of rich chocolate dessert back to life.
The Simple Trick to Reviving Leftover Cake Slices
If your slice seems even a little bit dry after a few days, you need a quick spritz of moisture. Take the slice you want to eat and place it on a microwave-safe plate. Then, grab a tiny microwave-safe cup or ramekin and fill it about halfway with water. Place the water cup right next to the cake slice in the microwave.
Heat them both together for about 10 to 20 seconds—you don’t want to melt the frosting, just warm the cake through slightly. The water cup creates steam in the microwave, which reintroduces a tiny bit of moisture back into the cake crumb. When you pull it out, the slice will taste incredibly fresh, almost like it was just pulled from the oven. It’s like cheating your way back to the best moist chocolate cake recipe!
Freezing Extra Layers or Unfrosted Cake
If you made a double batch and plan to save an unfrosted layer for a future need (hello, emergency birthday chocolate cake ideas!), freezing is the way to go. Make sure the layer is completely cool, then wrap it tightly. I mean *tightly*—first in plastic wrap, and then again in aluminum foil. This double layer protects it from freezer burn.
The layers can hang out in the freezer for up to three months without losing much quality. When you’re ready to use one, just unwrap it (keep the plastic wrap on!) and let it thaw overnight on the counter. Once it’s thawed, you can proceed with making your homemade frosting and assembling it!
Frequently Asked Questions About This Homemade Chocolate Cake
You know how it goes when you try a new recipe—you have a million little questions floating around about substitutions or what happens if you mess up a step. I totally get it! Baking this homemade chocolate cake should be fun, not stressful. Here are the top things folks ask me about getting this cake right, especially when prepping for a big event like a birthday chocolate cake. For more about my baking philosophy, you can always peek at my baking philosophy!
Can I use regular milk instead of buttermilk in this homemade chocolate cake?
Absolutely! I put that note in there because sometimes you just don’t have buttermilk on hand, and driving to the store for one ingredient is no fun. If you only have regular milk, you can easily whip up a substitute that works just as wonderfully for this moist chocolate cake recipe. Just take one cup of regular milk—whole milk works best but 2% is fine too—and stir a single tablespoon of white vinegar or lemon juice into it. Leave it alone on the counter for about five minutes until it looks a little bit curdled. That’s your homemade buttermilk! It does the exact same job acidifying the batter to help activate that baking soda for a perfect rise.
How do I make this a rich chocolate dessert without using coffee?
That hot coffee is my big secret for that super dark, rich chocolate dessert flavor, but I know not everyone loves the idea. If coffee is a no-go for you or your family, you have a couple of really good options to keep that flavor intense. You can use hot water instead, but you absolutely must add about one teaspoon of instant espresso powder to it first. The espresso powder doesn’t make it taste like coffee, it just boosts the cocoa flavor dramatically, making it a deeper, more fudgy chocolate cake flavor. If you skip both the coffee *and* the espresso powder, just use plain hot water. The cake will still be moist because of the buttermilk and oil, but honestly, you’ll notice the chocolate isn’t quite as deep or complex as the coffee version.
Can I make the cake ahead of time?
Yes, you definitely can! This is key when you’re making a big, layered homemade chocolate cake. If you bake the layers and let them cool completely, you can wrap each layer very tightly—I mean, plastic wrap first, then foil—and freeze them for up to three months. When you want to use them, just unwrap them enough to let the air get to them and thaw them overnight on the counter. They come out perfect! Once you frost the whole cake, keep it covered at room temperature for 3-4 days. If you used any fresh cream in the frosting, keep the whole thing chilled, but always let a slice sit out for 30 minutes before serving so it softens up and tastes its best!
Nutritional Estimates for Your Rich Chocolate Dessert
I know some of you are tracking macros, and some of you just want to know what you’re getting into when you devour a slice of this homemade chocolate cake! Since this is the ultimate chocolate cake recipe, it’s definitely rich, especially once you add that fluffy buttercream frosting on top. I always encourage people to use this information as a general guide, because honestly, the way you frost the cake changes the numbers instantly!
Keep in mind these figures are just my best estimates based on standard grocery store ingredients for one slice, assuming you get 12 nice servings out of the whole cake. If you are using specialty butters or different types of flour, these quantities will shift, so take them with a grain of salt. For more information on how I calculate these things, you can always check out my baking disclaimer page.
Here’s a basic breakdown for one slice of this wonderful, rich chocolate dessert:
- Calories: Around 450
- Fat: Approximately 24g (with about 12g coming from saturated fat)
- Carbohydrates: Close to 60g
- Protein: About 5g
- Sugar: That’s where the decadence comes in—around 55g!
It’s a wonderful treat for a celebration, and totally worth those numbers for a slice of such a perfect moist chocolate cake recipe. Just balance it with a nice green salad later, right?
PrintOne-Bowl Super Moist Chocolate Cake with Chocolate Buttercream
A simple, one-bowl recipe for a rich, moist chocolate cake topped with homemade chocolate buttercream frosting. This recipe is beginner-friendly and perfect for birthdays.
- Prep Time: 20 min
- Cook Time: 35 min
- Total Time: 55 min
- Yield: 12 servings
- Category: Dessert
- Method: Baking
- Cuisine: American
- Diet: Vegetarian
Ingredients
- 1 3/4 cups all-purpose flour
- 1 3/4 cups granulated sugar
- 3/4 cup unsweetened cocoa powder
- 1 1/2 teaspoons baking soda
- 1 1/2 teaspoons baking powder
- 1 teaspoon salt
- 2 large eggs
- 1 cup buttermilk (or milk mixed with 1 tablespoon white vinegar)
- 1/2 cup vegetable oil
- 2 teaspoons vanilla extract
- 1 cup hot brewed coffee
- 1 cup (2 sticks) unsalted butter, softened
- 3 cups powdered sugar
- 1/2 cup unsweetened cocoa powder (for frosting)
- 1/2 cup milk or heavy cream (for frosting)
- 1 teaspoon vanilla extract (for frosting)
Instructions
- Preheat your oven to 350°F (175°C). Grease and flour two 9-inch round cake pans or one 9×13 inch pan.
- In a very large bowl, whisk together the flour, sugar, 3/4 cup cocoa powder, baking soda, baking powder, and salt until combined.
- Add the eggs, buttermilk, oil, and 2 teaspoons of vanilla extract to the dry ingredients. Beat with an electric mixer on medium speed for two minutes.
- Carefully pour in the hot coffee and mix on low speed until just combined. The batter will be thin.
- Divide the batter evenly between the prepared cake pans.
- Bake for 30 to 35 minutes, or until a wooden pick inserted into the center comes out clean.
- Let the cakes cool in the pans for 10 minutes before inverting them onto a wire rack to cool completely.
- To make the frosting, beat the softened butter in a large bowl until creamy.
- Gradually add the powdered sugar and 1/2 cup cocoa powder, alternating with the milk or cream. Beat until smooth.
- Add the remaining 1 teaspoon of vanilla extract and beat on high speed until the frosting is light and fluffy.
- Once the cakes are completely cool, frost and stack the layers.
Notes
- Using hot coffee deepens the chocolate flavor without making the cake taste like coffee.
- If you do not have buttermilk, mix 1 cup of regular milk with 1 tablespoon of white vinegar or lemon juice and let it sit for 5 minutes before using.
- For a single-layer cake, bake time may increase to 40-45 minutes.
Nutrition
- Serving Size: 1 slice
- Calories: 450
- Sugar: 55g
- Sodium: 320mg
- Fat: 24g
- Saturated Fat: 12g
- Unsaturated Fat: 12g
- Trans Fat: 0g
- Carbohydrates: 60g
- Fiber: 3g
- Protein: 5g
- Cholesterol: 65mg