

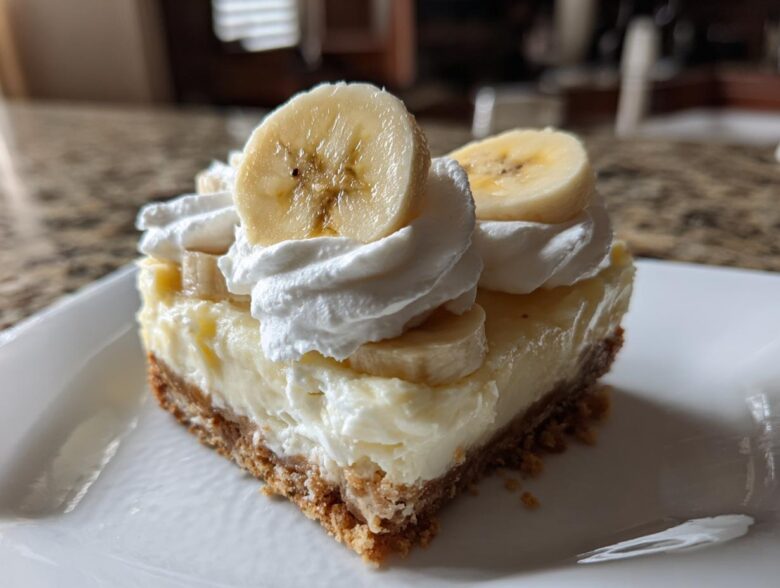
Oh my goodness, if you love that creamy, comforting vibe of Southern banana pudding but also crave the tangy structure of a really great cheesecake, stop everything you’re doing! I’ve finally cracked the code on the ultimate hybrid dessert, and trust me, these **Banana Pudding Cheesecake Bars** are going to be your new obsession. For years, I played around trying to marry those two heavyweights—pudding and cheesecake—without the result turning into soup or collapsing into a sad puddle. It took a few messy batches, but I finally figured out how to bake them perfectly into firm, sliceable squares. If you loved my ideas on the snickerdoodle cheesecake recipe, you know I love a good mashup! They have that amazing vanilla wafer base that just sings! You absolutely have to try this recipe; it’s a showstopper that’s surprisingly easy to manage once you know my little secrets.
Why You Will Love These Banana Pudding Cheesecake Bars
Okay, so why should you ditch your usual rotation and dive into this recipe? Honestly, it’s all about convenience meeting pure Southern decadence. I’ve broken down the best features right here so you can see why these deserve a spot in your baking rotation:
- Perfectly Sliceable Texture: Forget digging into a floppy trifle! Because it’s a true cheesecake bar, you get that satisfying density from the baked layer, but it stays creamy. These **Banana Pudding Cheesecake Bars** hold their shape beautifully when chilled, making cutting clean squares a breeze.
- Flavor Fusion That Just Works: What’s not to love? You get the slight tang of the cheesecake cutting through the sweet, classic vanilla flavor of the pudding and the comforting crunch of the vanilla wafers. It’s like three desserts had a party in one pan!
- Amazing Make-Ahead Potential: This is my favorite part for hosting! You can bake the cheesecake layer one day, add the pudding layer the next, and chill them overnight. They taste even better the next day, meaning less stress on party day. You can find more tips on make ahead dessert bars over on my other post.
- Portion Control is Easy: Serving is so simple. You pull the whole sheet out using the parchment sling, chill it firm, and slice away. Everyone gets the perfect ratio of crust, cheesecake, and topping every single time. No fuss, no mess!
- The Wafer Crunch Factor: Every bite gives you that necessary textural contrast. The bottom crust is buttery and firm, and I add a few extra wafers on top for garnish, so you always get that signature vanilla wafer hit.
Essential Ingredients for Perfect Banana Pudding Cheesecake Bars
Okay, let’s talk about what goes into these magnificent bars because quality ingredients make a huge difference, especially when you’re working with something this rich! You want everything at the perfect stage before you start mixing, or you end up with a lumpy cheesecake, and we absolutely cannot have that. I always set my cream cheese out at least an hour before I plan to bake so it’s truly soft—when you press it, it should yield easily, not fight you back!
For the crust, you’ll need 1 1/2 cups of vanilla wafer crumbs. If you don’t buy them pre-crushed, just pulse some Nilla Wafers in your food processor until they look like fine sand. That, combined with the 1/4 cup of sugar and 6 tablespoons of melted butter, forms our sturdy base. When mixing the main cheesecake part, make sure you use those three large eggs one at a time! For the pudding layer, the trick is using the instant vanilla pudding mix—please use *instant*—and whisking it vigorously with 1 1/2 cups of cold milk until it really pops up and thickens. If you need tips on getting your vanilla flavor right in general, check out my notes on vanilla buttercream frosting; it’s the same vibe!
Finally, don’t skip the sour cream; it gives the cheesecake that slight, wonderful sour tang that keeps it from being sickeningly sweet. And of course, those final touches—the cold heavy cream whipped up soft, the two perfectly ripe bananas, and those few extra wafers for topping—are non-negotiable for the full experience!
Step-by-Step Instructions for Making Banana Pudding Cheesecake Bars
Getting these layers right takes just a bit of patience, but honestly, you can do this! We’re essentially building a cheesecake sandwich with a crumbly base and a light, fluffy top. Make sure your oven is ready to go—350 degrees Fahrenheit is what we’re aiming for. And trust me on this one: line your 9×13 inch pan with parchment paper and let those ends hang over the sides like little handles. It saves you SO much grief later when you need to lift these babies out to slice them into perfect squares.
Preparing the Vanilla Wafer Crust
This is where we start building flavor! Take those vanilla wafer crumbs, the 1/4 cup of sugar, and your 6 tablespoons of melted butter. Mix it all up until it looks like wet sand. Press that mixture down into the bottom of your lined pan. I use the bottom of a clean drinking glass to really pack it in tight so it doesn’t crumble when we cut it later. Pop that pan into the 350-degree oven for exactly 10 minutes. When it comes out, just let it cool off on the counter for a bit while you conquer the next, creamier layer. Don’t try to rush it; a warm crust melts the cheesecake layer!
Creating the Creamy Cheesecake Layer
This is our big commitment step. Grab your bowl and start whipping that softened cream cheese and the 1 cup of sugar until it’s absolutely lump-free. If you see any cream cheese lumps now, you’ll definitely see them later! Then, beat in your sour cream and vanilla extract. Listen to me: Add those three eggs in one at a time, mixing just until they disappear after each addition. Don’t overbeat once the eggs are in, or you introduce too much air, and we want dense, not airy! Pour this beautiful, pale yellow mixture right over your slightly cooled crust.
Bake this layer for 25 to 30 minutes. How do you know it’s done? The edges should look firm and set, but the very center should still have a tiny, gentle wobble, like Jell-O on a very slight tremor. If it’s completely stiff, it’s probably overbaked. Pull it out and let it cool down completely on a wire rack. We need it cool before we touch it with pudding!
Assembling the Pudding and Chilling the Banana Pudding Cheesecake Bars
While the cheesecake is cooling, let’s get that pudding pudding-y! Whisk that instant vanilla pudding mix with the 1 1/2 cups of **cold milk**. You need that cold milk for it to set up right! Whisk it hard for about two minutes until it thickens up nicely, and then just let it sit for five minutes to firm up even more. Next, take your half-cup of heavy cream that you whipped until soft peaks formed—remember, you don’t want stiff peaks here! Gently fold the whipped cream into the thickened pudding. You want to keep all those lovely air bubbles from the cream in the pudding mix, so go easy with the spatula.
Spread that pudding mixture evenly over that now-cool cheesecake layer. Don’t worry about perfection; just get it smooth. Now comes the hardest part of making **Banana Pudding Cheesecake Bars**: waiting! You have to chill these in the refrigerator for a minimum of 4 hours. Seriously, overnight is best so everything sets up rock-solid and you can slice it cleanly.
Once they are totally firm, use those parchment handles to hoist the whole slab out onto a cutting board. Top them with your sliced bananas and those extra vanilla wafers right before you serve. If you need tips on getting sharp cuts without dragging the soft topping, check out my advice about slicing on old-fashioned fruitcake cookies; the technique is the same!
Tips for Perfect Banana Pudding Cheesecake Bars Slicing
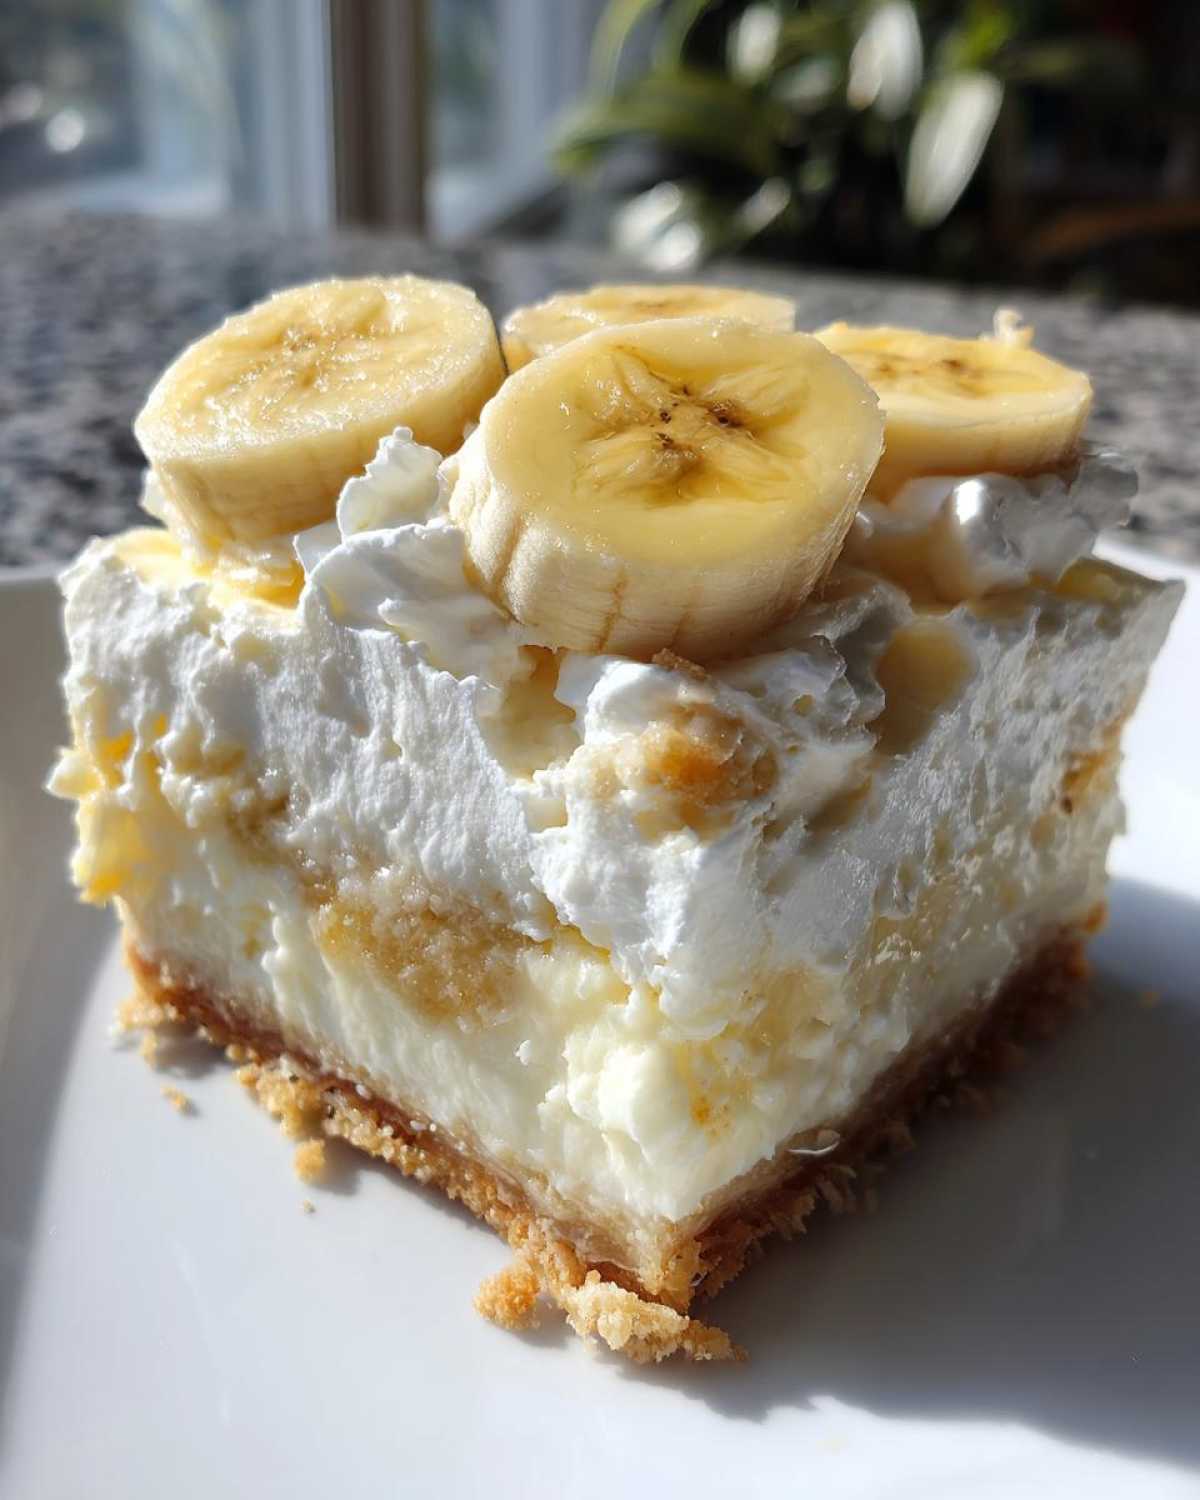
Okay, you just pulled these glorious, chilled **Banana Pudding Cheesecake Bars** out of the fridge, and they look perfect! Now comes the moment of truth: cutting them. If you try to slice through that cold cheesecake layer and the soft pudding top with a regular knife, things can get messy fast. Trust me, I’ve learned this the hard way more times than I care to admit!
You need a little trick to get those beautiful, bakery-style clean edges. Before you even make your first cut, grab a sharp, long knife—the longer the better, if you have one—and dip the entire blade into a tall glass of very hot water. Let it sit for about ten seconds to really warm up that steel. Then, dry the knife completely with a clean paper towel.
Use that hot, dry knife to make one clean slice downward through all the layers. Don’t saw; just use gentle downward pressure. This heat melts just enough of the fat and sugar in the cheesecake layer on contact to prevent sticking. After that cut is made, you absolutely must rinse the knife, dry it instantly, and reheat it in hot water again before the next slice. This ensures every single cut is pristine!
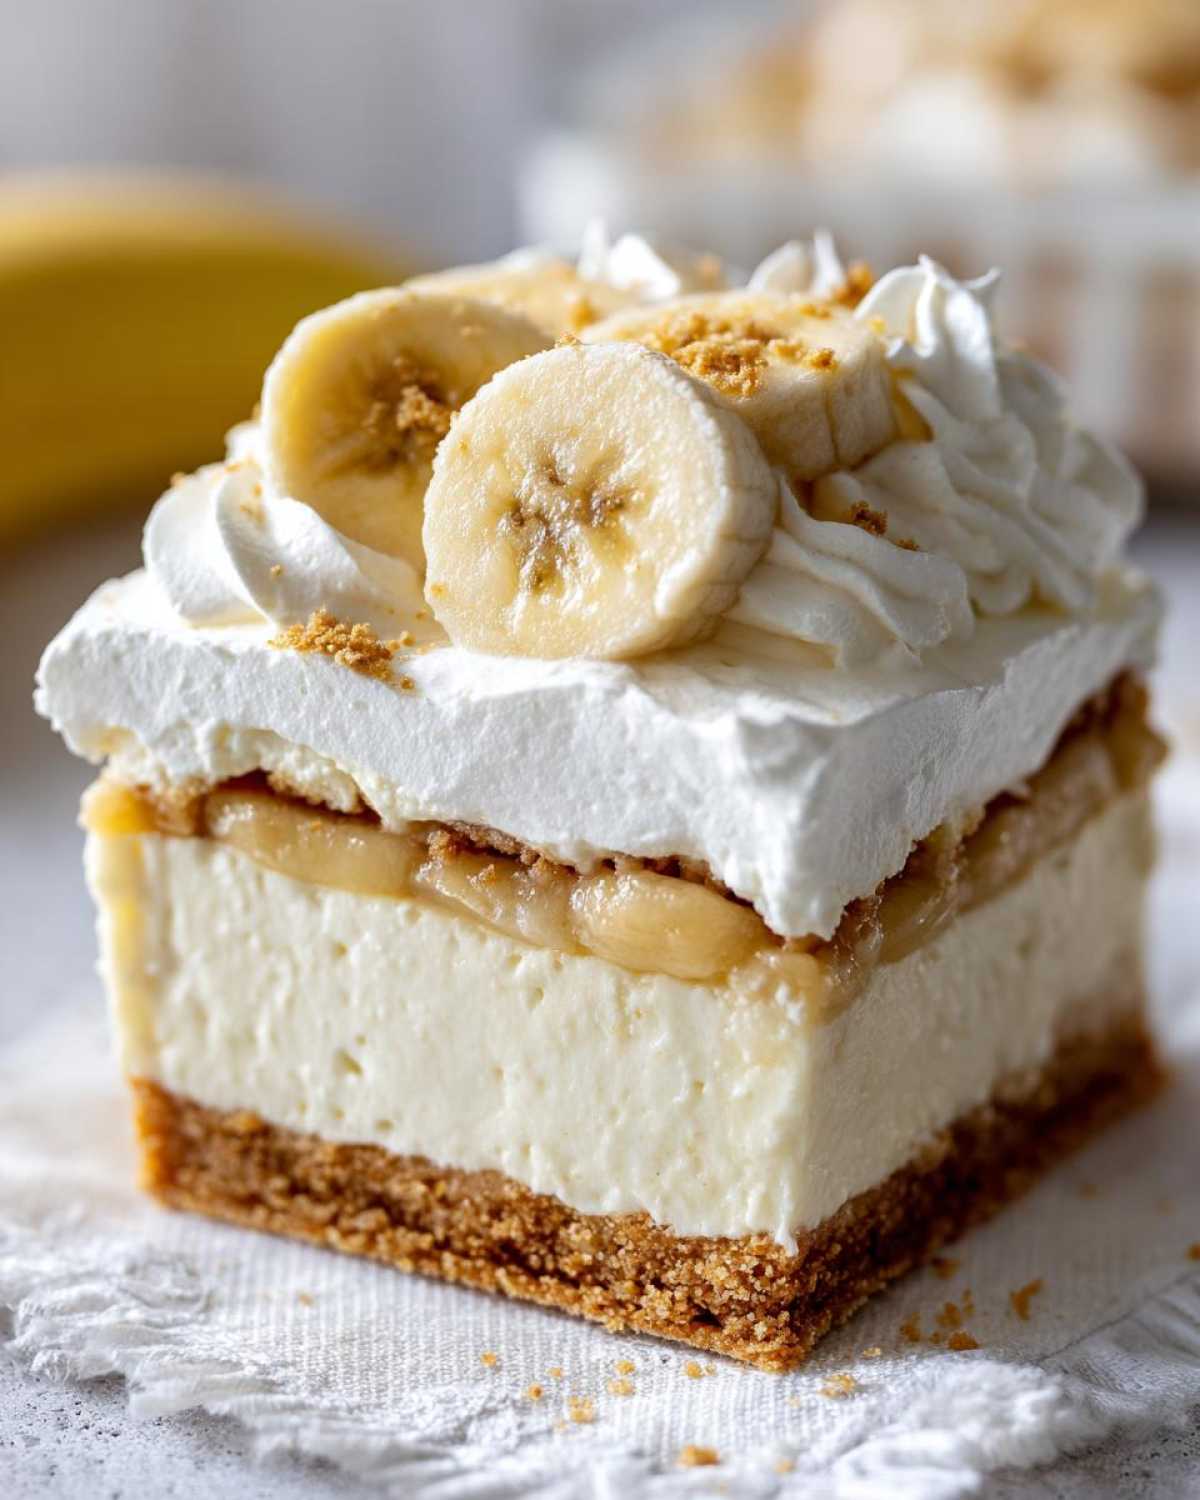
If you wait until the very last minute to add your fresh banana slices before serving, you avoid the issue of them getting too mushy. But when you do slice through them, move quickly. Because the knife is hot, it glides right through the soft banana topping and the pudding layer without dragging everything sideways. It’s a small effort, but it makes these look like they came from a professional bakery! If you’re looking for other cookie hacks, I wrote about a similar slicing technique for old-fashioned fruitcake cookies that might help too!
Ingredient Notes and Substitutions for Your Banana Pudding Cheesecake Bars
I get so many questions about the ingredients, and that’s usually because people either run out of something or they want to customize their desserts! Let’s be clear: this recipe is designed around classic vanilla flavors, but we can certainly talk substitutions. The most critical thing you have to get right is the bananas. You want them perfectly ripe—think slightly spotty, almost sweet but still firm enough to slice neatly. If they are too green, they won’t offer enough sweetness. If they are mushy brown, they might break down too much when you layer them on top.
Now, about the pudding. I specified instant vanilla because we need that quick thickening power without having to cook anything on the stove, but if you only have French vanilla, go ahead and use it! It’ll just give you an extra layer of flavor, which is always welcome in my book. Just make sure you stick to instant, otherwise the texture of your top layer will be completely different. Don’t try to use a cook-and-serve pudding mix unless you want to reduce the milk significantly and cook it down first—that’s a whole different beast!
The sour cream is truly important for cutting the richness of the cream cheese. If you’re in a pinch and don’t have sour cream, what can you use? Greek yogurt works in a pinch! Use the same amount, but make sure it’s full-fat Greek yogurt because the low-fat versions can sometimes introduce too much liquid when they bake. It won’t taste exactly the same—the sour cream gives a particular zip—but it keeps the cheesecake structure silky. Speaking of silkiness, if you’re curious about other moist recipes that nail texture, you should check out my tips for the best moist coconut cake recipe; it’s all about technique!
Also, I’ve seen people ask about swapping the vanilla wafers in the crust. While I strongly recommend keeping them for that authentic banana pudding experience, you *could* use a graham cracker crust in a pinch. Just know that you lose that specific vanilla note that pairs so perfectly with the banana pudding topping. Stick to the vanilla wafers if you can, because that pairing is what makes these **Banana Pudding Cheesecake Bars** truly special!
Storage and Make Ahead Dessert Bars
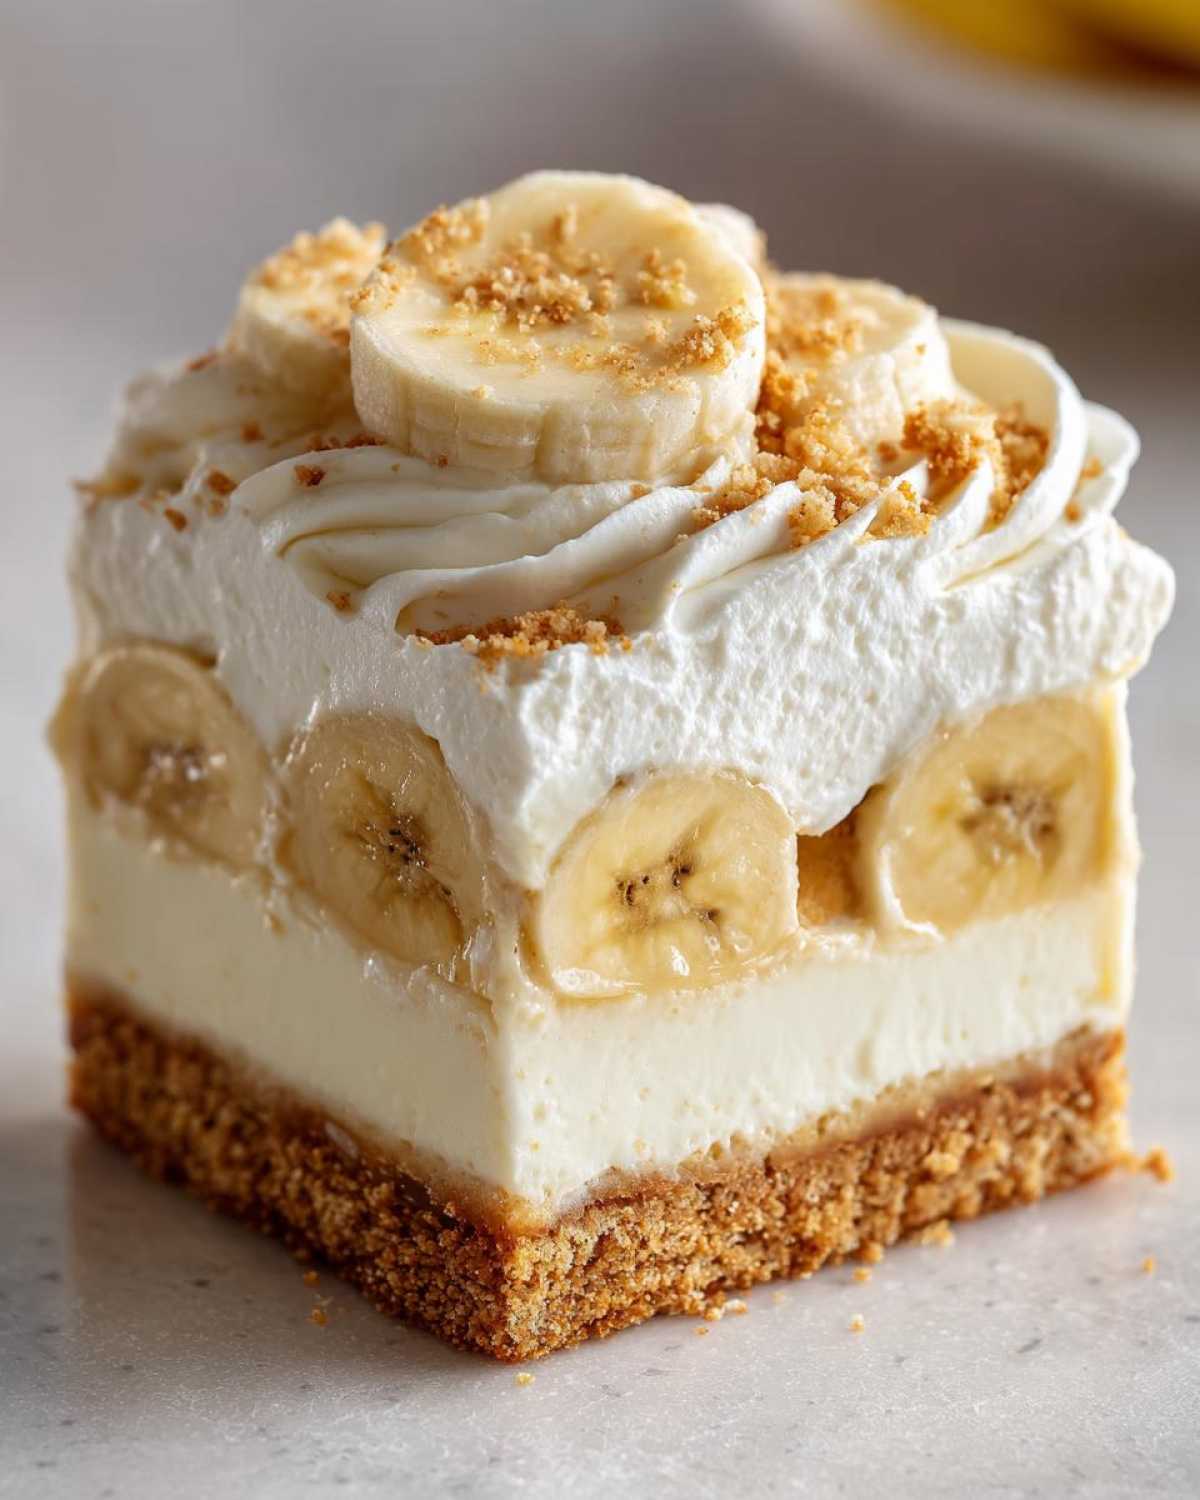
One of the reasons I love these so much is because they are fantastic **Make Ahead Dessert Bars**! Seriously, planning ahead just makes life so much sweeter, doesn’t it? Since these bars have that delicate pudding and fresh banana topping, timing is everything when it comes to storage and serving. You want to make sure you get that perfect firmness before slicing them into neat squares.
The absolute best scenario? You assemble the cheesecake layer, bake it, let it cool completely, and then add the pudding topping. Cover the whole pan tightly with plastic wrap—make sure the wrap isn’t touching the surface if you can help it—and tuck it into the fridge overnight. That’s when the flavors meld and that **Layered Pudding Cheesecake** sets up perfectly. If you slice them the next day, the cuts are remarkably clean, which is a huge win for presentation!
Now, let’s talk about those beautiful bananas on top. Fresh bananas start browning the second they hit the air, even if they are chilled! If you need to store these for more than 12 hours, I highly recommend waiting to add the banana slices and the final vanilla wafer garnish until about an hour before you plan to serve them. If you absolutely have to top them the night before, here’s my trick:
- Mix the fresh banana slices with just a tiny squeeze—like half a teaspoon—of lemon juice before spreading them over the pudding layer. It’s not enough to taste the lemon, thankfully, but it does slow down that yucky oxidation process.
- If you’re planning on keeping these for a few days, omit the bananas entirely when you store them. Just keep the base (crust, cheesecake, and pudding layer) chilled under plastic wrap. They’ll happily wait for you for up to 3 or 4 days!
When you are ready to serve the last few bars, just slice up a couple of fresh bananas and stack them on top. This way, every serving gets that bright, fresh banana flavor. I’ve got way more tips on making desserts ahead of time you might find handy right here!
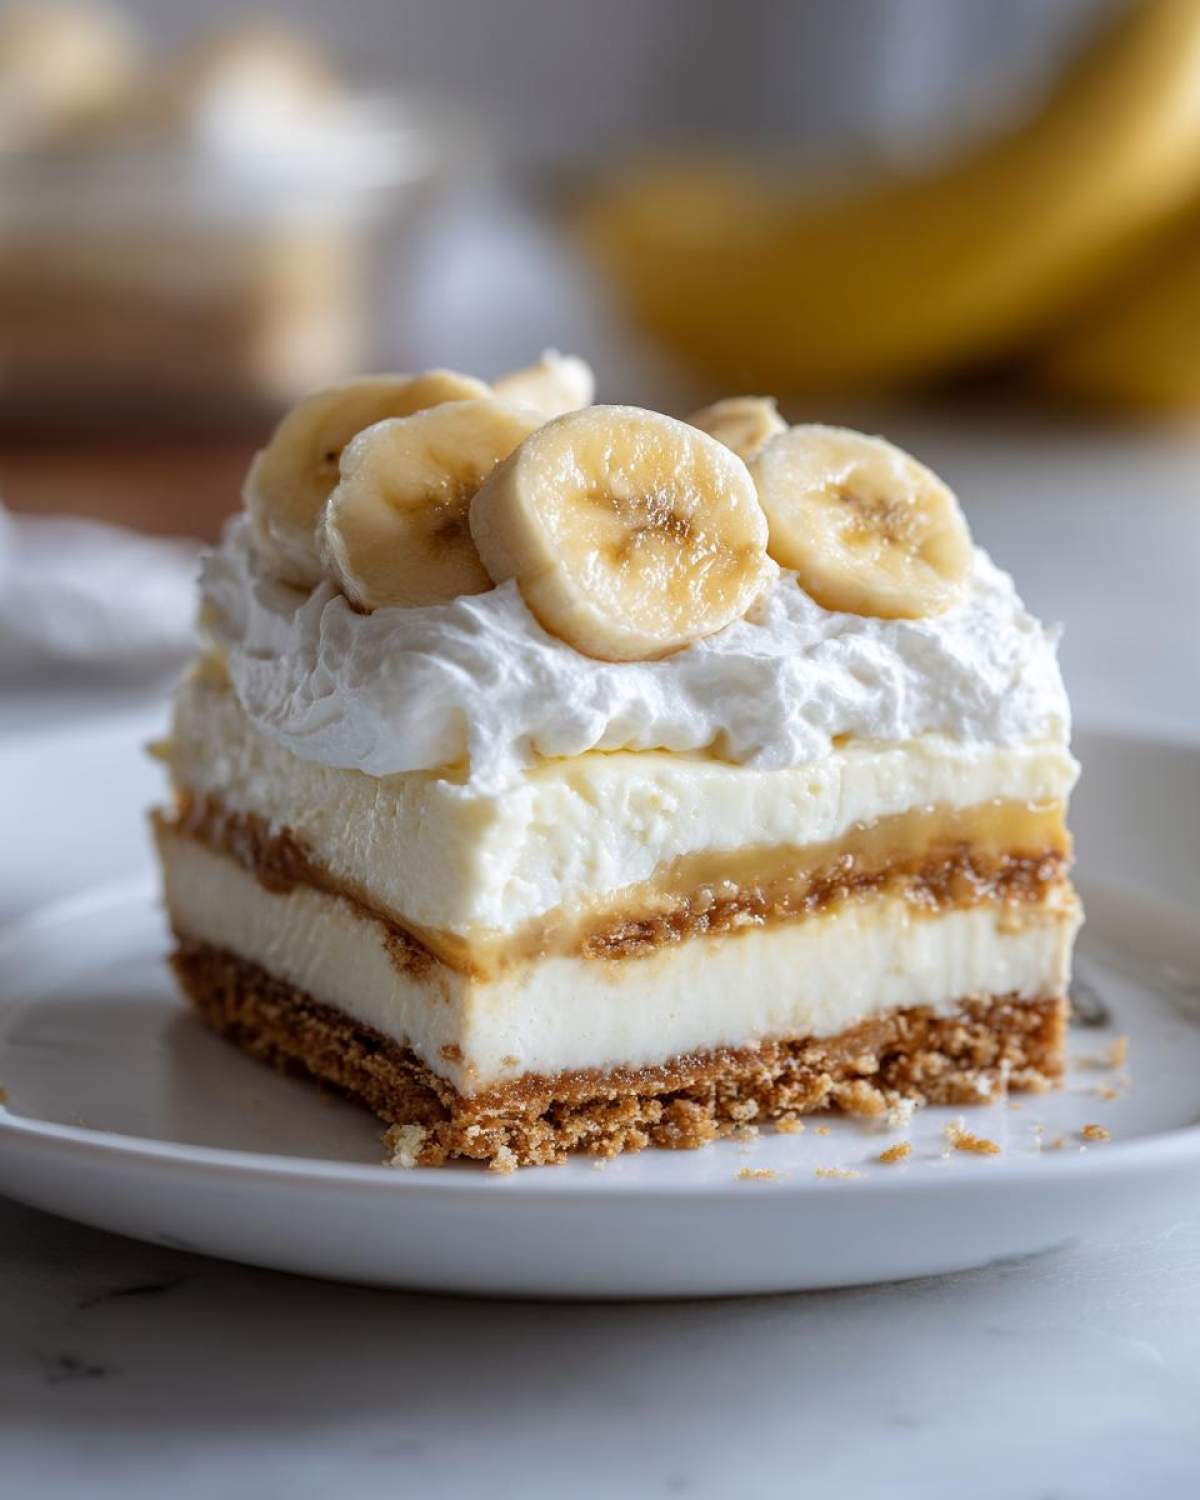
Variations on Banana Pudding Cheesecake Bars
Now that you’ve mastered the classic version of these **Banana Pudding Cheesecake Bars**, maybe you’re thinking, “What if I want to make them EXTRA special next time?” I totally get it! Customizing desserts is one of the best parts of baking. These **Hybrid Dessert Bars** are incredibly versatile, and you can make small tweaks that totally change the vibe while keeping that incredible texture we worked so hard to achieve.
I’ve got three easy ideas for you to try out next time you’re whipping up a batch. Remember, these are just suggestions—don’t be afraid to play around!
Caramel Drizzle Magic
Oh, yes. If you want to lean into pure decadence, you simply have to add caramel. Once the pudding layer has set up just a little—maybe about 30 minutes into its chill time—you can start drizzling! Warm up some store-bought caramel sauce until it’s thin and pourable. Use a spoon to flick thin ribbons all over the top of the pudding layer. Then, gently spread it out a tiny bit so it covers the surface before you put it back in the fridge to finish chilling overnight. The caramel pairs so beautifully with the vanilla and banana; it’s truly next level. It really elevates these from a great dessert to a showstopper. If you like this idea of mixing toppings, you should check out my post on cranberry crumble bars; those toppings are so interchangeable!
Cookie Crunch Inside the Cheesecake
This variation is a fun little secret to hide inside the creamy layer. For this one, you’re going to reserve about a half cup of vanilla wafer crumbs *before* you mix the crust. When you are mixing the actual cheesecake filling (after the eggs are added, but before you pour it into the pan), gently fold those extra crumbs right into the batter. This creates little pockets of vanilla wafer crunch throughout the cheesecake layer itself!
It makes the texture even more interesting, honestly. It gives it a bit of chewiness right in the middle. It’s a subtle but brilliant way to incorporate more of that classic banana pudding flavor right into the structure. Just be careful not to overmix once you add those crumbs in, or you’ll deflate all the air we just worked to incorporate!
A Hint of Southern Spirit with Rum Extract
Because we love that deep, slow-cooked flavor that often comes through in Southern desserts, sometimes I like to add just a tiny whisper of dark flavor to the cheesecake layer. You can do this by substituting the 1 teaspoon of regular vanilla extract with just 3/4 teaspoon of high-quality vanilla extract *and* adding 1/4 teaspoon of dark rum extract. You don’t want to add actual rum to the cheesecake mixture because it messes with the structure, but that extract gives you all the warm, oaky, slightly molasses-y flavor we associate with aged spirits.
It’s faint, but when paired with the sweet bananas, it really adds complexity. These little **Cheesecake Bar Variations** are what keep me from getting bored in the kitchen! If you’re looking for other ways to change up standard desserts, you might get inspired by some of the mixing I do in my cranberry crumble bar recipe, too!
Frequently Asked Questions About Banana Pudding Cheesecake Bars
I always get asked a bunch of questions when people first try to make these, and that’s totally understandable! It’s new territory combining cheesecake with that jiggly pudding top. I’ve pulled together the most common things people worry about before they start baking their first batch of **Banana Pudding Cheesecake Bars**.
Can I make this recipe no-bake?
That’s a great question, especially if you don’t want to turn on your oven! While you *can* adapt it, you absolutely cannot rely on the exact recipe above for a no-bake version. The cheesecake layer needs that gentle bake time to set up properly and achieve that perfect creamy density that pairs well with the pudding. If you want a truly no-bake, jiggly dessert, I suggest checking out my full no-bake banana cheesecake recipe instead. It uses gelatin to help it set firm in the fridge, which is exactly what you need for a no-bake square!
How do I stop the bananas on top from getting brown?
Ugh, brown bananas are the worst when you’re trying to make a beautiful dessert! As I mentioned before, the best thing you can do to keep the bananas looking fresh is to wait until the very last second to put them on. But if you *must* top them a few hours ahead of time—say, if you’re transporting these **Sweet and Creamy Squares** to a potluck—you need a little acid barrier. Mix your sliced bananas with just a tiny bit of lemon juice or some pineapple juice before you layer them over the set pudding. It really slows down that discoloration process without making the bananas taste tart!
What exactly is the right pan size for these bars?
I wrote this recipe specifically for a 9×13 inch baking pan, and I stick to that size because it gives the perfect ratio of crust to cheesecake thickness. With a 9×13 pan, you usually get about 18 generous, perfect squares. If you use a significantly smaller pan, like an 8×8, you’ll have way too much batter for the surface area; it will take ages to bake through and might become a soupy mess. Stick with the 9×13 for these **Layered Pudding Cheesecake** bars, and you’ll have the exact texture I described!
Can I use reduced-fat cream cheese or sour cream?
I really, really advise against substituting the full-fat dairy here, especially for the cheesecake layer. Cheesecake relies on the fat content to create that smooth, dense mouthfeel. If you use low-fat cream cheese or low-fat sour cream, they have more water content, and when you bake them, the bars tend to weep, crack, or become slightly grainy. Remember, this is a decadent dessert, so let yourself have the full-fat ingredients for the best results. That fat is what gives you that satisfying richness in these **Creamy Banana Cheesecake** squares!
Estimated Nutrition for These Creamy Banana Cheesecake Squares
Now, don’t scrutinize this too closely, because, let’s face it, once you dive into these amazing **Creamy Banana Cheesecake** squares, you aren’t exactly worried about counting macronutrients! But, for those who like to keep track, I plugged the ingredients into a calculator to give you a general idea of what you’re looking at per serving. These are definitely a treat, not an everyday snack!
Here are the estimated numbers for one serving, based on yielding 18 bars:
- Calories: Approximately 350
- Fat: About 20 grams (with 12 grams being saturated fat—that’s where the richness comes from!)
- Carbohydrates: Roughly 38 grams
- Protein: Around 6 grams
- Sugar: About 30 grams
Please keep in mind that these are just estimates, dear friends! If you use slightly different brands of wafers or add a big caramel drizzle, those numbers will shift. But it gives you a good baseline when you’re planning out your week. If you are looking for recipes that focus more on healthier profiles, you absolutely have to check out my classic carrot cake recipe; sometimes you just need that comforting sweetness!
Share Your Banana Pudding Cheesecake Bars Experience
I truly hope you had as much fun making these as I did perfecting them for you! There is nothing better than hearing from you when you tackle one of these big, flavorful desserts. Baking is a collaboration, after all!
So, after you’ve chilled them overnight and finally cut those perfectly clean slices—use that hot knife trick, I swear by it!—I want to know what you thought! If you try these **Banana Pudding Cheesecake Bars**, pop on over to the comments below and give this recipe a solid 5-star rating if you loved it. Tell me what your favorite layer was!
Did you stick strictly to the recipe, or did you sneak in one of those yummy variations we talked about? Maybe you added caramel, maybe you added rum extract—let me know! Don’t forget to snap a picture of your finished squares! Tag me over on social media so I can see your beautiful work. Happy baking, my friend, and don’t forget to explore the rest of my recipes on the blog!
Estimated Nutrition for These Creamy Banana Cheesecake Squares
Now, don’t scrutinize this too closely, because, let’s face it, once you dive into these amazing **Creamy Banana Cheesecake** squares, you aren’t exactly worried about counting macronutrients! But, for those who like to keep track, I plugged the ingredients into a calculator to give you a general idea of what you’re looking at per serving. These are definitely a treat, not an everyday snack!
Here are the estimated numbers for one serving, based on yielding 18 bars:
- Calories: Approximately 350
- Fat: About 20 grams (with 12 grams being saturated fat—that’s where the richness comes from!)
- Carbohydrates: Roughly 38 grams
- Protein: Around 6 grams
- Sugar: About 30 grams
Please keep in mind that these are just estimates, dear friends! If you use slightly different brands of wafers or add a big caramel drizzle, those numbers will shift. But it gives you a good baseline when you’re planning out your week. If you are looking for recipes that focus more on healthier profiles, you absolutely have to check out my classic carrot cake recipe; sometimes you just need that comforting sweetness!
Share Your Banana Pudding Cheesecake Bars Experience
I truly hope you had as much fun making these as I did perfecting them for you! There is nothing better than hearing from you when you tackle one of these big, flavorful desserts. Baking is a collaboration, after all!
So, after you’ve chilled them overnight and finally cut those perfectly clean slices—use that hot knife trick, I swear by it!—I want to know what you thought! If you try these **Banana Pudding Cheesecake Bars**, pop on over to the comments below and give this recipe a solid 5-star rating if you loved it. Tell me what your favorite layer was!
Did you stick strictly to the recipe, or did you sneak in one of those yummy variations we talked about? Maybe you added caramel, maybe you added rum extract—let me know! Don’t forget to snap a picture of your finished squares! Tag me over on social media so I can see your beautiful work. Happy baking, my friend, and don’t forget to explore the rest of my recipes on the blog!
PrintBanana Pudding Cheesecake Bars
A recipe for sliceable dessert bars featuring a vanilla wafer crust, a creamy cheesecake layer, and a banana pudding element, topped with whipped cream.
- Prep Time: 25 min
- Cook Time: 40 min
- Total Time: 4 hours 5 minutes
- Yield: 18 servings
- Category: Dessert
- Method: Baking
- Cuisine: American
- Diet: Vegetarian
Ingredients
- 1 1/2 cups vanilla wafer crumbs
- 1/4 cup granulated sugar
- 6 tablespoons unsalted butter, melted
- 2 (8 ounce) packages cream cheese, softened
- 1 cup granulated sugar
- 1/2 cup sour cream
- 1 teaspoon vanilla extract
- 3 large eggs
- 1 (3.4 ounce) package instant vanilla pudding mix
- 1 1/2 cups cold milk
- 1/2 cup heavy cream, whipped
- 2 ripe bananas, sliced
- Extra vanilla wafers, for garnish
Instructions
- Preheat your oven to 350 degrees Fahrenheit. Line a 9×13 inch baking pan with parchment paper, leaving an overhang on the sides for easy removal.
- Prepare the crust: Mix the vanilla wafer crumbs, 1/4 cup sugar, and melted butter until combined. Press the mixture firmly into the bottom of the prepared pan. Bake for 10 minutes. Let cool slightly.
- Prepare the cheesecake layer: In a large bowl, beat the softened cream cheese and 1 cup sugar until smooth. Beat in the sour cream and vanilla extract. Add the eggs one at a time, mixing well after each addition. Pour this mixture evenly over the cooled crust.
- Bake the cheesecake layer for 25 to 30 minutes, or until the edges are set but the center still has a slight wobble. Remove from the oven and let cool completely on a wire rack.
- Prepare the pudding: Whisk the instant vanilla pudding mix and cold milk together in a medium bowl until thickened, about 2 minutes. Let it sit for 5 minutes.
- Assemble the pudding layer: Gently fold the whipped heavy cream into the thickened pudding. Spread this mixture evenly over the cooled cheesecake layer.
- Chill the bars in the refrigerator for at least 4 hours, or preferably overnight, until firm.
- Before serving, top the chilled bars with sliced bananas and garnish with extra vanilla wafers. Use the parchment overhang to lift the bars out of the pan, then slice into squares.
Notes
- Use cold milk when mixing the instant pudding for the best texture.
- For cleaner slices, run your knife under hot water and wipe it dry between cuts.
- You can substitute the whipped cream with stabilized whipped topping if making ahead of time.
Nutrition
- Serving Size: 1 bar
- Calories: 350
- Sugar: 30
- Sodium: 250
- Fat: 20
- Saturated Fat: 12
- Unsaturated Fat: 8
- Trans Fat: 0
- Carbohydrates: 38
- Fiber: 1
- Protein: 6
- Cholesterol: 65