

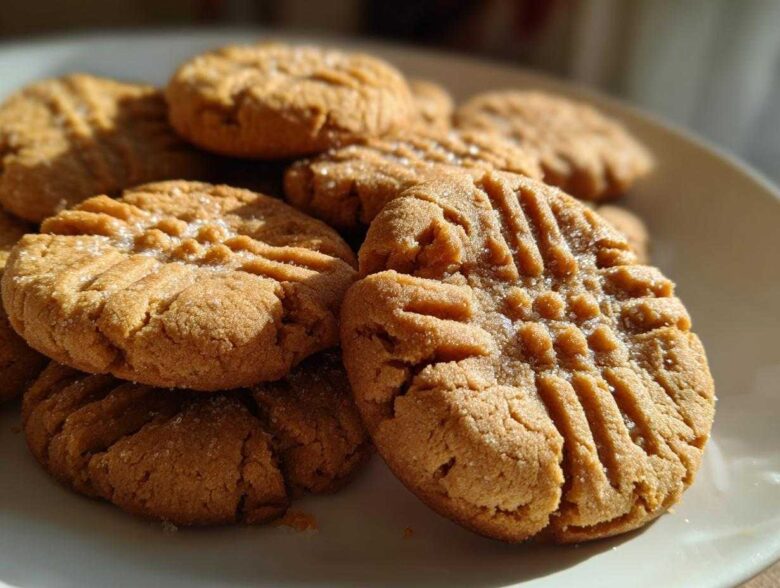
Oh, the smell of warm peanut butter wafting from the oven! Seriously, there is nothing that screams ‘instant comfort’ quite like a batch of homemade peanut butter cookies. But let’s be honest, store-bought ones or even some recipes out there end up tasting like dry, crumbly hockey pucks, and we just can’t have that. I’ve spent years tinkering, and trust me when I say this is the ultimate recipe you need.
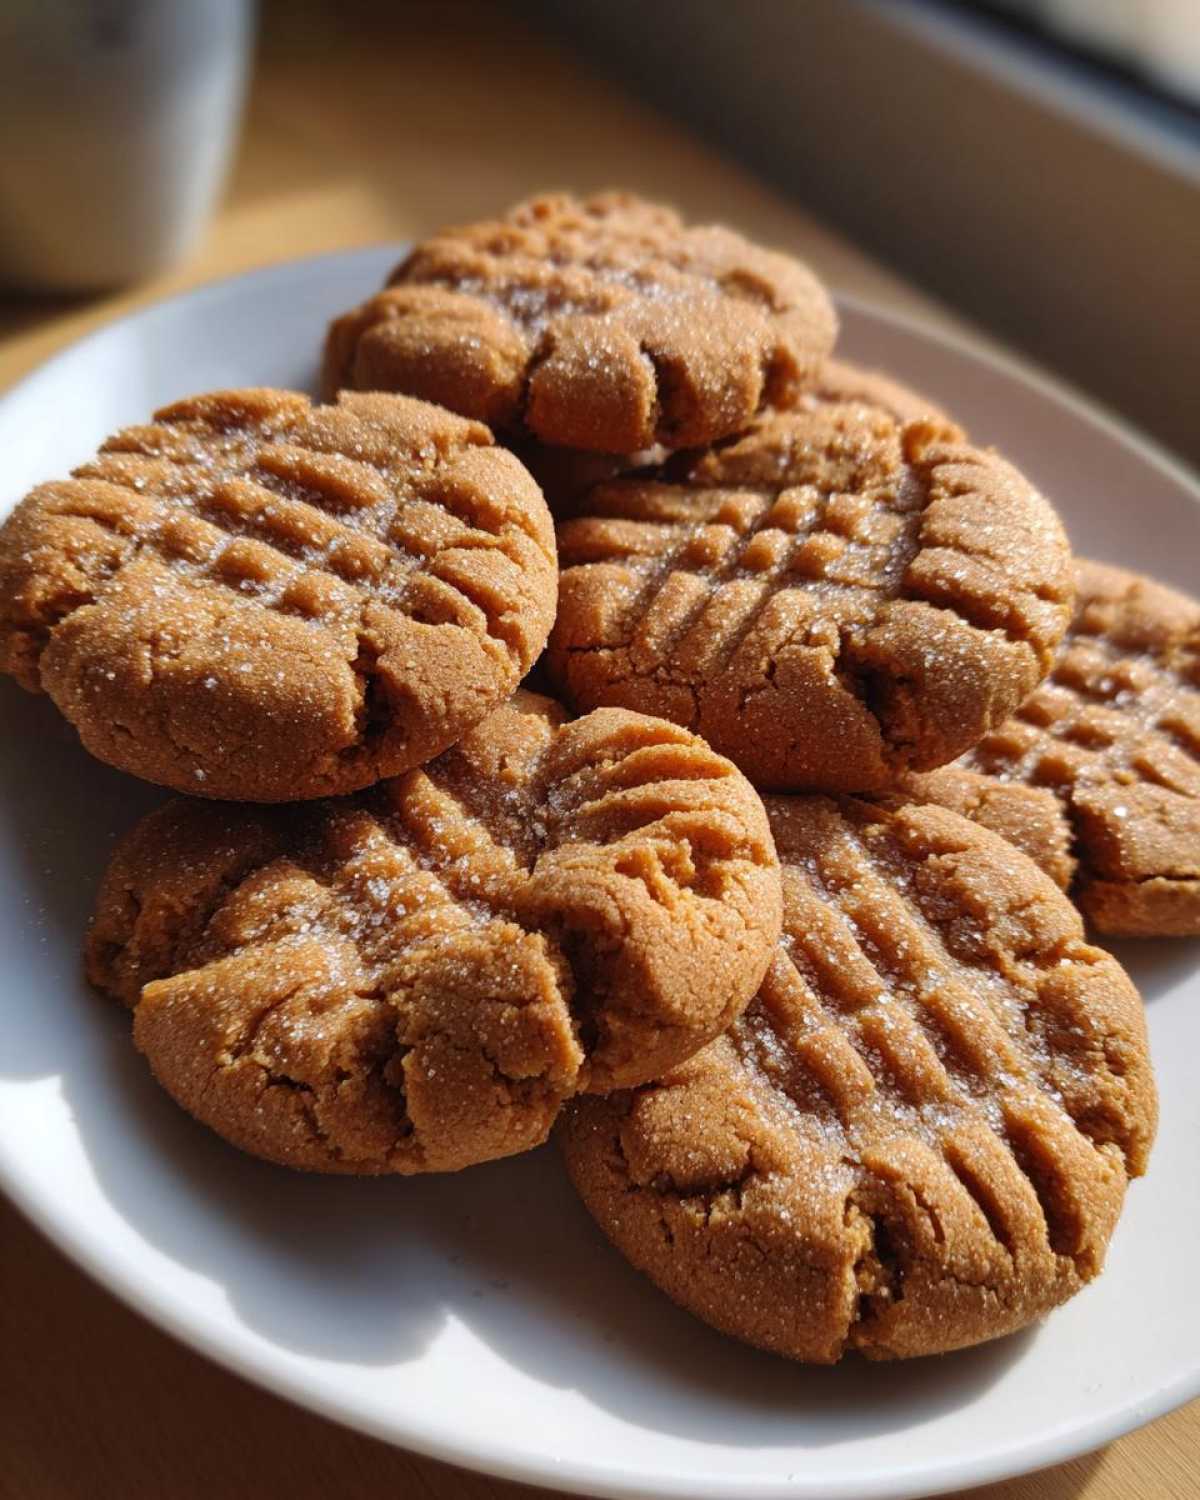
We are talking about the most perfectly **soft and chewy peanut butter cookies** you’ll ever make, all ready in less than 30 minutes! That classic crisscross pattern—who doesn’t love it? My dad always used to say that if the fork didn’t make a perfect cross, I had to eat the leftover dough. It’s the ultimate benchmark for a fantastic batch of these classic treats!
Why This is Your New Favorite Soft and Chewy Peanut Butter Cookies Recipe
So, why am I making such a huge fuss over this particular Peanut Butter Cookie Recipe? Because it hits all the marks: ultimate softness, amazing chew, and it won’t hog your whole afternoon. We’re talking about pulling these beauties out of the oven when you need a quick homemade peanut butter treat!
- They are truly ready to eat faster than most quick cookie recipes out there—we’re aiming at about 26 minutes total!
- The texture lasts! These are designed to stay melt-in-your-mouth soft the next day, not crumble into dust.
- It’s the classic look we all remember; that lovely, familiar crisscross pattern is non-negotiable for me.
Achieving Perfect Soft Peanut Butter Cookies Texture
The secret sauce for getting those wonderfully soft peanut butter cookies comes down to two little things. First, we use both white and brown sugar, but we make sure that light brown sugar content is generous. That molasses makes all the difference in keeping things tender!
Second, and this is important, you have to pull them just before you think they are done. You want the edges set and lightly golden, but the middle should still look a little bit underdone when you take them out. They’ll finish baking on that hot sheet, guaranteeing you those wonderfully chewy peanut butter cookies every single time.
Gathering Ingredients for Classic Peanut Butter Cookies
Okay, pulling together the ingredients for these Old Fashioned Peanut Butter Cookies is actually really simple—this is why they are such a staple! Most of what you need is probably already sitting in your pantry right now. But listen closely, because the type of ingredient really matters if you want that perfect homemade peanut butter treat consistency.
We need to be specific on a few things, especially the butter. Make sure your butter is actually softened—not melted, just soft enough to gently push your finger into it without struggling. Also, please grab the light brown sugar, packed tight into the cup. That’s where we get that deep, molasses flavor that keeps our cookies so unbelievably moist.
Here’s what you need to pull together for this delightful baking session:
- 1 cup (that’s 2 sticks!) unsalted butter, nice and softened.
- 1 cup plain granulated white sugar.
- 1 cup light brown sugar, make sure it’s packed down firmly in the cup.
- 2 large eggs—don’t substitute these!
- 1 full cup of creamy peanut butter. Seriously, stick to creamy for the best results here.
- 1 teaspoon of pure vanilla extract.
- 2 1/2 cups all-purpose flour.
- 1 teaspoon baking soda.
- 1/2 teaspoon baking powder.
- And finally, just 1/2 teaspoon of salt to balance out all that sweetness.
If you have all of this ready to go, you are already halfway to success! You can find more ideas for using simple pantry staple desserts on my other posts!
Step-by-Step Guide to Making Easy Peanut Butter Cookies
Okay, let’s get down to business! Making these is definitely an easy cookie recipe, but following the order matters if we want those perfect, thick **peanut butter cookies** that don’t spread into flat little discs. Before we even look for a bowl, crank that oven up! We need it hot—375 degrees Fahrenheit is what the card says. Don’t forget to line those sheets with parchment paper right away; that’s a non-negotiable prepping step for me.
Now, get that butter, your two sugars—granulated and brown—and beat them together until they look fluffy and pale. That’s called creaming, and it’s how we build air. Add in the eggs one by one, making sure they are totally combined before adding the next one. Then, mix in your peanut butter and vanilla until it just comes together. For other great mixing methods, check out how I make my one-bowl fudgy brownie cookies!
In a separate bowl, I whisk together all the dry stuff: flour, baking soda, baking powder, and salt. Whisking dries ingredients is an important step for evenly distributing the leaveners, which keeps our cookies from baking unevenly. Now, add the dry mix to the wet mix slowly. Seriously, slow down here—mix it on low speed until you see *just* the last streaks of flour disappear. If you overmix the dough, you’ll activate too much gluten, and you’ll end up with tough cookies, not the soft peanut butter cookies we’re aiming for! You want to respect the dough and stop mixing when it’s barely combined.
Roll your dough into little balls, about an inch and a half across. Pop them onto your lined sheets, giving them some space because they will spread just a little bit. This is where the magic of tradition comes in, so get ready for the best part!
The Secret to the Perfect Crisscross Cookies Pattern
This is the visual signature of a homemade peanut butter treat, right? After you place your dough balls on the sheet, grab a regular dinner fork. To keep the fork from sticking horribly to the dough (and making a total mess), here is my little trick: dip the tines of the fork directly into a small bowl of plain granulated sugar before pressing. It helps prevent sticking and gives the top of the cookie a beautiful little sparkle!
Press down once to flatten the ball slightly. Then, rotate the fork 90 degrees and press again to create that perfect crisscross design. You are pressing the dough down until it feels pretty flat because these cookies don’t spread a ton on their own. This pressing step is what guarantees the classic look and helps them bake evenly throughout!
Baking and Cooling Your Homemade Peanut Butter Treats
Time to get them in the oven! Pop those tempting trays into the preheated 375-degree heat. You are going to bake these amazing **peanut butter cookies** for just 9 to 11 minutes. Now listen carefully because this is the chewy tip: you want the edges to look just barely golden brown. If the middle still looks a little soft or pale when you peek through the oven window, that’s *perfect*. Trust me on this; they look slightly underdone, but they are truly done!
The cooling part is almost as important as the baking itself! Don’t try to rush them. Let them hang out on the hot baking sheet for a full five minutes right after they come out. This resting period is crucial because it lets those centers finish firming up without turning dry. After those five minutes, *then* you can carefully move them over to a wire rack to cool completely. This ensures you get those fantastically soft and chewy peanut butter cookies we intended!
If you’re curious about how to bake cookies right in a pan for easy cleanup, check out my recipe for that chocolate chip pan cookie—it’s a totally different approach but equally delicious!
Tips for Making the Best Peanut Butter Cookies Every Time
You’ve got the basic recipe down, but like any good home baker, you want to make sure your **peanut butter cookies** are perfect *every single time* you try them. Baking can be tricky; humidity one day can change how your dough behaves the next. That’s why I always keep a few little secrets up my sleeve to ensure we get those melt-in-your-mouth cookies we deserve.
First thing: use creamy peanut butter! I know some folks love the texture of chunky, but for this specific soft and chewy peanut butter cookies recipe, the natural oils and smoother consistency of creamy blends so much better with the fats and sugars. It helps the dough stay cohesive. If you try to use a natural, oily peanut butter, you might need to chill the dough a bit longer before rolling it out, or they might spread too much.
If you are struggling with spreading, try chilling the portion of dough you aren’t actively scooping for about 20 minutes. That solidifies the fat just enough to keep the cookies thicker and taller. These little refinements elevate a good cookie to just the best peanut butter cookies!
Ingredient Substitutions for Peanut Butter Cookies
When it comes to simple pantry staple desserts like this, people always ask about swapping ingredients, especially if they have dietary restrictions. Keep in mind that changing structure ingredients—like flour or butter—changes the results instantly, but here are a few safe bets.
If you absolutely must use natural peanut butter, I’d suggest draining off any extra oil you see floating on top before measuring. You might even add an extra tablespoon of flour just to compensate for the difference. Please, please use real butter though; substitutes just don’t give you the right flavor or texture we are looking for in these classic peanut butter cookies.
For those looking to dip their toes into alternative flours, you *can* swap about a quarter cup of the all-purpose flour for an equal amount of oat flour. It adds a nice, hearty texture, though it won’t be a true gluten-free version, of course. For that, you’d need a completely different approach, but this simple swap is great when you don’t want to stray far from the original recipe!
I actually have a whole post about spices and how they affect baked goods if you’re interested in diving deeper into flavor science, like how I use cardamom in my Chai Spice Oatmeal Cookies!
Variations on Classic Peanut Butter Cookies
While these creamy, soft **peanut butter cookies** are absolutely perfect straight from the recipe card, I know sometimes you just need a little extra something, right? It’s so easy to customize them right before you bake them. Think of this dough as a fantastic foundation for other lunchtime favorites!
If you are craving something richer, toss in about a cup of milk or semi-sweet chocolate chips right at the end when you mix in the dry ingredients. That transforms them instantly into something like a Subway Style cookie! You could also chop up some peanut butter cups and fold those in for a real treat. For a twist on a classic holiday favorite, you can always grab my Peanut Butter Blossoms Recipe adaptation, which uses only the dough from this base recipe!
Storage and Make Ahead Cookies Instructions
So you made a huge batch of these perfect **peanut butter cookies**, or hey, maybe you just want the easiest possible weeknight treat! Since we nailed that soft and chewy texture, storage is key to keeping them tasting fresh from the oven. Once they are completely cool, tuck them into an airtight container. I like putting a small slice of sandwich bread in there with them—it sounds crazy, but that bread releases moisture and keeps my cookies soft forever! They stay fantastic for about four or five days this way.
If you’re planning ahead for a busy week, you can absolutely prepare the dough in advance! Just roll your dough balls out, put them on a sheet, and stick that whole tray into the freezer for an hour or two until they are solid little pebbles. Then, transfer them to a freezer bag. Now you have instant **homemade peanut butter treats** whenever the craving hits! You don’t even need to thaw them completely; just add an extra minute or two to the baking time. It’s a fantastic trick for keeping a quick cookie recipe ready to go!
I’ve shared lots of tips on preparing food ahead of time, like my recipes for make-ahead breakfast burritos, because sometimes you just need that convenience!
Frequently Asked Questions About Peanut Butter Cookies
I get so many questions about these classic cookies, especially when people try to adapt them for their own pantry needs or when they compare them to the super simple versions out there. Don’t worry, I’ve tested all the variables!
How can I make my cookies significantly thicker?
If you prefer really thick peanut butter cookies rather than the flatter, chewier style this recipe aims for, you have a couple of easy options. As I mentioned in the tips section, chilling is your best friend! If you chill the dough balls for at least 30 minutes before they hit the oven, they spread less during baking. Another trick for making them thicker is reducing the amount of butter slightly, or just reducing the amount of sugar, but honestly, chilling the dough is the least invasive technique!
Can I use crunchy peanut butter instead of creamy?
Oh, sure, you can use crunchy peanut butter if you really prefer those little peanut bits scattered throughout your homemade peanut butter treats. However, I need to warn you: it changes the texture quite a bit. Crunchy peanut butter adds solid texture elements that interfere with the dough’s general smoothness and creaminess. You might find the dough a little drier, so keep an eye on your mixer, and don’t be surprised if you need to add just a tiny splash more vanilla or even a teaspoon of milk to get things combined properly.
Do I need to cream the butter and sugar for the 3-Ingredient Peanut Butter Cookies version?
That’s a great question! If you are looking to make those super simple 3-ingredient peanut butter cookies (usually just egg, sugar, and peanut butter), then no, you absolutely do *not* cream anything. That 3-ingredient version is totally different from this recipe because it relies purely on the mix to hold together; it won’t have the lift, richness, or chewiness that comes from using butter, leavening agents, and both sugars. This recipe is for classic, fully developed flavor!
Why did my cookies spread way too much when baking?
Spreading is the nemesis of any good cookie baker! If your cookies flattened out too much, almost parchment thin, it usually comes down to the temperature of your ingredients or your oven. If your butter was too soft, close to melted, the dough can’t hold its structure when it hits the heat. Also, check your baking soda and baking powder! If they are old or you accidentally used too much, they cause the cookie to lift too fast and then collapse flat. Make sure your oven temperature is accurate, maybe with an oven thermometer—that’s the best tip for consistent results in your snacks recipes!
Estimated Nutritional Information for Peanut Butter Cookies
Now, I always say that when you’re baking something this comforting and delicious, we aren’t focusing too hard on the totals, but awareness is good practice! These numbers are just estimates based on the ingredients used in this classic recipe. Keep in mind that brands of peanut butter and the exact size of your cookie balls can make a difference in the final count.
If you want to see the full breakdown for this recipe, you can check out the details over on my disclaimer page, but here’s a quick peek at what one cookie contains:
- Serving Size: 1 cookie
- Calories: 160
- Fat: 9g
- Carbohydrates: 18g
- Protein: 4g
It’s always encouraging to see that 4 grams of protein in a cookie, right? That’s all that good peanut butter goodness shining through!
PrintThe Ultimate Soft and Chewy Classic Peanut Butter Cookies
A straightforward recipe for making classic, soft, and chewy peanut butter cookies with the traditional crisscross pattern. This recipe uses common pantry ingredients and bakes quickly.
- Prep Time: 15 min
- Cook Time: 11 min
- Total Time: 26 min
- Yield: About 3 dozen
- Category: Dessert
- Method: Baking
- Cuisine: American
- Diet: Vegetarian
Ingredients
- 1 cup (2 sticks) unsalted butter, softened
- 1 cup granulated sugar
- 1 cup packed light brown sugar
- 2 large eggs
- 1 cup creamy peanut butter
- 1 teaspoon vanilla extract
- 2 1/2 cups all-purpose flour
- 1 teaspoon baking soda
- 1/2 teaspoon baking powder
- 1/2 teaspoon salt
Instructions
- Preheat your oven to 375 degrees Fahrenheit (190 degrees Celsius). Line baking sheets with parchment paper.
- In a large bowl, beat the softened butter, granulated sugar, and brown sugar together until the mixture is light and fluffy.
- Beat in the eggs one at a time, mixing well after each addition. Stir in the peanut butter and vanilla extract until just combined.
- In a separate medium bowl, whisk together the flour, baking soda, baking powder, and salt.
- Gradually add the dry ingredients to the wet ingredients, mixing on low speed until just combined. Do not overmix the dough.
- Roll the dough into 1 1/2 inch balls and place them about 2 inches apart on the prepared baking sheets.
- Use the tines of a fork to press down on each ball, creating a crisscross pattern. Press once in one direction, then press again perpendicular to the first marks.
- Bake for 9 to 11 minutes, or until the edges are lightly golden brown but the centers still look slightly soft.
- Let the cookies cool on the baking sheet for 5 minutes before transferring them to a wire rack to cool completely.
Notes
- For extra soft cookies, slightly underbake them; they will firm up as they cool.
- Use creamy peanut butter for the best texture, as chunky varieties can affect dough consistency.
- To achieve the perfect crisscross, dip the fork tines in granulated sugar before pressing the dough balls.
- If you want thicker cookies, chill the dough for 30 minutes before rolling and baking.
Nutrition
- Serving Size: 1 cookie
- Calories: 160
- Sugar: 12g
- Sodium: 110mg
- Fat: 9g
- Saturated Fat: 3g
- Unsaturated Fat: 6g
- Trans Fat: 0g
- Carbohydrates: 18g
- Fiber: 1g
- Protein: 4g
- Cholesterol: 25mg