

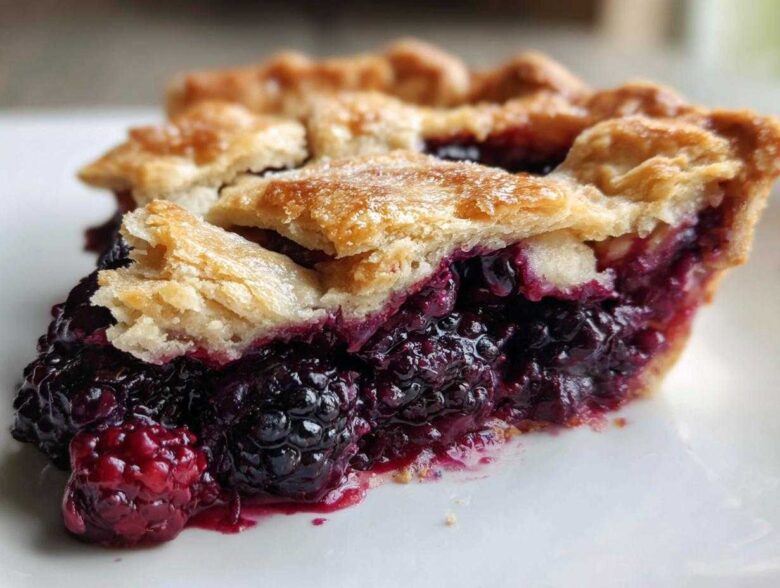
Oh my goodness, are you ready for summer in a slice? Because that’s what this recipe is! When those plump, deep purple blackberries start showing up at the market, I know it’s time to pull out my specialty supplies. We’re not just making any pie here; we’re making the ultimate flaky crust blackberry pie. I’ve spent years tinkering—oops, I mean, *perfecting*—this method, and I promise you it works whether you’re just learning to bake or you’re a seasoned pro!
The real magic, the thing that sets this apart, is that crust. I’m talking about layers that shatter delicately when you cut into them, and they only happen when you treat that butter right. Then, we balance that incredible buttery shell with a filling that pops—perfectly sweet, but with that necessary little tart kick from the berries. Trust me, once you master this technique for a deep-dish, lattice-topped beauty, you’ll never look back!
Why This Homemade Blackberry Pie Recipe Works Every Time
Honestly, I know baking a pie from scratch can feel intimidating, especially when you hear horror stories about soggy bottoms or tough crusts. But that’s exactly why I’m sharing this as my go-to. It solves those major headaches!
- This recipe guarantees a crust that actually flakes—it’s not just sturdy; it melts in your mouth.
- Baking this is easier than you think; I break down the lattice so it looks fancy but isn’t fussy.
- You end up with a deep, bubbly filling that slices beautifully without running all over the plate.
If you’ve been looking for the secret to a truly fantastic homemade Blackberry Pie Recipe, this is it. It seriously makes baking feel like a breeze!
Achieving the Perfect Flaky Pie Crust Tutorial
The secret lives and dies with the temperature of your butter! You absolutely *must* keep your butter freezing cold when you cut it into the flour. When those tiny, hard butter pieces hit the hot oven, they melt, creating little pockets of steam. That steam is what pushes the dough apart layer by layer, giving you that incredible flakiness. Don’t ever substitute room-temp butter here; it just won’t work the same way, trust me on this one.
The Secret to Juicy Blackberry Filling
Nobody wants a soupy pie. The number one way we prevent that is making sure we use just the right thickening agent—I prefer cornstarch because it gives a cleaner shine, but tapioca works too. This specific ratio lets your blackberries release all their wonderful, tart juice while baking, but the starch steps in immediately to create that beautiful, thick, scoopable sauce. That’s how you get a perfect slice of blackberry pie every time.
Gathering Ingredients for Your Blackberry Pie
Okay, time to get organized! The key to baking success—especially when you are dealing with temperamental dough and high-water-content fruit—is having everything measured and ready before you even turn the oven on. This list makes sure we have the components for two main parts: that killer buttery pie shell recipe and that gloriously chunky filling. Don’t stress about the exact measurements; they look specific for a reason, but feel free to taste your berries first!
Ingredients for the Buttery Pie Shell Recipe
This is exactly what you need for a double crust—a bottom layer and that beautiful lattice top. Remember the golden rule: your butter needs to be kept as frigid as possible, like it just came out of a deep freeze, and use water that’s nearly slushy. I mean it!
- Two and a half cups of all-purpose flour—sifted or not, it’s fine for me.
- One teaspoon of salt to wake everything up.
- One cup (which is two full sticks!) of unsalted butter, cut into small, very cold cubes. Seriously, keep those cubes distinct!
- Half a cup of ice water. If your kitchen is hot, you might need a tablespoon or two more, but start slow.
Ingredients for the Sweet Tart Berry Dessert Filling
This is where the flavor explosion happens. We want that perfect balance of sweet and tart, so pay attention to the sugar amount—you can dial it up or down depending on your harvest!
- Six cups of blackberries. If you’re using fresh ones, wash them gently. If you’re using frozen, listen closely: DO NOT thaw them! Toss them in straight from the freezer.
- One and a half cups of granulated sugar. If those berries are super sweet already, maybe drop it down to 1 1/4 cups.
- A quarter cup of cornstarch or tapioca starch—this is non-negotiable for thickness!
- A full tablespoon of fresh lemon juice and one teaspoon of zest. That acid brightens everything up.
- And just a tiny whisper of ground cinnamon to round out that lovely fruit flavor.
How to Make Blackberry Pie From Scratch: Step-by-Step
This is where the action happens! Don’t rush this process, but don’t dawdle either. We need action, but calm action. Following these steps exactly is how we transform simple flour and berries into that show-stopping, perfect blackberry pie you’ve been dreaming of. We start with the dough because, frankly, cold dough is happy dough, and happy dough makes a flaky crust!
Preparing the Dough for the Flaky Pie Crust Tutorial
First things first, we need to cut that ice-cold butter into the flour mixture we looked at earlier. Grab a pastry cutter, or honestly, just use your fingertips if you work fast. What you’re aiming for is a mix that looks like sandy pebbles with some larger, noticeable chunks—think slightly bigger than a pea. Those pea-sized butter bits are pure gold!
Now, slowly drizzle in that ice water, a tablespoon at a time. Stop mixing the *instant* the dough starts to hold together when you squeeze a handful. You want it shaggy, not smooth! If you keep kneading, you develop gluten, and gluten means tough pie. Oops! Once it holds, divide that dough into two equal, flattened disks, wrap them tight in plastic wrap, and slide them into the fridge. They need a solid sixty minutes minimum to chill out and relax. Seriously, don’t skip that hour!
Mixing the Juicy Blackberry Filling
While the dough is meditating in the cold, we mix our filling. Take your berries—fresh or still frozen, remember—and gently shower them with that sugar mixture, the starch, the lemon zest, and the tiny bit of cinnamon. I use a big rubber spatula for this because I want to coat everything evenly, but I do *not* want to mash my pretty berries. We’re aiming for whole berries swimming in a syrup that will thicken up nicely later. Just gently fold everything together until the mixture looks wet and coated. That’s it for the filling prep!
Assembling Your Blackberry Lattice Top Pie
Okay, pull one disk of dough out. Flour your counter lightly and roll that first piece out into a big circle, maybe about 12 inches across. Carefully drape that over your pie plate and gently press it into the bottom and sides. Trim the overhang to about an inch past the rim. Back into the fridge it goes! This step keeps the bottom crust from shrinking too much.
Now for the fun part: the lattice! Roll out your second disk. Use a pizza cutter, or a regular knife if you’re careful, to cut even strips—maybe an inch wide is good. Drape half your strips vertically over the filling, then start weaving. Take one every-other strip, fold it back, lay a perpendicular strip down, and unfold the first set. It’s easier than explaining, I promise! Once the Blackberry Lattice Top Pie is woven, gently crimp the top edges tightly to the bottom edges, sealing all that delicious juice inside.
Baking Instructions for the Perfect Blackberry Pie
We finish this masterpiece with a quick brush of that egg wash—that’s just the egg beaten with a splash of water—and a generous sprinkle of coarse sugar. That sugar adds sparkle, crunch, and the professional finish nobody can resist. Pre-heat your oven to a hot 400°F (200°C). We bake high first for 20 minutes to set that bottom crust and give it a blast of heat.
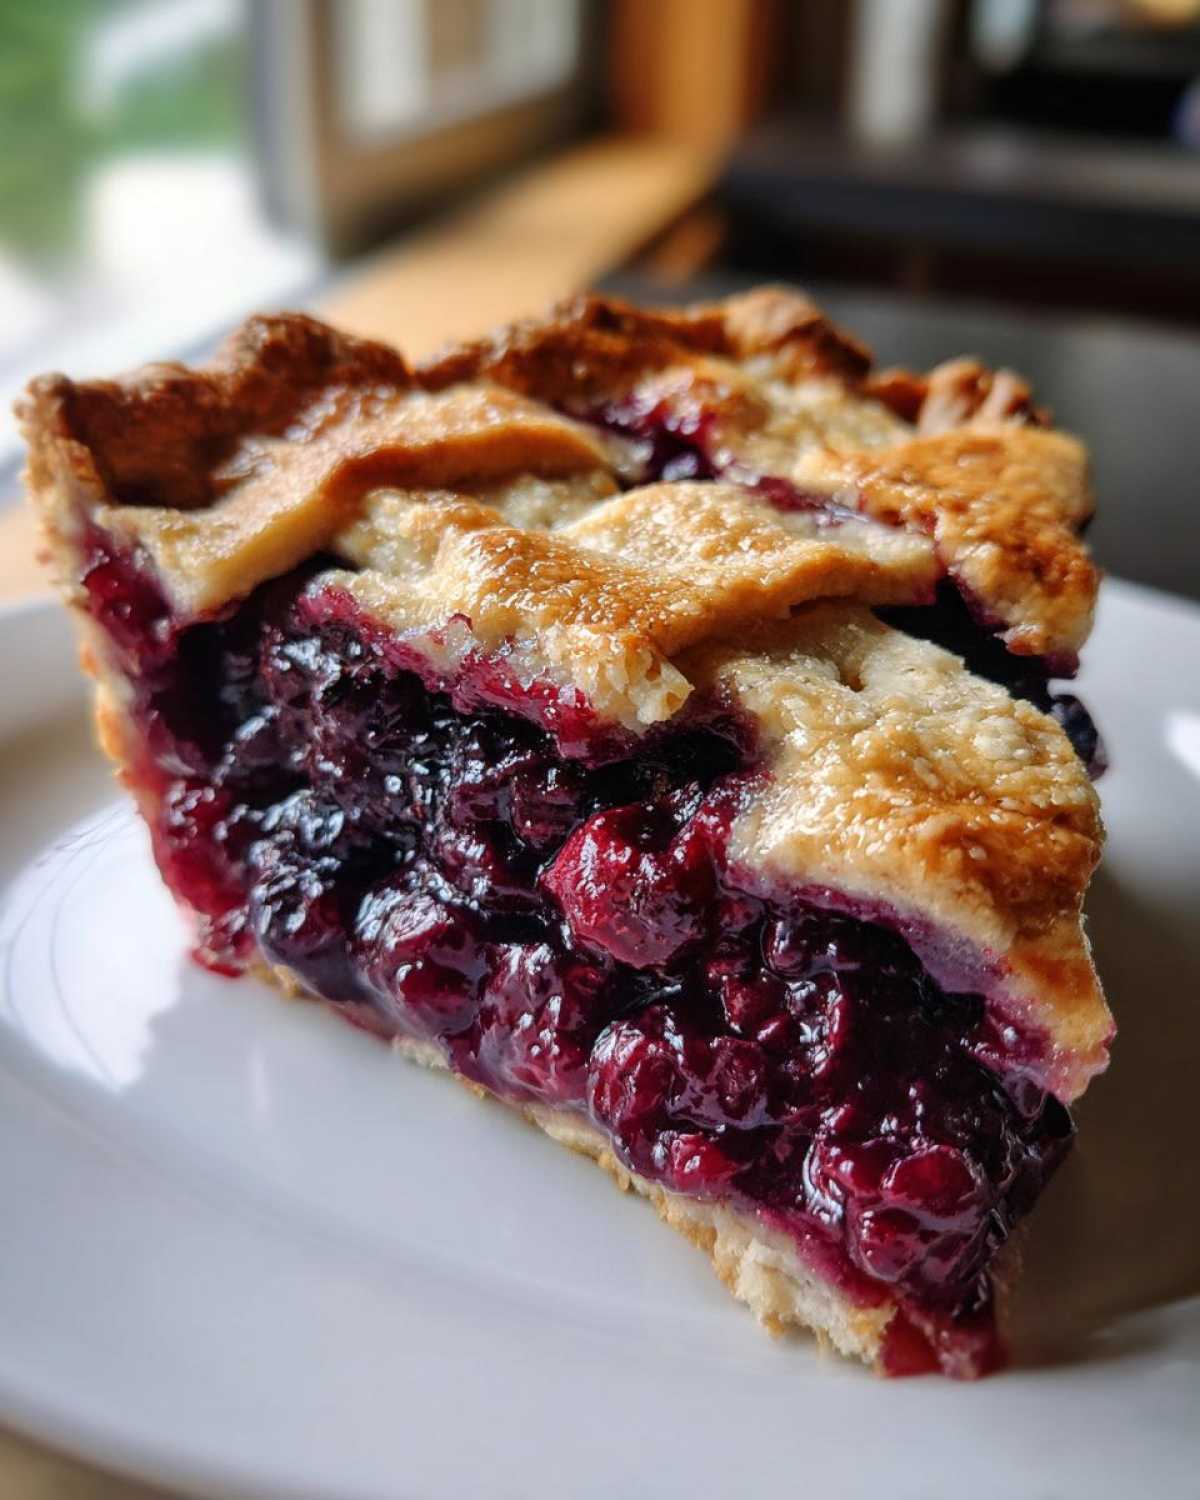
Then, drop that temperature way down to 375°F (190°C) and keep baking for another 35 to 45 minutes. How do you know it’s done? Foil shields are your friend if the edges look too dark! Look for the juices bubbling up through the lattice holes; they should look thick, almost lava-like, not thin and watery. And please, please, please, let it cool for at least three to four hours on a rack before you even *think* about slicing. If you cut it hot, you get a purple puddle, not a slice!
Tips for Success Making Your Easy Blackberry Pie Baking
Even with the perfect recipe laid out, sometimes a little insider knowledge makes the difference between a good pie and the legendary blackberry pie everyone talks about for months.
I’ve got three quick things I always double-check before I slide that beauty into the oven. These little moves are what separate the amateur pies from the ones that look like they came straight from a county fair!
First up: those berries. If you are using frozen ones—and honestly, sometimes I do just because they are so convenient—make sure you don’t thaw them at all! Put them in the bowl straight from the freezer. If they start getting mushy before you mix them, your starch won’t work right when it hits the heat. Keep ‘em cold until baking time!
Second, let’s talk about the oven temperature again. That initial blast at 400°F is non-negotiable. It shocks the bottom crust into cooking before the filling has a chance to steam it soggy. Don’t worry about the top burning; that’s why we have foil ready to drape over the edges if the crust looks like it’s getting too cozy!
And finally, the hardest tip of all: waiting for it to cool. I know, I know, the smell alone is torture. But slicing a warm, gooey blackberry pie means losing all that structure we worked so hard for. You need those few hours for the juices to truly gel up and set into that thick, sliceable state. A scoop of vanilla ice cream waits patiently, so you should too!
Storage and Reheating Instructions for Classic American Pie Dessert
Once you manage to get this perfect Classic American Pie Dessert cooled (which, let’s be real, is the hardest part!), you might wonder how long you can let this beauty sit on the counter. Good news: because of that thick, sugary filling, this pie is remarkably stable.
If you plan on eating the whole thing within, say, 8 hours of baking, leaving it loosely covered on the counter at room temperature is totally fine. The fruit filling holds up really well. Just make sure it’s somewhere cool, away from direct sunlight, where your dog or curious toddler can’t reach it!
If you need it to last longer—maybe you made this epic dessert for a holiday and need leftovers—then the fridge is your best bet. Cover the pie tightly with plastic wrap or foil after it has completely cooled (never wrap a warm pie, trust me, you’ll create steam and a soggy crust!). In the refrigerator, this blackberry pie will stay wonderful for about three to four days. The crust might get just a tiny bit softer over time, but the flavor is still amazing.
Can I freeze leftover blackberry pie?
Oh yes, you absolutely can freeze it! This is where baking ahead saves the day. You have two options here. You can freeze an already baked and cooled slice, well-wrapped in plastic wrap and then foil. It keeps well for maybe two months if you do that. Or, even better, you can freeze that freezer-friendly pie filling raw, poured into a pie shell, and freeze the whole thing unbaked! Then you just pop it in the oven (add about 15-20 extra minutes to the bake time) when you want a fresh-baked pie later.
The best way to reheat a slice
Nobody wants cold pie, right? If you’re just heating up a slice, the microwave is speedy but it turns the crust a little chewy, which isn’t our goal. For that “fresh from the oven” feel, use a toaster oven or a regular oven set low, around 300°F (150°C). Just heat the slice for about 10 to 15 minutes until the filling is warmed through. That low temperature lets the crust crisp up again without turning the fruit filling into soup. Perfect for serving with a fresh dollop of whipped cream or, better yet, a scoop of vanilla ice cream that melts right into the warm tart fruit!
Serving Suggestions for Blackberry Pie with Vanilla Ice Cream
You’ve baked the perfect jewel-toned, flaky-crusted pie. Now comes the best part: deciding how to dress it up for company! Honestly, this blackberry pie is so flavorful that it doesn’t need much, but a little something extra just elevates it into true comfort food territory, doesn’t it?
My absolute, hands-down, number one favorite way to serve this amazing seasonal fruit pie baking is warm—not piping hot, but definitely warm enough that the filling is still soft—with a massive scoop of really good vanilla ice cream. The contrast between the tart, warm berry filling and the cold, sweet cream is just unbeatable. That ice cream melts into the lattice gaps, creating its own creamy sauce. It’s heaven, I tell you!
If you aren’t a huge ice cream fan, or maybe you’re serving this after a really rich dinner, fresh whipped cream is my second choice. Don’t buy that aerosol stuff, though! Whip heavy cream yourself with just a tiny bit of powdered sugar and maybe a drop of vanilla extract. It feels so much lighter, and it pairs beautifully with the acidity of the berries without being too heavy.
For something really special during holidays or when you want that extra layer of decadent sweetness, try drizzling it with a light homemade caramel sauce. The deep, slightly burnt sugar notes of the caramel play so well with the earthy blackberry flavor. It takes it from a simple summer dessert to a real showstopper! Whatever you choose, make sure you have napkins ready, because that juicy filling tends to escape!
Frequently Asked Questions About This Blackberry Pie Recipe
Whenever I post about this pie, the same questions always pop up, and honestly, they’re all super fair questions because pie baking has a few quirks! I figured I’d tackle the most common ones right here so you can hop straight to baking your pie recipes for beginners with total confidence!
Can I use frozen blackberries in this blackberry pie recipe?
Yes, absolutely! I often rely on frozen berries when fresh ones aren’t in season, or if I just didn’t get to the market in time. The one major thing you need to remember: do *not* thaw them first! Toss them in straight from the freezer alongside your sugar and starch. Since they are starting out colder, they release their moisture a little slower and sometimes take a tiny bit longer to heat up, so you might just need to add an extra 5 to 10 minutes onto that total bake time to ensure that filling is bubbling hot in the center.
What is the best way to prevent a soggy bottom crust?
This is the eternal pie battle, isn’t it? The simplest defense against a soggy bottom is chilling, chilling, chilling! Make sure your bottom crust is cold when it goes into the oven, placed on the lowest rack possible, and that your oven temperature is accurate. Hitting it with that initial 400°F blast for 20 minutes is key—it cooks the bottom crust before the hot berry juice has a chance to soak in and steam it soft. If you are paranoid, dust the inside of your bottom shell with a tiny bit of flour or almond flour right before filling it, though this recipe’s thickening agent usually handles the job just fine!
How do I achieve a truly Old Fashioned Blackberry Pie flavor?
If you want that deep, complex taste reminiscent of an Old Fashioned Blackberry Pie, it usually means leaning into the tartness and depth rather than just pure sweetness. I suggest cutting the sugar back by about 1/8 cup right off the bat; use the lower end of the suggested sugar amount. Beyond that, try mixing in just a quarter teaspoon of good-quality vanilla extract right with your spices, or for a really sophisticated, old-world tang, add just half a teaspoon of thick balsamic vinegar to the berry mixture. It sounds wild, but it deepens the berry flavor without making the pie taste like salad dressing, I promise!
Nutritional Data for Your Sweet Tart Berry Dessert
Okay, I know that for most of us, flavor reigns supreme when it comes to pie, but I always like to include the estimated nutritional breakdown just so nobody is completely shocked later! Remember, my kitchen definitely favors butter over spreadsheets, so please take these numbers with a big grain of salt—or maybe a big scoop of that vanilla ice cream we talked about.
These figures are estimates calculated based on the recipe as written, assuming 8 slices per pie. If you swap out butter for shortening, or use less sugar, naturally, things will change quite a bit. For the full legal details, you can always check out the site’s general disclaimer here: you can review our standard information here.
- Serving Size: One very generous slice of this phenomenal blackberry pie.
- Calories: Roughly 450. See? Not too bad for a full homemade dessert!
- Sugar: About 45 grams. Comes mostly from those gorgeous berries and the granulated sugar we use to balance their tartness.
- Total Fat: Around 25 grams. That’s the price of admission for that flaky, buttery crust, and totally worth it!
- Protein: About 5 grams.
- Carbohydrates: Coming in around 58 grams.
This helps put things in perspective, but honestly, when you cut into a fresh slice of this sweet tart berry dessert, thinking about macros just feels wrong. Enjoy every single bite!
Share Your Perfect Blackberry Pie Creation
Well, that’s it! You’ve made it through the entire process, from mixing that icy cold butter to pulling that gorgeous, bubbling blackberry pie out of the oven. Your kitchen should smell absolutely amazing right now, and I’m honestly so proud of you for tackling a classic pie from scratch!
Now, I really, truly want to see what you created! Baking is so much more fun when we can share it, so please don’t just take a picture and keep it to yourselves. Head down to the comments right now and tell me how it went!
Did the lattice cooperate? Did you serve it with that vanilla ice cream we dreamed about? Did you find that the tartness level was spot-on for your favorite berries? Drop a star rating at the top of the page—your feedback helps other bakers know what to expect when they jump into this Homemade Blackberry Pie Recipe.
And if you snapped a picture of your final, perfect slice—especially if you got that thick, beautiful cross-section of filling—I’d be thrilled if you tag me on social media! It truly makes my day to see my recipes ending up on your family tables. If you’re curious about who I am and why I share all these baking secrets, you can always read a little more about me right over here: Here’s a bit about me and my kitchen philosophy.
Thank you so much for baking with me today. Happy eating!
PrintThe Ultimate Flaky Crust Blackberry Pie with Juicy Summer Filling
Follow these steps to make a classic, deep-dish blackberry pie featuring a rich, tart-sweet filling and a perfectly flaky, buttery crust, complete with a decorative lattice top.
- Prep Time: 45 min
- Cook Time: 65 min
- Total Time: 120 min
- Yield: 8 servings
- Category: Dessert
- Method: Baking
- Cuisine: American
- Diet: Vegetarian
Ingredients
- 2 1/2 cups all-purpose flour
- 1 teaspoon salt
- 1 cup (2 sticks) unsalted butter, very cold and cubed
- 1/2 cup ice water, plus more if needed
- 6 cups fresh or frozen blackberries (do not thaw if frozen)
- 1 1/2 cups granulated sugar (adjust based on berry sweetness)
- 1/4 cup cornstarch or tapioca starch
- 1 tablespoon lemon juice
- 1 teaspoon lemon zest
- 1/4 teaspoon ground cinnamon
- 1 large egg, beaten with 1 teaspoon water (for egg wash)
- 1 tablespoon coarse sugar for sprinkling
Instructions
- Prepare the Crust: In a large bowl, whisk together the flour and salt. Cut in the cold butter using a pastry blender or your fingers until the mixture resembles coarse crumbs with some pea-sized pieces of butter remaining. Gradually add the ice water, one tablespoon at a time, mixing until the dough just comes together. Do not overmix.
- Divide the dough in half, flatten each half into a disk, wrap in plastic wrap, and chill for at least 1 hour.
- Prepare the Filling: In a separate bowl, gently combine the blackberries, granulated sugar, cornstarch, lemon juice, lemon zest, and cinnamon. Set aside while you roll out the dough.
- Assemble the Bottom Crust: On a lightly floured surface, roll out one dough disk into a 12-inch circle. Carefully transfer the dough to a 9-inch pie plate. Trim the edges, leaving a 1-inch overhang. Place the pie plate in the refrigerator.
- Roll the Top Crust: Roll out the second dough disk into an 11-inch circle. Cut the dough into strips for a lattice top, or leave it whole if you prefer a solid top with vents cut later.
- Fill the Pie: Pour the blackberry filling into the chilled bottom crust. Dot the top of the filling with a few small pieces of reserved cold butter if desired for extra richness.
- Create the Top Crust: If making a lattice, weave the strips over the filling. If using a solid top, place it over the filling and cut several slits in the top to allow steam to escape. Crimp the edges of the top and bottom crusts together to seal.
- Chill and Bake: Brush the top crust lightly with the egg wash and sprinkle with coarse sugar. Chill the assembled pie for 15 minutes before baking. Preheat your oven to 400°F (200°C).
- Bake the pie at 400°F (200°C) for 20 minutes. Reduce the oven temperature to 375°F (190°C) and continue baking for another 35 to 45 minutes, or until the crust is golden brown and the filling is bubbling thickly. If the edges brown too quickly, cover them loosely with aluminum foil.
- Cool: Let the pie cool completely on a wire rack for at least 3 to 4 hours before slicing. This allows the filling to set properly.
Notes
- For the flakiest crust, keep all ingredients, especially the butter and water, as cold as possible during mixing.
- If you use frozen berries, do not thaw them first; add them directly to the sugar mixture. You may need to add 5-10 minutes to the total bake time.
- Serve slices warm or at room temperature with vanilla ice cream or fresh whipped cream.
Nutrition
- Serving Size: 1 slice
- Calories: 450
- Sugar: 45
- Sodium: 250
- Fat: 25
- Saturated Fat: 15
- Unsaturated Fat: 10
- Trans Fat: 0
- Carbohydrates: 58
- Fiber: 5
- Protein: 5
- Cholesterol: 60