

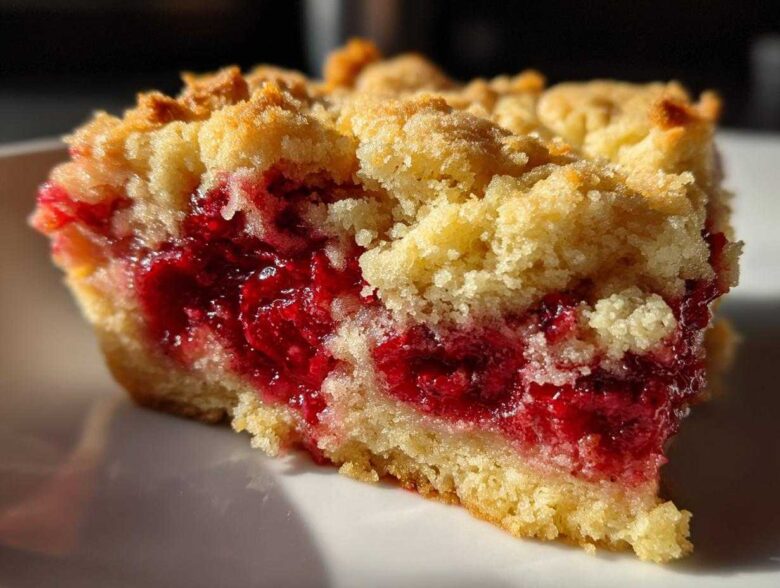
You know those nights? You promised dessert for the potluck tomorrow, or you realize at 8 PM that you need something warm and comforting *right now*, but the thought of pulling out the stand mixer makes you want to just crawl under the covers? I live for those moments because they bring out the absolute easiest recipe in my baking arsenal: the cherry dump cake. Seriously, this is easily the best EASY dump cake recipe you’ll ever find because it requires zero mixing effort. It’s a glorious, 3-ingredient miracle that never fails.
I’m talking about dumping things into a pan and walking away! I once forgot about a school function until 3 PM, and this recipe saved my reputation. I threw it together in five minutes flat before running out the door. It came out bubbly, golden, and everyone swore I’d been fussing over it all afternoon. Trust me, if you need a foolproof, no-fuss dessert, you’ve found your champion. If you want the absolute simplest way to make magic happen, check out my guide on lazy 3-ingredient dump cake for the full details!
Why This is the Ultimate EASY Dump Cake Recipe
I adore this recipe because it completely skips the fuss, which is why so many people call it their go-to minimal ingredient dessert. Honestly, if you can open three cans or boxes, you can make this! There is absolutely no heavy lifting involved. You don’t even have to worry about what setting your electric mixer is on because we aren’t using one!
This is the perfect starter recipe for anyone who thinks they can’t bake. It’s the definition of a simple cherry dessert no mixer required. You just layer, pour, and pray—but trust me, the praying isn’t necessary because this baby always works out.
If you’re looking for other easy starting points, be sure to check out my notes on beginner baking recipes fruit for more ideas where the effort is minimal and the payoff is huge.
The Magic of the Cherry Dump Cake with Cake Mix
So, what gives? Why does this work without stirring? It all comes down to physics, which sounds fancy, but it’s not! When you pour that melted butter over the dry cake mix, something amazing happens as it bakes. The cake mix doesn’t *mix* into the cherries; instead, the flour and sugar in the dry mix soak up all that gooey cherry moisture and the butter.
This absorption process causes the topping to transform into this wonderfully crisp, golden, slightly crunchy layer—it’s just like a perfect cobbler crust but needs zero technique. It’s completely foolproof!
Gathering Ingredients for Your 3 Ingredient Dump Cake
Okay, let’s talk stuff! The best part about this recipe is that your grocery list is ridiculously short. You really only need three main things to achieve that classic, gooey dessert perfection. I always keep these items stocked because you just never know when a dessert emergency will strike!
When I first learned how to make a cherry dump cake, I was shocked that something tasting this decadent could come together with so few items. But trust me, the quality of these simple components is what makes this recipe sing. Let’s look exactly at what you need to grab before we move on to crushing this bake!
Essential Components for Classic Cherry Dump Cake
- 1 (21 ounce) can cherry pie filling – Make sure you get the big one unless you’re baking in a smaller pan!
- 1 (15.25 ounce) box yellow cake mix – This is the classic flavor we are going for.
- 1 cup (2 sticks) unsalted butter, melted – Don’t even think about using margarine here; solid butter makes the topping crisp up perfectly.
Step-by-Step Gooey Dump Cake Instructions
This is where the magic happens, and I mean that literally because it requires the least amount of actual work you will ever put into a fantastic dessert. You want to get your oven ready first. Make sure you set it to a nice, steady 350 degrees Fahrenheit. While that warms up, you need to grab a standard 9×13 inch baking dish and give it a light greasing. I usually use a little cooking spray, but butter works fine too!
When you’re ready for the gooey dump cake instructions, remember the golden rule: Layer, don’t mix! This is what separates a beautiful dessert from a brick.
Preparing the Pan and Fruit Layer
First things first, open that gorgeous can of cherry pie filling. Dump the entire thing right into your greased 9×13 dish. Use a spatula to gently persuade it to spread out evenly across the bottom of the pan. You want that sweet, ruby-red layer covering everything neatly. This is the comforting base of our entire cherry dump cake experience.
Layering the Cake Mix and Butter for Perfect Cherry Dump Cake
Next up is the dry cake mix. You must sprinkle the *entire* box of yellow cake mix evenly over the cherry layer. Resist the urge to mix! Seriously, put the spoon down. Once that dry, pale layer is sitting on top of the fruit, take your melted butter—we used a full cup, remember?—and slowly drizzle it all over the cake mix. Make sure the butter hits every corner, creating those little golden rivers across the dry powder.
Here’s the pro tip: Try to pour the butter slowly and evenly, ensuring you soak all of that dry mix. That butter is what binds the topping together as it bakes, turning it into that unbelievably crisp layer for this no fuss fruit dessert.
Baking Time and Achieving the Golden Top
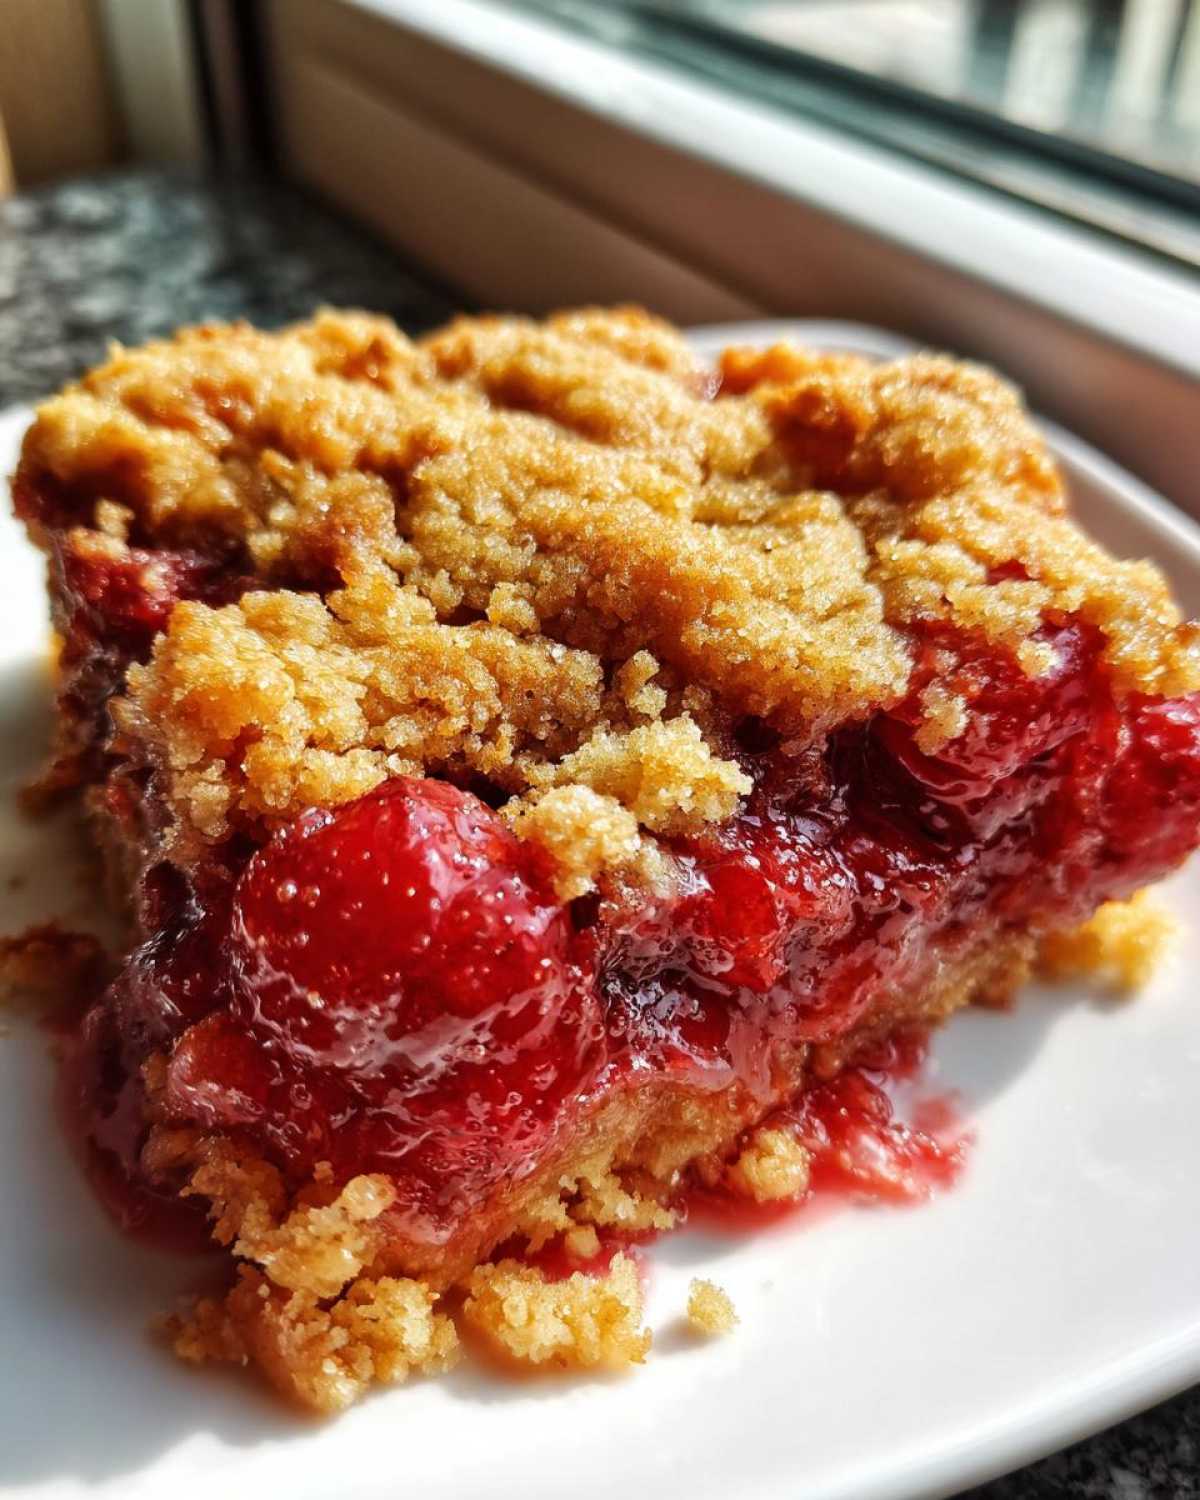
Now it’s time to pop it into the preheated oven. You’re looking at 45 to 55 minutes of baking time. You’ll know it’s done when the topping is beautifully golden brown, and you can see the cherry filling bubbling up vigorously around the edges. Don’t open the oven door too early, but peek around the 40-minute mark!
When you pull it out, you absolutely must let it rest. I know it smells incredible, but resist the siren call for at least 15 minutes. This allows the filling to set up just a touch, so you get those perfect, clean squares when you serve up this amazing lazy 3-ingredient dump cake.
Tips for the Best Cherry Dump Cake Success
Even though this recipe is pretty much impossible to mess up, I still have a few little secrets I’ve picked up over the years to make sure every batch is the absolute best it can be! Remember, even the simplest recipes deserve a little bit of love and attention, right? These tips help elevate this easy bake from good to legendary.
You want that delicious, warm, bubbly dessert that people ask for at every get-together? It’s all about these tiny refinements. Getting the topping texture just right is key to making this feel like a carefully crafted dessert, even though we barely lifted a finger!
Ingredient Notes and Substitutions
While yellow cake mix is my go-to for that classic flavor, you can totally switch it up! If you want something a little richer, try using a white cake mix or, even better, a butter cake mix if you can find one. It really boosts the richness of the topping layer. Don’t stress if you only have white cake mix on hand, though; it still turns out fantastic!
Now for texture! If you want to turn this into a slightly crunchier, nutty cherry dump cake, you totally can. Just grab about half a cup of chopped pecans or walnuts. You sprinkle those right over the dry cake mix *before* you pour the butter on top. The butter holds them in place, and they toast up perfectly while baking. It adds a fantastic counterpoint to the gooey filling, making it feel extra gourmet!
Making Variations of the Cherry Dump Cake
Just because this recipe is beautifully simple doesn’t mean we can’t have a little fun with it! Once you master the classic cherry dump cake base, it’s so great because you can easily twist it to get a brand-new dessert experience. I love seeing what people come up with, but I’ll share my two favorite adaptations for when you want a little extra something special without adding any real work to the prep time.
These little tweaks keep things exciting, whether you’re craving chocolate or you want something that leans a little closer to a traditional cobbler texture.
Try the Chocolate Cherry Dump Cake Variation
Oh my goodness, this one is decadent! If you’re a chocolate lover, switch that yellow cake mix for a box of chocolate cake mix. Seriously, that’s it for the main swap. The chocolate and cherry combination is classic for a reason, right? It’s so rich and comforting. If you really want to go all out—and you already have the butter poured on—sprinkle a handful of semi-sweet chocolate chips over the dry cake layer before you bake it. It melts down into the fruit and creates this amazing, gooey layer of bliss.
Quick Cherry Cobbler Recipe Using This Method
People often ask me if this is a cobbler or a crisp, and honestly, it falls somewhere in between because of that buttery, slightly crisp topping! It’s definitely a quick cherry cobbler recipe in spirit, much faster than making a biscuit topping from scratch. If you want to specifically try the cherry pineapple dump cake variation, just substitute half of the cherry pie filling with canned crushed pineapple. Make sure you drain the pineapple really, really well first, or your topping might get a little too soggy under the topping!
Serving Suggestions for Your Warm Bubbly Dessert Recipes
You’ve just pulled this incredible, no-fuss cherry dump cake out of the oven. It’s hot, it smells like pure happiness, and it’s bubbling gloriously around the edges. Now what? Well, you are officially in the category of serving up spectacular warm bubbly dessert recipes, and you deserve toppings!
While you absolutely *can* eat this straight out of the pan with a fork (and I won’t judge you if you do!), serving it warm really brings out the best in that sweet and buttery topping contrast with the soft fruit underneath. Don’t let this masterpiece cool completely!
The classic pairing, and the one my family insists on, is a big scoop of cold, creamy vanilla ice cream right on top. The contrast between the warm, gooey cake and the frozen ice cream melting down into the cracks is just unbeatable. It’s truly heaven on a plate.
If ice cream isn’t your thing, a big dollop of freshly whipped cream works wonders too! For something a little different, especially if you made the chocolate variation, try drizzling it with a little chocolate sauce or even a light sour cream topping. If you’re feeling adventurous and want to see another amazing dessert that pairs creamy goodness with fruit, check out my take on this creamy orange dessert idea!
Storage and Reheating the Cherry Dump Cake
Okay, let’s manage expectations! While this cherry dump cake is so delicious that leftovers are usually rare, sometimes you just can’t finish the whole 9×13 pan in one sitting. Don’t worry about it lasting, though; this dessert actually reheats beautifully!
The key to keeping it wonderful is storing it properly. Once the cake has cooled down completely—and I mean completely, otherwise the steam makes everything soggy—you need to put it into an airtight container. You can cover the pan tightly with plastic wrap and foil, or scoop individual servings into smaller containers. I usually try to get it into the fridge within a day just to be safe, though honestly, it rarely lasts that long in my house!
When you’re ready to enjoy that second helping, you have two great options for restoring that perfect, warm, gooey texture. This is the part that often makes people nervous about leftovers, but trust me, it works!
Reheating in the Oven (For Best Texture)
If you are pulling this out of the fridge and want it to taste almost freshly baked, the oven is your friend. Take your piece (or a larger square) and place it on an oven-safe plate or small baking dish. Cover it loosely with aluminum foil—this stops the crispy top from burning before the center warms up. Pop it into a moderate oven, maybe 325 degrees F, for about 10 to 15 minutes. It comes out tender, warm, and the topping regains some of its crispness. This is my preferred method for sharing leftovers!
Quick Microwave Reheat
If you need dessert *right now* and can’t manage the oven, the microwave is fine, but you have to be gentle! Microwaving heats unevenly, so the topping can sometimes get a little soft, which we absolutely want to avoid if possible. Use a lower power setting if your microwave allows it, or just heat in short 15-second bursts, testing in between. It’ll be hot, gooey, and ready to eat almost instantly, perfect for drizzling extra vanilla ice cream over!
Frequently Asked Questions About the Cherry Dump Cake
I always get questions once people see how unbelievably simple this recipe is! It sounds too good to be true, right? But I promise, it’s the real deal. I gathered up the most common things folks ask me about making their first batch of the best cherry dump cake. Hopefully, this clears up any lingering doubts before you preheat your oven!
These questions cover everything from tweaking the fruit base to making sure you’re following the core technique for baking without mixing bowl drama. If you’ve mastered the basics and are looking for more ideas on how to avoid mixing bowls entirely, you should take a peek at my thoughts on other no-mixer bakes!
Can I use a different fruit filling in this dump cake?
Oh, absolutely! While I stand by the fact that this recipe is the reigning champion for the best cherry dump cake flavor profile, the dump cake method works brilliantly with almost any canned fruit filling you enjoy. Things like canned blueberry pie filling or even apple pie filling create similar, spectacular results. You just layer the fruit, sprinkle the dry cake mix evenly, and pour that melted butter right over the top.
Just remember that the richer the filling, the more liquid it might release, so your baking time might shift slightly, but the buttery topping will still crisp up beautifully over whatever fruit you choose!
What is the best way to serve this simple cherry dessert no mixer?
The absolute best way to serve this simple cherry dessert no mixer victory lap is definitely warm! Seriously, skip eating it cold from the fridge if you can manage it. When it’s warm, the cherry layer is soft, gooey, and just melts in your mouth.
Toppings are non-negotiable for me. You *have* to have a scoop of good quality vanilla ice cream melting slowly over the top. The cold creaminess against the warm, buttery crust is just magical. If you prefer less melty goo, a dollop of cold whipped cream or a drizzle of something sweet, like vanilla custard sauce, works just as well!
Does this recipe qualify as a 3 ingredient dump cake?
It absolutely does, in its purest form! The base recipe—cherry filling, dry cake mix, and butter—is the rock-solid foundation of the true 3 ingredient dump cake. That’s what makes it so legendary for quick weeknight treats or last-minute dessert emergencies.
Now, any time you start adding things like pecans, cinnamon, or swapping for chocolate cake mix, technically you are adding a fourth, fifth, or sixth ingredient. But don’t stress about that! Those are just my recommended upgrades. For the purist, yes, it’s the easiest 3-ingredient dessert out there! You just need to make sure you keep those extras optional if you’re sticking strictly to that three-thing rule.
Share Your Perfect Cherry Dump Cake Results
Now, that’s it! You have conquered dessert with what might be the least amount of effort required in the entire baking world. I swear, every time I pull this golden, bubbly cherry dump cake out of the oven, I feel like I should get a prize for minimal effort!
But honestly, the best part of sharing these recipes is hearing from you! I want to know how it turned out for you. Did you stick to the basic three ingredients, or did you sneak in those pecans? I love seeing your results and hearing what occasion this super simple dessert saved you for this time around.
Please, don’t be shy! Leave me a rating—five stars if this saved your weeknight! Drop a comment down below telling me your favorite vanilla ice cream pairing. If you snapped a photo of that gorgeous golden topping, I’d love for you to share it with me. You can find me over on social media, or just use the comments section here at the blog. I’m always happy to chat about easy bakes like this one! For more fun ideas, you can always browse my full collection of simple bakes.
PrintEasy 3-Ingredient Cherry Dump Cake

Make this simple cherry dump cake using only three ingredients. You do not need a mixer or a bowl for preparation.
- Prep Time: 5 min
- Cook Time: 50 min
- Total Time: 55 min
- Yield: 8 servings
- Category: Dessert
- Method: Baking
- Cuisine: American
- Diet: Vegetarian
Ingredients
- 1 (21 ounce) can cherry pie filling
- 1 (15.25 ounce) box yellow cake mix
- 1 cup (2 sticks) unsalted butter, melted
Instructions
- Preheat your oven to 350 degrees Fahrenheit. Lightly grease a 9×13 inch baking dish.
- Pour the entire can of cherry pie filling into the prepared baking dish. Spread it evenly across the bottom.
- Sprinkle the dry yellow cake mix evenly over the cherry filling layer. Do not mix.
- Pour the melted butter evenly over the dry cake mix layer. Again, do not mix.
- Bake for 45 to 55 minutes, or until the topping is golden brown and the filling is bubbly around the edges.
- Let the cake cool for at least 15 minutes before serving.
Notes
- For a richer flavor, substitute the yellow cake mix with white cake mix or butter cake mix.
- Serve this dessert warm with a scoop of vanilla ice cream or whipped cream.
- If you want a slight variation, sprinkle 1/2 cup of chopped pecans or walnuts over the butter layer before baking.
Nutrition
- Serving Size: 1 slice
- Calories: 420
- Sugar: 45
- Sodium: 350
- Fat: 24
- Saturated Fat: 15
- Unsaturated Fat: 9
- Trans Fat: 0.5
- Carbohydrates: 52
- Fiber: 1
- Protein: 4
- Cholesterol: 60