

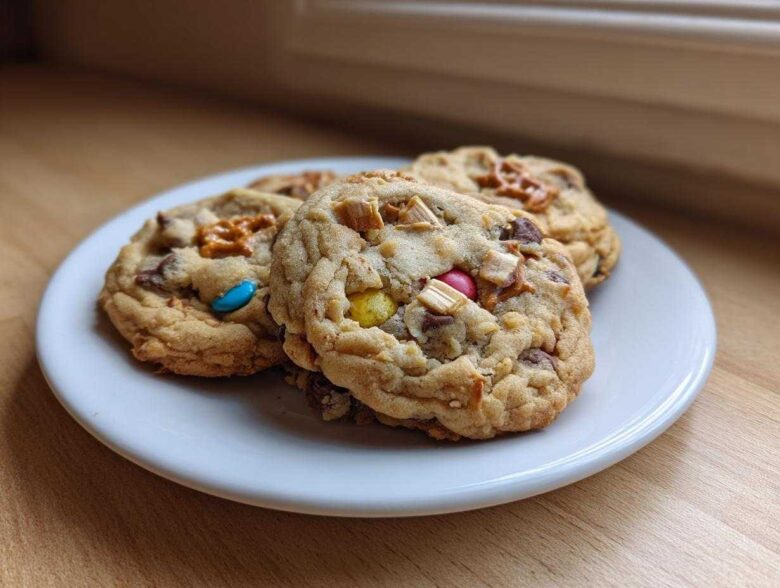
Oh, you know those days when you just can’t pick just *one* thing? When your sweet tooth demands chocolate, your salty cravings need a crunch, and your inner pastry chef screams, “Throw it all in!”? That, my friend, is the exact philosophy behind these glorious **kitchen sink cookies**!
I spent what felt like weeks messing around with mix-in ratios—seriously, my family thought I was going overboard—just to nail the perfect density and chew factor. We aren’t making thin, crispy cookies here; we’re making ultimate, loaded indulgence. You’ll find everything from chocolate to pretzels tucked into this recipe, and trust me, the balance is just sensational. I’ve finally landed on the perfect blend that keeps them wonderfully chewy every single time. If you’re looking for the definitive, ultimate customizable cookie, you’ve found it. You can check out some of my other chewy favorites over here, like my Ultimate Chewy Chocolate Chip Cookies.
Why This Kitchen Sink Cookies Recipe Is a Must-Try
Honestly, these aren’t just cookies; they are an experience! Since I started piling everything but the actual kitchen sink into the dough, I haven’t looked back. They hit every possible craving you could have in one bite.
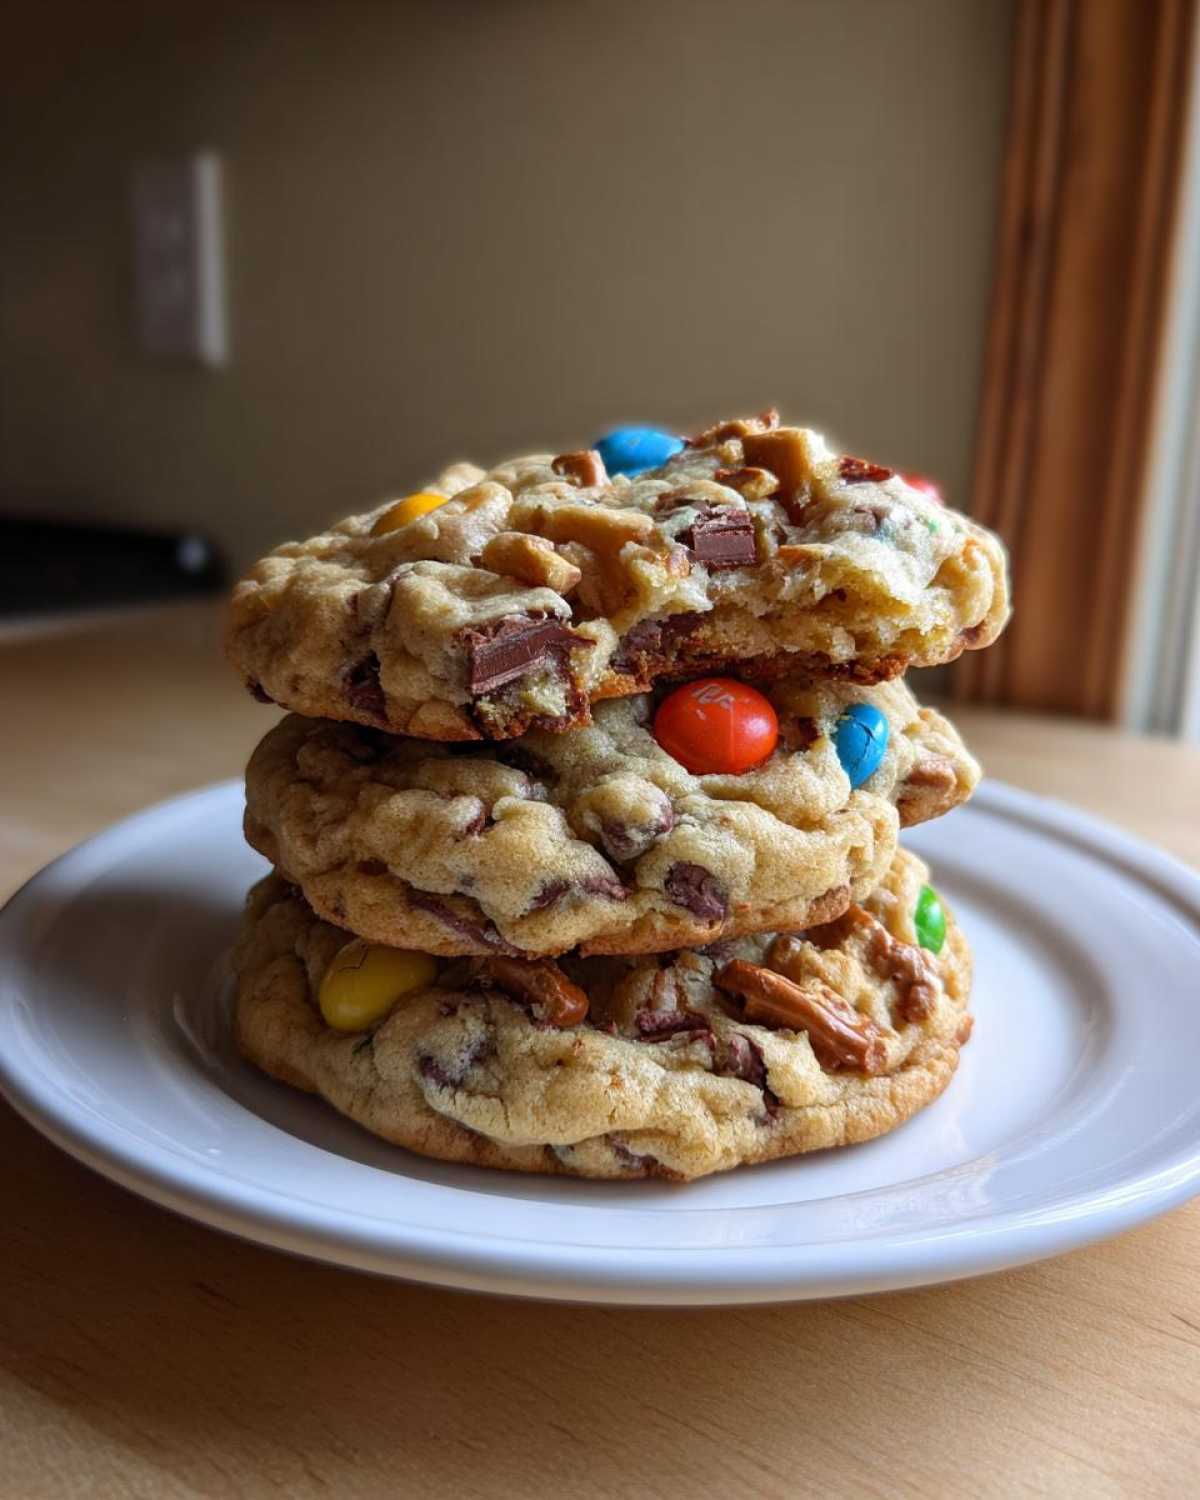
- They are incredibly easy—we mix everything up fast.
- You can swap out almost anything; they are the ultimate customizable cookie recipe.
- They consistently bake up perfectly chewy, just like you want them!
I remember taking a batch of these sweet and salty cookies to a neighborhood potluck last year. People kept grabbing them, asking what was in them! They disappeared faster than anything else on the table.
The Perfect Balance of Sweet and Salty Cookies
This is where the magic happens! You get the soft melt of the chocolate chips right alongside that sharp, satisfying *crunch* from the pretzels. It’s genius, really. That salty snap cuts through the sweetness of the brown sugar base so perfectly. It stops the cookie from feeling too heavy, even when it’s loaded with goodies.
Tips for Achieving Chewy Kitchen Sink Cookies
If you take one thing away from this mess of a cookie recipe, let it be this: don’t skimp on the brown sugar. I specifically use a heavier base of brown sugar compared to white sugar. That extra molasses is the main reason these cookies stay that beautiful, soft chew right in the center, even after they cool down completely.
Gathering Ingredients for Your Ultimate Kitchen Sink Cookies
Okay, now for the fun part—the haul! When we talk about making the **Ultimate Mix In Cookies**, you need to gather your core dough elements and then get creative with your extras. I’ve listed exactly what I use below for my favorite texture, but remember, this recipe is begging you to customize it!
I always make sure my butter is actually *softened* and not melted. That makes a huge difference when you cream it! Also, don’t use just any brown sugar; make sure it’s packed tightly into the cup so you get all that molasses flavor. You should also take a look at some other great dessert bar recipes while you’re gathering things, like my Lemon Blueberry Cheesecake Bars.
- 1 cup (2 sticks) unsalted butter, softened
- ¾ cup granulated sugar
- ¾ cup packed light brown sugar
- 2 large eggs
- 1 tablespoon vanilla extract
- 2 ¼ cups all-purpose flour
- 1 teaspoon baking soda
- ½ teaspoon salt
- 1 cup semi-sweet chocolate chips
- ½ cup white chocolate chips
- ½ cup chopped pretzels
- ½ cup M&M’s or similar candy-coated chocolates
- ½ cup chopped nuts (optional)
- ½ cup shredded coconut (optional)
Ingredient Notes and Substitution Ideas for Kitchen Sink Cookies
This is where you make the recipe truly yours! If you can’t find pretzels, crushed potato chips are a fantastic swap for that salty crunch. Seriously, don’t knock the chips until you try them. If you’re allergic to nuts, just skip them; they’re totally optional.
The one thing you have to watch is overloading. Since we are dealing with so many different chunky mix-ins, try not to exceed 2.5 cups total of additions in the dough. If you put in too much stuff, your dough gets too heavy for the butter/sugar structure, and you end up with hard, dense hockey pucks instead of soft **kitchen sink cookies**. We want loaded, not impossible!
How to Prepare Easy Kitchen Sink Cookies Step-by-Step
Don’t let the name fool you! Even though these are loaded cookies, the process is incredibly straightforward. We are basically using a super sturdy chocolate chip cookie base, which is honestly my favorite way to go. First things first: get that oven fired up to 375 degrees Fahrenheit. And listen to me on this part: line those baking sheets with parchment paper. It makes cleanup a breeze and guarantees these beauties won’t stick, which is important when they are this heavy!
If you want to see how I make my fudgy brownie cookies later—which share a similar one-bowl method—you can check out those instructions here.
Creaming Butter and Sugars for the Best Kitchen Sink Cookies
This is the foundational move for getting the **Best Kitchen Sink Cookies**, so don’t rush it! Get your softened butter, white sugar, and that glorious packed brown sugar into your big bowl. Beat it good! You’re looking for the mixture to turn light in color and look fluffy—almost whipped. This process forces air into the batter. That trapped air is what keeps your heavy mix-ins from just sitting in a dense puddle on the sheet; it helps them rise a little bit!
Folding in the Mix-Ins for Customizable Cookie Recipe Success
Once your eggs and vanilla are mixed in, you slowly add your flour and baking soda. Mix until it *just* comes together. I mean it—stop the mixer as soon as you see the last streaks of flour disappear. Now, salt goes in, and then it’s time for the fun! Dump in every chip, pretzel, and nut you grabbed. Gently fold everything in with a spatula. If you churn those delicious add-ins around too much now, you’ll lose that wonderful texture contrast, and we definitely don’t want that for our **Holiday Kitchen Sink Cookies** variations!
Baking and Cooling Your Kitchen Sink Cookies
Scoop out tablespoon-sized mounds onto your parchment-lined sheets, leaving a good two inches between them because they will spread a little. Now, watch them bake at 375°F for about 9 to 11 minutes. You want the edges to look golden brown and set—but the very center should still look a tiny bit soft or underbaked. That’s your signal! Pull them out and let them hang out right on that hot baking sheet for five full minutes. If you try to move them too soon, they might collapse! After five minutes, gently move them to a wire rack to cool completely.
Tips for Making the Ultimate Mix In Cookies
Okay, you’ve got the basic steps down for these **Ultimate Mix In Cookies**, but if you really want to elevate them from “really good” to “I might need to hide the rest of these,” you need a couple of insider tricks. The most important thing I learned? Temperature control!
Always, always chill your dough if you can swing it. Even 30 minutes in the fridge makes a huge difference. Why? Because when the butter starts cold, it melts slower in the oven. Slower melting means less spreading, which gives you that thick, perfect dome shape we are chasing. Plus, chilling lets those flavors really marry up.
Another pro move is how you add your mix-ins. Seriously, don’t dump them all in at once if you are using a super high volume. I mix the dough base until everything is barely combined, then I gently stir in about 80% of my chips, pretzels, and candies by hand. The last 20%? I gently press those right onto the tops of the dough balls before they go into the oven. They look prettier, and they ensure a massive payoff in every single bite!
If you want a fun, different presentation, you could always skip the individual scooping and try baking one giant cookie in a pan! I have a great method for that over here if you’re feeling ambitious for another day: Rainy Day Chocolate Chip Pan Cookie.
Variations: Making Festive Kitchen Sink Cookies
You know I love dressing these cookies up for the holidays! Because the base recipe is so simple and flexible, it’s the perfect canvas for **Festive Cookie Baking**. It’s all about swapping out a few elements while keeping that essential sweet-and-salty structure intact.
If you are baking for Christmas, this is where you go wild. Ditch the regular M&M’s and grab the red and green ones! They just make the whole cookie look happier. Think about adding crushed peppermint or candy canes—but you have to chop those up small and fold them in right at the end, or they taste bitter.
Fall time is great for toffee bits. If you want to try something spooky for Halloween, you can swap the white chocolate chips for butterscotch chips and add little bits of orange or black candies. It’s basically an **Everything But The Kitchen Sink Dessert** contest at my house during October!
If you’re looking for something super fun that doesn’t require opening the oven door, you should check out my recipe for Haunted Candy Bark. But back to cookies!
The little note I gave earlier about swapping mix-ins is key here. If you switch the semi-sweet chips for dark chocolate and throw in some dried cranberries or cute autumnal M&M colors, you’ve got a whole new cookie for Thanksgiving!
Storage and Reheating Instructions for Kitchen Sink Cookies
Listen, these cookies are so good you’ll want to eat them all in one sitting, I get it! But if you manage to have leftovers—which I find requires Herculean willpower—storage is straightforward. You absolutely want to keep these babies airtight.
For short-term keeping, like, within four or five days, just pop them into a sturdy, airtight container right on the counter. They do great at room temperature, and honestly, they sometimes get even better on day two as the flavors settle in. Don’t put them in the fridge unless you live somewhere ridiculously humid, though. Cold air tends to suck the moisture right out, and we worked really hard to make them chewy!
If you need to make them last longer, freezing is the answer for your **Loaded Chocolate Chip Cookies**. You should freeze them *before* baking if you love that just-out-of-the-oven experience. Just scoop the dough balls, place them on a parchment-lined tray, freeze solid, and then transfer them to a freezer bag. When you’re ready for a treat, just toss those frozen dough balls onto a sheet and add maybe 4 or 5 extra minutes to your baking time.
Now, if the cookies are already baked and they’ve firmed up overnight? Don’t stress! You can totally revive them. Pop one lonely cookie onto a microwave-safe plate for about 8 to 10 seconds. That little burst of warmth softens the butter and chips again, making it taste like it just came out of the oven. For a batch revival, I prefer a low oven—275 degrees Fahrenheit for about 5 minutes. That warms through the center without drying out the edges. Easy peasy!
Frequently Asked Questions About Kitchen Sink Cookies Recipe
I get so many questions every time I post these monstrously good treats! It’s because everyone wants *their* version of the **kitchen sink cookies** to be the absolute best, and honestly, I’ve tested just about every possibility trying to get the chewiness right. Here are the ones I hear most often!
Can I use different types of chocolate chips in my Kitchen Sink Cookies?
Yes, please do! I use semi-sweet and white chocolate chips because I love the swirl of color and flavor. But mixing in some dark chocolate chips is fantastic if you like a slightly more intense chocolate flavor. If you want to go wild, some people even fold in peanut butter chips! Just remember that every different type of chip adds a little bit of weight, so stick close to the total volume we talked about earlier.
What is the secret to making these Everything But The Kitchen Sink Dessert chewy?
If I had to pick just *one* secret for these **Everything But The Kitchen Sink Dessert** cookies, it would be the sugar ratio paired with chilling the dough. You must use more packed brown sugar than white sugar; that’s the molasses doing the work to keep things soft. After you mix the dough, if you can stand it, chill it for at least 30 minutes. That slows down the butter melt, and boom—perfect chew!
How long can I chill the dough for these Easy Kitchen Sink Cookies?
You have a wonderful window here for the dough! For a quick turnaround, 30 minutes is enough to firm things up before baking. But if you have the patience, you can chill this dough for up to 24 hours in the fridge. When you chill it longer, the dry ingredients absorb more moisture from the eggs and the sugars concentrate, which actually deepens the vanilla and butterscotch flavors. It makes for ridiculously good **Easy Kitchen Sink Cookies** when they bake up!
If you’re done with the cookies, you might want to check out my recipe for Crab Rangoon Dip if you need a savory appetizer for your next party!
Estimated Nutritional Data for Kitchen Sink Cookies
Okay, let’s talk calories for a second, because when you load up a cookie with butter, three types of chips, and pretzels, you are definitely reaching for something decadent! I wanted to include the estimated breakdown, but please, take this with a grain of salt—or maybe a giant pretzel bite!
Since these cookies are so customizable, these numbers can swing around wildly depending on how many nuts or how much coconut you actually throw in there. But based on the exact measurements I gave, here is the approximate data for one single, beautiful cookie.
- Serving Size: 1 cookie
- Calories: 180
- Sugar: 15g
- Sodium: 110mg
- Fat: 10g
- Saturated Fat: 6g
- Trans Fat: 0g
- Carbohydrates: 22g
- Fiber: 1g
- Protein: 2g
- Cholesterol: 30mg
This is just an estimate, of course! If you loaded yours up with extra peanut butter chips or used butter vs. margarine, those numbers might shift. But honestly, when a cookie tastes this good and brings so much joy, I try not to look too closely at the fine print on the label!
Share Your Thoughts on This Customizable Cookie Recipe
Whew! We made it to the finish line, and now you have the blueprint for what I genuinely believe are the **Best Kitchen Sink Cookies** out there. They are rich, they are loaded, and they are perfect for any time of year, especially if you tweak those mix-ins!
I’m dying to know what you put in yours! This recipe is all about personality. Did you stick to the classic chips and pretzels, or did you decide to throw in something totally unexpected, like dried cherries or maybe some white chocolate chips along with toffee bits? Tell me your winning combination in the comments below!
If you whipped up a batch, please consider leaving me a quick star rating right under the recipe card. That feedback helps other bakers know this is the ultimate guide for making **Loaded Chocolate Chip Cookies**! I read every single comment, and I really enjoy seeing photos of your creations—it honestly makes my day! If you want to know more about our little corner of the internet, you can read all about the philosophy behind Spoonful Snap right here. Happy baking, everyone!
PrintUltimate Kitchen Sink Cookies

A highly customizable recipe for chewy cookies packed with a variety of sweet, salty, and crunchy mix-ins.
- Prep Time: 15 min
- Cook Time: 11 min
- Total Time: 26 min
- Yield: About 3 dozen cookies
- Category: Dessert
- Method: Baking
- Cuisine: American
- Diet: Vegetarian
Ingredients
- 1 cup (2 sticks) unsalted butter, softened
- ¾ cup granulated sugar
- ¾ cup packed light brown sugar
- 2 large eggs
- 1 tablespoon vanilla extract
- 2 ¼ cups all-purpose flour
- 1 teaspoon baking soda
- ½ teaspoon salt
- 1 cup semi-sweet chocolate chips
- ½ cup white chocolate chips
- ½ cup chopped pretzels
- ½ cup M&M’s or similar candy-coated chocolates
- ½ cup chopped nuts (optional)
- ½ cup shredded coconut (optional)
Instructions
- Preheat your oven to 375 degrees Fahrenheit. Line baking sheets with parchment paper.
- In a large bowl, cream together the softened butter, granulated sugar, and brown sugar until light and fluffy.
- Beat in the eggs one at a time, then mix in the vanilla extract.
- In a separate bowl, whisk together the flour and baking soda. Gradually add the dry ingredients to the wet ingredients, mixing until just combined.
- Stir in the salt and all your chosen mix-ins: chocolate chips, white chocolate chips, pretzels, M&M’s, nuts, and coconut. Do not overmix.
- Drop rounded tablespoons of dough onto the prepared baking sheets, spacing them about 2 inches apart.
- Bake for 9 to 11 minutes, or until the edges are golden brown and the centers look slightly set.
- Let the cookies cool on the baking sheet for 5 minutes before transferring them to a wire rack to cool completely.
Notes
- For a chewier cookie, chill the dough for at least 30 minutes before baking.
- You can swap out any mix-in for another favorite item, such as toffee bits or dried fruit.
- If you want a holiday version, use red and green M&M’s or peppermint pieces.
Nutrition
- Serving Size: 1 cookie
- Calories: 180
- Sugar: 15g
- Sodium: 110mg
- Fat: 10g
- Saturated Fat: 6g
- Unsaturated Fat: 4g
- Trans Fat: 0g
- Carbohydrates: 22g
- Fiber: 1g
- Protein: 2g
- Cholesterol: 30mg