

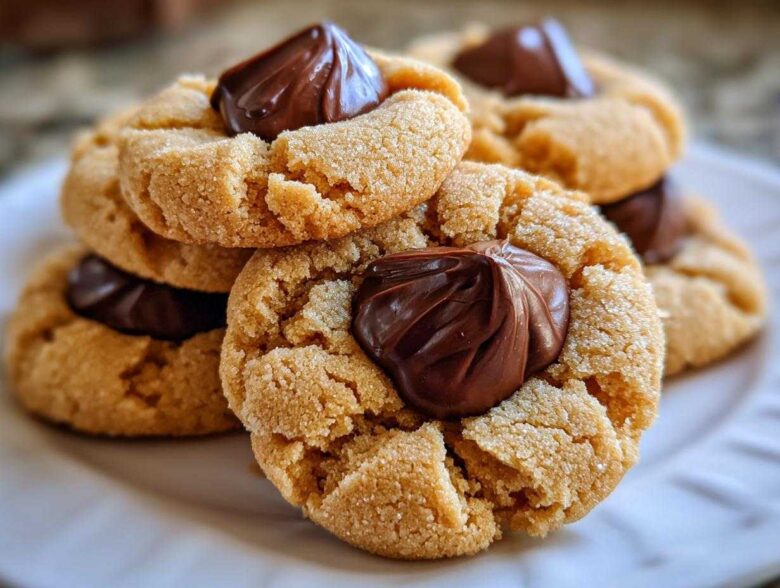
Oh, friend, if you’re talking holiday baking, you HAVE to talk about the ones that always disappear first! I’m opening up my recipe box today to share my absolute, rock-solid, can’t-be-beat recipe for the iconic Peanut Butter Blossom Cookies. You know the ones—that soft, perfectly crinkly peanut butter cookie cradling that little chocolate kiss right in the middle. It’s pure nostalgia in a bite, isn’t it?
I must have made five different versions tweaking the flour-to-fat ratio over the years, but this one? This is the winner. It guarantees the cookie base isn’t too hard, so it doesn’t shatter when you bite into it, and the chocolate melts just enough to stick perfectly. This isn’t just a recipe; it’s the official smell of my December. Trust me, this straightforward method is what makes them my family’s favorite Christmas Cookie Classic. We’re making soft, chewy peanut butter cookies here, not bricks!
Why This is the Best Peanut Butter Blossom Cookies Recipe
Listen, I get it. You’ve seen a million versions of these cookies out there, especially around the holidays. But I promise you, this recipe is special because it solves all the classic problems. You don’t want a cookie that cracks into a million pieces, nor do you want a kiss that slides right off into the cooling rack. We nail that perfect balance every single time.
We’ve worked out the bumps so you get that fantastic peanut butter flavor paired with perfectly softened chocolate. If you click over on this link about making the base chewy, you’ll see just how much testing went into this!
Key Features of Our Peanut Butter Blossom Cookies
- The base cookies stay delightfully soft, even after they cool completely.
- We use a specific sugar coating technique that prevents too much spreading in the oven.
- The timing for adding the chocolate center is dialed in so it sets up perfectly without sinking through.
- It’s a quick no-chill dough, meaning you can go from mixing bowl to cookie sheet in under thirty minutes!
Gathering Ingredients for Perfect Peanut Butter Blossom Cookies
Okay, now for the fun part—gathering our materials! For these Peanut Butter Blossom Cookies to truly shine, we need good quality building blocks. It might seem like a simple cookie, but the right ratios of sugar and fat are what give us that wonderfully textured cookie base. Don’t even think about substituting the brown sugar for white here; the molasses in the dark stuff adds necessary moisture and that classic, soft chew.
I know you guys have a million things going on, but just make sure you pull your butter out an hour ahead of time! Softened, not melted, is key for the creaming step. Also, take a peek at my recipe for apple cobbler—sometimes a simple ingredient like applesauce can replace some fat, but for these cookies, we stick to the richness of real butter for structure!
Ingredients for the Peanut Butter Cookie Base
You’ll need these exact things to get the dough right. Remember, measuring accurately makes all the difference in baking!
- 1 cup unsalted butter, softened until it smiles back at you
- 1 cup granulated sugar
- 1 cup packed light brown sugar (pack it in there!)
- 2 large eggs
- 1 teaspoon vanilla extract
- 1 cup creamy peanut butter (Yes, creamy! It mixes smoother.)
- 2 3/4 cups all-purpose flour
- 1 teaspoon baking soda
- 1/2 teaspoon baking powder
- 1/2 teaspoon salt
The Essential Chocolate Kiss Component
This is the star, of course! You need enough chocolate to top every single cookie. We roll these dough balls in extra sugar, which helps prevent cracks, so make sure you have plenty of extra granulated sugar set aside just for that coating step.
- About 48 Hershey’s Kisses, unwrapped (Don’t forget to unwrap them ahead of time—nobody wants to peel foil off a warm cookie!)
Step-by-Step Instructions: How to Make Peanut Butter Blossom Cookies
Time to get baking! This is where the magic happens, and honestly, it goes so fast. We’re aiming for about 4 dozen cookies total, and the timeline from oven to cooling rack is crucial for getting that perfect look. If you want to see how much I love brown butter in my chocolate chip recipes, check out this master recipe for browns butter perfection, but for these blossoms, we stick to the classic method!
Mixing the Peanut Butter Cookie Dough
First things first, get that oven heating up—set it to 375 degrees F and line those baking sheets with parchment paper. Don’t skip the parchment; it makes cleanup a breeze! In your big bowl, take your softened butter, white sugar, and brown sugar and beat them until they look light and fluffy. This creaming step really works air into the dough, which helps keep our Peanut Butter Blossom Cookies soft.
Add the eggs one at a time, making sure the first one is mixed well before dropping in the second. Then, swirl in the vanilla and all that creamy peanut butter. In a separate bowl, whisk your flour, baking soda, baking powder, and salt together. Now, add those dry ingredients to your wet mixture slowly. Mix on low speed until everything is *just* combined. I mean it—stop right there! Overmixing develops too much gluten, and we want soft cookies, not tough ones.
Shaping and Sugaring the Dough
Once the dough comes together, grab a small scoop and roll it into balls about 1-inch thick. This is the step that prevents excessive spreading and cracking later on. Take each dough ball and roll it gently but completely in that extra granulated sugar you set aside. You want a nice, thick, sugary coating all over. Place those sugared balls about 2 inches apart on your prepared sheets. They need space to breathe while they bake!
Baking and Inserting the Chocolate Kiss Center
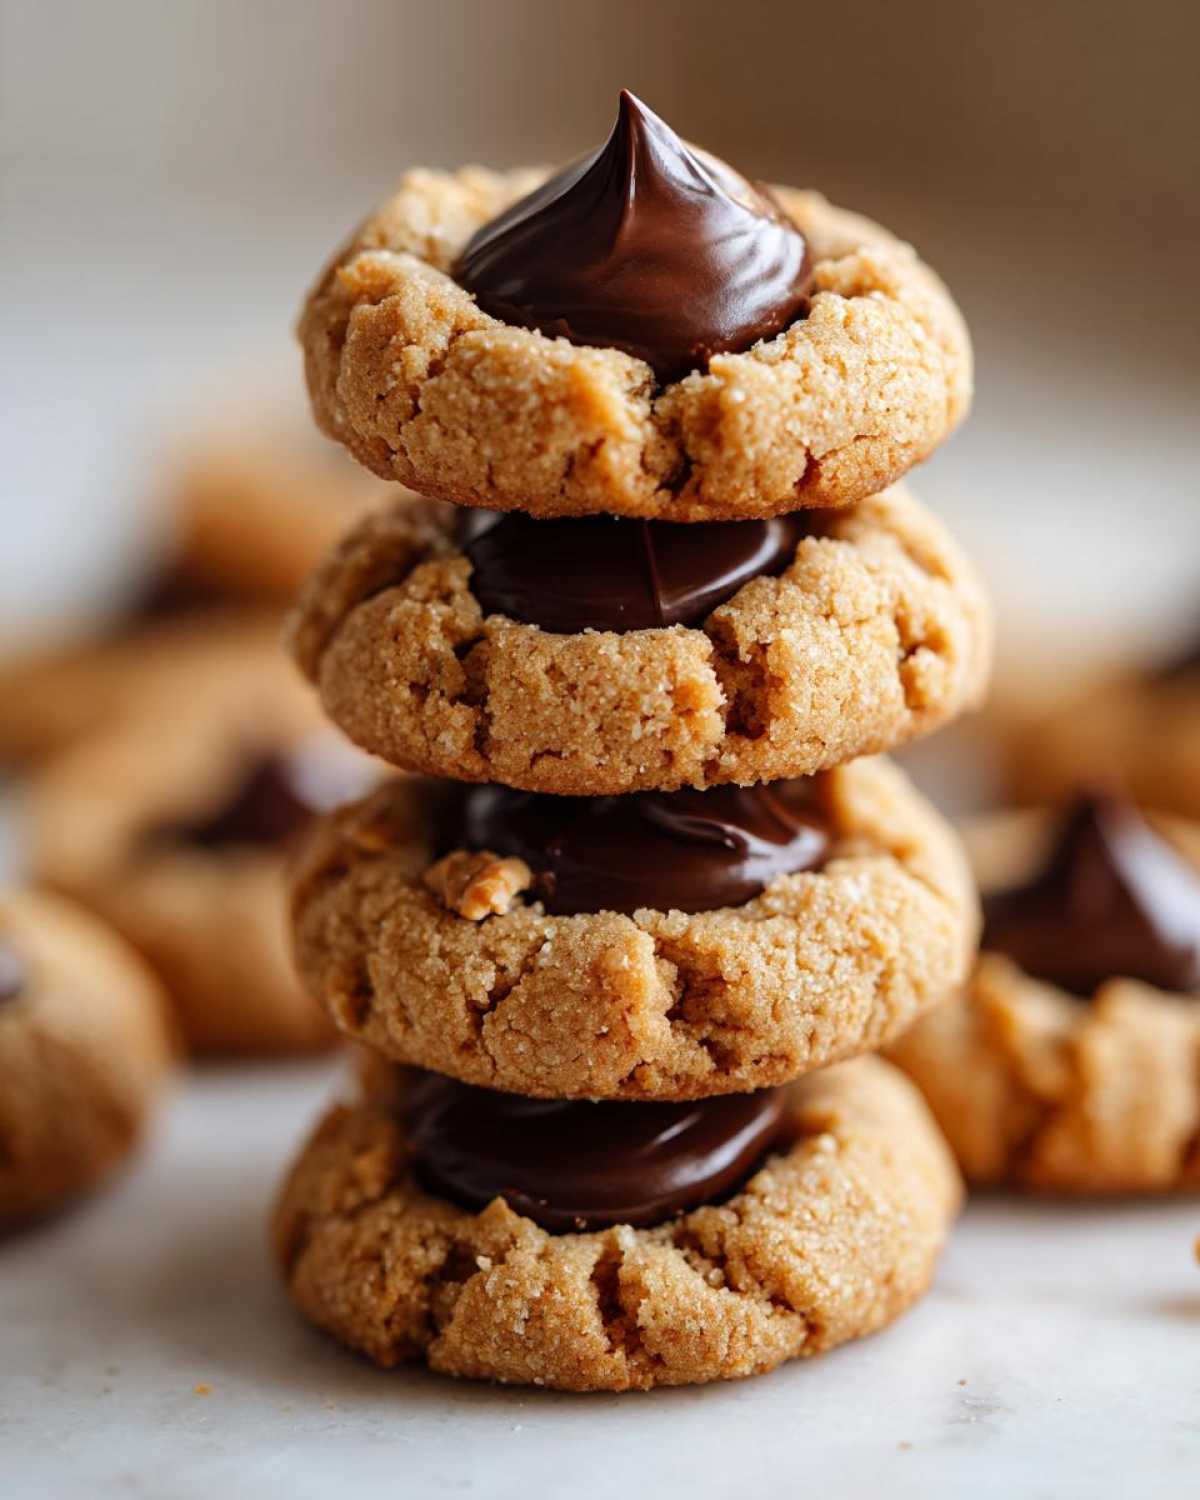
Pop those sheets into the preheated oven for 8 to 10 minutes. You’re looking for the edges to look set, maybe slightly golden, but the center should still appear a little soft—this is important for our next step! You need to work fast! Immediately when the tray comes out, grab one unwrapped Hershey’s Kiss and gently press it right into the center of each warm cookie. The residual heat is what slightly melts the bottom of the chocolate so it adheres beautifully.
Don’t worry; the cookie won’t melt flat! Let those beauties sit on the hot baking sheet for about 5 minutes so the kiss can get set in place, and then carefully move them over to a wire rack to cool completely. Trying to move them too soon will definitely result in a broken blossom!
Tips for Perfect Peanut Butter Blossom Cookies Every Time
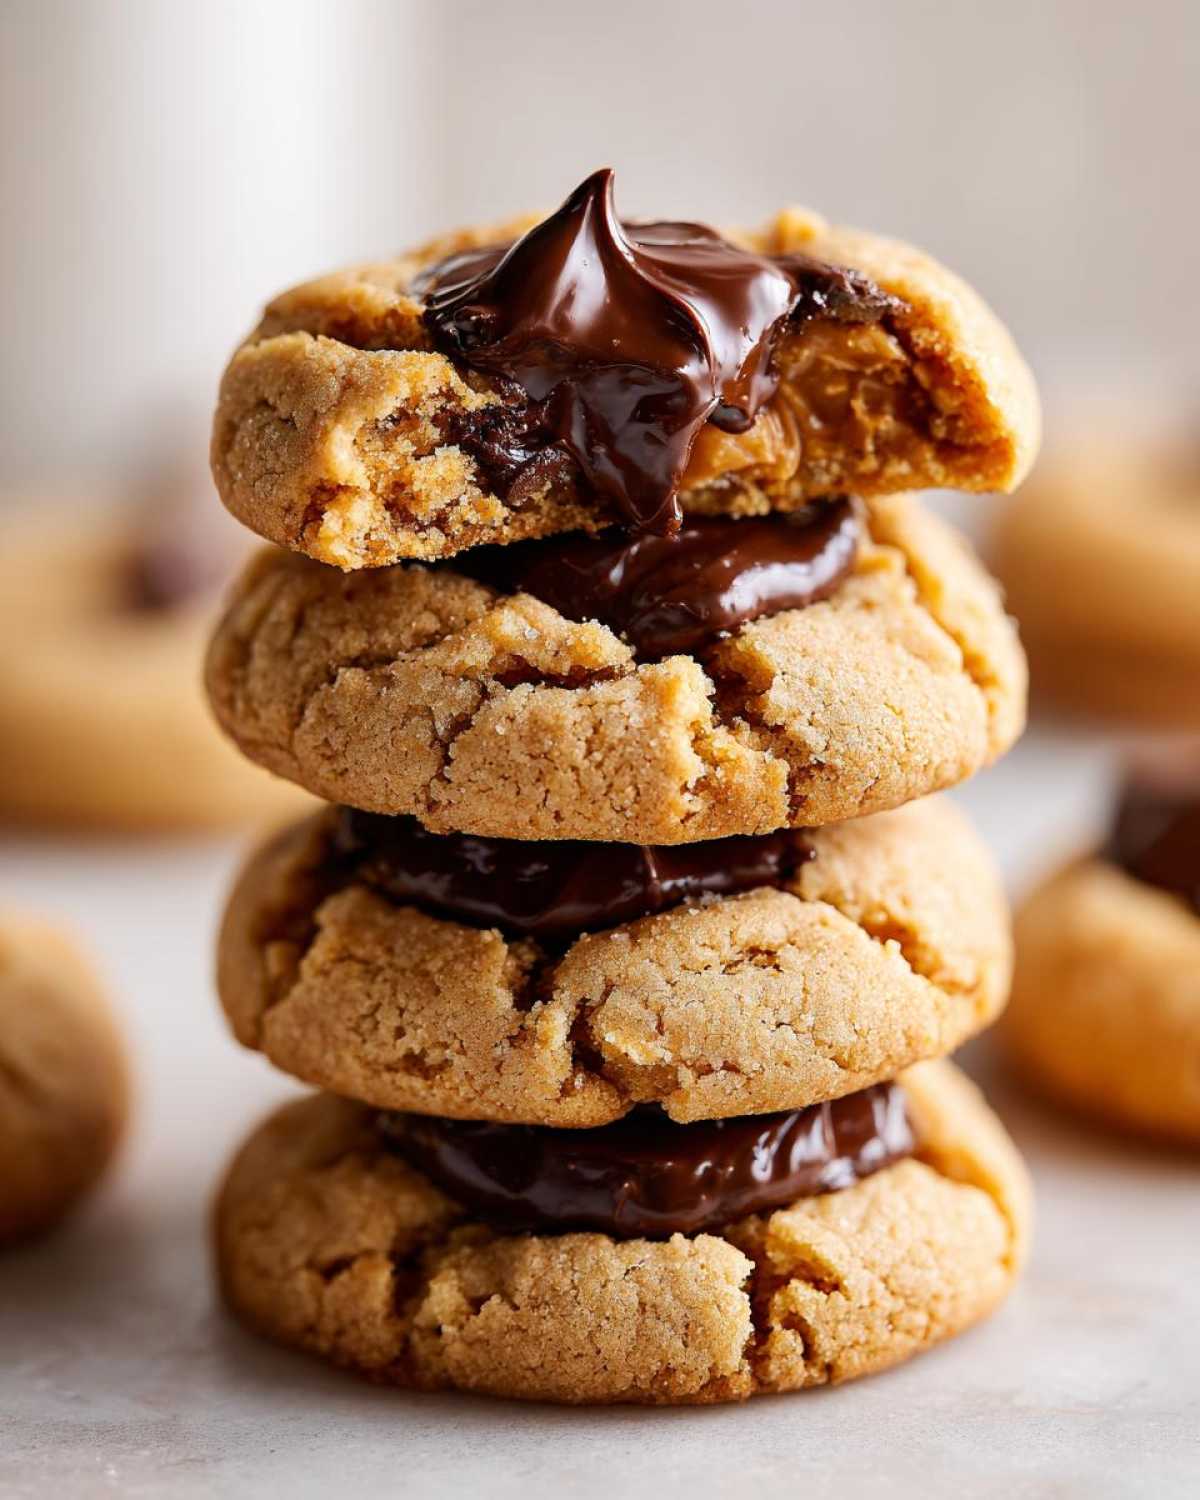
I know you want these to come out looking just like the picture, right? Believe me, when you follow these little tricks, you’ll look like a baking ninja. This recipe is already designed to be super reliable—I even linked to some other variations if you want to explore other easy peanut butter cookies—but these adjustments really guarantee success with the **Peanut Butter Blossom Cookies**.
Preventing Cracks in Your Peanut Butter Cookie Base
The main reason these cookies crack is usually twofold: the dough is too dry, or you overbake them. Since we used creamy peanut butter and kept the liquids balanced, you mostly need to watch the clock in the oven. I mentioned keeping them slightly underbaked? That’s your best weapon against cracking! You want the edges firm but the middle soft. Also, make sure you roll those dough balls thoroughly in the sugar. That sugary crust acts like armor, preventing the dough from shifting too much as it spreads.
Achieving the Ideal Chocolate Kiss Melt
The whole point is that little chocolate crater, and we don’t want the Kiss to sink right through! If you see that your cookies are coming out and the chocolate seems to be immediately disappearing into a puddle, pull the tray out and let the cookies rest on the sheet for just one minute before you press the chocolate in. That tiny pause gives the base structure a chance to settle. If you still have issues, remember the note on softening: if your kisses are too soft already, chilling them for 10 minutes before you start baking can help give you that perfect dollop that just softens slightly on top!
Variations for Your Peanut Butter Blossom Cookies
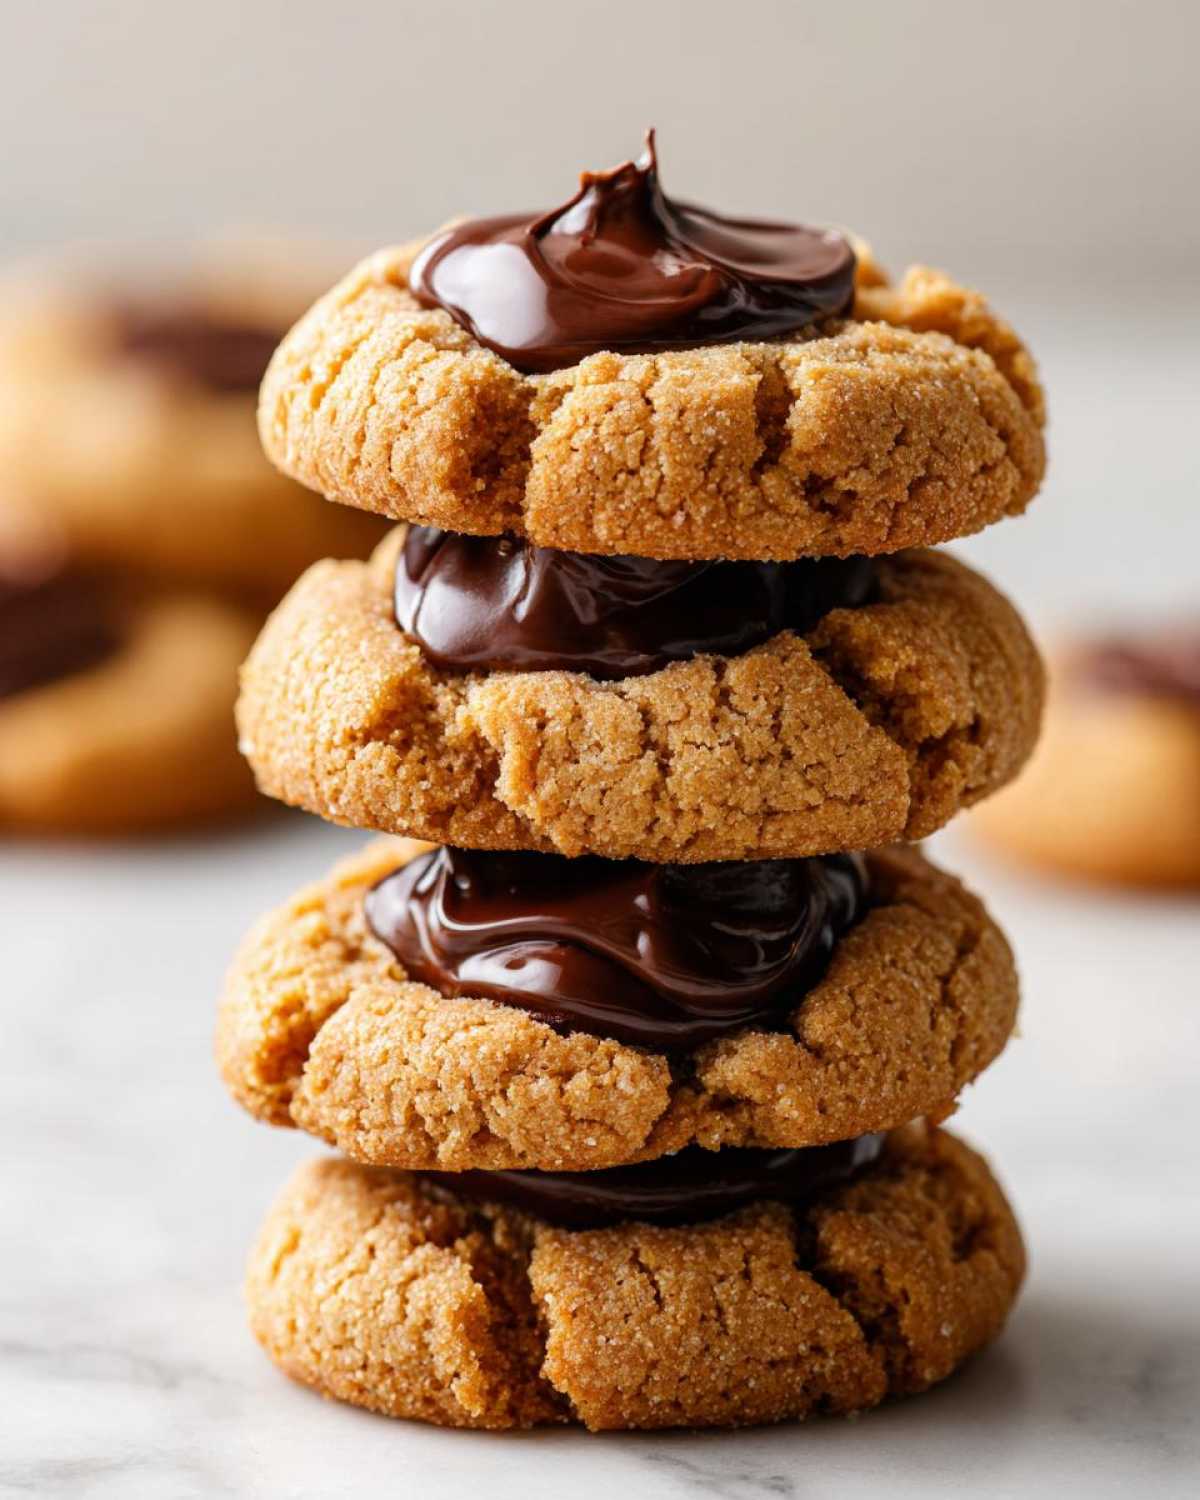
While this recipe is the gold standard for that classic combination, I totally understand wanting to mix things up! Baking should be fun, and sometimes you just don’t have those specific Hershey’s Kisses on hand, or maybe you want a bit more texture in your base. Don’t sweat it! You can absolutely tweak these simple drop cookies without ruining the magic.
I often experiment when I’m making a big batch because I can’t risk messing up the main batch I need for the cookie exchange! If you’re ever looking for decoration ideas after baking, you might enjoy reading up on how to make a cookie icing that hardens nice and smooth, though our blossoms don’t need any glaze!
Swapping the Chocolate for Different Flavors
The easiest thing to swap out is the topping, right? If you’re not a milk chocolate fan, try using dark chocolate kisses instead. Wow, does that add a fantastic, slightly bitter counterpoint to the sweet peanut butter dough! It gives the cookie a much more sophisticated flavor profile, honestly.
Another fun idea, especially if you’re making these for adults, is to substitute the Kisses entirely. You could press in a mini peanut butter cup immediately after baking—just make sure you peel off the foil wrapper first! The texture won’t be quite the same, but the doubled-up peanut butter flavor is amazing. You could even try using those caramel-filled chocolate cups for a gooey surprise!
And what about the base itself? Creamy peanut butter gives you that ultra-smooth, classic look in the crinkles, but if you love texture, go ahead and use crunchy peanut butter! Just know that the dough will be a bit chunkier, and the final cookie might spread slightly more because the nuts take up space that the fat otherwise fills. It’s a trade-off, but crunchy lovers insist it’s worth it!
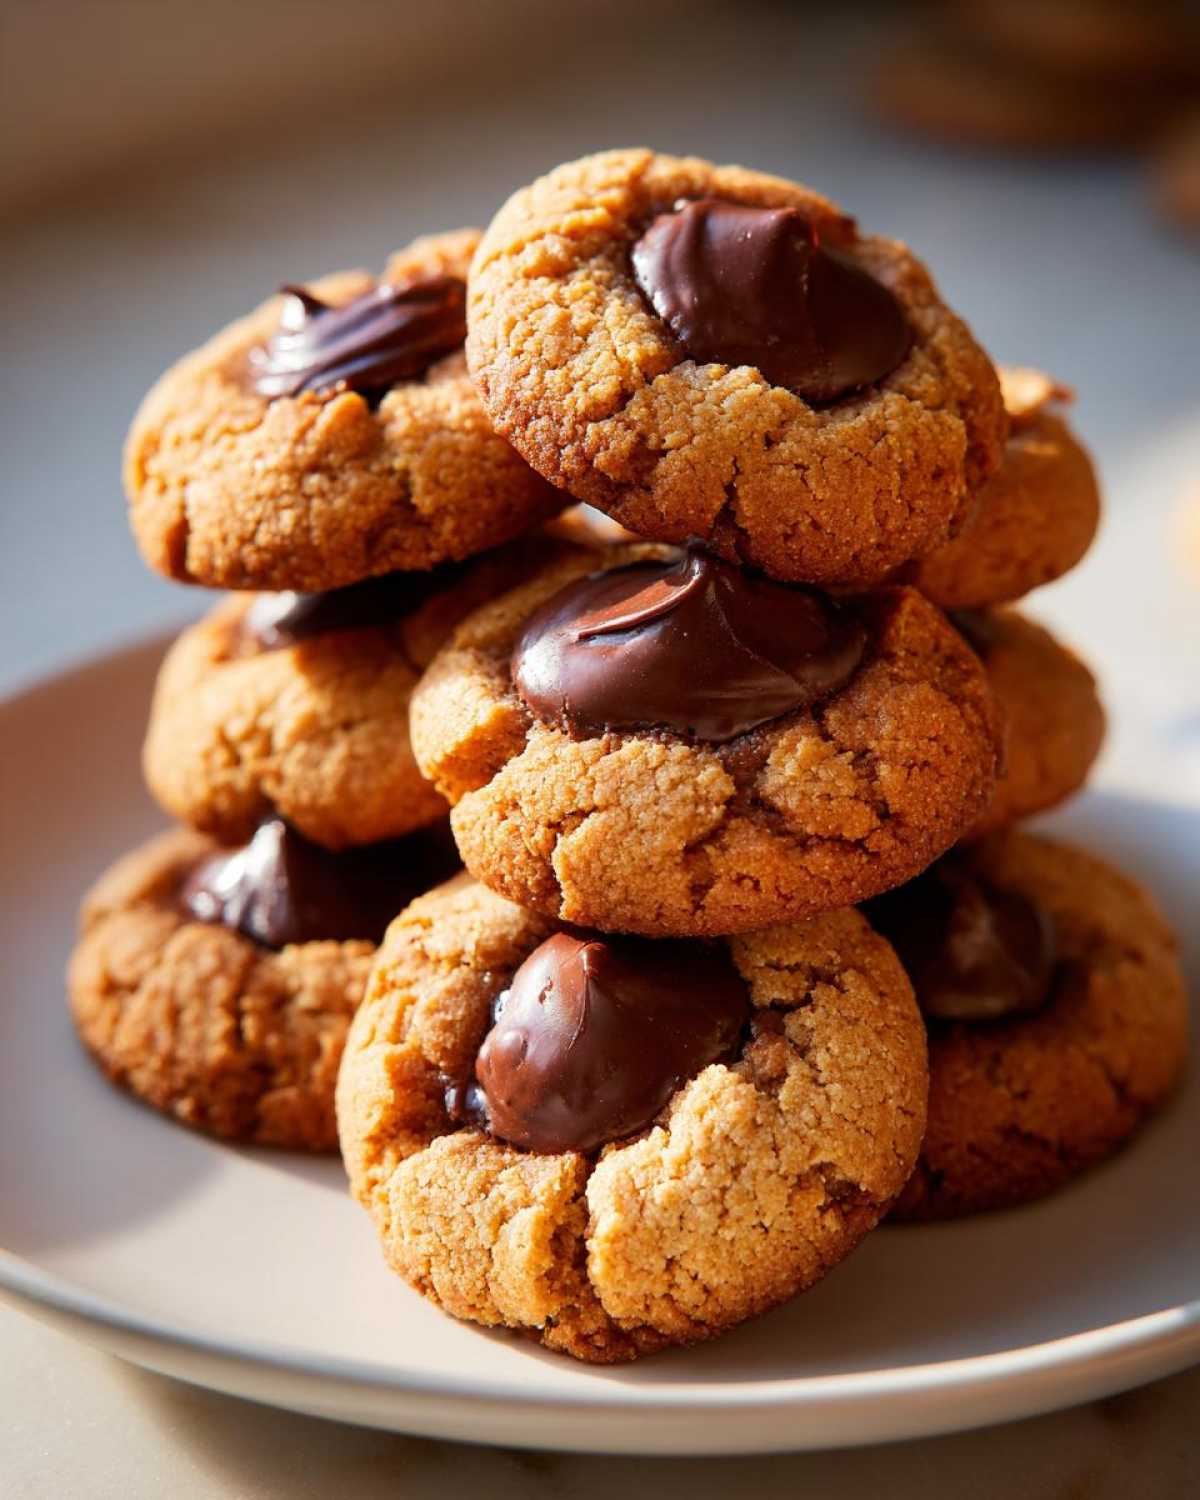
Storing and Serving Your Classic Peanut Butter Blossom Cookies
Okay, you’ve baked a giant batch (because who ever makes just one dozen of these?), and now you have to figure out how to keep them perfect. The good news is these Peanut Butter Blossom Cookies are actually fantastic keepers, provided you store them correctly. We want to keep that peanut butter base soft and the chocolate kiss firm but not dry.
For serving, these cookies are rich enough to stand on their own, but I find they pair wonderfully with a cold glass of milk, obviously! If you are planning a big holiday spread, maybe try adding a delicate complement, like my recipe for maple cookies on the side for a contrasting flavor profile.
Best Practices for Storing Peanut Butter Blossom Cookies
The absolute best way to keep these delicious cookies fresh is simple: airtight containers at room temperature. We never refrigerate these! Chilling them actually pulls moisture out of that soft cookie base and can make the peanut butter flavor taste muted. Just stack them gently—maybe with a piece of wax paper between layers if you’re worried about the chocolate sticking—and they should stay wonderful for up to a week. Seriously, though, they rarely last that long in my house!
Frequently Asked Questions About Peanut Butter Blossom Cookies
I figured you might have a few last-minute questions floating around, especially as you gather your ingredients for these Chocolate Kiss Cookies. Baking can feel intimidating, but I promise, once you get the hang of this recipe, you’ll never look back. It’s so straightforward!
We’ve answered the big stuff in the main steps, but here are a few more quick tidbits I always get asked about when I share this favorite family recipe. If you’re also keen on other fantastic holiday bakes, you have to check out how I make these chewy old-fashioned fruitcake cookies!
Can I chill the Peanut Butter Cookie Dough before baking?
That’s a great question, and usually, the answer is no, you don’t *have* to. For these specific Peanut Butter Blossom Cookies, the recipe is designed so you roll the dough balls immediately and bake them. Chilling the dough means the butter hardens up again, which can lead to more spreading in the oven, and sometimes those dreaded cracks we talked about!
If your kitchen is super hot and the dough is getting greasy while you’re rolling out the last few batches, pop the remaining dough balls in the fridge for about 15 minutes only. That brief chill helps them hold their shape better, but honestly, if the dough feels good, get them into that hot oven right away!
What is the best peanut butter for these Chocolate Kiss Cookies?
For the absolute smoothest, most classic texture—and my recommendation for the Best Peanut Butter Blossom Recipe—you really should stick to creamy peanut butter. It incorporates much more uniformly into the fats and sugars, leading to a consistent, soft dough that yields those beautiful fine crinkles on the surface. Crunchy peanut butter is wonderful, but the nuts disrupt that gorgeous, soft peanut butter matrix we are trying to create.
If you use crunchy, just be ready for a rougher texture overall and slightly less uniformity when you press down the chocolate piece. It’s an easy swap, but it changes the feel quite a bit!
Are these considered Easy Holiday Cookies?
Absolutely, one hundred percent yes! These fall right into the category of Easy Holiday Cookies. Why? Because there’s no chilling required, no rolling out dough with a pin, and no complicated frosting needed—just a quick press of a chocolate candy. They are drop cookies, which are always my go-to when I need a big platter ready quickly for a last-minute party. This is why they became such a Family Favorite Cookie Recipe for our busy holidays!
Estimated Nutrition for Peanut Butter Blossom Cookies
I’m not a nutritionist, so please take these numbers with a grain of salt—or maybe a few grains of sugar! These estimates are based on dividing the recipe into about 4 dozen cookies and using standard ingredient measurements. If you’re looking for precise counts for diet tracking, you might want to run the exact brands you used through an online calculator, but this gives you a good general idea of what you’re enjoying in one of these classic treats.
- Serving Size: 1 cookie
- Calories: 150
- Sugar: 15g
- Fat: 8g
- Protein: 3g
Share Your Classic Peanut Butter Blossom Cookies Creations
I have given you all my best secrets for achieving the perfect Peanut Butter Blossom Cookies, from softening the butter to that crucial moment of pressing the chocolate kisses in. Now it’s your turn! I absolutely live to see your bakes. Did they hold their shape beautifully? Did the chocolate melt just right?
Please let me know how your batch turned out in the comments below. Did you stick totally traditional, or did you try my suggestion to use dark chocolate? If you loved this recipe and want to see more of what I’m whipping up in my kitchen, feel free to jump over to my main recipe index and check out what’s new!
Estimated Nutrition for Peanut Butter Blossom Cookies
I’m not a nutritionist, so please take these numbers with a grain of salt—or maybe a few grains of sugar! These estimates are based on dividing the recipe into about 4 dozen cookies and using standard ingredient measurements. If you’re looking for precise counts for diet tracking, you might want to run the exact brands you used through an online calculator, but this gives you a good general idea of what you’re enjoying in one of these classic treats.
- Serving Size: 1 cookie
- Calories: 150
- Sugar: 15g
- Fat: 8g
- Protein: 3g
Share Your Classic Peanut Butter Blossom Cookies Creations
I have given you all my best secrets for achieving the perfect Peanut Butter Blossom Cookies, from softening the butter to that crucial moment of pressing the chocolate kisses in. Now it’s your turn! I absolutely live to see your bakes. Did they hold their shape beautifully? Did the chocolate melt just right?
If you made a batch of these traditional cookie recipes, tell me how it went! Drop a rating right here on the recipe card—that helps other bakers know they’re grabbing the right instructions. And if you snapped a picture of your gorgeous, crinkled beauties, tag me on social media! I love checking out everyone’s work.
If you loved this recipe and want to see more of what I’m whipping up in my kitchen, feel free to jump over to my main recipe index and check out what’s new! Happy baking, and enjoy every sweet, peanut-buttery bite!
PrintClassic Peanut Butter Blossom Cookies
A recipe for traditional peanut butter cookies topped with a chocolate kiss immediately after baking.
- Prep Time: 20 min
- Cook Time: 10 min
- Total Time: 30 min
- Yield: About 4 dozen
- Category: Dessert
- Method: Baking
- Cuisine: American
- Diet: Vegetarian
Ingredients
- 1 cup unsalted butter, softened
- 1 cup granulated sugar
- 1 cup packed light brown sugar
- 2 large eggs
- 1 teaspoon vanilla extract
- 1 cup creamy peanut butter
- 2 3/4 cups all-purpose flour
- 1 teaspoon baking soda
- 1/2 teaspoon baking powder
- 1/2 teaspoon salt
- About 48 Hershey’s Kisses, unwrapped
Instructions
- Preheat your oven to 375 degrees F. Line baking sheets with parchment paper.
- In a large bowl, beat the softened butter, granulated sugar, and brown sugar together until creamy.
- Beat in the eggs one at a time, then mix in the vanilla extract and peanut butter until combined.
- In a separate medium bowl, whisk together the flour, baking soda, baking powder, and salt.
- Gradually add the dry ingredients to the wet ingredients, mixing on low speed until just combined. Do not overmix.
- Roll the dough into 1-inch balls. Roll each ball in granulated sugar to coat completely.
- Place the sugared balls about 2 inches apart on the prepared baking sheets.
- Bake for 8 to 10 minutes. The edges should be set, but the centers should still look slightly soft.
- Immediately upon removing the cookies from the oven, gently press one unwrapped chocolate kiss into the center of each warm cookie. The heat will slightly melt the bottom of the kiss.
- Let the cookies cool on the baking sheet for 5 minutes before transferring them to a wire rack to cool completely.
Notes
- Use creamy peanut butter for the smoothest texture.
- For softer cookies, slightly underbake them; they will continue to set as they cool.
- If the chocolate kiss seems to sink too much, let the cookie cool for 1 minute before pressing the kiss in.
- Store cookies in an airtight container at room temperature for up to one week.
Nutrition
- Serving Size: 1 cookie
- Calories: 150
- Sugar: 15
- Sodium: 75
- Fat: 8
- Saturated Fat: 3
- Unsaturated Fat: 5
- Trans Fat: 0
- Carbohydrates: 18
- Fiber: 1
- Protein: 3
- Cholesterol: 20