

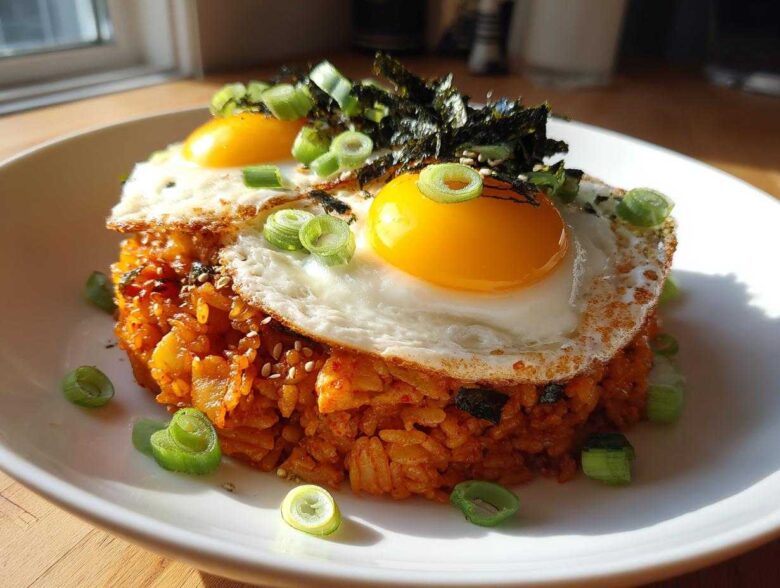
Are you staring into your fridge at 6:30 PM thinking, “I have zero energy for actual cooking tonight”? Trust me, I know that feeling. Some nights you just need something fast, deeply flavorful, and comforting. That’s why I spent months perfecting this 15-Minute Ultimate Kimchi Fried Rice. This isn’t some bland, rushed attempt; this is truly the king of quick comfort food. It hits that perfect note—spicy, tangy, savory, all wrapped up in perfectly seasoned rice. If you’re looking for the best spicy fried rice that actually tastes like you spent way more time on it, you’ve finally found my secret weapon for busy weeknights.
Why This 15-Minute Kimchi Fried Rice Recipe Works So Well
When you’re trying to get dinner on the table fast, you don’t want a recipe that requires baby steps or twenty separate bowls. I’ve tweaked this Kimchi Fried Rice so many times I nearly wore out my wok, but I finally landed on the magic formula that delivers big on taste but tiny on time. It’s the ultimate cheat code for busy evenings.
- Speed: Achieving Perfect Kimchi Fried Rice in Minutes: Seriously, this is a true Quick Weeknight Dinner candidate. We’re talking 15 minutes, start to finish! The key is using very high heat—you’re stir-frying, not stewing. That intense heat cooks everything quickly and gives you that slightly smoky flavor you dream about.
- Flavor Profile: Savory, Spicy, and Tangy Balance: This recipe nails Korean comfort food complexity without the fuss. The aged kimchi brings the necessary sour tang, which is balanced perfectly by that deep, sweet heat from the gochujang. A splash of soy sauce anchors it all with rich umami. It’s basically a flavor explosion that takes no effort.
Essential Ingredients for Your Kimchi Fried Rice
The secret to making this Kimchi Fried Rice so incredibly fast is using ingredients that are *ready* to go. You aren’t chopping vegetables for twenty minutes; you are assembling flavor bombs! Remember, the better your quality starts out—especially the kimchi—the better your final result will be. I’ve listed everything you need for two satisfying servings right here, but don’t be alarmed by the list; most of these are pantry staples for me now!
- 2 cups cold, cooked leftover rice (this is non-negotiable, trust me!)
- 1 cup chopped aged kimchi (use the stuff that’s been in the fridge a while—it’s tangier!)
- 1/4 cup kimchi juice (don’t pour out that precious liquid!)
- 2 tablespoons neutral cooking oil (like canola or vegetable)
- 4 ounces pork belly or bacon, diced (optional, but oh so good for flavor)
- 1/2 small onion, diced
- 1 tablespoon gochujang (Korean chili paste—the heart of the flavor!)
- 1 teaspoon soy sauce
- 1 teaspoon sugar
- 2 large eggs
- 1 scallion, sliced, for garnish
- 1 teaspoon toasted sesame oil
- 1 sheet roasted seaweed (gim), crumbled, for garnish
If you want to see how other rice dishes shine, check out my guide on making Chicken Fried Rice Better Than Takeout—it uses similar high-heat throwing techniques!
Ingredient Notes and Substitutions for Easy Kimchi Fried Rice recipe
Okay, let’s talk about the non-negotiables, especially if you’re aiming for that perfect texture in your Easy Kimchi Fried Rice recipe. That cold, leftover rice is crucial. Freshly cooked rice is too watery, and you end up with mushy clumps instead of distinct grains. I usually keep a container of day-old rice in the fridge just for these moments.
If you skip the pork belly, that’s fine! But you need to replace that fat and savoriness. If you’re going vegetarian, I highly recommend cubed firm tofu that you sauté in the oil until it’s nice and golden *before* you add the onions. And that gochujang? It’s your flavor workhorse. You can adjust it up or down based on how hot you like your Spicy Fried Rice, but don’t skip it entirely—it brings sweetness that plain chili powder just can’t match.
How to Make Kimchi Fried Rice: Step-by-Step Instructions
Listen, if you want that authentic taste in your Kimchi Fried Rice, you absolutely have to treat your wok (or a big skillet—I won’t judge!) like it’s on fire. This isn’t simmering; this is fast, high-heat work. Make sure all your components are measured and ready to go because once we start, it flies! We’re building layers of savory flavor right here, so move quickly but carefully.
Step 1: Render Fat and Sauté Aromatics for Flavorful Dinner Ideas
First things first: get your oil smoking hot over medium-high heat. If you’re using bacon or pork belly like I have listed, toss it in first until it gets crispy and renders out all that delicious fat. Use a slotted spoon to pull the crispy bits out and set them aside for later—we want that pork flavor in the dish, but we don’t want chewy pieces when we’re done. If you skipped the meat, just add your cooking oil and toss in those diced onions. Cook them until they start to look soft and a little translucent, which takes maybe two minutes.
Step 2: Building the Sauce Base in Your Spicy Fried Rice
Now for the star: the kimchi! Add the chopped kimchi and stir-fry it for about three minutes. You want it to darken slightly and really deepen in color; this wakes up all those fermented flavors. Once it looks good, make a little space and add your flavor boost: the gochujang, soy sauce, sugar, and all that precious kimchi juice. Stir that paste around for just a minute until it’s smelling incredible and everything is binding together nicely. This quick cook step concentrates the sauce!
Step 3: Frying the Leftover Rice Recipe Components
This is where we use that cold rice. Dump those cold clumps into the heavily seasoned mixture. Take your spatula and start breaking them up right away. You have to mix, mix, mix! Make sure every single grain gets coated in that beautiful red sauce we just built. Keep tossing and stir-frying for about three minutes until the rice is piping hot all the way through. Now is the time to toss that crispy pork back in if you made it.
Step 4: Finishing the Kimchi Fried Rice with Egg
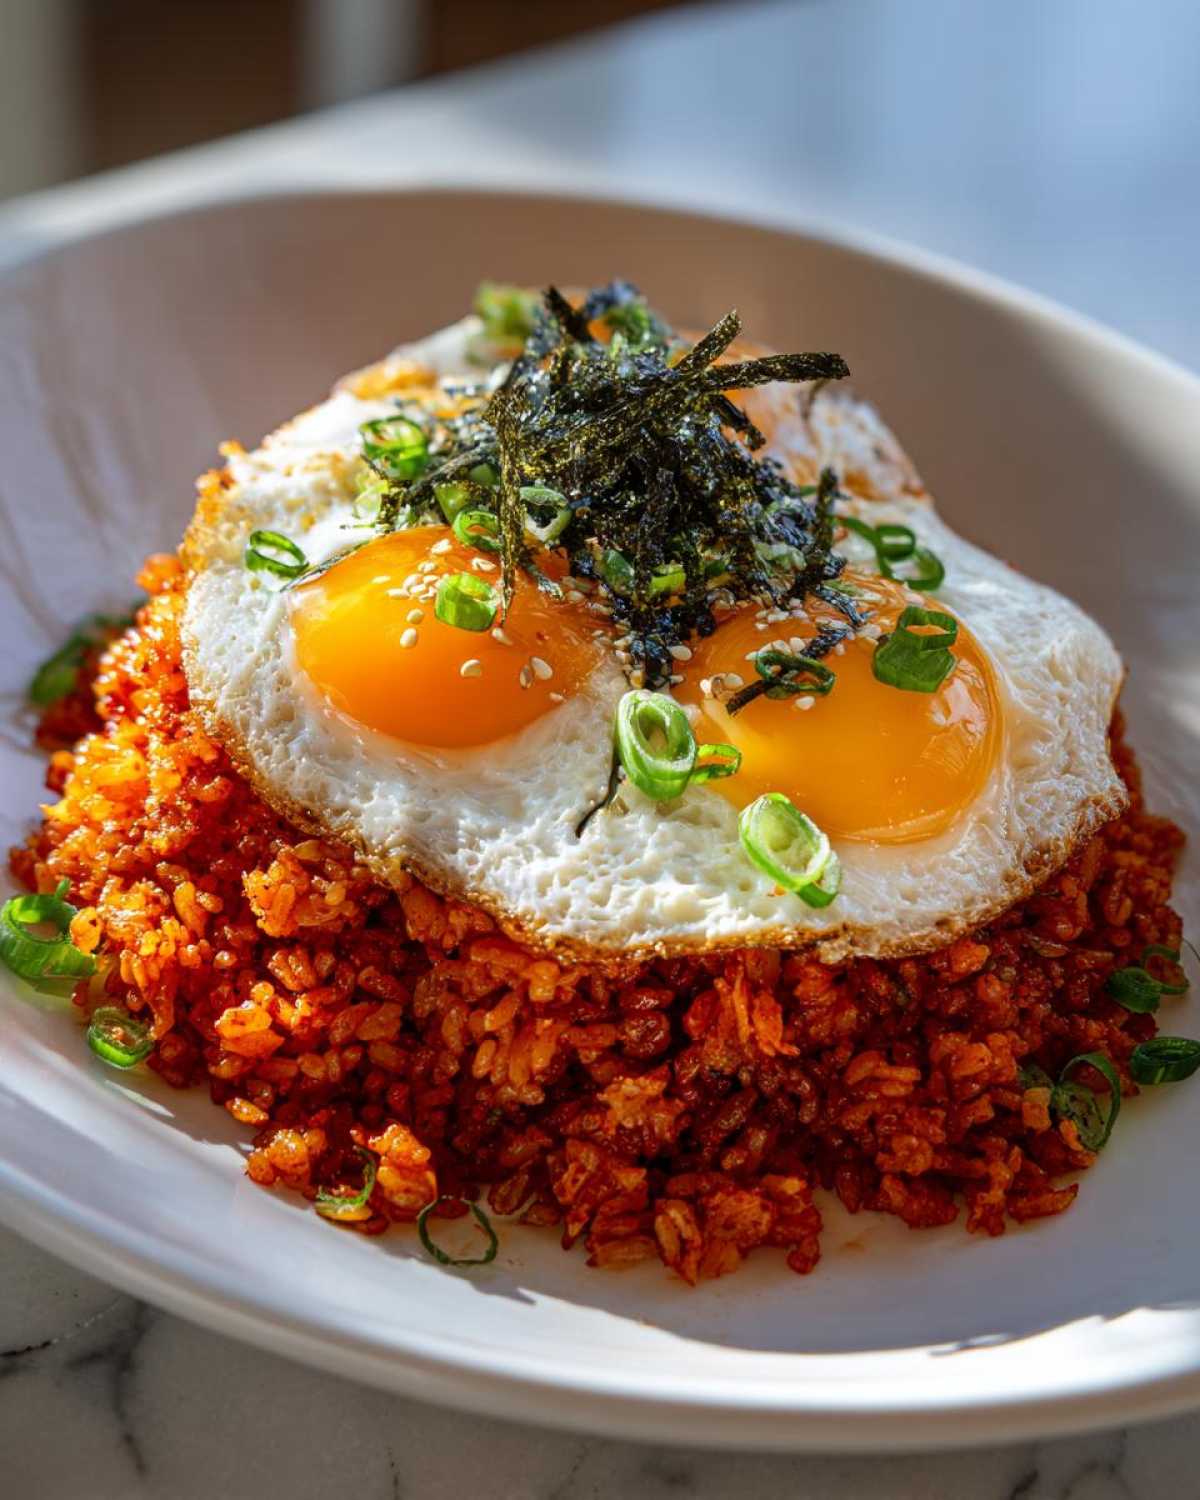
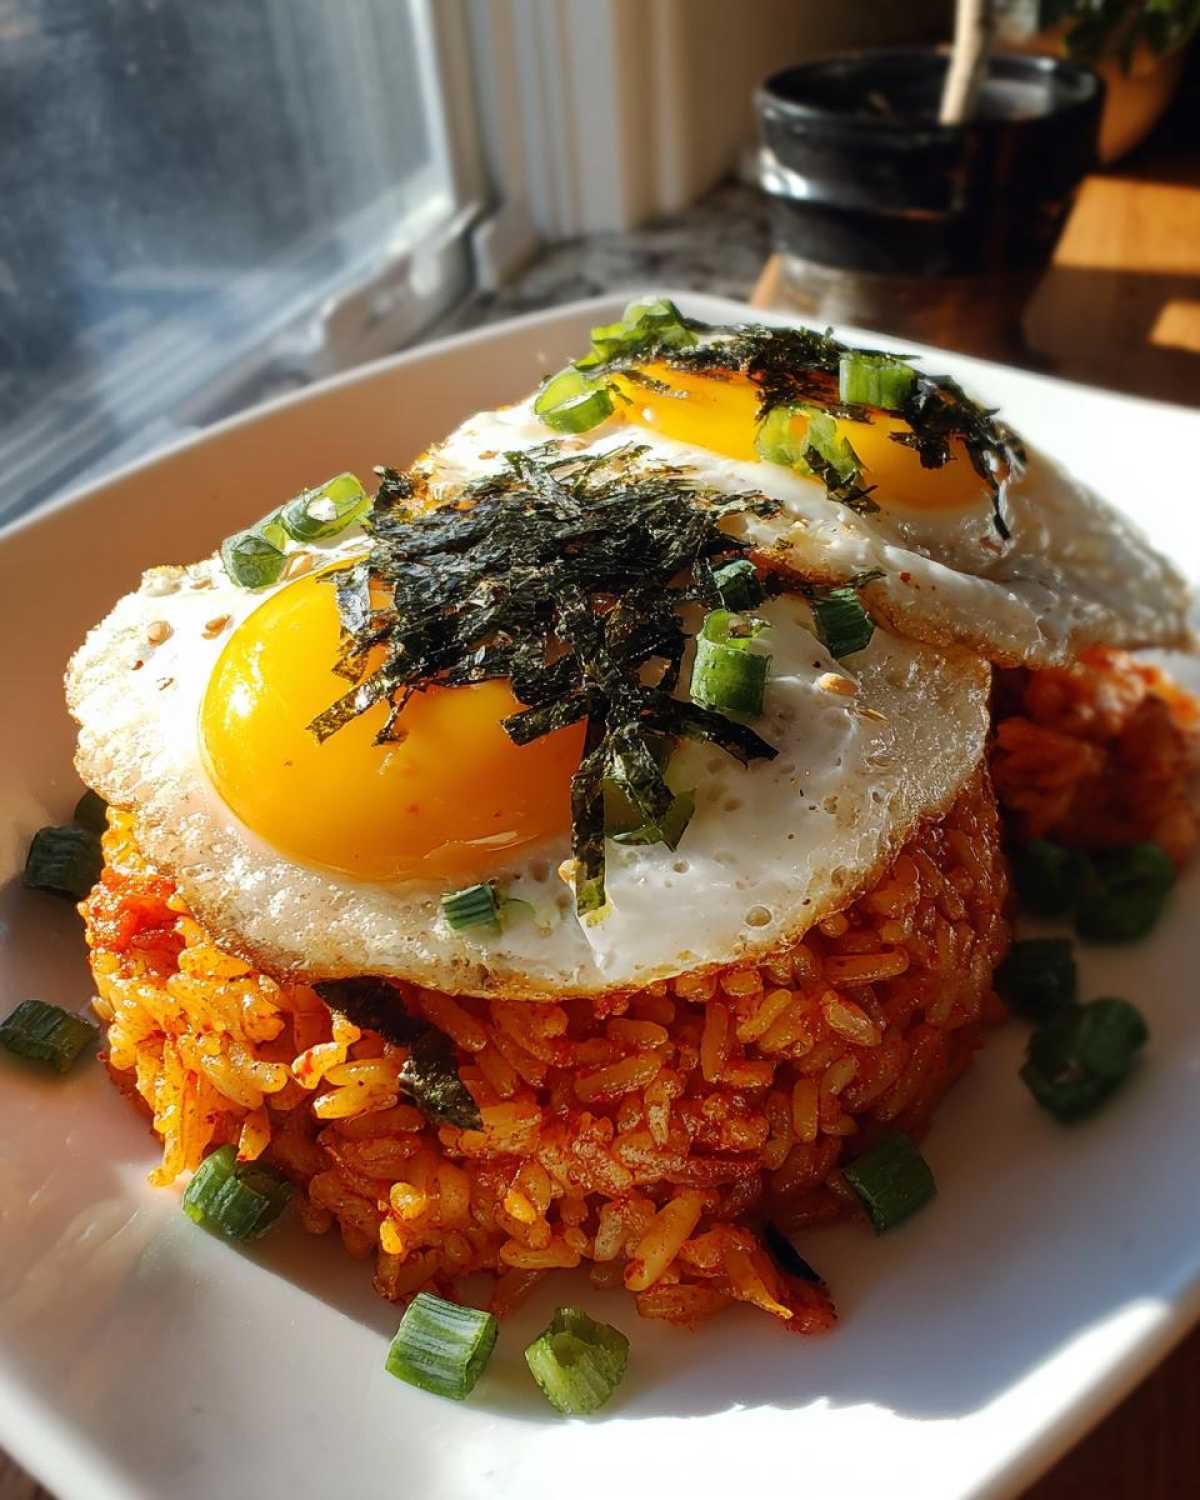
I love finishing this dish by cooking the eggs fresh right in the pan—it just makes it feel more special, even though it saves washing another dish! Push the rice mixture over to one side of your pan. Add a tiny drizzle of oil to the empty spot and crack your two eggs right in there. Cook them however you like, honestly. Sunny-side up so the yolk runs into the rice is my favorite Fried Rice with Egg experience, but scrambled works too!
Tips for Perfect Bokkeumbap recipe Texture and Heat
Even though this is designed to be super fast—a masterpiece in under 15 minutes—a few little tricks separate the okay Kimchi Fried Rice from the absolutely mind-blowing stuff. Texture is probably the biggest thing people struggle with. Remember what I said about that cold rice? Seriously, don’t skip that. If you use warm rice, you are guaranteeing a gummy, sticky mess—we want every grain happy and separate so it can drink up that sauce! That’s the difference between a great Leftover Rice Recipe and one that sits sadly on your plate.
As for heat, you have total control here! The gochujang gives a deep warmth, but if you want a real kick, you can absolutely load up on extra kimchi juice during the saucing stage. If your kimchi is already super sour, maybe dial back the juice a tiny bit. My rule is always: taste before you serve! You can always add more saltiness or sweetness, but if you oversauce it, it’s hard to pull back quickly.
Customizing Your Kimchi Fried Rice
I love that this Kimchi Fried Rice is such a fantastic base recipe because it begs you to mess with it! That’s what makes it perfect for those nights you need Quick Korean Recipes that feel totally personalized. We used pork belly in the main instructions because, well, fat equals flavor, but totally swap it out! This dish is incredibly adaptable depending on what you have rattling around in your fridge.
Protein Swaps for Your Kimchi Rice
If you’re tired of pork or just ran out, don’t stress. You can easily slip in shredded leftover rotisserie chicken—just toss it in right when you add the rice to make sure it heats through completely. Canned tuna is surprisingly amazing in pan-fried rice, it adds a savory saltiness that just works with the kimchi tang. Make sure you drain it super well, though! For a veggie-forward spin, try adding leftover steamed broccoli florets or some thinly sliced zucchini when you sauté the onions. Remember, anything you add needs to be cooked or pre-cooked!
Making a Vegetarian or Vegan Kimchi Fried Rice
If you’re cutting out meat, this recipe handles it beautifully, especially if you’re aiming for a totally vegan approach. As I mentioned before, cubes of well-pressed, firm tofu are your best friend here. You should pan-fry the tofu in that initial oil until it gets golden brown and a little textural *before* you even think about adding onions or kimchi. That step gives it the necessary chew we miss when we skip the meat.
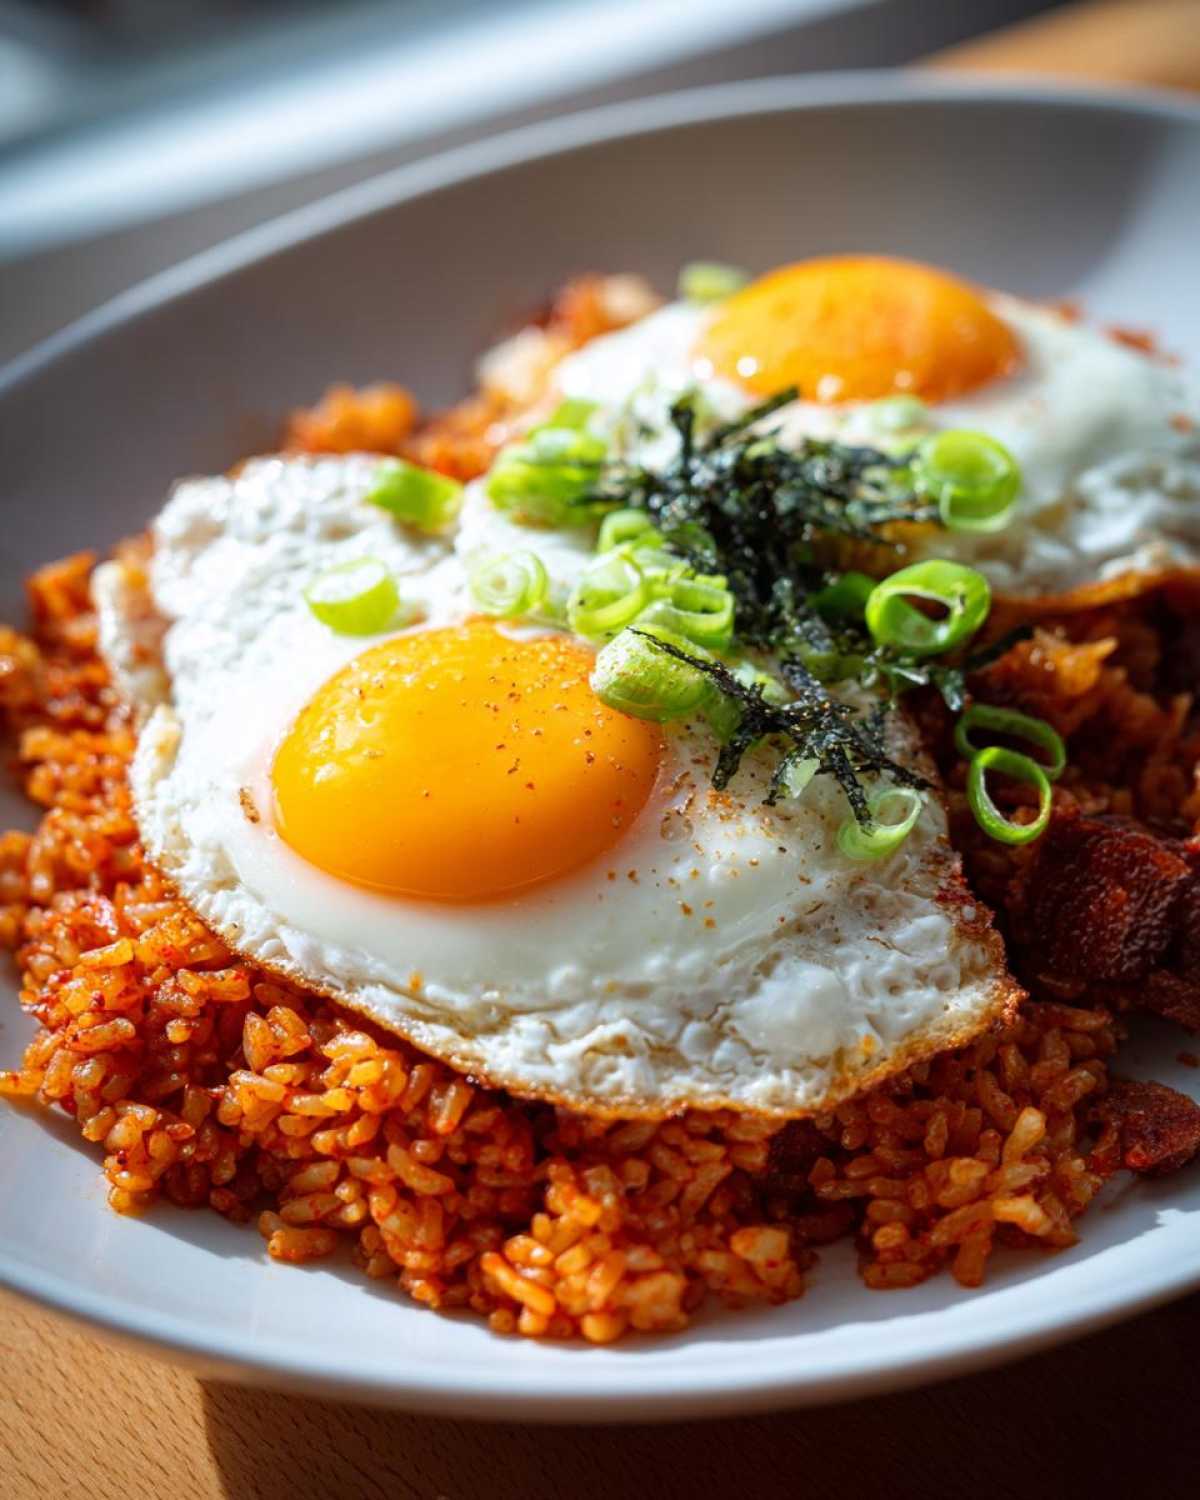
Now, for the vegan part, this is important: double-check your gochujang! Most brands are naturally vegan, but some specialty pastes might contain trace amounts of seafood products. If you are worried, or if you used fermented shrimp paste in your kimchi, you might want to skip the kimchi juice or swap it out for a splash of rice vinegar instead. Keep everything else the same, and you’ve got a fantastic, flavorful vegan feast!
Serving Suggestions for this Savory Rice Dish
Okay, you’ve got your perfectly seasoned, piping hot Kimchi Fried Rice in the bowl. Don’t stop now! The garnishes aren’t just for pretty pictures, they are absolutely essential to making this feel like a true, balanced meal. They cut through the richness of the gochujang and add necessary pops of texture right when you need them most.
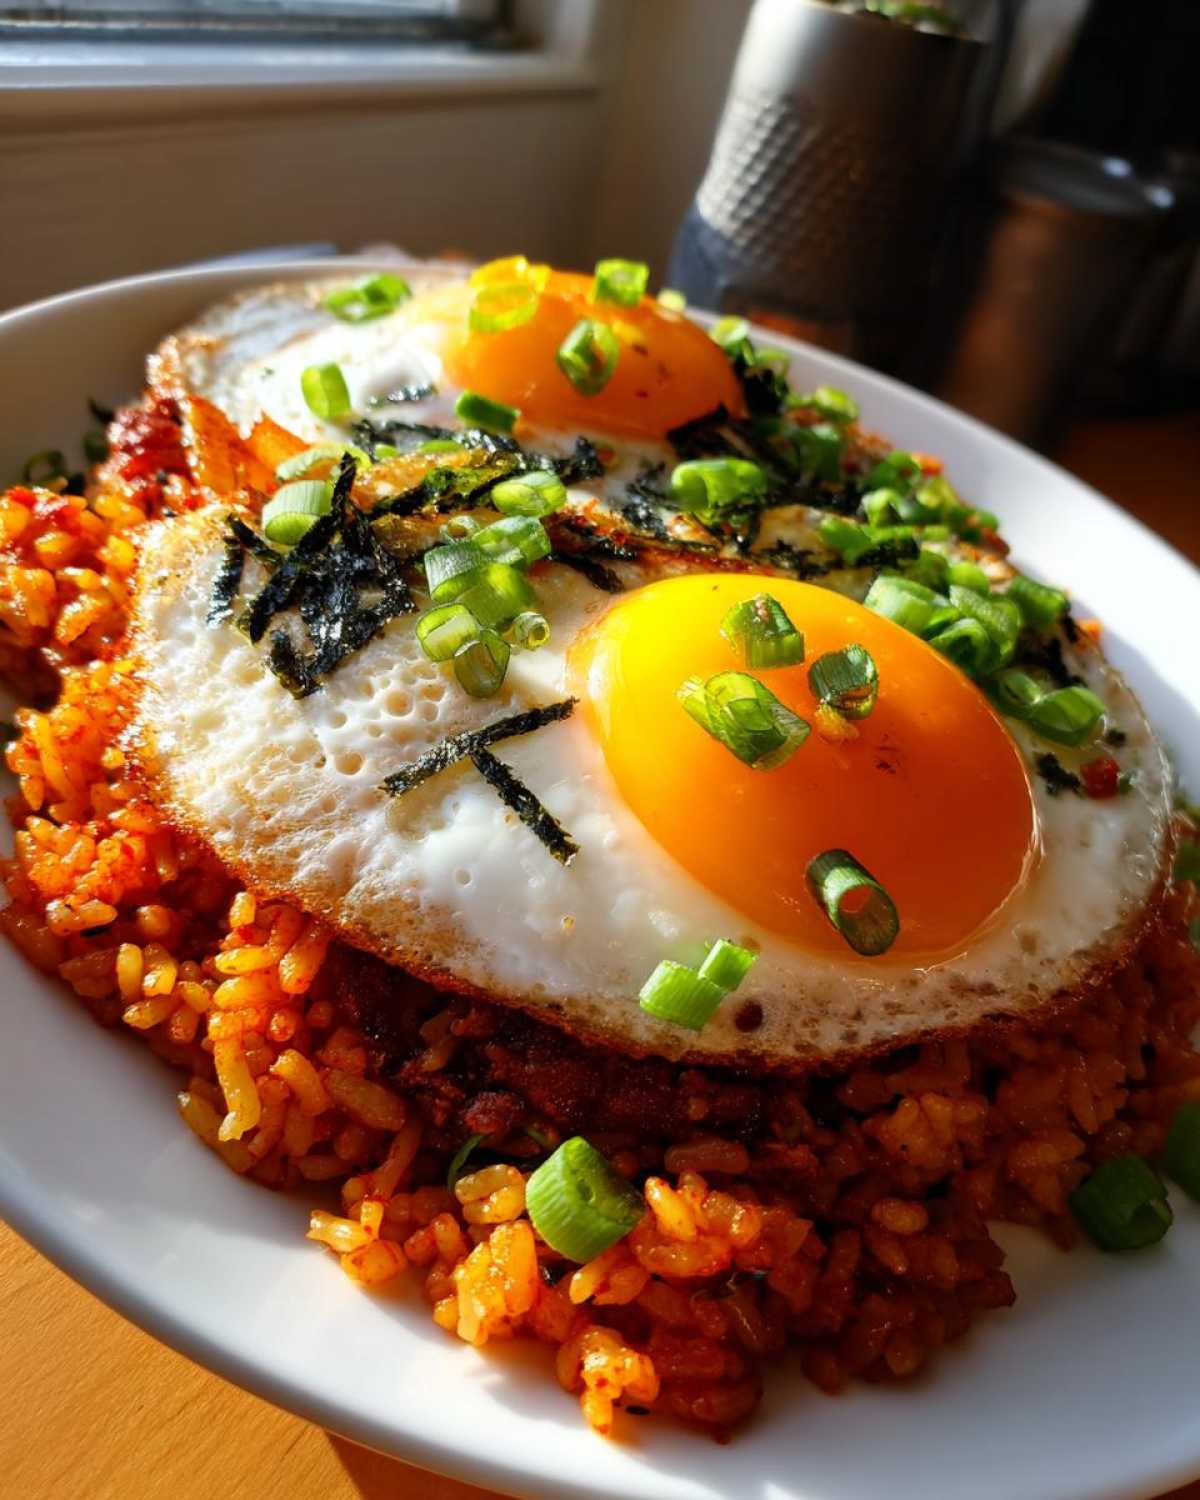
See those toppings I listed? You need all of them! The toasted sesame oil drizzled right on top is pure magic; it hits your nose with that deep, nutty aroma the second you set the bowl down. Then you crumble that sheet of roasted seaweed—gim—over everything. It adds a fantastic salty crispness that contrasts perfectly with the soft rice, kind of like a savory confetti blast!
If you’re turning this into a huge meal, which I often do because I get too ambitious with portions, I love pairing a bowl of this spicy rice with a simple, cool side dish. Think quick pickled cucumbers or maybe some non-spicy seasoned spinach. If you want another satisfying rice dish inspiration, you might want to check out how I make my Smothered Chicken and Rice Recipe—it’s a totally different vibe but equally comforting!
And of course, the egg! If you manage to get a beautiful sunny-side up with a runny yolk, that’s the final sauce component. When you break that yolk and mash it into the savory kimchi mixture, it adds an incredible creamy richness that ties the whole Savory Rice Dish together. It’s the perfect, quick end to a long day!
Storage and Reheating Kimchi Fried Rice
Even though this Kimchi Fried Rice is meant to be eaten RIGHT NOW, sometimes life happens, or maybe you correctly made a double batch because you knew you couldn’t stop eating it! Don’t worry; leftovers are almost as good as the fresh version, provided you treat them right. The main thing to remember is that you want to preserve that distinct grain texture, not turn it into a steamy brick.
For storage, you need an airtight container, obviously. Pop the leftovers into the fridge as soon as they cool down a bit—never leave food like this out on the counter for hours. It should keep perfectly well for about three or four days. I’ve made sure my recipe sticks around long enough for a couple of lunches later in the week!
Now, for reheating, please, please, please do not just microwave it cold and expect miracles. The microwave is fast, yes, but turning your beautiful leftovers into slightly chewy rice is a crime. If you have five extra minutes, use the skillet for reheating! It’s the best way to revive that texture. Just toss a tiny bit of fresh oil (or even a tablespoon of water if you’re worried about drying it out) into your pan over medium heat. Add the cold rice and break it up. Stir it constantly until it’s hot all the way through. This mimics the original stir-fry process and brings back that slightly toasted texture.
If you are absolutely desperate and only have a microwave, use short bursts—maybe 30 seconds at a time. And here’s my trick: sprinkle just a teaspoon of water over the portion before you microwave it, then cover it with a damp paper towel. That steam helps loosen the rice up. It’s not as good as the skillet, but it keeps it edible! These preservation tips ensure you get the most out of every batch, just like I do when I make my easy one-pot beans and rice recipe!
Frequently Asked Questions About Making Kimchi Fried Rice
I always get questions whenever I share this recipe because everyone wants to make sure their first attempt at Kimchi Fried Rice is a total success. It might seem simple, but those little tweaks make all the difference between an average meal and a perfect Bokkeumbap recipe. Here are the things I hear most often!
Can I use fresh kimchi instead of aged kimchi?
You totally can, but you’ll notice a difference! Aged kimchi—the kind that’s been sitting in the fridge for a few weeks—is sourer and tangier. This acidity is key because it cuts through the richness of the pork fat and the gochujang, balancing the whole dish out beautifully. If you use really fresh kimchi, it’s milder and sweeter. To compensate when using fresh kimchi, I always add a tiny splash of rice vinegar right when I add the kimchi juice to boost that necessary sour punch for your Kimchi Rice.
What is the best type of rice for Kimchi Fried Rice?
If you take one thing away from this whole process, let it be this: the rice MUST be cold! I cannot stress this enough for any good Spicy Fried Rice endeavor. You need rice that has been fully cooked, chilled completely, and ideally, a day old. Short-grain or medium-grain rice is best, like Calrose or standard sushi rice, because it clumps nicely when cold but separates perfectly when tossed in the hot wok. Never, ever use freshly steamed rice; it steams in the pan instead of frying, and you end up with a gloppy mess.
How can I make this recipe spicier?
Oh, I love a spice challenge! If you want to ramp up the heat in your Savory Rice Dish, you have a few easy routes. The easiest is just adding more gochujang, but if you want a sharper, fresher heat, slice up a small serrano or Thai chili when you dice the onion and cook it alongside. For a truly authentic Korean kick, stir in about half a teaspoon of gochugaru (Korean chili flakes) right when you’re mixing in the gochujang sauce. It adds a beautiful red color and a cleaner heat that really wakes everything up!
Nutritional Snapshot of This 15 Minute Meals Recipe
I know you’re looking for speed, but let’s just quickly peek at what’s packed into this powerhouse meal. Keep in mind these numbers are estimates for one serving if you exclude the optional pork belly but include one fried egg. This is designed to be a filling, reasonably balanced 15 Minute Meals option that tastes indulgent!
- Serving Size: 1 serving
- Calories: 450
- Fat: 18g
- Carbohydrates: 60g
- Protein: 18g
Share Your Perfect Kimchi Fried Rice Experience
Now you have everything you need to whip up what I consider the absolute best Kimchi Fried Rice on the internet! Don’t keep this deliciousness to yourself. Once you’ve made it, stop by the comments below and let me know how you liked it. Did you stick to the pork belly, or did you try one of those veggie swaps? I always love hearing what protein additions people make!
Don’t forget to snap a picture with that perfectly runny egg yolk sitting on top and share it with me over on social media! Tagging me helps me see how you’re enjoying these Quick Korean Recipes! Happy cooking, friends!
Nutritional Snapshot of This 15 Minute Meals Recipe
I know you’re looking for speed, but let’s just quickly peek at what’s packed into this powerhouse meal. Keep in mind these numbers are estimates for one serving if you exclude the optional pork belly but include one fried egg. This is designed to be a filling, reasonably balanced 15 Minute Meals option that tastes indulgent!
- Serving Size: 1 serving
- Calories: 450
- Fat: 18g
- Carbohydrates: 60g
- Protein: 18g
Share Your Perfect Kimchi Fried Rice Experience
Now you have everything you need to whip up what I consider the absolute best Kimchi Fried Rice on the internet! Don’t keep this deliciousness to yourself. Once you’ve made it, stop by the comments below and let me know how you liked it. Did you stick to the pork belly, or did you try one of those veggie swaps? I always love hearing what protein additions people make!
Don’t forget to snap a picture with that perfectly runny egg yolk sitting on top and share it with me over on social media! Tagging me helps me see how you’re enjoying these Quick Korean Recipes! Happy cooking, friends!
Print15-Minute Ultimate Kimchi Fried Rice
Make quick, flavorful Kimchi Fried Rice using leftover rice for a fast weeknight meal.
- Prep Time: 5 min
- Cook Time: 10 min
- Total Time: 15 min
- Yield: 2 servings
- Category: Dinner
- Method: Stir-Frying
- Cuisine: Korean
- Diet: Vegetarian
Ingredients
- 2 cups cold, cooked leftover rice
- 1 cup chopped aged kimchi
- 1/4 cup kimchi juice
- 2 tablespoons neutral cooking oil
- 4 ounces pork belly or bacon, diced (optional)
- 1/2 small onion, diced
- 1 tablespoon gochujang (Korean chili paste)
- 1 teaspoon soy sauce
- 1 teaspoon sugar
- 2 large eggs
- 1 scallion, sliced, for garnish
- 1 teaspoon toasted sesame oil
- 1 sheet roasted seaweed (gim), crumbled, for garnish
Instructions
- Heat the cooking oil in a large skillet or wok over medium-high heat. If using pork belly or bacon, add it now and cook until crisp, about 3-4 minutes. Remove the meat with a slotted spoon and set aside, leaving the rendered fat in the pan.
- Add the diced onion to the pan and cook until softened, about 2 minutes.
- Add the chopped kimchi to the pan and stir-fry for 3 minutes until it darkens slightly.
- Stir in the gochujang, soy sauce, sugar, and kimchi juice. Cook for 1 minute, stirring constantly.
- Add the cold rice to the skillet. Break up the rice clumps with your spatula and mix thoroughly with the kimchi mixture until everything is evenly coated and heated through, about 3 minutes. Stir in the cooked meat, if using.
- Push the rice mixture to one side of the pan. Add a small amount of oil to the empty space and crack the two eggs directly into the pan. Cook them sunny-side up or scrambled, as you prefer.
- Serve the kimchi fried rice immediately, topped with the fried eggs, sliced scallions, crumbled seaweed, and a drizzle of sesame oil.
Notes
- Using cold, day-old rice prevents the fried rice from becoming mushy.
- Adjust the amount of gochujang based on your spice preference.
- For a vegetarian version, skip the pork and add 1/2 cup of firm tofu, cubed, and sautéed until golden brown before adding the onions.
Nutrition
- Serving Size: 1 serving
- Calories: 450
- Sugar: 8
- Sodium: 950
- Fat: 18
- Saturated Fat: 6
- Unsaturated Fat: 12
- Trans Fat: 0
- Carbohydrates: 60
- Fiber: 4
- Protein: 18
- Cholesterol: 250