


Oh my goodness, if you’re looking for comfort food that truly hits the spot, you have to try making these from scratch! I know when people say “rice balls,” they could mean a million things—maybe you’re thinking of soft, sticky Japanese Onigiri for a quick lunch, or perhaps something else entirely. But let me tell you, nothing beats a perfectly executed, deep-fried Italian Arancini. I spent ages trying to get that exterior just right, that shatteringly crisp shell that protects the creamy, savory center. Trust me, once you master that crunch, these amazing homemade rice balls will become your favorite appetizer. Today, we’re diving deep into the Sicilian classic!
What Are Classic Italian Rice Balls (Arancini)?
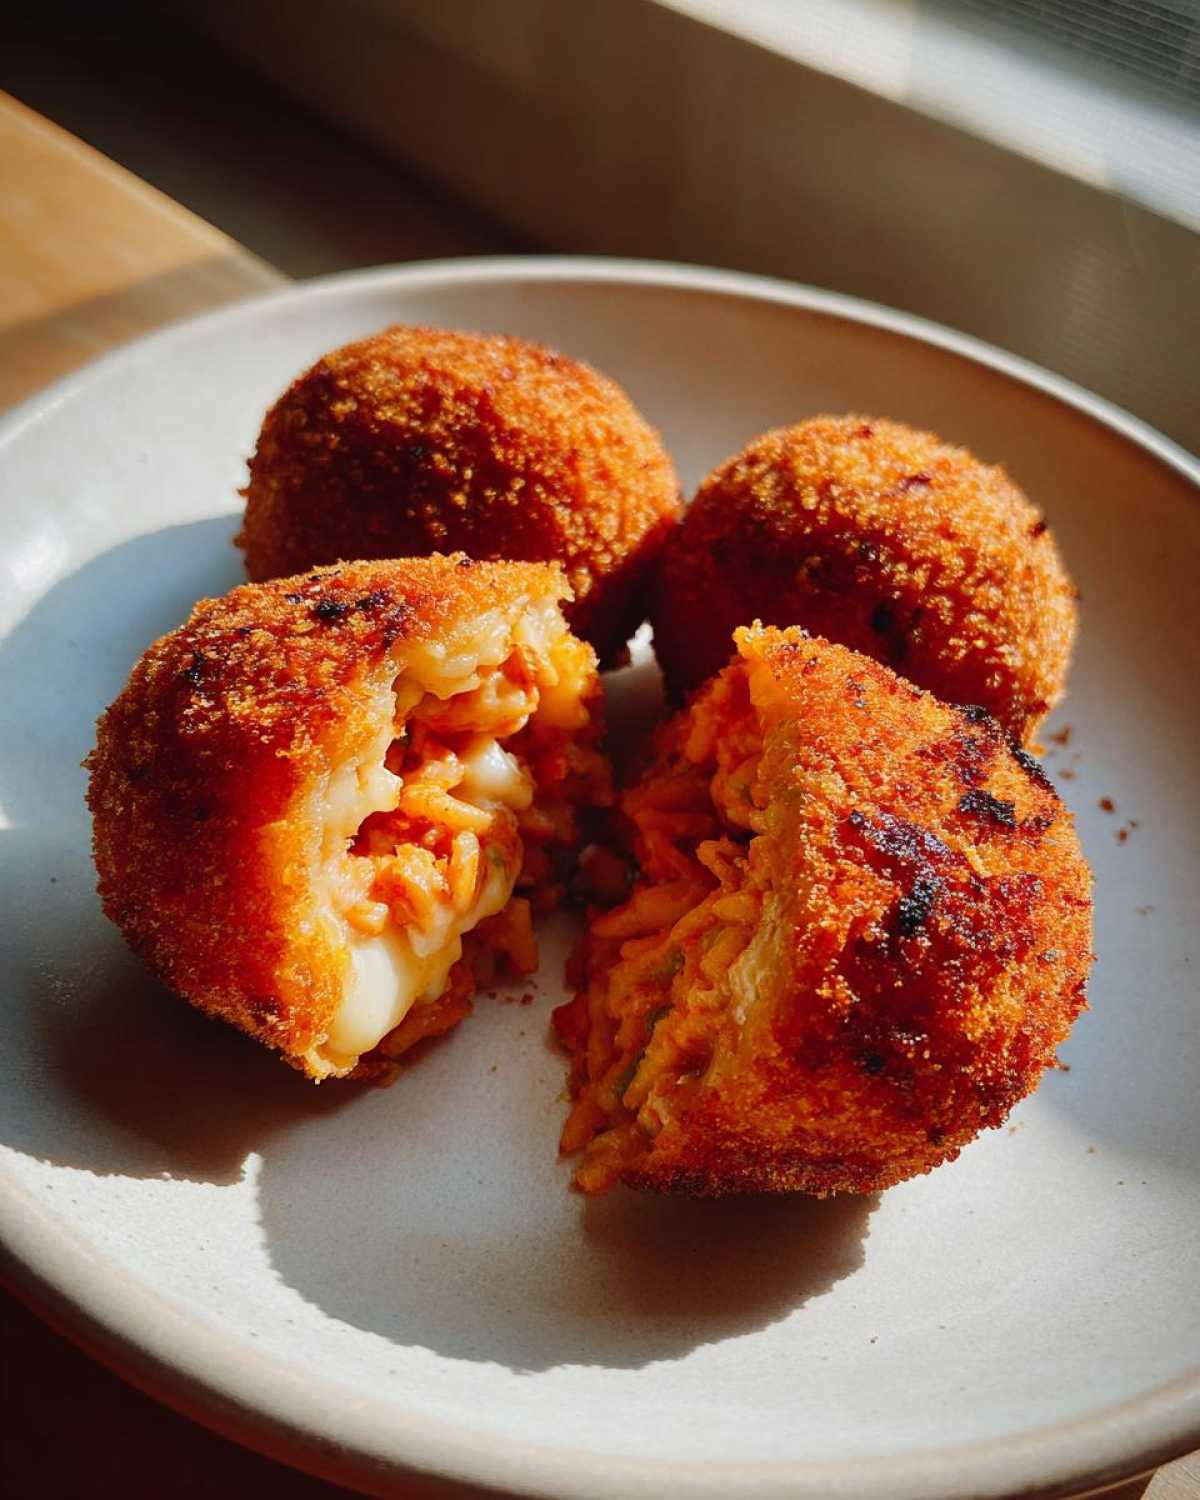
So, what exactly are we making here? These aren’t just simple sticky rice snacks; we are talking about authentic Sicilian Arancini! They are traditionally shaped into beautiful little spheres—though sometimes you see them cone-shaped—and they get that incredible texture from being fully submerged and deep-fried. These fantastic Italian rice balls are so hefty and satisfying, you can definitely serve them as a main course, even though most menus list them as appetizer rice balls. That cheesy, savory filling just makes them substantial!
Why Crispy Fried Rice Balls Are Worth the Effort
Honestly, the entire point of this recipe is the glorious contrast. You take all that creamy, perfectly seasoned rice, tuck a melting cube of mozzarella and rich meat sauce inside, and then you wrap the whole thing in a shield of crunchy breadcrumbs. We are aiming for the ultimate crispy fried rice balls experience! When you bite through that golden shell and hit that soft, hot center? Wow. It’s just pure comfort food magic, and that’s why taking the time to bread them nicely is absolutely worth it.
Essential Ingredients for Perfect Homemade Rice Balls
Okay, let’s talk about what goes into these gorgeous little spheres. You can’t just throw any leftover rice in here and expect magic, trust me. For the rice itself, you absolutely must use Arborio rice. It has the right starch content, which gives us that perfect binding quality, unlike regular long-grain rice. The most important thing I learned when trying to make my first batches of homemade rice balls was that the rice has to be fully cooked, seasoned well, and—this is key—completely cooled down, preferably overnight! Dry, cold rice holds its shape so much better when you’re trying to form them.
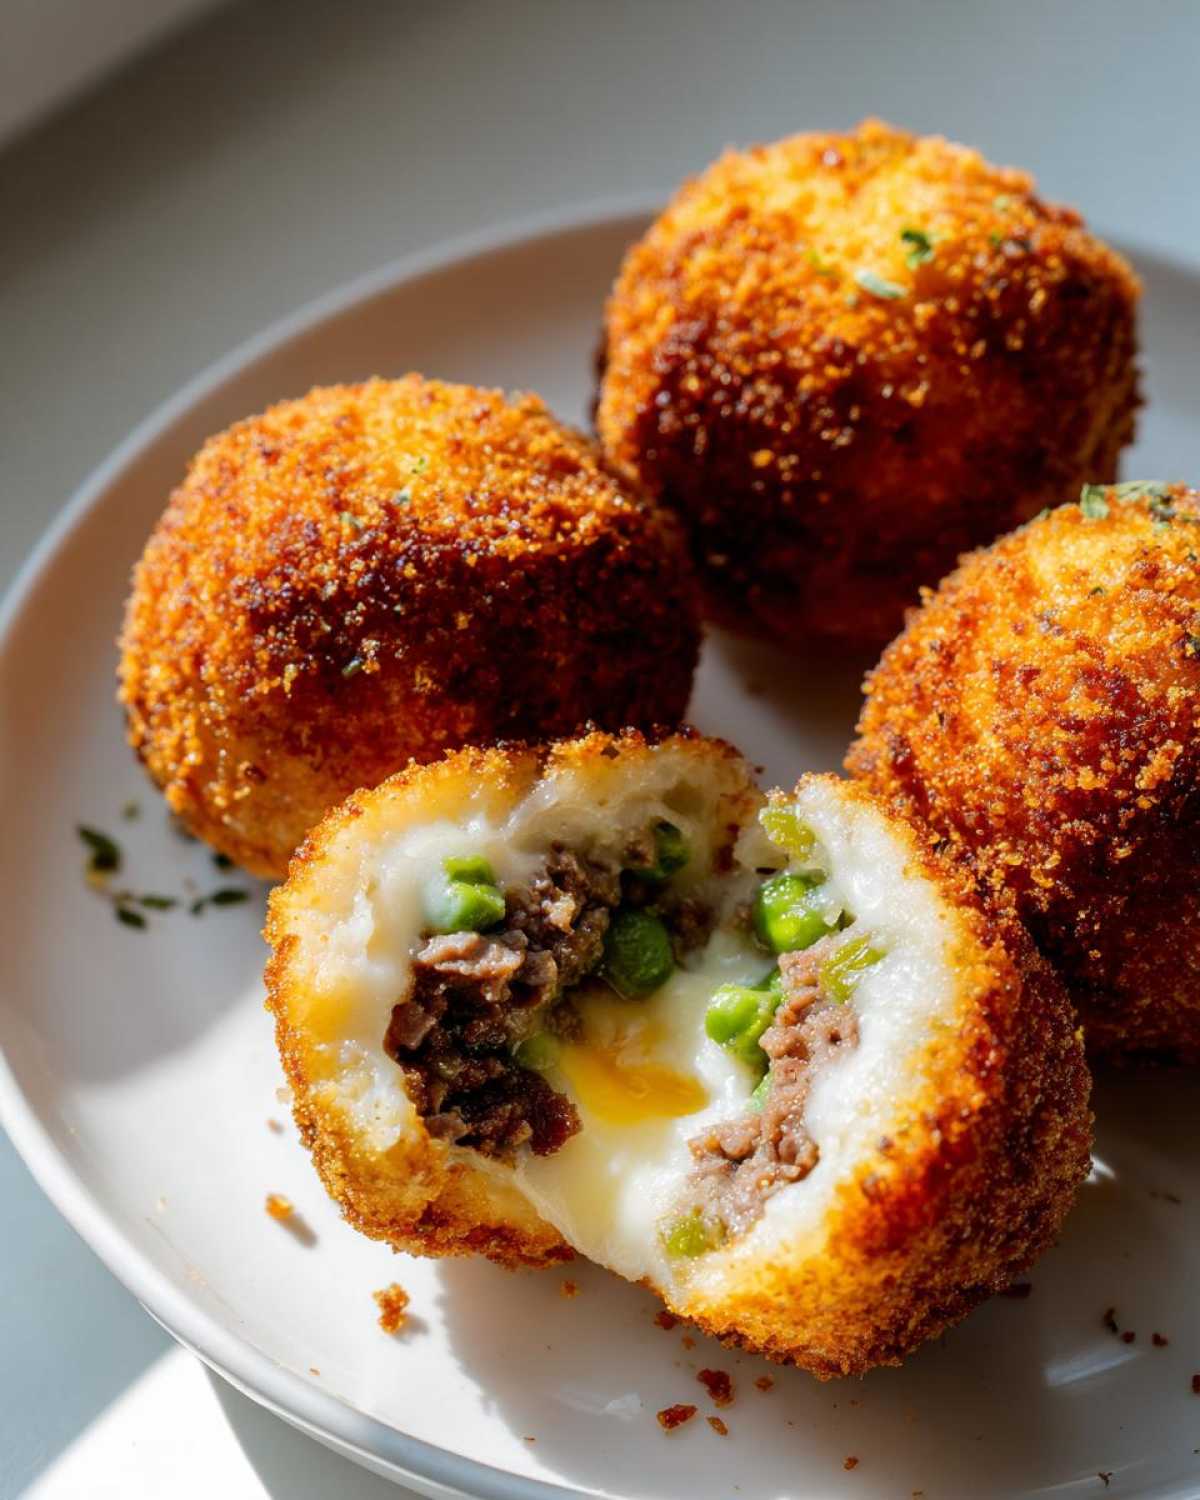
For the filling, you need that savory foundation. We’re using ground beef or Italian sausage here, mixed with tomato sauce and frozen peas. Make sure that meat mixture is cooled down almost completely before you try to assemble anything, or you’ll melt the mozzarella before it even hits the frying oil! And speaking of oil, make sure you have plenty of high-heat vegetable oil ready for the frying part later!
Ingredient Notes and Substitutions for Your Rice Balls
Since we want these to look professional and taste amazing, let’s go over a few pointers my grandmother passed down. Remember I mentioned using cooled rice? If you’re cooking your Arborio rice fresh, spread it thinly on a baking sheet—almost like you’re drying it out a bit by cooling it rapidly. That slightly dry texture is the secret weapon for easy shaping!
For the meat filling, if you want to skip the beef and make these vegetarian rice balls, sautéed mushrooms mixed with spinach and maybe a pinch of oregano are just divine. It gives you that deep, umami flavor without the meat. Also, for the coating, please try Panko breadcrumbs if you can find them. They are bigger and flakier than regular breadcrumbs, and that’s what guarantees you that award-winning, shatteringly crispy fried rice balls coating we are aiming for.
Step-by-Step Instructions for Stuffed Rice Balls
Alright, this is where the fun starts, but you need to focus a little bit here. The biggest disaster with any rice balls is having them fall apart in the hot oil, so we have to be methodical with the assembly. Remember, both your meat filling and your rice mixture must be cold—don’t rush this part!
To start, grab about a quarter cup of that cold rice mixture. Gently flatten it into a small, thin disk right in the palm of your hand. Then, you carefully place your treasures in the center: one cube of mozzarella and a teaspoon of that cooled meat sauce. You want to make sure it’s centered so the cheese melts evenly.
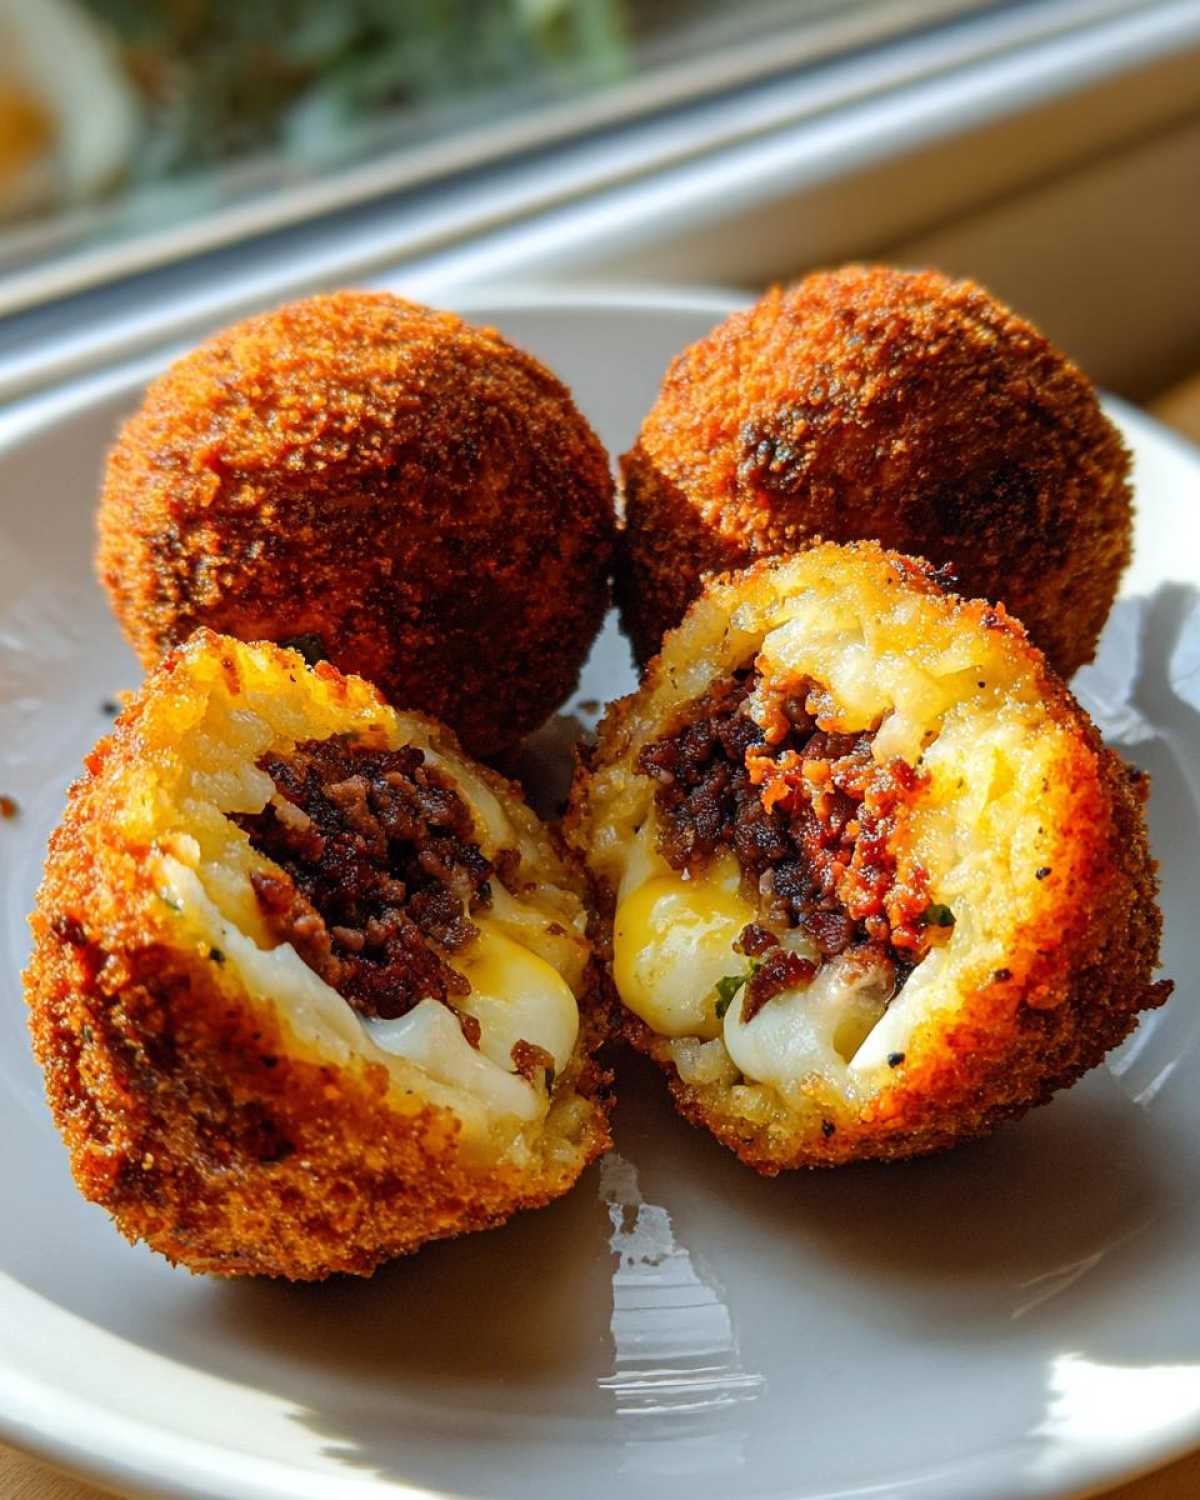
Now, gently fold the edges of the rice up and over the filling, closing it like a little pouch. Roll it delicately between your palms until you have a tight, smooth sphere. I usually give it a little tap to make sure there are no cracks where the meat might sneak out. Don’t press too hard, or you’ll crush the rice structure!
Mastering the Assembly of These Appetizer Rice Balls
The seal is everything! When you seal that rice ball, you want zero gaps. It’s like pastry work—you’re making sure every single bit of filling is encased by that starchy wall. If you see a thin spot, just add a tiny bit more of the plain rice mixture there to patch it up before rolling it smooth. Once they are sealed, you move immediately to the breading station that we set up earlier (flour, egg, Panko). Make sure you get a good, even coat on all three layers! A nice thick crust is what keeps these babies looking perfect.
Achieving Golden Perfection: Frying Your Rice Balls
Now for the sizzle! Don’t even think about putting the rice balls in until your oil is happy. You absolutely MUST maintain 350°F (175°C). If it’s too cold, the breading soaks up grease and gets soggy. If it’s too hot, the outside burns before that cheese in the middle even gets soft. Using a thermometer is your best friend here. Seriously, don’t eyeball it!
Carefully lower just three or four balls into the oil at a time. Overcrowding the pot cools the oil down instantly! Let them cook for about three to five minutes. You’ll see them turn a gorgeous, deep golden brown. Scoop them out with a slotted spoon and let them drain on that wire rack. The sound they make when they hit the rack? Perfection!
Tips for Success When Making Homemade Rice Balls
I’m going to share a few real secrets here, things that separate the ‘okay’ homemade rice balls from the spectacular ones. First, when you are dealing with the meat filling, make sure it’s almost frozen when you scoop it! When the filling is cold, it holds its shape perfectly against the rice, which means no leakage during assembly or frying.
Second, the final, final roll in the breadcrumbs needs some texture. Try pressing the breadcrumbs into the sides of the ball with your fingertips rather than just rolling them gently. This kind of pressure helps cement that coating on tight. You want that crunch, especially when making these amazing homemade rice balls!
Now, what if you simply can’t face the deep fryer? I get it, cleaning up a deep fryer is a pain. You can absolutely bake these! Pre-heat your oven to 400°F. Place the breaded balls on a lightly oiled baking sheet and bake them for about 15 to 20 minutes. They won’t have that true deep-fried blistered texture, but they will still be golden and delicious inside!
Serving Suggestions for Your Savory Rice Bites
You’ve done the hard work, you’ve fried them until they are golden brown perfection—now what do you serve them with? These savory rice bites are rich and hearty, so they really only need a few simple things alongside them for dipping. You absolutely need some nice, bright marinara sauce. Forget that jarred stuff if you can; a quick, homemade tomato sauce really cuts through the richness of the fried Arancini.
If you want a little cool contrast to those hot, cheesy centers, a light, simple salad is perfect. Think arugula tossed with lemon juice, a tiny bit of salt, and maybe some shaved Parmesan. It keeps the meal feeling fresh rather than overly heavy. If you’re feeling a little fancy, a homemade dip adds flair. Have you ever made a quick garlic aioli? It’s surprisingly easy, and that garlicky punch is amazing with these crispy Italian rice balls. They are wonderful just on their own too, especially when they are piping hot!
Storage and Reheating Instructions for Leftover Rice Balls
Let’s be real, trying to eat all ten of these crispy fried rice balls in one sitting is always a noble goal, but rarely achieved! If you have leftovers, we need to treat them right so they don’t turn into sad, soggy mounds of rice the next day. For short-term storage, just let them cool completely on the counter first. Then, pop them into an airtight container in the fridge. They should be fantastic for about three to four days.
Now, the reheating is crucial if you want to recapture that magic. Please, I beg you, skip the microwave! The microwave will just steam them, and all that wonderful crispiness you worked so hard for will vanish in seconds. The absolute best way to reheat these homemade rice balls is in your oven.
Set your oven to about 375°F (190°C). Lay the leftover Arancini out in a single layer on a baking sheet—no need to add extra oil. Bake them for about 10 to 12 minutes. This gives the heat time to gently warm up that cheesy center while simultaneously waking up the crust and making it crispy again. They’ll taste almost as good as fresh!
If you have a ton leftover and need to store them longer, the freezer is your friend. Flash freeze them first by laying the cooked balls on a parchment-lined sheet tray until they are rock solid. Then, transfer them to a heavy-duty freezer bag. They can hang out in the freezer for up to two months. When you’re ready to eat them, thaw them slightly on the counter, and then reheat using that same oven method—you might need an extra minute or two since they start frozen!
Frequently Asked Questions About Making Rice Balls
Can I make Japanese rice balls (Onigiri) using this technique?
That’s a great question, and it highlights why the term “rice balls” is tricky! The short answer is: no, not really. This Arancini technique relies on the starchiness of Arborio rice mixed with cheese and egg to create a binder strong enough to hold a meat and mozzarella center while frying. Japanese Onigiri, on the other hand, use short-grain sticky rice that’s molded by hand, often seasoned with salt, and they are usually just wrapped in nori seaweed or sometimes grilled (Yaki Onigiri). Onigiri rely on the stickiness of the rice, not a heavy breaded coating, so the methods are quite different!
What is the best rice to use for these rice balls?
For this specific Italian recipe—the deep-fried, stuffed kind—you really need a medium- or short-grain Italian rice. Arborio is what I always use because it releases enough starch to create a creamy interior while still holding a shape when cooled. Carnaroli is another fantastic option if you happen to have it! Both cook up beautifully creamy on the inside but become firm enough to handle rolling and breading without disintegrating. Don’t use basic long-grain rice; it just won’t cooperate!
Can these be made ahead of time?
Yes, thank goodness! If you’re hosting a party, you absolutely should get ahead of the game. You have two great options. You can complete the entire process up until the final breading step. That means make the filling, make the rice mixture, assemble the balls, and then leave them sitting on a tray uncovered in the fridge for several hours or even overnight. They firm up even more overnight, which is fantastic for frying!
Alternatively, you can fry them completely, let them cool, and store them in the fridge for up to four days. Then, you just use the oven reheating method I mentioned earlier to bring that crunch back to life! Both methods work, but assembling them ahead of time saves you the most stress on serving day. If you have any questions about technique, please reach out to us on the contact page!
Estimated Nutritional Data for These Italian Rice Balls
Now, as amazing as these stuffed rice balls taste, we do have to remember they are deep-fried, so they carry a bit more weight than a simple Japanese rice ball! I always say that everything in moderation tastes best, and knowing what’s in your food is part of that enjoyment. The nutritional facts I dug up here are an *estimate* based on using those ingredients listed in the recipe—especially considering that deep-frying step.
Keep in mind that if you choose the vegetarian filling I mentioned, or if you use less cheese, these totals will shift slightly. But generally, for one of these hearty, crispy fried rice balls, here’s what you’re looking at:
- Serving Size: 1 ball
- Calories: 280
- Fat: 15g (Note: This includes the oil from frying!)
- Saturated Fat: 6g
- Carbohydrates: 25g
- Protein: 12g
- Sugar: 3g (mostly from the tomato sauce)
These numbers show just how satisfying these are! They pack a good punch of protein and fat, making them seriously filling appetizer rice balls. For the full breakdown and to read our standard recipe disclaimer, you can always check out our site disclaimer page. Enjoy these savory rice bites knowing every golden, crispy shell is worth it!
Share Your Experience Making These Rice Balls
Whew! We made it through the frying process, and I am just so excited for you to taste these incredible Italian rice balls. Once you pull them out of the oil, golden brown and smelling absolutely divine, I really want to hear what you think! Don’t be shy—this is where our little community grows stronger.
Have you tried them plain, just savoring the amazing texture of that Panko crust meeting the creamy, cheesy filling? Or did you whip up a dipping sauce? Tell me in the comments below! I am always looking for new ways to sneak extra flavor into my appetizers, so I’d love to know if you tried a different filling substitution—maybe sun-dried tomatoes or artichoke hearts?
If you snapped a picture of your perfectly spherical, crispy fried rice balls looking golden on your serving platter, please share it! Tag me on social media—I absolutely live for seeing your kitchen triumphs. It means the world to me when you trust a family recipe from my blog, the blog, and have success with it. Happy cooking, and I can’t wait to read your reviews!
PrintClassic Italian Arancini (Deep-Fried Sicilian Rice Balls)

Make authentic, crispy Italian Arancini. These stuffed rice balls feature a savory filling, breaded exterior, and a soft, cheesy center.
- Prep Time: 30 min
- Cook Time: 25 min
- Total Time: 55 min
- Yield: 10 servings
- Category: Appetizer
- Method: Deep Frying
- Cuisine: Italian
- Diet: Vegetarian
Ingredients
- 3 cups cooked Arborio rice (cooled)
- 1/2 cup grated Parmesan cheese
- 2 large eggs, lightly beaten
- 1/4 cup all-purpose flour
- 1 cup breadcrumbs (Panko recommended for extra crunch)
- 1 pound ground beef or Italian sausage
- 1/2 cup tomato sauce
- 1/2 cup frozen peas
- 4 ounces mozzarella cheese, cut into small cubes
- Vegetable oil, for deep frying
- Salt and black pepper to taste
Instructions
- Prepare the filling: Brown the ground meat in a skillet. Drain excess fat. Stir in the tomato sauce and peas. Simmer for 10 minutes. Season with salt and pepper. Set aside to cool completely.
- Prepare the rice mixture: In a large bowl, combine the cooled cooked rice, Parmesan cheese, and one beaten egg. Mix until just combined.
- Assemble the arancini: Take about 1/4 cup of the rice mixture and flatten it in your palm. Place a small cube of mozzarella and a spoonful of the cooled meat filling in the center. Gently fold the rice around the filling, shaping it into a tight ball about 2 inches in diameter.
- Set up the breading station: Place the flour in one shallow dish, the remaining beaten egg in a second dish, and the breadcrumbs in a third dish.
- Dredge each rice ball first in the flour, shaking off any excess. Dip it into the egg, allowing excess to drip off. Finally, roll it thoroughly in the breadcrumbs, pressing lightly to adhere.
- Heat the oil: Pour vegetable oil into a deep, heavy pot or deep fryer to a depth of about 2 inches. Heat the oil to 350°F (175°C). Use a thermometer to monitor the temperature.
- Fry the arancini: Carefully place 3 or 4 rice balls into the hot oil, ensuring you do not overcrowd the pot. Fry for 3 to 5 minutes, turning occasionally, until they are deep golden brown and crispy.
- Remove the arancini with a slotted spoon and place them on a wire rack lined with paper towels to drain excess oil. Serve warm.
Notes
- Use day-old, slightly dry rice for the best texture when forming the balls.
- If you prefer a vegetarian version, substitute the meat filling with sautéed mushrooms and spinach.
- For a quicker cooking time, you can bake the arancini at 400°F for 15-20 minutes instead of deep frying.
Nutrition
- Serving Size: 1 ball
- Calories: 280
- Sugar: 3
- Sodium: 450
- Fat: 15
- Saturated Fat: 6
- Unsaturated Fat: 9
- Trans Fat: 0
- Carbohydrates: 25
- Fiber: 2
- Protein: 12
- Cholesterol: 60