

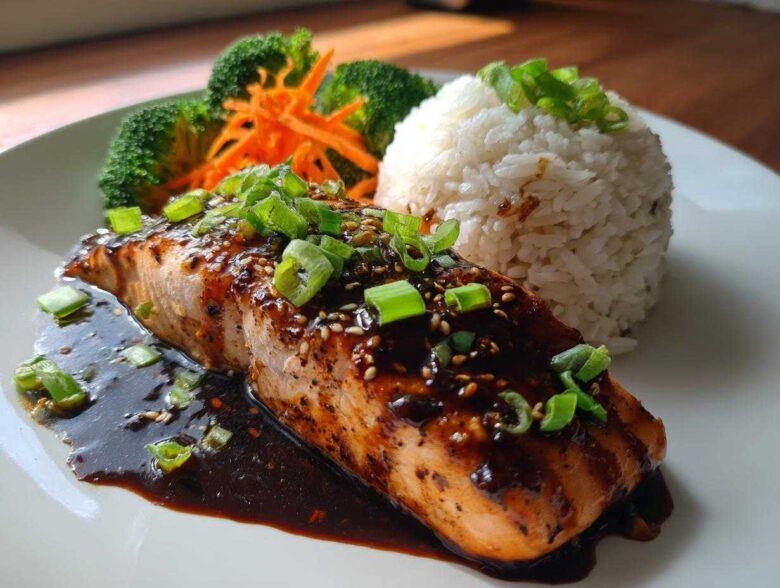
Okay, listen to me: sometimes you just crave that sticky, savory, slightly sweet perfection you get at your favorite Japanese spot, but you need it on your table in under 40 minutes. I swear, I spent almost a year testing sauces just for this recipe. I tasted every store-bought jar, and honestly? They were either too thin or tasted overwhelmingly like plain sugar. So, I finally nailed the balance using fresh ginger and that little bit of mirin when making our homemade teriyaki sauce, and now? Now we have the ultimate weeknight hero: the Teriyaki Salmon Rice Bowls. Seriously, frying up that salmon and watching it get perfectly glazed is the best part of my Tuesday nights. You’ve got to try this!
Why You Will Love These Teriyaki Salmon Rice Bowls
I know you’re busy, so let’s get straight to why this recipe is going to be a regular star on your dinner rotation. It checks all the boxes for a truly satisfying, yet simple, meal. Trust me on these!
- It’s lightning fast! With only about 35 minutes total, this is perfect for those nights when you get home late and need dinner ASAP.
- The homemade teriyaki sauce is seriously restaurant quality. It coats the salmon beautifully without being overly salty or sweet. You won’t go back to the jar!
- It’s a complete, balanced meal right there in one bowl. You get your protein from the salmon, your carbs from the rice, and a nice hit of green veggies.
- Crispy skin versus tender, flaky fish—this pan-searing method gives you the absolute best texture contrast. It’s addictive.
- If you want to try a slightly different method next time, this sauce works amazingly well with baked chicken too, like in my sheet pan teriyaki chicken idea!
Essential Ingredients for Perfect Teriyaki Salmon Rice Bowls
Okay, the key to any great meal is starting with ingredients you trust. For these bowls, I broke the list down so you aren’t staring confusedly at one giant block of text. This recipe is meant to be flexible, but for the first time, stick to these measurements exactly! If you’ve got leftover rice from another meal, it works great, but for the absolute best texture, sushi rice or good old short-grain white rice is what you want in there. It gives you that perfect fluffy base for soaking up all that delicious glaze.
Don’t skip the fresh ginger for the sauce—dried simply won’t cut it here. It’s what brings that authentic pop! If you’re looking for other bowl ideas, check out how I layer flavors in my sticky garlic chicken rice bowls, but for the salmon, we keep it focused.
Here’s what you need to gather before you start:
Salmon, Veggies, and Rice Base
- About 1 pound of good salmon fillets. Honestly, you can leave the skin on or take it off; I usually leave it on because that crisp skin is just unbeatable when pan-searing!
- 1 cup of cooked short-grain white rice. Make sure it’s ready to go before you start cooking the fish.
- 1 cup of broccoli florets. We’re going for tender-crisp here, not mush!
- About 1/2 cup of shredded carrots—just enough for color and a little crunch.
- 2 green onions, sliced thin right at the end for garnishing. That final green touch makes everything look professional!
For the Homemade Teriyaki Sauce
This sauce is the real deal, designed to coat beautifully and not run off the fish. Having these pantry staples ready makes the whole process seamless:
- 1/2 cup soy sauce (use low-sodium if you worry about salt, though the recipe balances it well).
- 1/4 cup mirin. This sweet rice wine is essential for that classic, slightly sweet glaze finish.
- 1/4 cup water.
- 2 tablespoons brown sugar. The molasses in it adds so much flavor depth.
- 1 tablespoon grated fresh ginger. Make sure you grate it finely!
- 1 clove garlic, minced into a tiny paste.
- And the thickener! You need 1 teaspoon of cornstarch mixed thoroughly with 1 tablespoon of cold water. This is your slurry, and it comes in handy later.
Making the Homemade Teriyaki Sauce for Your Teriyaki Salmon Rice Bowls
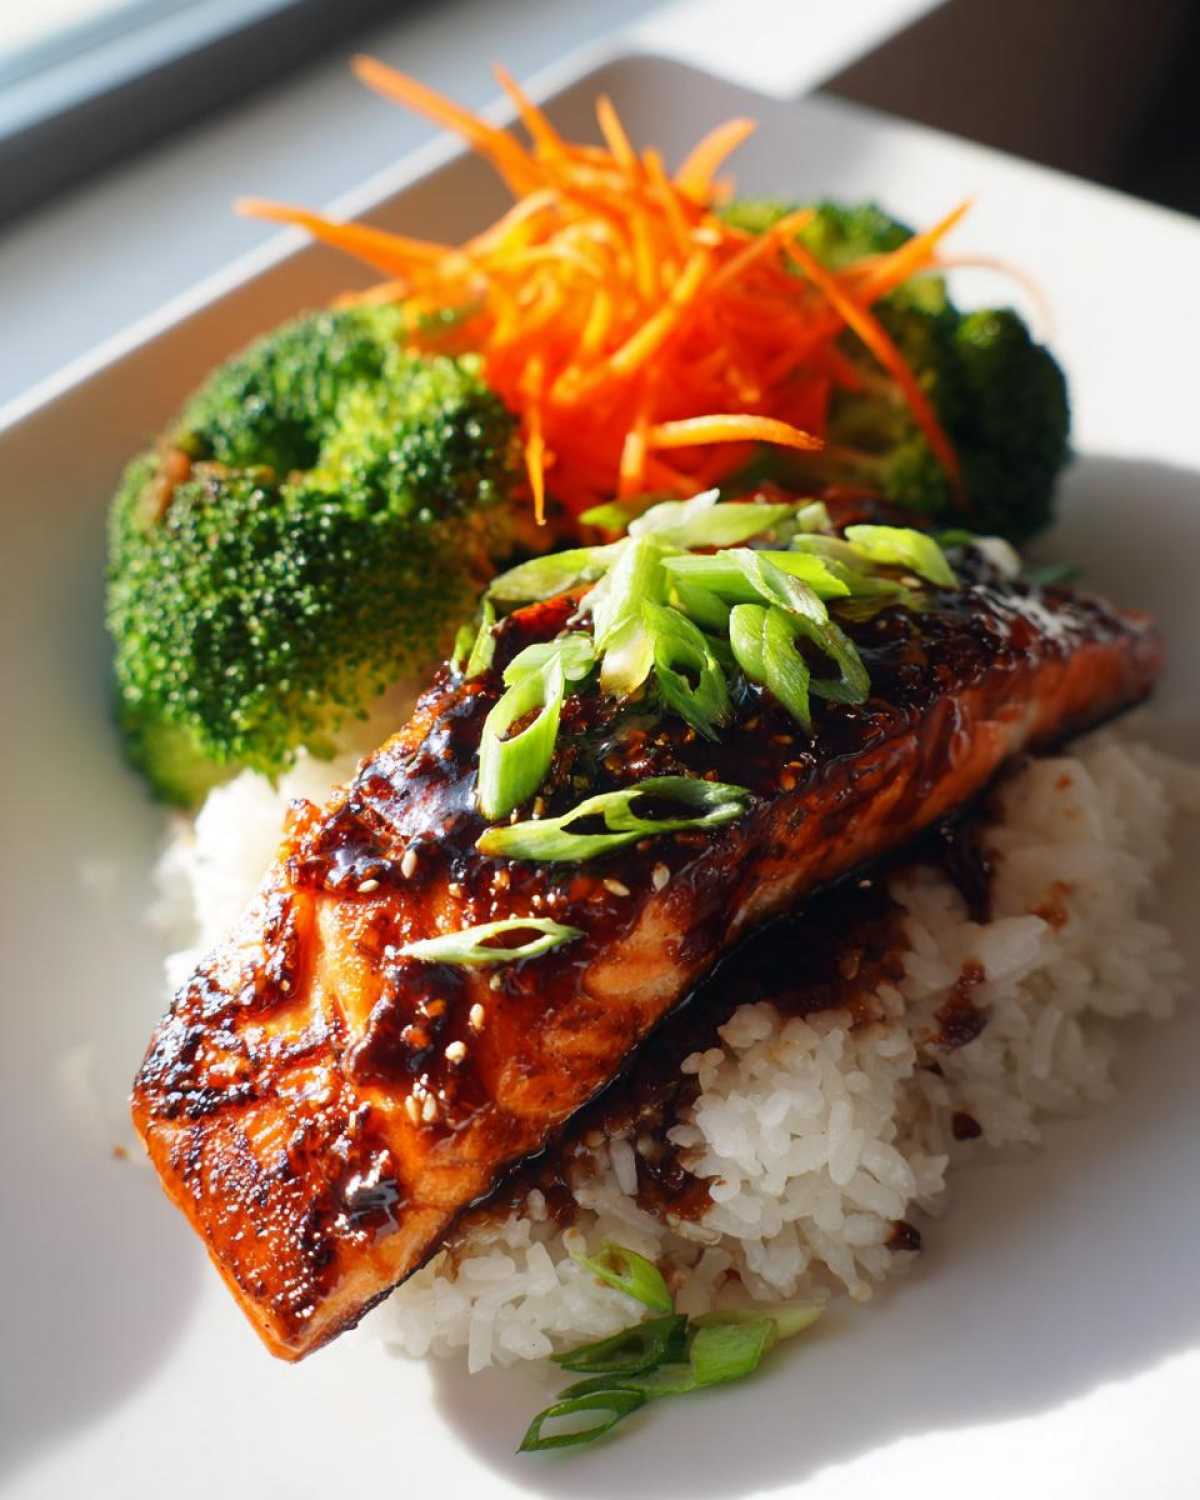
Forget those packets! The soul of our Teriyaki Salmon Rice Bowls lives right here in this simple saucepan. We’re starting by bringing the soy sauce, that sweet mirin, water, brown sugar, fresh ginger, and minced garlic to a nice simmer. You want that sugar totally dissolved, which usually happens pretty fast over medium heat. Don’t let it go too wild; just a gentle bubble is perfect. If you’ve ever made my creamy peanut sauce, you know how important the simmering step is for incorporating flavor!
Once it’s warm and smooth, it’s time for the magic trick: the slurry. Whisk that cornstarch and cold water mixture in quickly! Keep stirring constantly, maybe for just a minute or two. You’ll see it transform from watery liquid to a glossy coating that sticks to the back of your spoon. That’s how you know the glaze for your salmon is ready to go. When you’re done, set half of it aside—that extra sauce is for drizzling at the end!
How to Make Teriyaki Sauce from Scratch
Here’s the secret to getting that perfect restaurant vibe instead of just salty syrup: balance. Mirin and sugar bring the sweet, but since we are using soy sauce, we’ve already got a ton of saltiness. I always taste the sauce right before I add the cornstarch. If it tastes intensely salty, I add just a tiny splash more water or a pinch more sugar to balance it out. It’s about coaxing out that deeply savory flavor!
Preparing the Vegetables for Your Teriyaki Salmon Rice Bowls
We don’t want mushy vegetables mingling with our perfectly seared fish, right? Absolutely not! The veggies for these Teriyaki Salmon Rice Bowls need texture so they give you a nice little crunch against the soft rice and flaky salmon. We’re keeping this super simple by using just broccoli and carrots, but these techniques apply to almost anything you want to toss in your bowl—like those amazing green beans I make, garlic parmesan roasted ones, although for the bowl, steaming is faster!
The step here is super quick: you want to steam or lightly boil your broccoli florets until they are perfectly tender-crisp. I usually time that for exactly four minutes. Any longer, and they turn that sad, dull green color, and nobody wants that! Right after the broccoli comes out, use the same hot water to blanch the shredded carrots for maybe 30 seconds—just long enough to take the raw edge off but keep them bright and snappy.
Drain them both really well! Waterlogged vegetables are the enemy of a great rice bowl. We want moisture from the sauce, not from rogue steam. Once they are done, set them aside so they are ready for quick assembly when that beautiful glazed salmon comes off the heat!
The Best Pan Seared Salmon Recipe for Glazed Teriyaki Salmon Rice Bowls
Alright, here’s where the real flavor action happens for your Teriyaki Salmon Rice Bowls! We need that outside surface perfectly textured while the inside stays wonderfully flaky. This is all about getting your skillet nice and hot. First things first, and I can’t stress this enough: pat your salmon fillets absolutely DRY with paper towels. Seriously, I mean bone dry. If there’s surface moisture, you get steam, and steam means no crust—we want a crust!
Once they are dry, just a little salt and pepper—don’t go crazy, the teriyaki brings all the major flavor notes here. Heat up about a tablespoon of vegetable oil in a big non-stick pan over medium-high heat. You want that pan hot, but not smoking furiously. When you slip the salmon in—skin-side down if you’re keeping that layer on—it should sizzle immediately. That sizzle is the sound of perfection!
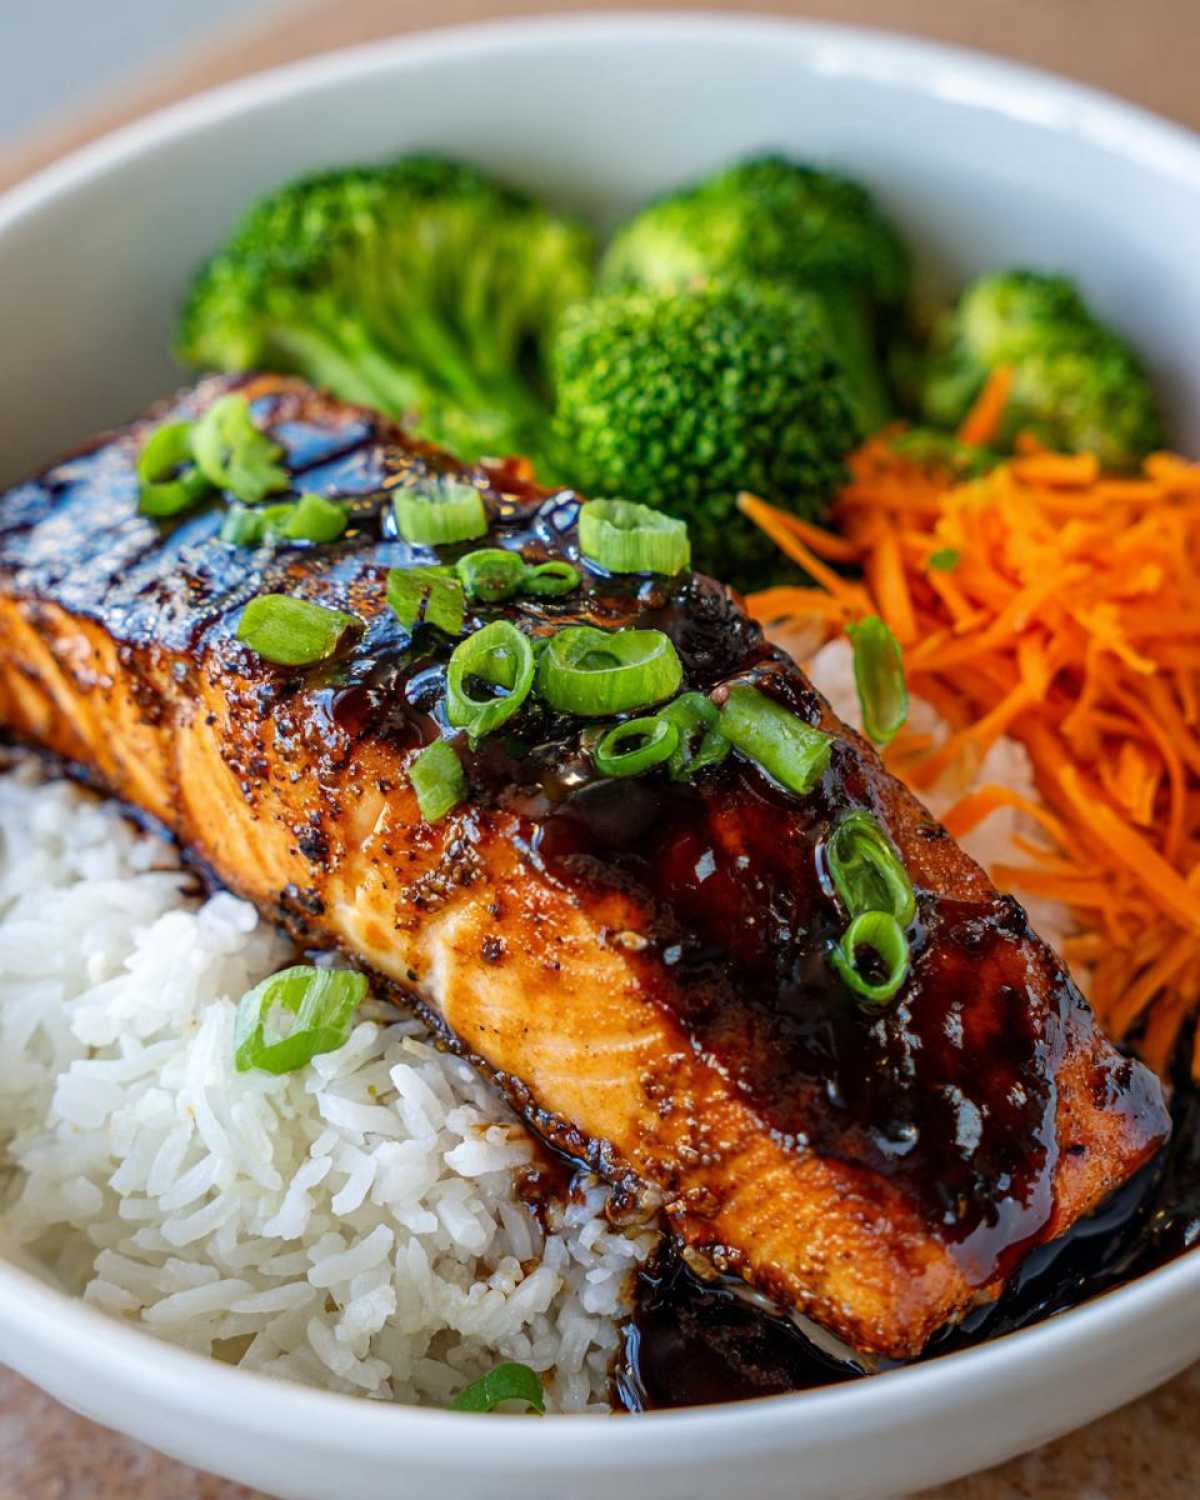
If you left the skin on, let it sear undisturbed for a solid four or five minutes until you can see the color change creeping halfway up the side of the fillet. Then, flip gently and cook for about three to four more minutes. If you skip the air fryer for once and try this pan-searing method like in my air fryer salmon guide, you’ll understand why this skillet method is my go-to for bowls!
Once the fish is pretty much cooked through, knock that heat down to medium-low—this is important so you don’t burn the sugar in our sauce. Now, pour about half of that amazing teriyaki sauce right over the fish. Let it bubble gently, turning the salmon once or twice so it gets coated on all sides in that rich, sticky glaze. When it looks beautiful and glossy, pull the fish out right away onto a little plate so it doesn’t overcook while you finish assembling the bowls.
Tips for Perfect Sticky Glazed Salmon
The visual cues are often better than a thermometer when you’re cooking fast like this. When you press gently on the side of the fillet, you want it to feel firm but still yield slightly—that means it’s probably done right around that 140°F internal target. If the sauce starts clinging really thickly to the bottom of the pan, you know you’ve got it exactly right! Remember what I always say? Never poke or move that fish until you are ready to flip it. If you try to rush it before the crust develops, it rips apart, and all that crusty goodness stays stuck to the pan instead of your beautiful salmon.
Assembling Delicious Teriyaki Salmon Rice Bowls
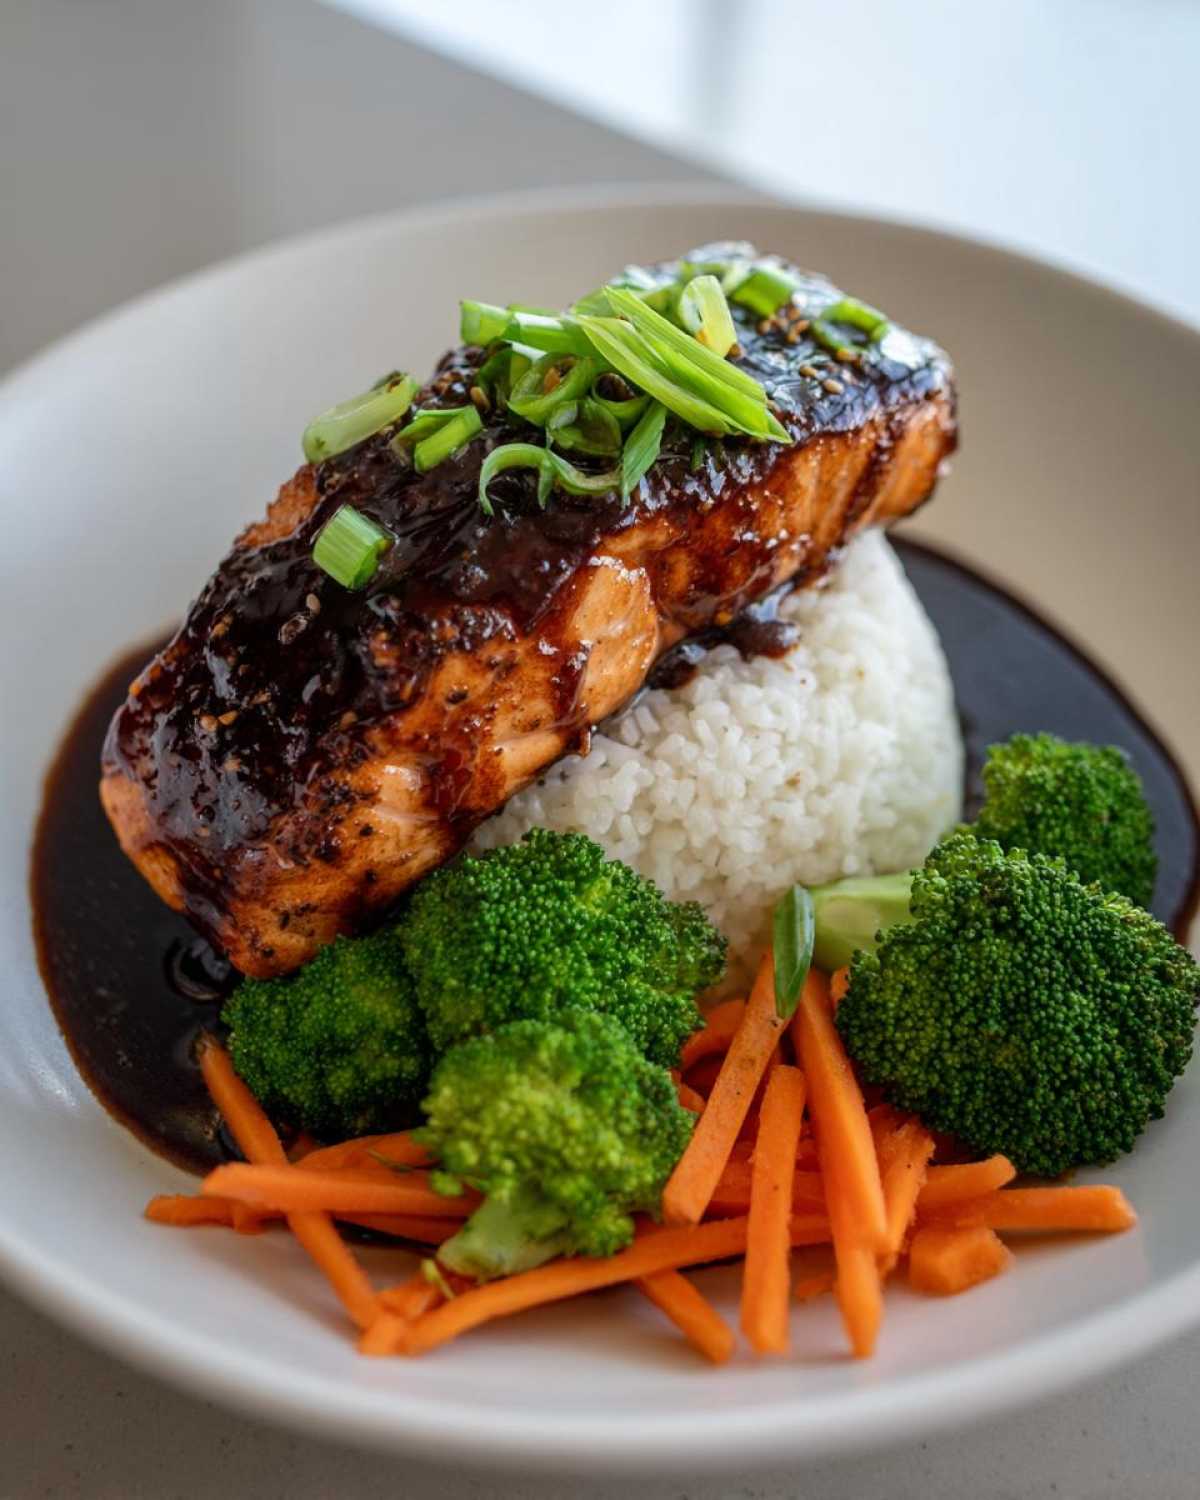
Now that we have our perfectly cooked, sticky, glazed salmon and our tender-crisp veggies resting, it’s time for the fun part: building the beautiful final product! Creating great Teriyaki Salmon Rice Bowls is all about thoughtful layering. It’s not just throwing stuff into a bowl, you know? It’s about making sure every single bite has a little bit of everything—fluffy rice, fresh crunch, tender flakey fish, and that sweet, salty sauce.
Start by dividing up your cooked rice evenly among the bowls. I usually aim for about a cup per bowl, but go with what makes you feel satisfied! Next, you want to place your vegetables—the bright green broccoli and those slightly sweetened carrots—nicely beside the rice mound. I like to keep them separated just slightly so they don’t steam each other while sitting there waiting for the salmon.
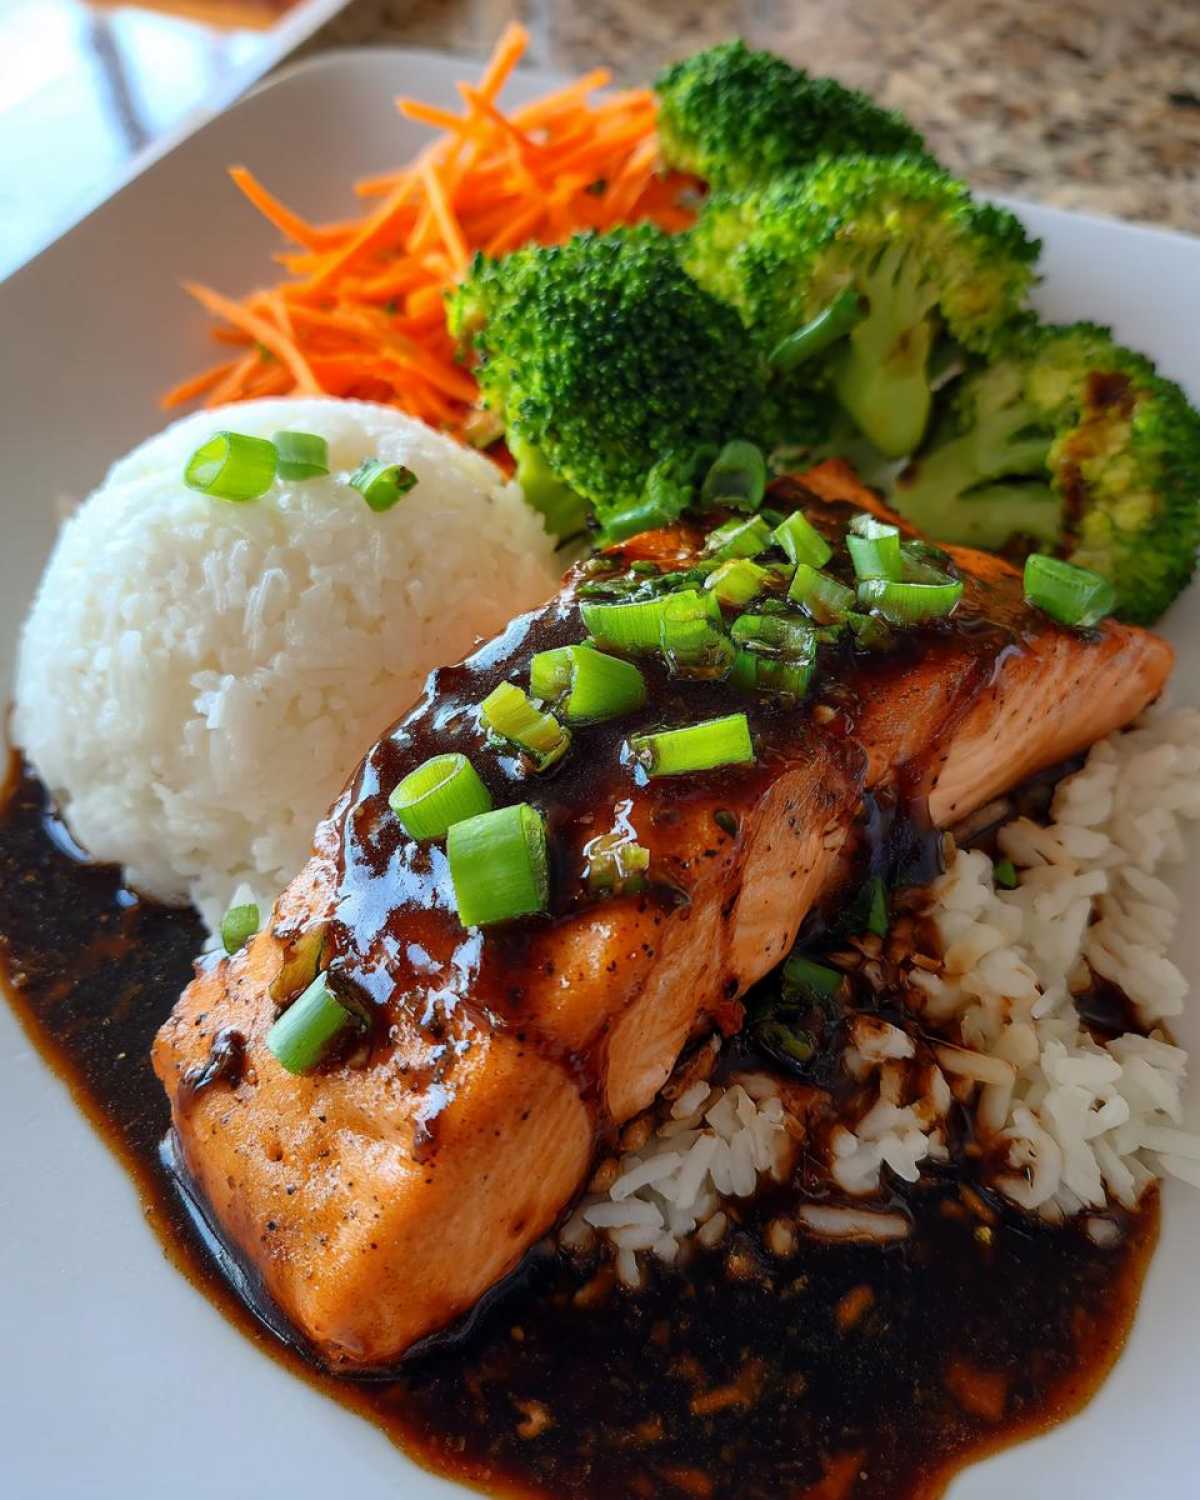
Gently place one of those gorgeous, glazed salmon fillets right on top of the rice and nestled against the veggies in each bowl. They look so impressive sitting there, right? Drizzle the remaining teriyaki sauce—the sauce you saved earlier so it didn’t cook down too much—right over the top of the fish and let it run down into the rice a little bit. That’s the flavor pool you want!
Finally, we finish with the garnish. Grab those sliced green onions we cut right at the start and sprinkle them generously. They add such a necessary sharp zest and color contrast. If you wanted to add some toasted sesame seeds or maybe some thinly sliced cucumber—like those extras in my cauliflower fried rice prep—now is the perfect time. Serve these immediately while the salmon is still warm and the glaze is perfectly sticky!
Ingredient Notes and Variations for Teriyaki Salmon Rice Bowls
I love that so many of you are asking about swapping things out! That’s how you make a recipe truly your own, right? The beauty of these Teriyaki Salmon Rice Bowls is that the sauce itself is so robust, it really holds up well even if you change the base or the veggie mix-ins. But always remember that the homemade sauce is the non-negotiable star here—it’s what makes this shine!
We’ve got a few ideas floating around that I wanted to cover quickly, especially if you’re trying to make these for meal prep or avoiding pan-searing this week. You can totally swap out the short-grain white rice for brown rice or even quinoa if you are looking for a healthier bowl base; just make sure you cook them according to package directions so they aren’t too wet.
And please, throw in those extras if you have them! Shelled edamame tossed in at the end adds a great textural burst of green, and thinly sliced cold cucumber is shockingly good with that warm, sticky glaze. If you’re doing meal prep bowls, keep the sauce separate until serving time, just like I do in my cauliflower rice prep guide, to keep everything crisp!
Alternative Cooking Methods
If you are like me sometimes and just don’t want to stand over a hot skillet, the oven is your friend! The instructions say you can absolutely bake the salmon to perfection. You’ll want to preheat your oven to 400°F (200°C) and plan for about 12 to 15 minutes, depending on how thick your fillets are. The trick here is timing the glaze. Don’t just slather it on before it goes in, or the sugar will burn! Instead, brush about half the teriyaki sauce over the fish during the last five minutes of baking.
It gets you that beautiful sticky exterior without the need to flip it aggressively on the stove. It’s slightly less crispy on the edges than the pan-seared version, but it’s still wonderfully juicy and totally hands-off during cooking. Pop it out, drizzle with the rest of your sauce, and you’re ready to assemble those bowls!
Storage and Reheating Instructions for Teriyaki Salmon Rice Bowls
One thing I always tell people about these Asian Inspired Bowls is that they are fantastic for meal prepping—but you have to be smart about it! If you mix everything together immediately, that glorious crispy salmon skin gets soggy fast. When I box mine up for work lunches, I keep the rice, the veggies, and the salmon in separate compartments. That way, the textures stay distinct!
To reheat, I skip the microwave for the fish entirely unless I’m in a massive hurry. If you have five minutes, just pop the salmon and veggies into a toaster oven or an air fryer set to about 350°F until warmed through. It brings some of that moisture back to life! For reheating advice on making bigger batches, check out my guide on salmon meal prep bowls for more component storage tips. As for the lovely extra sauce? Store that separately too, and drizzle it on just before you take that first bite!
Frequently Asked Questions About Teriyaki Salmon Rice Bowls
I get so many great questions whenever I post pictures of these bowls online! It makes sense—you want to make sure your Easy Salmon Dinner turns out perfect the first time around. Here are the most common things people ask about when they are planning to make their own Healthy Salmon Bowls at home.
Can I just use a store-bought teriyaki sauce?
Oh, you totally *can*, and if you’re in a real pinch, go for it! That’s what the store-bought jar is for, right? But honestly, if you want that restaurant-quality taste, especially that deep, complex stickiness in your Glazed Salmon Recipe, you need the homemade version. The jarred stuff usually has too much vinegar or high-fructose corn syrup, and it burns way faster in the pan than our perfectly balanced simmered sauce. Trust me, the extra five minutes it takes to make your own is totally worth the upgrade.
What kind of rice is best for these bowls?
For the most authentic feel in these Japanese Inspired Dinner bowls, you want short-grain white rice, like sushi rice. It has the right sticky quality that clumps just enough for you to scoop up with a fork and hold all that tasty sauce without falling apart. People sometimes ask if they can use things like Basmati or long-grain white rice, and technically, yes, but it won’t have that satisfying texture. If you are looking for something different, I actually have a great recipe for rice pudding if you ever feel like taking your rice in a totally different, sweeter direction! Check out my creamy rice pudding here.
Can I make these Teriyaki Salmon Rice Bowls vegetarian?
That’s a great idea for expanding your Quick Asian Dinner Ideas! You absolutely can make this vegetarian. The sauce works perfectly for baking marinated tofu or thick slices of shiitake mushrooms. You would prepare the homemade teriyaki sauce exactly the same way, but instead of searing salmon, you’d pan-fry your tofu (pressed very dry!) or mushrooms until they are nicely browned. Then, you glaze them just like the fish in the last step. Just substitute the protein, and you’ve got a fantastic meatless bowl!
How do I guarantee that crispy salmon skin?
Crispy skin is all about three things: a dry fillet, a hot pan, and patience! Make sure you pat that salmon skin until it feels almost powdery dry before it hits the oil. The pan needs to be medium-high hot—you should hear that immediate, aggressive sizzle when the fish touches down. And the last part? DO NOT move it! Don’t prod it, don’t shake the pan, don’t peek! Let that skin crisp itself completely—it will release from the pan naturally when it’s ready to be flipped. That 4-5 minutes of undisturbed searing is key to achieving that great texture for your final Salmon Rice Bowl Ideas.
Share Your Favorite Teriyaki Salmon Rice Bowls
I hope this recipe becomes as much of a regular feature in your kitchen as it is in mine! It’s one of those meals that proves you don’t need takeout menus when you have a few pantry staples and a great technique. Whether you stick strictly to my steps or swap out the veggies for something green and crunchy, I’d absolutely love to see what you create!
If you try this recipe out, please come back here and leave this article a 5-star rating right below. And don’t forget to share your photos or tell me about your favorite toppings in the comments section! Tag me when you share on social media so I can see your beautiful finished bowls! Happy cooking, friends! See you on the next recipe!
Share Your Favorite Teriyaki Salmon Rice Bowls
I hope this recipe becomes as much of a regular feature in your kitchen as it is in mine! It’s one of those meals that proves you don’t need takeout menus when you have a few pantry staples and a great technique. Whether you stick strictly to my steps or swap out the veggies for something green and crunchy, I’d absolutely love to see what you create!
If you try this recipe out, please come back here and leave this article a 5-star rating right below. And don’t forget to share your photos or tell me about your favorite toppings in the comments section! Tag me when you share on social media so I can see your beautiful finished bowls! Happy cooking, friends! See you on the next recipe!
PrintTeriyaki Salmon Rice Bowls
A recipe for pan-seared salmon glazed with homemade teriyaki sauce, served over rice with fresh vegetable toppings.
- Prep Time: 15 min
- Cook Time: 20 min
- Total Time: 35 min
- Yield: 4 servings
- Category: Dinner
- Method: Pan-Searing
- Cuisine: Japanese Inspired
- Diet: Low Fat
Ingredients
- 1 lb salmon fillets, skin on or off
- 1 cup cooked short-grain white rice
- 1 tablespoon vegetable oil
- 1 cup broccoli florets
- 1/2 cup shredded carrots
- 2 green onions, sliced
- For the Teriyaki Sauce:
- 1/2 cup soy sauce
- 1/4 cup mirin (sweet rice wine)
- 1/4 cup water
- 2 tablespoons brown sugar
- 1 tablespoon grated fresh ginger
- 1 clove garlic, minced
- 1 teaspoon cornstarch mixed with 1 tablespoon cold water (slurry)
Instructions
- Prepare the Teriyaki Sauce: In a small saucepan, combine soy sauce, mirin, water, brown sugar, ginger, and garlic. Bring the mixture to a simmer over medium heat, stirring until the sugar dissolves.
- Whisk in the cornstarch slurry. Continue to cook, stirring constantly, until the sauce thickens enough to coat the back of a spoon, about 1 to 2 minutes. Remove from heat and set aside.
- Cook the Vegetables: Steam or lightly boil the broccoli florets until tender-crisp, about 4 minutes. Blanch the shredded carrots briefly in the same water, then drain both.
- Cook the Salmon: Pat the salmon fillets dry with paper towels. Season lightly with salt and pepper. Heat the vegetable oil in a large non-stick skillet over medium-high heat.
- Place the salmon skin-side down (if using skin-on) and sear for 4 to 5 minutes until the skin is crisp. Flip the salmon and cook for another 3 to 4 minutes, depending on thickness, until cooked through.
- Glaze the Salmon: Reduce the heat to medium-low. Pour half of the prepared teriyaki sauce over the salmon. Let it bubble and coat the fish for about 1 minute, turning the salmon gently to glaze both sides. Remove the salmon from the pan.
- Assemble the Bowls: Divide the cooked rice among four bowls. Top the rice with the cooked broccoli and carrots. Place one glazed salmon fillet on top of the rice and vegetables in each bowl.
- Drizzle the remaining teriyaki sauce over the salmon and vegetables. Garnish with sliced green onions before serving.
Notes
- For crispier salmon skin, ensure the pan is hot before adding the oil and do not move the fish until you are ready to flip it.
- You can substitute brown rice or quinoa for the white rice.
- If you prefer baked salmon, bake at 400°F (200°C) for 12-15 minutes, then brush with sauce during the last 5 minutes of cooking.
- Add shelled edamame or thinly sliced cucumber for extra texture.
Nutrition
- Serving Size: 1 bowl
- Calories: 450
- Sugar: 18
- Sodium: 750
- Fat: 15
- Saturated Fat: 3
- Unsaturated Fat: 12
- Trans Fat: 0
- Carbohydrates: 40
- Fiber: 3
- Protein: 38
- Cholesterol: 90