

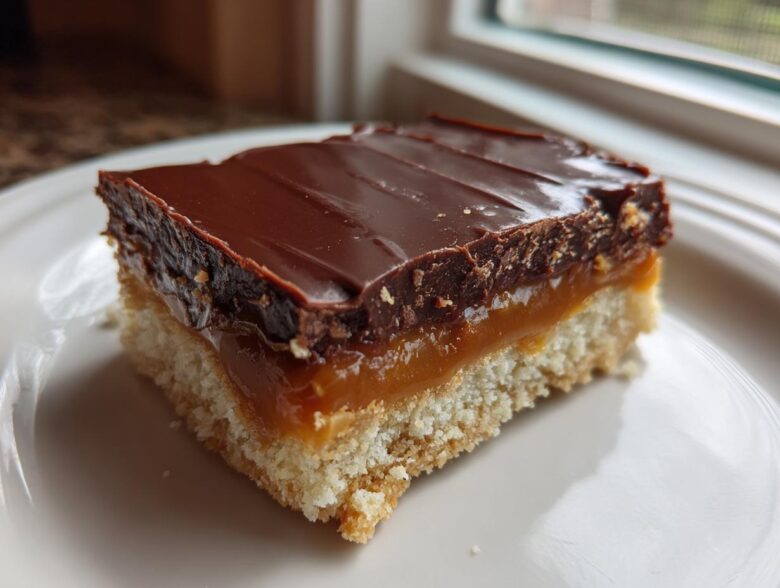
Oh my goodness, are you ready to finally silence that craving for those crunchy, chewy, chocolatey candy bars you always grab at checkout? Trust me, running to the store is officially optional now. I’m sharing my absolute favorite Homemade Twix Bars, and I promise, they crush the packaged stuff every single time. We aren’t messing around with shortcuts here; this recipe is pure copycat magic. You get that perfect, buttery shortbread base, that unbelievably gooey caramel layer, and a thick, satisfying dunk in chocolate. It’s everything you love about Twix, but homemade, and oh so much better!
Why You Will Love These Homemade Twix Bars
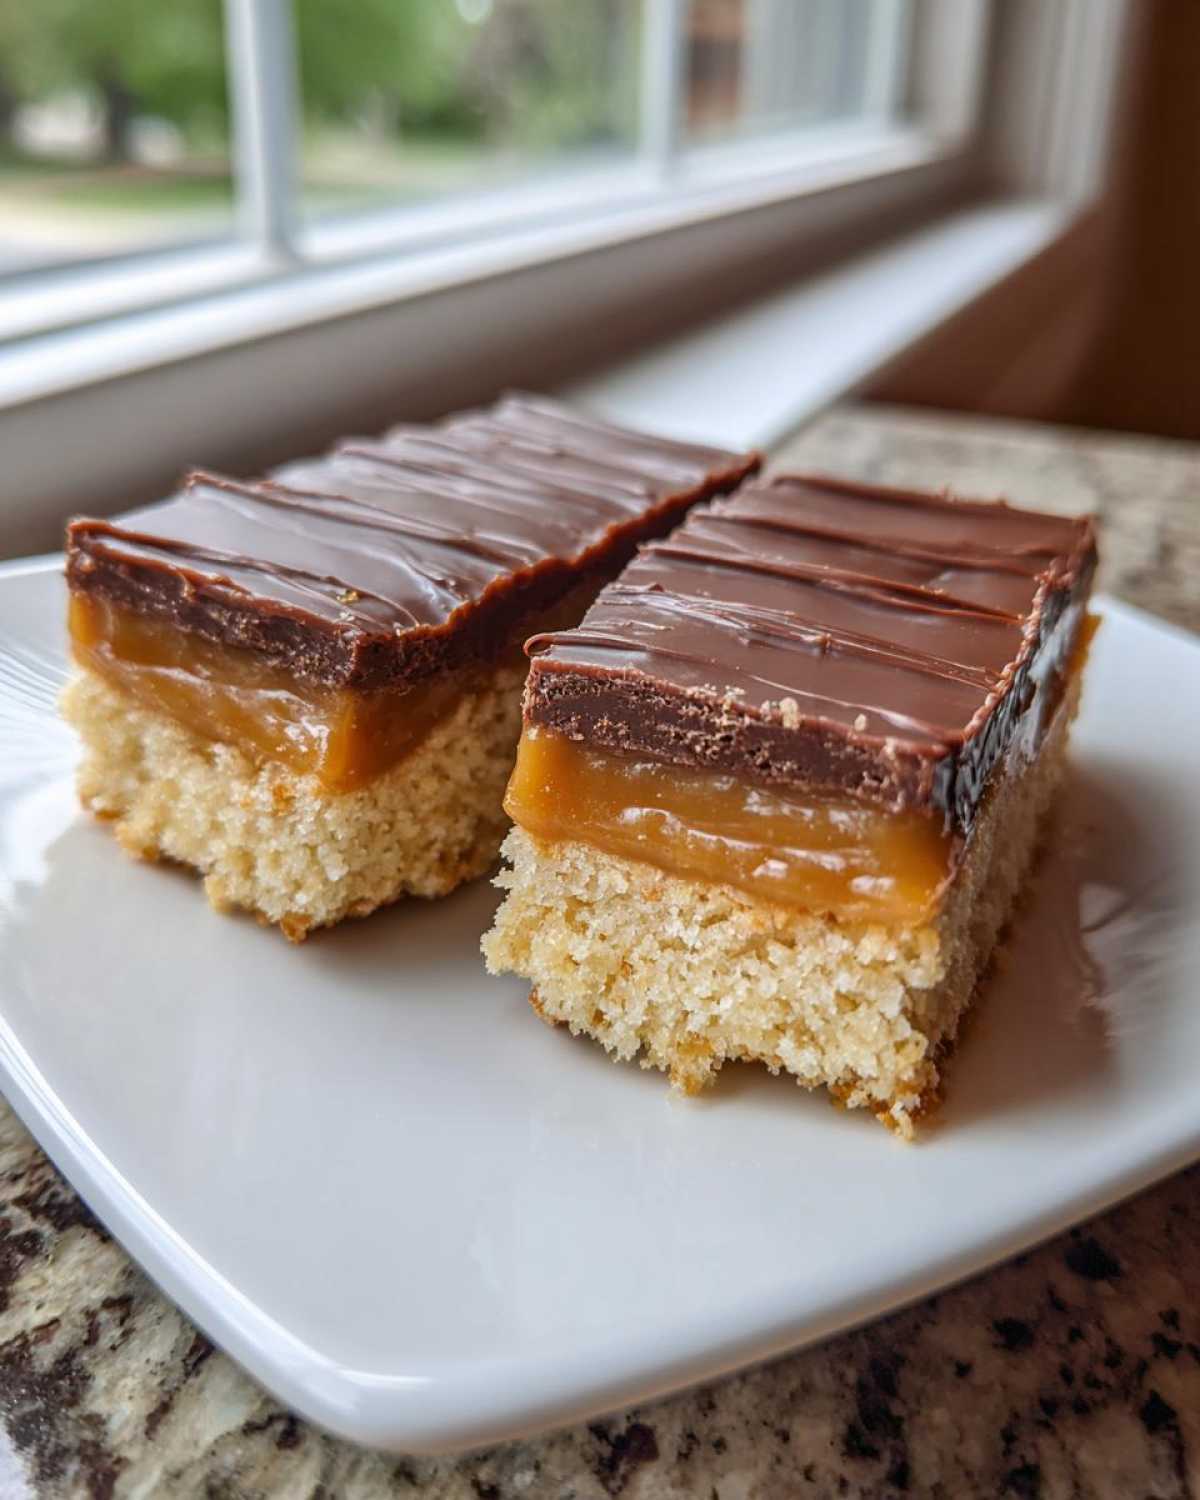
Honestly, these are going straight to the top of your favorite candy bar recipes. Forget those store-bought wrappers; we’re achieving something special here. These Homemade Twix Bars deliver on every promise, built on that amazing base layer we perfected.
- The Chocolate Caramel Shortbread layers are completely spot on—crisp, chewy, and totally decadent.
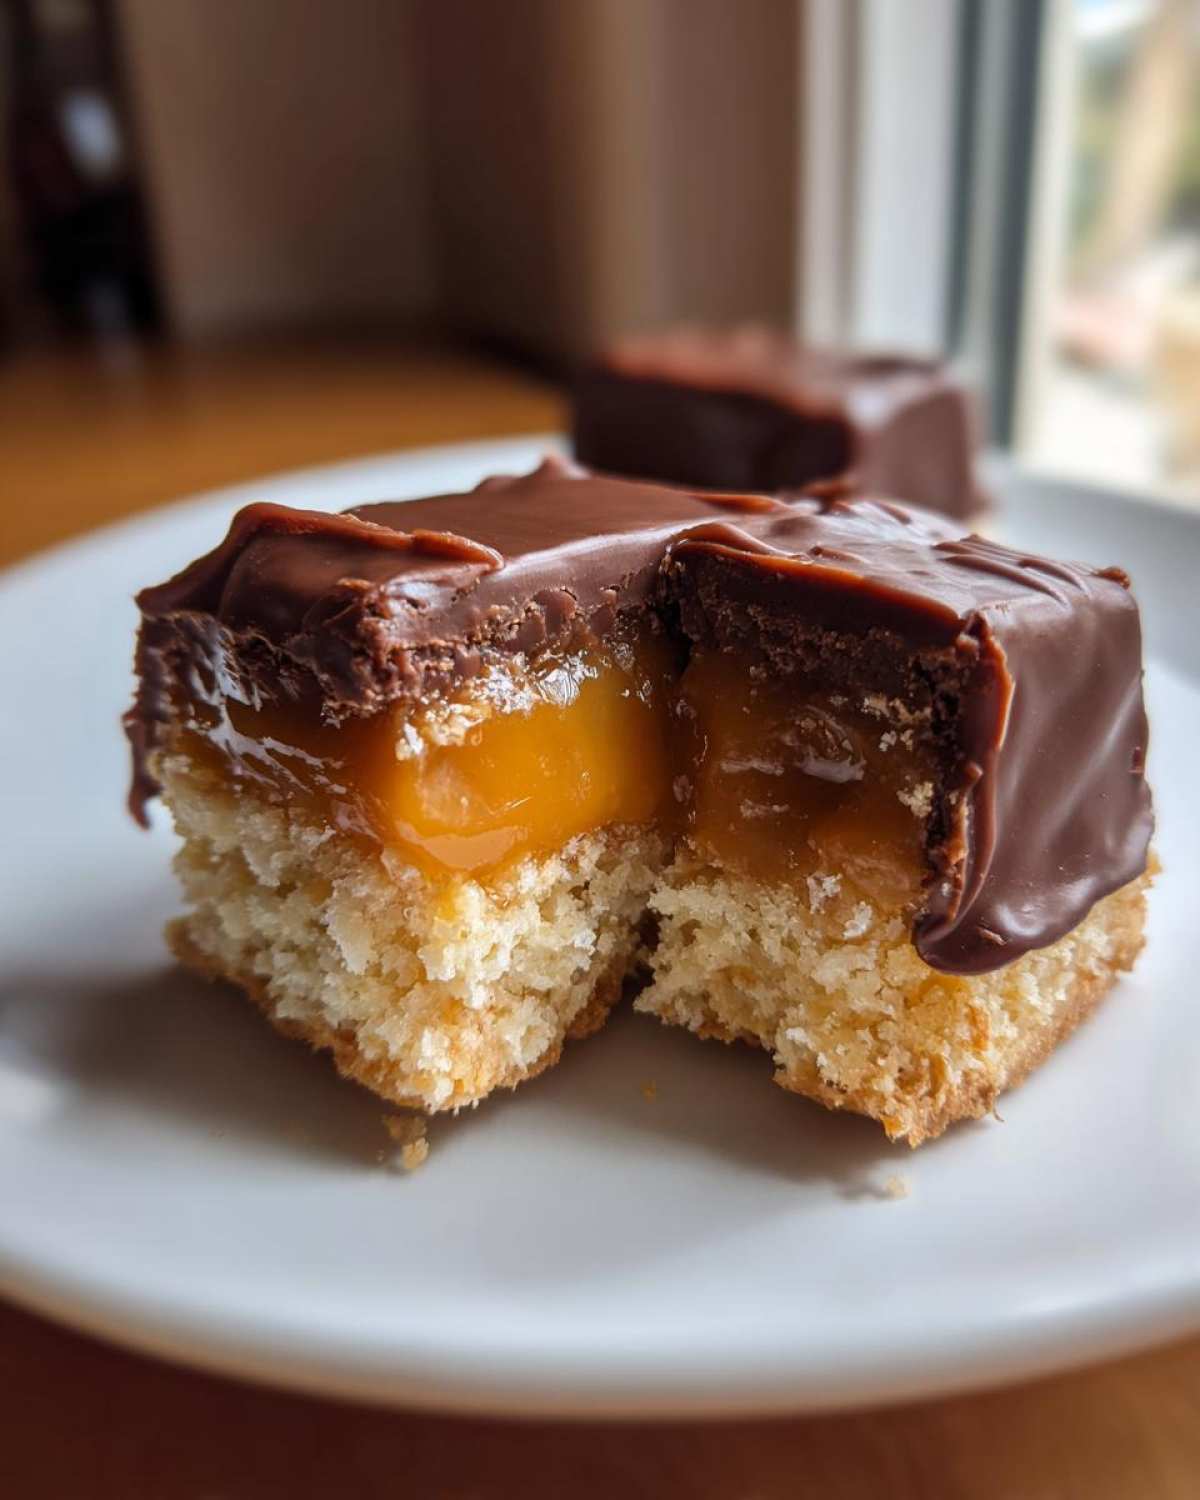
- You get that satisfying snap when you bite through the chocolate shell protecting the soft center.
- It feels like a huge win when you see the perfect layers after chilling. It’s easier than you think, I promise!
- If you love rich, Gooey Caramel Desserts, you absolutely have to try making your own caramels—check out my guide for the best homemade caramels recipe for ultimate chewiness.
- These are fantastic for gifting, and people go wild when they realize they are your own Copycat Twix Recipe!
Essential Ingredients for Your Copycat Twix Recipe
Okay, let’s talk ingredients. This is what separates a great homemade candy bar from just a good cookie! Because we are making everything from scratch, we have total control over the quality, and that is key for nailing that authentic texture. Pay attention to the details here, especially the temperature of that butter. Gathering everything beforehand makes mixing these Homemade Twix Bars a total breeze, letting you focus only on getting that shortbread perfect!
For the Shortbread Base
- 1 cup (2 sticks) unsalted butter, softened
- 1/2 cup granulated sugar
- 2 cups all-purpose flour
- 1/4 teaspoon salt
For the Gooey Caramel Layer of Your Twix
This is where we get serious about that perfect chew! We need a bit of help from corn syrup to keep things soft, but that brown sugar adds so much depth.
- 1 (14 ounce) can sweetened condensed milk
- 1/2 cup light corn syrup
- 1 cup packed light brown sugar
- 1 teaspoon vanilla extract
- 1/4 cup water
For the Chocolate Coating
For the coating, skip the fancy stuff and stick to chocolate chips! We add just a tiny bit of shortening, which isn’t for flavor, but it makes the melted chocolate so beautifully smooth and easy to work with when dipping your bars.
- 1 1/2 cups semi-sweet chocolate chips
- 1 tablespoon vegetable shortening
Step-by-Step Instructions for Perfect Homemade Twix Bars
Alright, put on some good music because now we get to assemble these beauties! This whole process takes about 25 minutes of active prep, 20 minutes in the oven, and then the resting time before dipping. We are moving fast but paying attention to detail, especially when that caramel gets hot. Remember, the key to a successful Copycat Twix Recipe is letting each layer set up properly before moving on to the next one.
Preparing the Shortbread Caramel Chocolate Shortbread Base
First things first, preheat your oven to 350 degrees F. This shortbread base needs love, but not too much mixing—we are aiming for tender, not tough! Beat your softened butter with the granulated sugar until they look creamy. Then, throw in the flour and salt. Mix it on low speed until it absolutely just comes together; seriously, stop when you see no more dry streaks. Press that dough evenly into a 9×13 inch pan that you already lined with parchment paper—this is going to save you major headaches later! Bake it for 15 to 18 minutes until those edges just turn a happy, light gold. Let it cool down just a touch while we whip up the center.
Making the Gooey Caramel Layer for Your Twix
This is where we get serious about those irresistible Gooey Caramel Desserts! In a medium saucepan, get your sweetened condensed milk, corn syrup, the packed brown sugar, vanilla, and water all mixed up. You need to cook this over medium heat, and I mean constantly stirring. If you walk away, caramel burns, and sad homemade bars result, so stick with it! You must cook this until your candy thermometer hits exactly 240 degrees F. That’s the magic number for the perfect texture. Pour that hot caramel right over your slightly warm shortbread base. Now, patience! You have to let this set up at room temperature for about an hour. If you cut it too soon, you’ll just have a caramelly mess! To make sure your caramel is perfect for these Chocolate Caramel Shortbread bars, I often consult my notes on soft homemade caramels to double-check the texture goals.
Coating Your Twix Bars in Chocolate
Once that caramel is nice and firm—you can press it gently to check—it’s time to slice! My trick for getting those super clean edges, just like the originals, is running a large, sharp knife under hot water, drying it quickly, and then making your cuts. Dip each pre-cut bar into the melted chocolate mixture (I melt the chips with the shortening for smoothness, heating in 30-second zaps). Make sure it’s totally coated, then set them onto your parchment-lined baking sheet. Into the fridge they go for about 30 minutes to set the chocolate hard. You’re almost done with your Best Homemade Candy Bar Recipes!
Tips for Success Making Your Twix Recipe
I learned early on that success in bar cookies like these Homemade Twix Bars comes down to a couple of small, but very important, details. Grandma always said the secret wasn’t in what you added, but in what you *didn’t* rush! Follow these little nuggets of hard-won wisdom and you’ll get that perfect, professional-looking finish.
You absolutely must let that shortbread base chill out a bit. If you’re having trouble getting the dough pressed evenly, pop the whole pan into the fridge for about 30 minutes before you stick it in the oven. That helps keep the butter cold, leading to a more tender shortbread structure later on. Nobody wants a tough base holding up that gooey caramel!
We talked about this a little in the instructions, but I’ll say it again: clean cuts are everything for presentation. Honestly, if you want those perfect little rectangles that look exactly like the store-bought version, you need the hot knife trick. Run your knife under genuinely hot water, wipe it dry quickly, and then slice through the caramel layer. It heats the blade just enough to glide through the firm caramel without sticking or pulling. Do this between every single cut, even if you think the knife is still clean!
Now, for a little chocolate show-off moment! If you want that super shiny, crackle-free coating on your finished Twix that stores really well, you need to temper your chocolate, even if you’re using chips. It’s not as scary as it sounds! Just melt a small portion of your chocolate chips separately, cool them down a bit, and then slowly reintroduce them to the rest of your melted batch along with the shortening. This locks in that professional look. If that feels like too much fuss, don’t stress—the chocolate will still set up beautifully just by chilling!
Variations on the Classic Twix Cookie Recipe
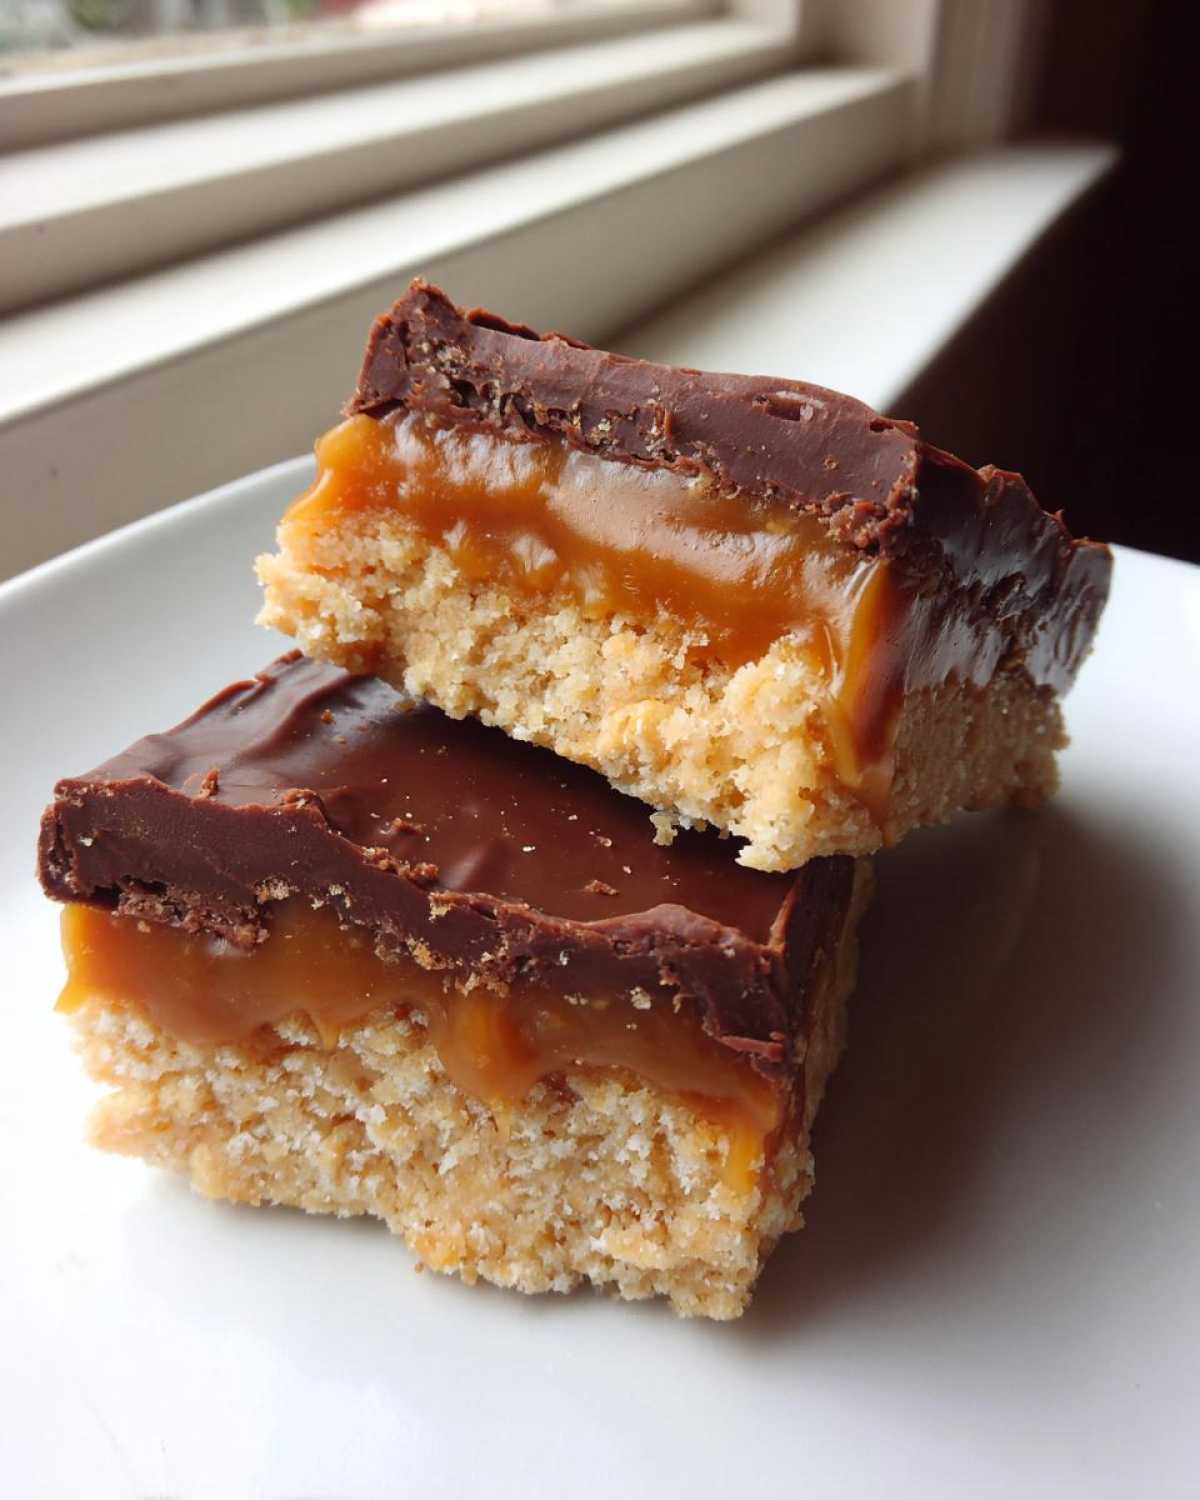
Even though this Copycat Twix Recipe is based on the classics, half the fun of baking at home is playing with the flavors, right? Once you master that shortbread, caramel, and chocolate combo, you can start experimenting! I’ve tried a few tweaks over the years, especially when I have people coming over for the holidays, and they always disappear first.
My favorite small change is definitely adding a little something extra to that caramel layer. Try sprinkling a tiny pinch of flaky sea salt right on top of the caramel after you pour it onto the shortbread, just before it sets up. That little hit of salt cuts through the sweetness beautifully—hello, sophisticated flavor!
If you’re not a huge fan of semi-sweet chocolate, you can totally swap it out. Dark chocolate makes these bars delightfully richer, turning them into a slightly more grown-up treat. Or, if you have someone who loves milk chocolate best, use those chips instead! The base recipe handles the switch just fine.
When I’m short on time, or when I’m making these for a big party where people are grabbing things quickly, I turn these into Bite Sized Twix Candy. Instead of cutting long rectangles, just cut the entire sheet into small squares *before* you dip them in chocolate. They are way easier to pop in your mouth, sort of like little homemade candy morsels.
If you like adding browned butter to everything (I know I do!), you can even swap out the regular butter in the shortbread base for it. It adds such a nutty depth that pairs wonderfully with caramel. If you are ready to dive into brown butter goodness for other recipes, like amazing cookies, I have a great guide on how to make brown butter chocolate chip cookies that explains the process perfectly!
Remember, whether you stick to the classic layers or try adding sea salt, these Homemade Twix Bars are always a winner. They are truly some of the Best Homemade Candy Bar Recipes out there!
Storage and Keeping Your Homemade Twix Fresh
So you made the most incredible batch of Homemade Twix Bars—congratulations! Now, the question is, how do we keep this chocolate caramel goodness perfect until every single bar is gone? Unlike store-bought candy which has tons of preservatives, ours are made with real butter and fresh caramel, which means they need a little more TLC in storage to maintain that perfect texture.
The absolute number one rule for keeping these bars fresh is that they must live in the refrigerator. Don’t even try leaving them on the counter, especially if you live somewhere warm! The caramel layer, which we worked so hard to get perfectly gooey, will start to soften up way too quickly at room temperature and you’ll end up with sticky squares.
Pop your finished, fully set Twix bars right into an airtight container. You want to make sure they’re snug! If you layer them, I always put a small piece of parchment or wax paper between the layers. This stops the chocolate coating on the top of one bar from sticking to the bottom of the next one when they get cold—nobody wants to peel off paper every time they grab a treat!
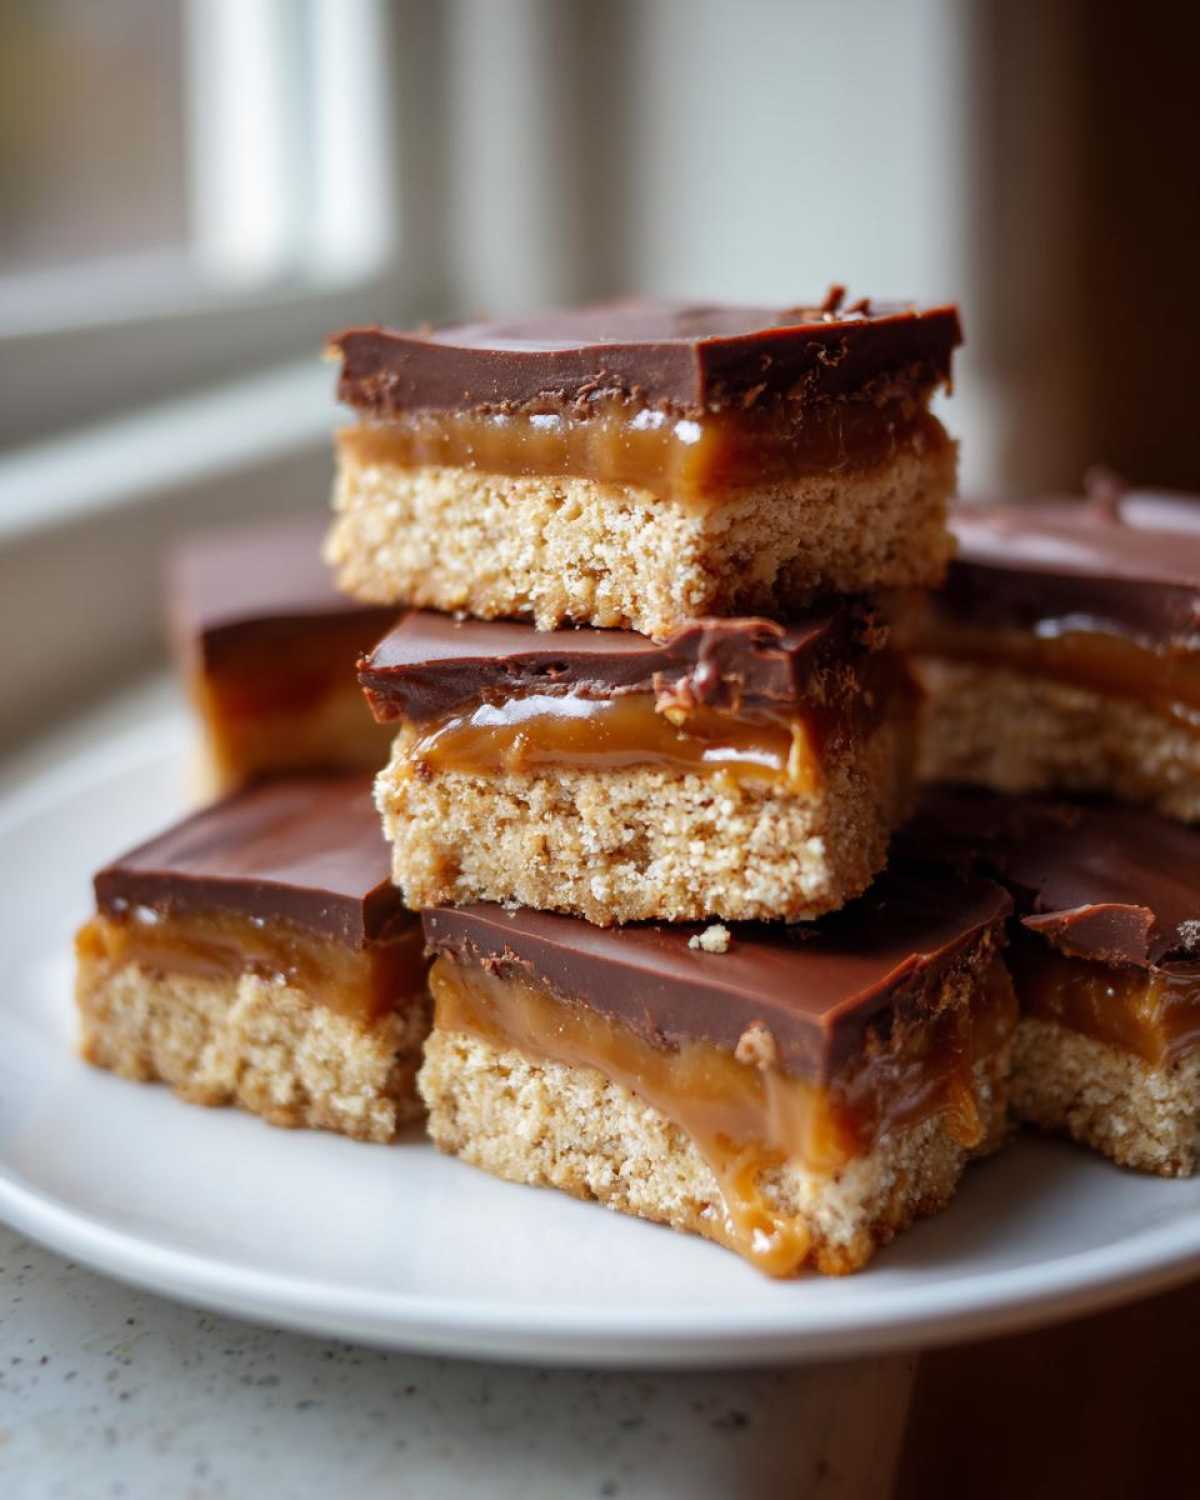
If you store them properly in an airtight container in the fridge, these bars will stay fantastic for at least a week, maybe even ten days! That’s pretty impressive for homemade candy, if you ask me. They taste even better when they’ve chilled for a day because the shortbread has a chance to really soak up some of that caramel moisture. When serving, just pull them out about 15 minutes before you plan to eat them. This lets the chocolate warm up just slightly so it gives you that perfect snap without being rock hard!
Frequently Asked Questions About Making Twix
I just know you’ll have questions once you start putting this together! Baking is all about learning, and I try to think of everything before you even ask. If you have a question about these Homemade Twix Bars, chances are someone else has asked it too. Here are the ones I get asked most often when people try my favorite Twix recipe!
Can I make this a No Bake Twix Treat?
That’s a great thought, especially when it’s blazing hot outside and you don’t want to turn on the oven! But no, this specific recipe really needs the bake time for that signature shortbread layer. The shortbread demands that dry heat to set up properly so it can support the heavy caramel on top. If you are dead set on no-bake, you could totally swap out the baked shortbread for a crust made from crushed graham crackers mixed with melted butter, but I have to warn you: the texture won’t be the classic Twix you’re dreaming of. The buttery crunch from the baking process just can’t be beaten!
What is the secret to gooey caramel in my Homemade Twix Bars?
This is the most important question if you want to nail the ‘gooey’ part! The true secret for making sure your caramel stays soft and chewy—and doesn’t harden like toffee—is that candy thermometer. You absolutely must cook that mixture until it hits exactly 240 degrees F (that firm ball stage). If you cook it too long or skip the thermometer, you’ll end up with something too firm to bite through nicely. Remember to stir constantly while it’s on the heat too; that prevents scorching and ensures a totally smooth texture for your center layer.
Are there Gluten Free Twix Bars options?
I know so many people looking for alternatives, and you can definitely make this recipe work for your gluten-free friends and family! The only thing you need to swap is the all-purpose flour in the shortbread base. Just use a good quality 1-to-1 gluten-free baking blend—the kind that already includes xanthan gum. Mix it in exactly where the recipe calls for the standard flour. Now, because GF flours behave a little differently when baked, your shortbread might crumble just a touch easier, so be extra gentle when pressing it into the pan and cooling it down. It will still taste amazing, though!
Nutritional Estimates for These Twix Bars
I like to keep an eye on what’s going into my body, even when I’m indulging in the best chocolate caramel shortbread! While homemade treats are always a bit more luxurious than the pre-packaged kind, it’s good to have a general idea of what you’re serving up. Please remember that these numbers are just estimates based on standard ingredient measurements. Things like the exact brand of chocolate chips or the amount of sugar absorbed into the shortbread can make these figures shift around a little bit. For the most accurate details, you can always check out my full nutritional disclaimer.
- Serving Size: 1 bar
- Calories: 250
- Sugar: 25g
- Sodium: 75mg
- Fat: 15g
- Saturated Fat: 9g
- Unsaturated Fat: 6g
- Trans Fat: 0g
- Carbohydrates: 28g
- Fiber: 1g
- Protein: 3g
- Cholesterol: 30mg
Share Your Homemade Twix Creation
Once you’ve tasted these, I just know you’re going to want to tell everyone! Finishing these Homemade Twix Bars is a huge baking accomplishment, and I want to see how yours turned out! Did you go for clean rectangles or petite little squares? Did you add that sprinkle of sea salt I recommended? Please take a picture and tag me on social media so I can celebrate with you! And seriously, if you loved them as much as my family does, please head back here when you have a moment and leave a quick star rating for the recipe. It helps other bakers find the path to the best homemade candy bar recipes out there! If you have any specific questions that weren’t covered here, feel free to shoot me a message through my contact page!
Nutritional Estimates for These Twix Bars
I like to keep an eye on what’s going into my body, even when I’m indulging in the best chocolate caramel shortbread! While homemade treats are always a bit more luxurious than the pre-packaged kind, it’s good to have a general idea of what you’re serving up. Please remember that these numbers are just estimates based on standard ingredient measurements. Things like the exact brand of chocolate chips or the amount of sugar absorbed into the shortbread can make these figures shift around a little bit. For the most accurate details, you can always check out my full nutritional disclaimer.
- Serving Size: 1 bar
- Calories: 250
- Sugar: 25g
- Sodium: 75mg
- Fat: 15g
- Saturated Fat: 9g
- Unsaturated Fat: 6g
- Trans Fat: 0g
- Carbohydrates: 28g
- Fiber: 1g
- Protein: 3g
- Cholesterol: 30mg
Share Your Homemade Twix Creation
Once you’ve tasted these, I just know you’re going to want to tell everyone! Finishing these Homemade Twix Bars is a huge baking accomplishment, and I want to see how yours turned out! Did you go for clean rectangles or petite little squares? Did you add that sprinkle of sea salt I recommended? Please take a picture and tag me on social media so I can celebrate with you! And seriously, if you loved them as much as my family does, please head back here when you have a moment and leave a quick star rating for the recipe. It helps other bakers find the path to the best homemade candy bar recipes out there! If you have any specific questions that weren’t covered here, feel free to shoot me a message through my contact page!
PrintHomemade Twix Bars
Make copycat Twix bars with a shortbread base, gooey caramel layer, and chocolate coating.
- Prep Time: 25 min
- Cook Time: 20 min
- Total Time: 1 hour 45 min
- Yield: 24 bars
- Category: Dessert
- Method: Baking and Chilling
- Cuisine: American
- Diet: Vegetarian
Ingredients
- 1 cup (2 sticks) unsalted butter, softened
- 1/2 cup granulated sugar
- 2 cups all-purpose flour
- 1/4 teaspoon salt
- 1 (14 ounce) can sweetened condensed milk
- 1/2 cup light corn syrup
- 1 cup packed light brown sugar
- 1 teaspoon vanilla extract
- 1/4 cup water
- 1 1/2 cups semi-sweet chocolate chips
- 1 tablespoon vegetable shortening
Instructions
- For the shortbread base, beat the softened butter and granulated sugar in a large bowl until creamy.
- Add the flour and salt. Mix on low speed until the dough just comes together.
- Press the dough evenly into the bottom of a 9×13 inch baking pan lined with parchment paper.
- Bake the shortbread at 350 degrees F for 15 to 18 minutes, or until the edges are lightly golden. Let it cool slightly.
- For the caramel, combine the sweetened condensed milk, corn syrup, brown sugar, vanilla extract, and water in a medium saucepan.
- Cook over medium heat, stirring constantly, until the mixture reaches 240 degrees F on a candy thermometer (firm ball stage). This takes about 8 to 10 minutes.
- Pour the hot caramel evenly over the warm shortbread base. Let it set at room temperature for about 1 hour, or until the caramel is firm enough to cut.
- For the chocolate coating, melt the chocolate chips and shortening together in a microwave-safe bowl in 30-second intervals, stirring until smooth.
- Cut the cooled caramel layer into bars of your desired size.
- Dip each bar into the melted chocolate, ensuring full coverage. Place the coated bars on a parchment-lined baking sheet.
- Refrigerate the bars for at least 30 minutes, or until the chocolate is set.
Notes
- You can chill the shortbread base for 30 minutes before baking for easier handling.
- For cleaner cuts, run your knife under hot water and dry it between slices when cutting the caramel layer.
- Store the finished bars in an airtight container in the refrigerator.
Nutrition
- Serving Size: 1 bar
- Calories: 250
- Sugar: 25
- Sodium: 75
- Fat: 15
- Saturated Fat: 9
- Unsaturated Fat: 6
- Trans Fat: 0
- Carbohydrates: 28
- Fiber: 1
- Protein: 3
- Cholesterol: 30