

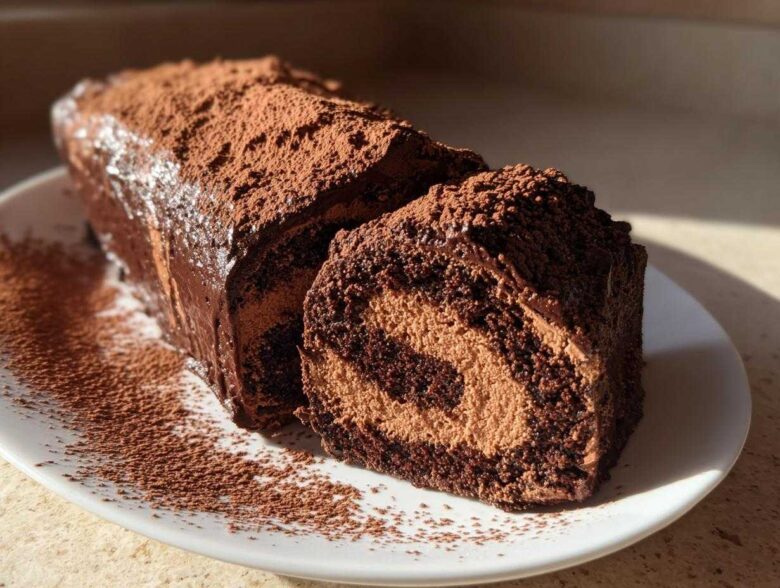
When the air gets crisp and the lights go up, you know it’s time for baking that centerpiece dessert—the showstopper that makes everyone stop talking when it hits the table. For me, that star is always the yule log cake. It just screams Christmas! Now, I know what you’re thinking: rolling a sponge cake without cracking it sounds like a nightmare, right? Nope! Trust me on this one; I’ve baked this classic yule log cake dozens of times for massive holiday parties, and I have perfected a method that guarantees you end up with a wonderfully moist sponge every single time. We’re going to keep this elegant, traditional, and surprisingly simple. If you want to see how I get my chocolate batter so perfect before rolling, check out my tips on making a moist homemade chocolate cake.
Why This Classic Chocolate Yule Log Cake Stands Out
There are so many pretty variations out there, but nothing beats the sheer satisfaction of nailing the traditional chocolate yule log cake. This isn’t just any rolled cake, folks—this recipe delivers on the three things every great holiday dessert needs: phenomenal flavor, incredible texture, and that showstopping look.
My absolute favorite things about rolling out this classic:
- It has that deep, rich cocoa flavor without being overly sweet.
- It makes the most perfect, tender sponge that holds up beautifully to rolling.
- When you dust it with cocoa and score the bark, it instantly becomes the prettiest thing on your table!
If you love rich flavors, you might also want to check out my secrets for making an amazing moist carrot cake for a different kind of holiday treat.
Moist Yule Log Sponge Texture
The secret weapon here is whisking those egg whites until they are stiff and glossy and then folding them in gently. Seriously, don’t rush this part! That careful folding traps all the air, which is what keeps the yule log cake sponge so incredibly light and pliable. If your sponge is light, it won’t crack when you roll it—simple as that! And please, listen when I say, do NOT overbake it. Even one extra minute can make it brittle.
Rich Chocolate Ganache Frosting
Forget those thin, sugary icings. We cover this baby in a luscious chocolate ganache. When it cools down just slightly, it becomes thick, creamy, and intensely chocolatey. It’s the perfect heavy mantle to cover the inside filling and gives you that amazing, rustic texture when you drag your fork across it to look like tree bark. It seals in all the moisture.
Essential Tools for Your Yule Log Cake
Okay, listen up! Getting a showstopping Christmas log cake on the table doesn’t require a professional kitchen, but you do need a few specific items. You don’t want to get halfway through mixing and realize you’re missing the most important pan, trust me. This technique relies on getting that cake thin and even, so specialty pans are key here.
Here is what you absolutely must have ready before you even think about cracking an egg:
- Jelly-Roll Pan (10×15 inches): This is non-negotiable for the even, thin bake we need for rolling. Don’t try to use a regular cake pan; it just won’t work!
- Parchment Paper: This is your cake’s best friend. You line the pan with it, letting it hang over so you have something to grab when transferring the cake. It basically guarantees you won’t stick. If you love using parchment, I shared my tips on how to make the best sugar cookie icing, which also benefits hugely from lined pans!
- Electric Mixer: You need to whip those egg whites into stiff peaks, and doing that by hand is asking for an arm workout you don’t need during the holidays.
- A Clean, Thin Kitchen Towel: This is for the rolling trick! Make sure it’s completely clean—you don’t want any mysterious lint in your beautiful holiday food.
- Offset Spatula: Essential for smoothly spreading that creamy filling later without tearing up the delicate sponge.
Once you’ve gathered these basics, you’re practically halfway there. The tools pave the way for success!
Ingredients for the Perfect Yule Log Cake (Bûche de Noël)
Okay, now we get down to the good stuff! Gathering your ingredients for this yule log cake is super important. Remember, for the cake to roll nicely, every single measurement has to be accurate, especially when dealing with such a delicate chocolate sponge. I always lay mine out on the counter first, just like this, so I know nothing gets missed during the mixing frenzy. If you’re looking for frosting ideas other than ganache, you can check out this wonderful vanilla buttercream frosting recipe, although for the log, ganache really is king!
For the Moist Chocolate Sponge
This is the base, the canvas for our holiday masterpiece. You need:
4 large eggs, separated
1/2 cup granulated sugar, plus 2 tablespoons set aside just for the whites
1/4 cup all-purpose flour
1/4 cup unsweetened cocoa powder
1/4 teaspoon baking powder
Pinch of salt
1 teaspoon vanilla extract
For the Creamy Filling
This filling has to be stable enough to hold up to the rolling and chilling, so we’re whipping cream stiff! You will need:
1/2 cup heavy cream, *cold* (I mean fridge-cold!)
1/4 cup powdered sugar
1 teaspoon vanilla extract
For the Chocolate Ganache Frosting
This is what gives us that gorgeous, rustic bark look and seals in the flavor. Make sure you have good quality chocolate chips!
1 cup semi-sweet chocolate chips
1/2 cup heavy cream (for ganache)
1 tablespoon unsalted butter
Cocoa powder, for dusting
Step-by-Step Instructions: How to Make a Yule Log Cake
This is it—the moment of truth! Don’t panic about the rolling; we’ve broken down every single part of making this yule log cake into manageable steps. Take your time, especially when folding, and you’ll have a beautiful, impressive holiday centerpiece dessert ready in no time. If you want to look ahead at what you’ll do if this turns out *too* soft, I have a handy guide on vanilla buttercream frosting that gives you a firmer option for filling, although this whipped cream is perfect!
Preparing the Chocolate Sponge for the Yule Log Cake
First things first, we need that super flexible chocolate sponge! Preheat your oven to 375°F (190°C). Grab your 10×15 inch jelly-roll pan and line it with parchment paper, making sure the paper hangs over just a little bit on the long sides—that’s your handle later!
In one bowl, beat the egg yolks until they look thick and pale, and mix them with the 1/2 cup of sugar. Sift your flour, cocoa powder, and baking powder right over that yolk mixture, and please, fold gently until it’s *just* mixed. Stir in the teaspoon of vanilla.
Now for the volume! In a totally clean bowl, beat your egg whites with a pinch of salt until soft peaks happen. Slowly add the reserved 2 tablespoons of sugar while you keep beating until those peaks are glossy and stiff. Remember, stiff peaks are the secret!
To combine, fold about a third of those lovely egg whites into the yolk batter to lighten it up. Don’t stir aggressively! Then, gently fold in the rest until just combined—no white streaks allowed, but don’t deflate all that air we just whipped in! Spread this batter evenly in your pan.
Bake this delicate sponge for only 10 to 12 minutes. You’ll know it’s done when the top springs back slightly when you press it. Pull it out right away!
The Critical Rolling Technique for Your Festive Rolled Cake
This step is where most people get nervous, but I promise, if you follow this, your festive rolled cake will be flawless. Right when the cake comes out of the oven, take a clean kitchen towel and dust it heavily with powdered sugar—make sure it’s a thick snowy layer!
Quickly, invert the hot cake directly onto that sugared towel. Peel off the parchment paper that’s stuck to the bottom of the cake. Now, starting with one of the short ends, roll the cake and the towel together *tightly* but smoothly.
Once it’s rolled up snugly, set the whole thing—cake and towel together!—on a wire rack to cool completely. It has to cool down fully in that rolled shape. Why? Because it trains the cake to set into that perfect roll shape permanently, so it won’t crack when you fill it later. Don’t rush the cooling! This might take an hour or so.
Assembling and Chilling the Yule Log Cake
When the cake is totally cool, it’s time for the filling! Beat your cold heavy cream, powdered sugar, and vanilla until you get medium-stiff peaks—it should hold its shape well. This is our light, creamy filling contrast to the rich chocolate.
Carefully unroll your cooled cake. Try not to sigh with relief when you see that it didn’t crack! Spread that glorious whipped cream evenly across the entire surface. Here’s a technique tip for the creamy filling recipes: leave about a 1-inch border clear on the far long edge. This border acts like a seal to keep the filling tucked inside when you roll it up again.
Reroll the cake! This time, roll it *without* the towel, nice and tight, making sure that border edge tucks neatly underneath. Place the entire log seam-side down onto your final serving platter. Stick this masterpiece in the fridge for at least 30 minutes. This chill time firms everything up, making the frosting step much easier to manage.
Finishing the Rustic Log Cake Decoration
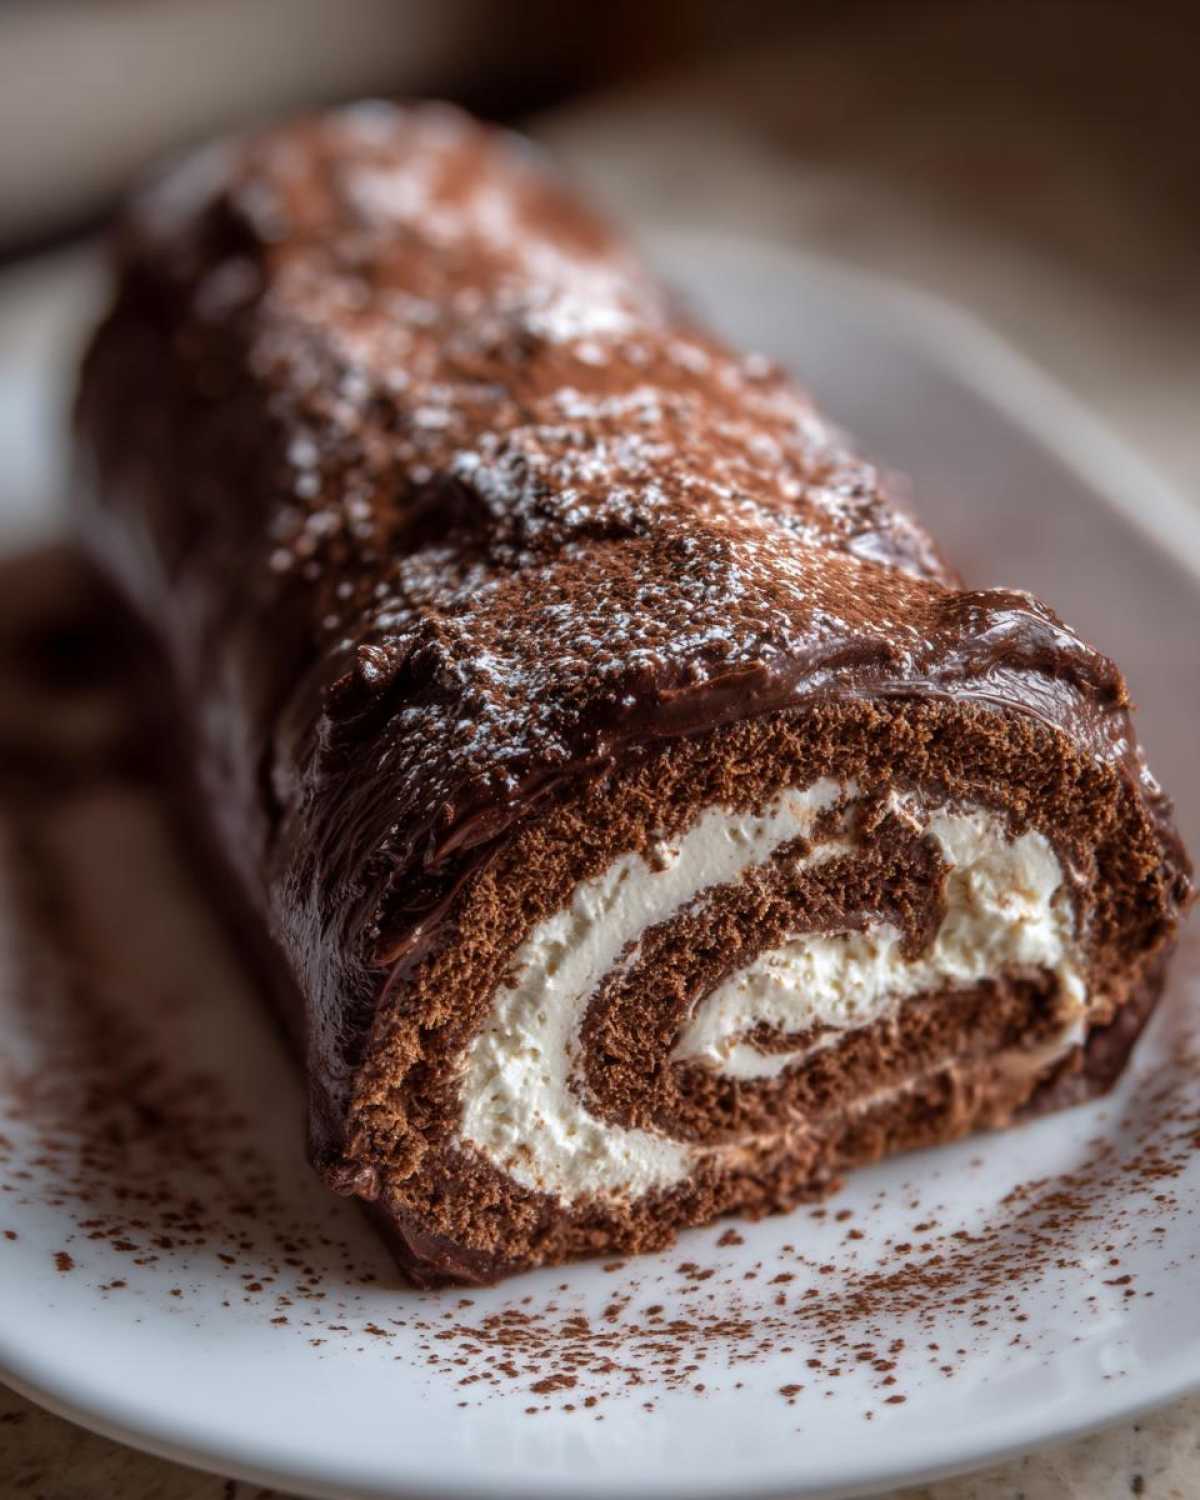
While the cake chills, whip up that chocolate ganache. Heat your heavy cream until it’s simmering, then pour it straight over your chocolate chips. Let it sit for about five minutes—don’t stir yet! After that waiting period, stir it all until it’s perfectly smooth. Then swirl in that tablespoon of butter; it gives it an extra glossy sheen. Let this ganache cool slightly until it’s thick enough to spread but not rock hard.
Grab that chilled log and let’s get decorating! Frost the entire outside—top, sides, and ends—with the slightly thickened ganache. Now, grab your fork or the back of a small knife and drag it across the frosting in long, sweeping motions. You are intentionally creating lines that look exactly like tree bark texture for your rustic log cake decoration. Isn’t that satisfying?
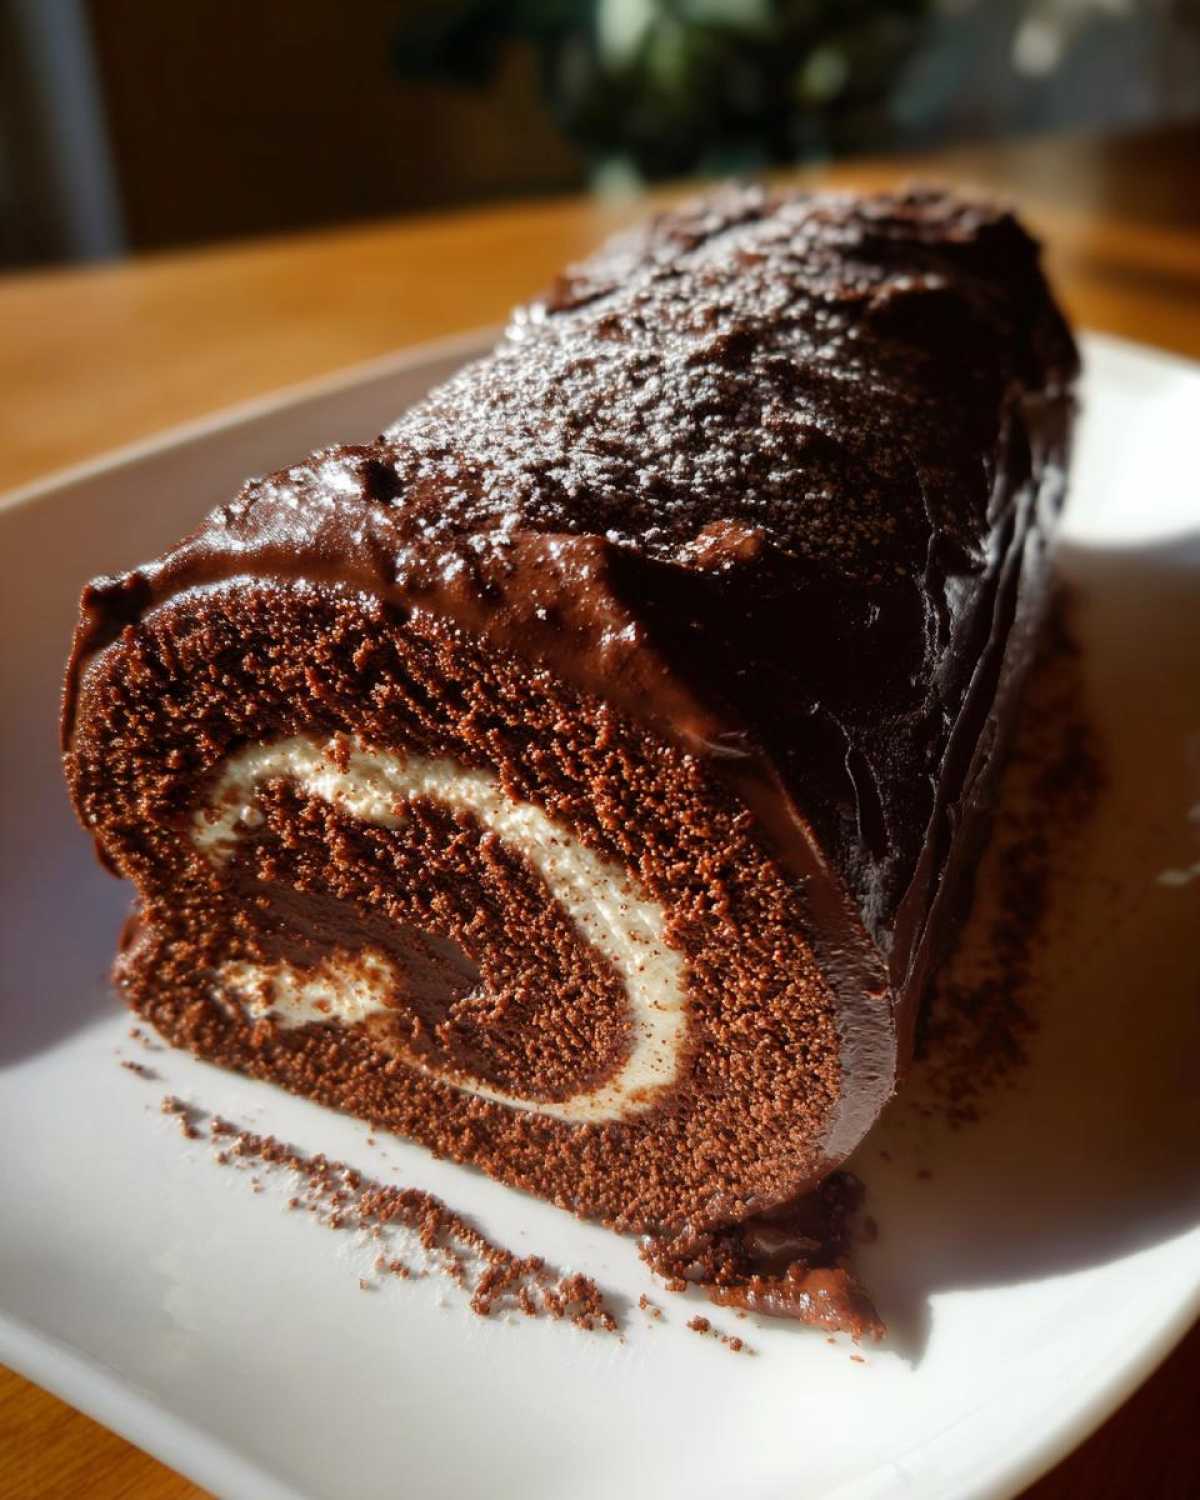
For the branch detail (this is what makes it an official yule log cake!), cut a 2-inch diagonal section off one end of the large log. Dab a little extra ganache on the main log where you want the branch to sit, and press the ‘branch’ piece on top. Finish the whole log by lightly dusting it with cocoa powder. Voila! Instant showstopper!
Tips for a Showstopping Christmas Dessert Yule Log Cake
You’ve done the hard part—the folding, the rolling, the chilling! But even the best-laid plans for a yule log cake can sometimes run into little bumps. Don’t stress if your ganache is too runny or if you worried you squished too much air out of the sponge! I’ve gathered the little reminders from my own trial-and-error years to make sure your final look is perfect.
If you are worried about the appearance, check out how I handle tricky glazes on my maple cookies—the principles for setting glaze are often the same!
Here are my best tricks to ensure your dessert shines:
- Dealing with Rolling: If you find the sponge is a little stiff when you go to roll it onto the towel, try gently warming the cake for just 30 seconds in the microwave before inverting it. This tiny bit of warmth softens the structure just enough so it flexes without snapping.
- Fixing Runny Ganache: If your chocolate ganache spreads out way too thin when you try to frost the log, don’t panic! Set the bowl aside and let it sit on the counter for 15 or 20 minutes. The ganache will slowly thicken as it cools down, giving you that perfect spreadable consistency needed to create the beautiful bark lines you want on your finished yule log cake.
- Adding Twigs: For an extra fancy touch, melt a little extra chocolate leftover from your ganache batch. Dip a small pastry brush in the warm, melted chocolate and gently flick or brush little ‘twigs’ directly onto the bark texture you scored into the frosting. It adds amazing dimension!
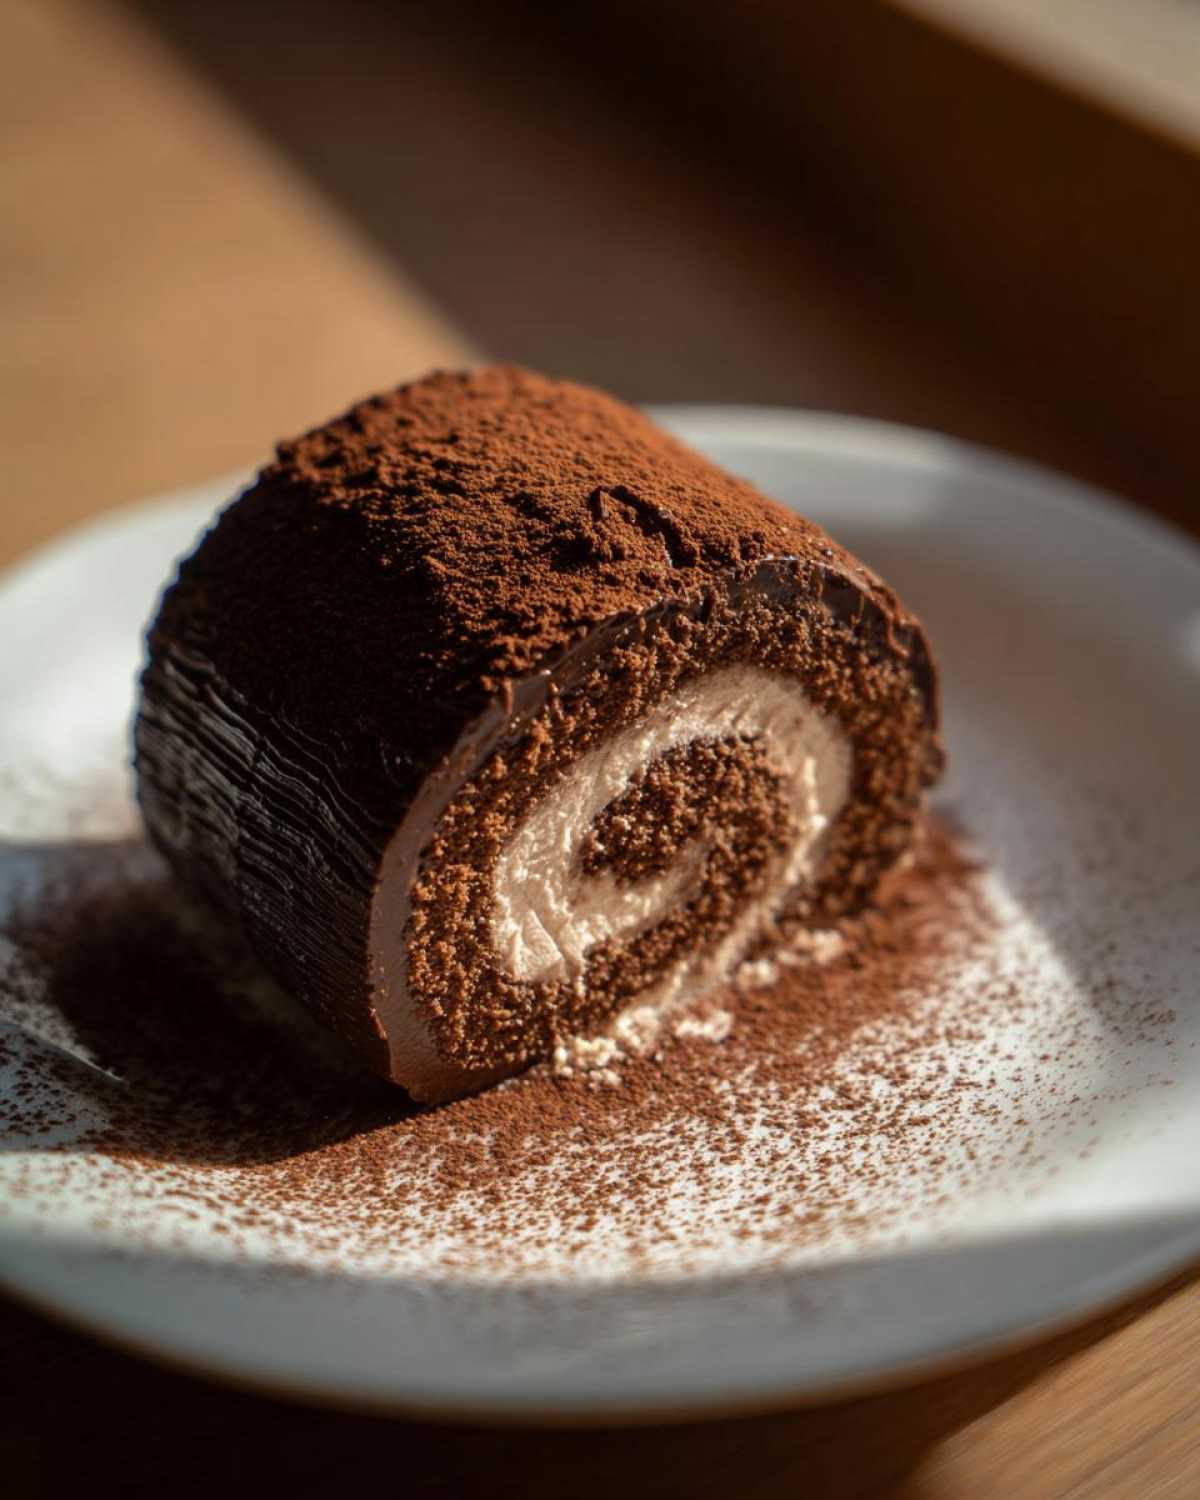
These little adjustments turn a good cake into that truly elegant holiday cake you dreamed of.
Variations on the Traditional Yule Log Cake
While I absolutely adore the deep, classic chocolate flavor, sometimes you want to mix things up for the holiday feast, right? Making a yule log cake gives you so much flexibility because the structure—the sponge, the roll, the frosting—stays the same, but we can change the character completely!
Don’t forget, if you are interested in other classic Italian flavors that translate well to creamy desserts, you should check out my other recipe for making classic Tiramisu—it gives you an idea of how to capture those intense coffee and cream notes!
Here are a few fun ideas to try next time you tackle your Christmas log cake:
Gingerbread Spin: Instead of cocoa powder in the sponge, use ground ginger, cinnamon, cloves, and a tiny bit of black pepper along with the same amount of flour. You get these amazing Gingerbread Yule Log variations that smell incredible baking! For the filling, skip the simple whipped cream and use a maple-flavored cream cheese filling instead. That’s total winter baking perfection.
White Chocolate Raspberry: If you want something lighter and brighter, switch the chocolate in the sponge to something lighter, or just use a standard vanilla sponge recipe. For the filling, fold freeze-dried raspberry powder into your heavy cream filling mix. When you frost it, use melted white chocolate instead of the dark ganache for a stunning, pale look. You can even add some fresh raspberries between the layers for color contrast.
Tiramisu Yule Log Ideas: This is one I pull out when I want something truly decadent! In the sponge base, substitute some of the liquid with strong, cooled espresso. Instead of plain whipped cream, use a mascarpone cheese mixture—it locks in that signature Tiramisu Yule Log flavor. When you frost it, use the dark ganache but dust generously with plain, unsweetened cocoa powder right at the end. It hides the fact that it’s not the traditional chocolate version underneath!
No matter which flavor direction you go, the process for rolling and decorating stays the same. It’s a brilliant framework for all your seasonal creativity!
Make Ahead Holiday Cake Storage and Serving
The best thing about making a beautiful yule log cake is that it’s actually an ideal choice when you’re juggling a million things on Christmas Eve! Since it has that rich ganache frosting, it’s incredibly stable. Knowing you can prepare this impressive holiday food ahead of time takes so much stress off the day of the party. Trust me, having this centerpiece dessert ready to go is a game-changer for your winter holiday baking schedule.
If you’re planning on looking at other make-ahead desserts, I have a fantastic recipe for easy classic apple crisp that also holds up really well overnight!
Storing Your Frosted Yule Log Cake
You can definitely make this cake the day before, and honestly, it tastes even better the next day because the flavors have time to meld! Since we used a whipped cream filling, you must keep it properly chilled. Cover the platter lightly with plastic wrap—and I mean *lightly*—so you don’t smash the beautiful bark texture you worked so hard on. Keep it tucked away in the refrigerator for up to 24 hours.
If you need to store it longer than that, I’d recommend freezing it before you frost it with the ganache. Wrap the unfilled, cooled roll extremely well in plastic wrap first, then foil. It freezes beautifully for up to a month! You’ll just thaw it overnight in the fridge, then proceed with the whipped filling and ganache decoration the day you plan to serve it.
Preparing for Serving: Bringing Out the Best Flavor
This is an important step that many people skip when preparing a make ahead holiday cake! You cannot serve this straight out of the fridge, especially if it was chilled overnight. Cold temperatures make the ganache firm and the sponge a bit tight. Giving it a little warmth helps release those wonderful chocolate aromas!
About an hour before you plan to slice up this gorgeous log, take it out of the refrigerator and let it sit on the counter at room temperature. That hour allows the whipped cream filling to soften slightly and the chocolate ganache to achieve that perfect, tender coating. When it’s perfectly tempered, it slices like a dream, giving everyone a clean, beautiful cross-section of cream and sponge.
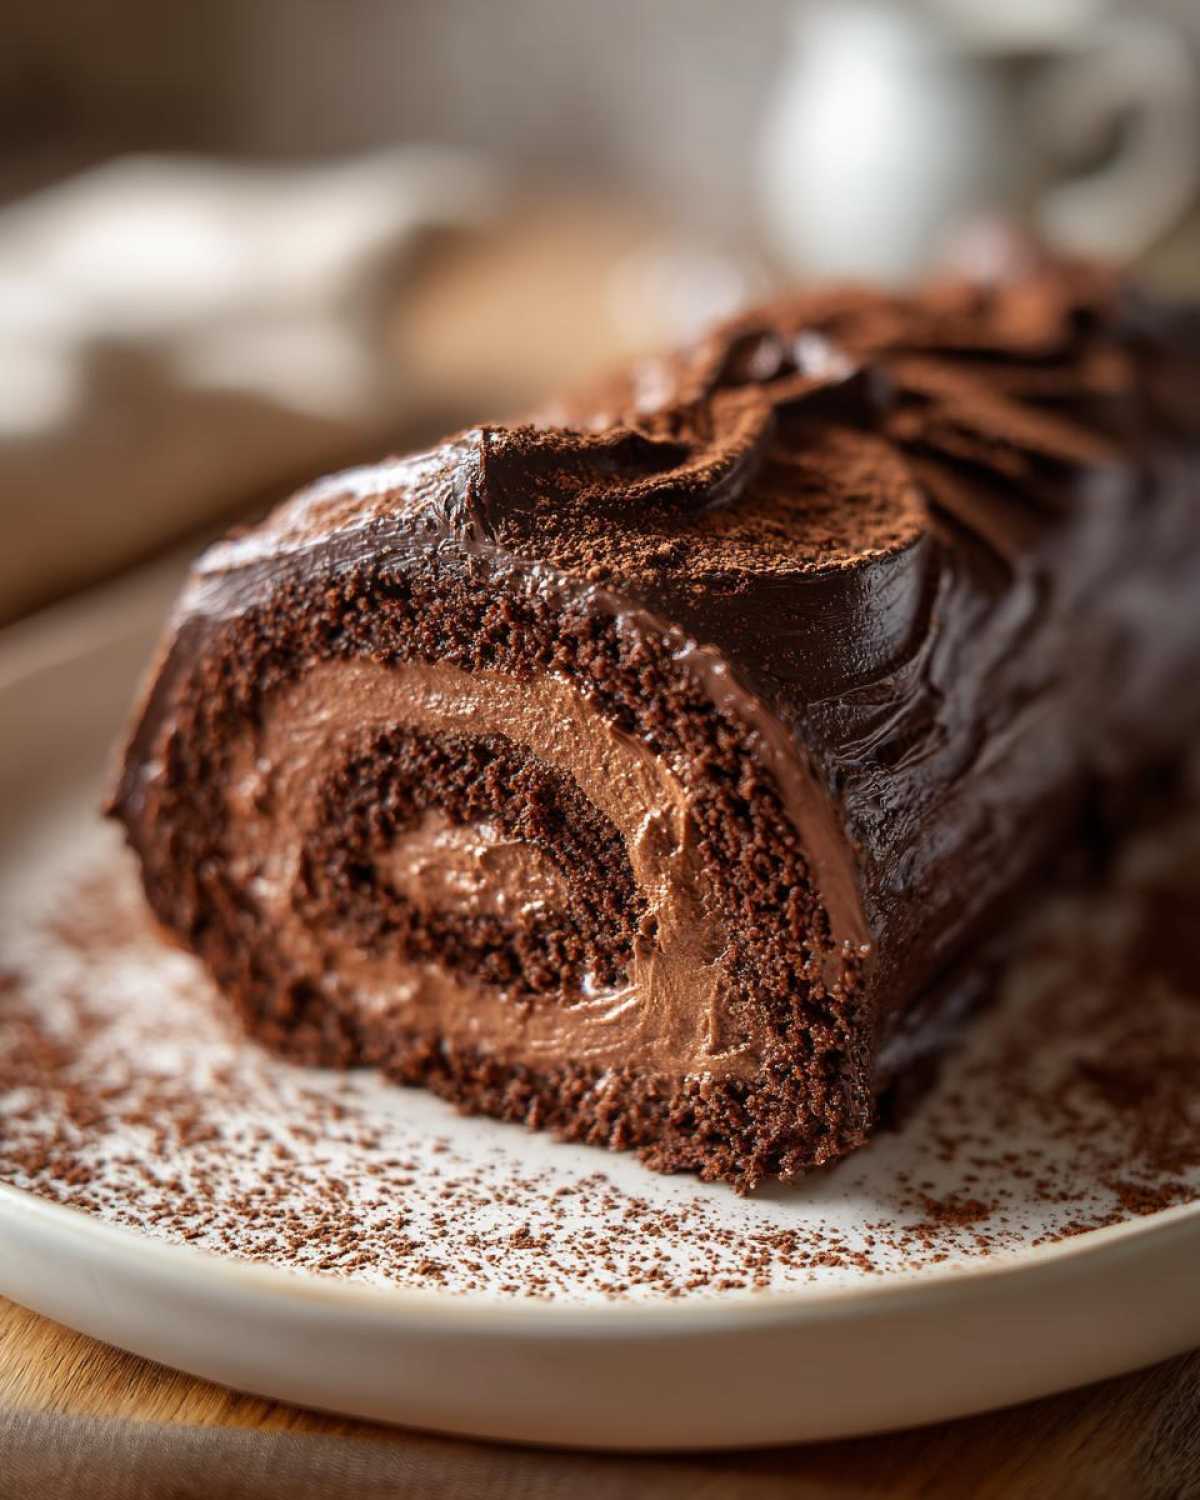
When serving, just use a sharp knife, wipe it clean between slices, and enjoy the payoff of all your careful baking!
Frequently Asked Questions About the Bûche de Noël Recipe
We’ve covered the entire process, from folding the batter gently to scoring the final bark, but I know when you’re tackling a big holiday project like this, questions pop up! Don’t let uncertainty stop you from making this incredible dessert. If you’re looking for more make-ahead ideas for your winter feast, you might want to check out my tips for making easy classic apple cobbler.
Can a beginner successfully make this Yule Log cake?
Absolutely, yes! Don’t let the elegance fool you. This recipe is designed to be a beginner friendly Yule Log experience. The most important skill here isn’t gourmet decorating, it’s gentle folding and patience during cooling. Seriously, if you follow my steps for baking the thin sponge just until it springs back and making sure you roll it in the hot towel immediately, you are golden. If you can whip cream and fold carefully, you can nail this!
What is the best way to prevent the chocolate sponge from cracking when rolling?
This is the million-dollar question! It all boils down to two non-negotiable things we covered. First, never overbake that chocolate sponge; it needs to be slightly underdone and very flexible when it comes out of the oven. Second, the cooling technique: you must invert it onto that heavily sugared towel and roll it up right away. Then, it has to cool completely in that tight spiral shape! That cooling process sets the cake into the roll, so when you unroll it to fill it, it remembers how to curve back into shape without breaking the delicate cake structure. It works like magic every time!
Can I substitute the whipped cream filling in the yule log cake?
You certainly can change up your creamy filling recipes, but you have to be mindful of stability. The whipped cream works because it’s light and sets up nice and firm in the fridge. If you want a richer filling, you can definitely swap it out for a classic American buttercream or a Swiss meringue buttercream. Just make sure you stabilize whatever you choose so it doesn’t ooze out when you slice the log later. A mascarpone filling, like in my Tiramisu variation, is another fantastic, stable option for a dairy filling!
Estimated Nutritional Data for This Yule Log Cake
Alright y’all, here’s the scoop on the nutrition for this incredible yule log cake! Since this is a labor of love and involves butter, cream, and chocolate (the best things in life!), it’s definitely a holiday treat, not an everyday snack. Please remember that these numbers are my best estimates based on the ingredients I list above, especially since the exact size of those four large eggs can sometimes throw things off a bit!
If you’re looking for a sweet idea that might be a little lighter on the richness scale but still hits that amazing holiday flavor, you should definitely check out my recipe for gooey pecan pie muffins—they are fantastic, but beware, they are definitely fudgy!
Based on those 10 servings the recipe yields, here is the general breakdown per slice of our Bûche de Noël recipe:
- Serving Size: 1 slice
- Calories: Approximately 350
- Fat: About 22g (with 13g of that being saturated fat, thanks to all that delicious cream and butter!)
- Carbohydrates: Around 35g
- Sugar: Just about 30g
- Protein: Roughly 5g
- Cholesterol: Around 110mg
It’s rich, it’s dense where it matters, and it has that lovely flavor profile we love in a great chocolate sponge roll cake. Definitely save room for a slice when you bring this beautiful cake to the table!
PrintClassic Chocolate Yule Log Cake (Bûche de Noël)
A recipe for a traditional, moist chocolate sponge cake rolled with creamy filling and covered in rich chocolate ganache, decorated to look like a rustic log.
- Prep Time: 45 min
- Cook Time: 12 min
- Total Time: 57 min
- Yield: 10 servings
- Category: Dessert
- Method: Baking and Rolling
- Cuisine: French
- Diet: Vegetarian
Ingredients
- 4 large eggs, separated
- 1/2 cup granulated sugar, plus 2 tablespoons for egg whites
- 1/4 cup all-purpose flour
- 1/4 cup unsweetened cocoa powder
- 1/4 teaspoon baking powder
- Pinch of salt
- 1 teaspoon vanilla extract
- 1/2 cup heavy cream, cold
- 1/4 cup powdered sugar
- 1 teaspoon vanilla extract
- 1 cup semi-sweet chocolate chips
- 1/2 cup heavy cream (for ganache)
- 1 tablespoon unsalted butter
- Cocoa powder, for dusting
Instructions
- Preheat your oven to 375°F (190°C). Line a 10×15 inch jelly-roll pan with parchment paper, letting the paper overhang slightly on the long sides.
- In a large bowl, beat the egg yolks with 1/2 cup of granulated sugar until pale and thick. Sift the flour, cocoa powder, and baking powder over the yolk mixture and gently fold until just combined. Stir in 1 teaspoon of vanilla extract.
- In a separate clean bowl, beat the egg whites with the salt until soft peaks form. Gradually add the remaining 2 tablespoons of sugar and beat until stiff, glossy peaks form.
- Gently fold one-third of the egg whites into the yolk batter to lighten it. Then, gently fold in the remaining egg whites until no white streaks remain, being careful not to deflate the batter.
- Pour the batter into the prepared pan and spread evenly. Bake for 10 to 12 minutes, or until the top springs back lightly when touched. Do not overbake.
- While the cake bakes, lay a clean kitchen towel on your counter and dust it heavily with powdered sugar.
- Immediately invert the hot cake onto the sugared towel. Peel off the parchment paper. Starting from a short end, tightly roll the cake and towel together. Let it cool completely in this rolled shape on a wire rack.
- For the filling, beat the 1/2 cup cold heavy cream, powdered sugar, and 1 teaspoon vanilla until medium-stiff peaks form.
- Once cool, carefully unroll the cake. Spread the whipped cream filling evenly over the surface, leaving a 1-inch border on the far long edge.
- Reroll the cake tightly without the towel. Place the rolled cake seam-side down on a serving platter. Chill for at least 30 minutes to set.
- For the ganache, place chocolate chips in a heatproof bowl. Heat the 1/2 cup heavy cream until simmering, then pour it over the chips. Let stand for 5 minutes, then stir until smooth. Stir in the butter. Let the ganache cool slightly until it thickens to a spreadable consistency.
- Frost the entire outside of the chilled log with the chocolate ganache. Use a fork or the back of a knife to score lines into the frosting to mimic tree bark texture.
- Cut a 2-inch diagonal piece from one end of the log to create a branch piece. Place this piece on top of the main log, securing it with a dab of ganache.
- Dust the entire cake lightly with cocoa powder before serving.
Notes
- For easier rolling, you can gently warm the cake for 30 seconds in the microwave before inverting it onto the towel.
- If the ganache sets too hard, warm it briefly over a water bath to soften it for easier spreading.
- You can use a small pastry brush dipped in melted chocolate to add small ‘twigs’ or mushroom shapes to the bark texture.
Nutrition
- Serving Size: 1 slice
- Calories: 350
- Sugar: 30
- Sodium: 80
- Fat: 22
- Saturated Fat: 13
- Unsaturated Fat: 9
- Trans Fat: 0.5
- Carbohydrates: 35
- Fiber: 2
- Protein: 5
- Cholesterol: 110