

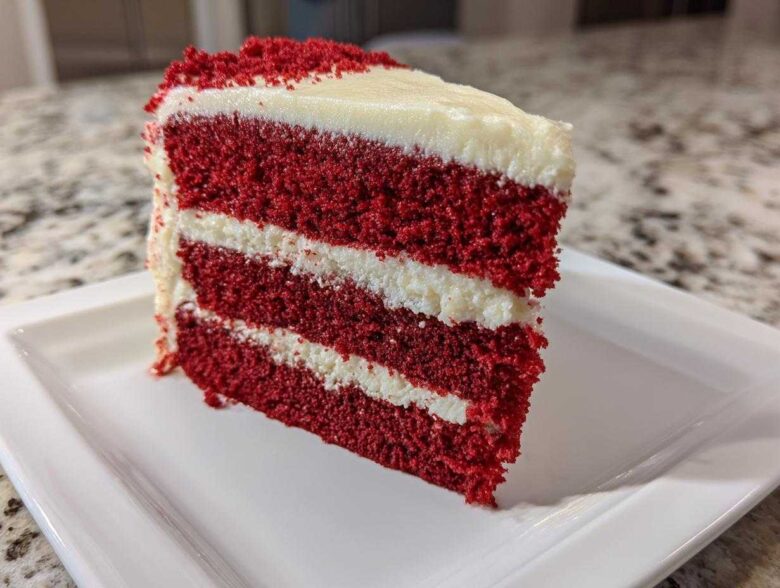
Oh, you know how much I love a dessert that demands attention, right? When Amina and I decide to bake for a real celebration—a big birthday or maybe Valentine’s Day is buzzing nearby—nothing beats the drama and flavor of a true classic. Forget those disappointing, dry cakes you sometimes see; we’re diving into what I truly believe is The Best Southern Style Moist Red Velvet Cake From Scratch with Classic Cream Cheese Frosting. Making an authentic red velvet cake feels like channeling Southern baking royalty. It’s show-stopping, tender, and comes together shockingly fast when made from scratch. I still remember the first time Amina showed me how the batter should look; pure magic! If you want to know the full story behind our Spoonful Snap kitchen magic, you can read all about it right here.
Why This Moist Red Velvet Cake Recipe is a Southern Staple
Look, you can’t just dump red dye into a chocolate cake and call it a day—that’s a rookie mistake! This moist red velvet cake recipe is beloved because it’s fundamentally a buttermilk cake. It gets its signature light tang and incredible tenderness from that specific acidic pairing. That’s what separates a true authentic southern red velvet experience from everything else. People search all over for a recipe that truly delivers that melt-in-your-mouth feel, and this one brings it every single time. We love seeing how others follow our method; check out some inspiration over at this link! For more of my baking deep dives, you can visit my other favorite cake post.
Achieving the Perfect Fluffy Red Velvet Cake Crumb
The secret weapon here is chemistry, trust me! We use buttermilk, which reacts beautifully with the baking soda and vinegar we add. That reaction creates carbon dioxide bubbles that lift the batter gently, giving you that incredibly fluffy red velvet cake crumb we all crave. It keeps the texture light, even though we use oil for richness. This process ensures we get a soft homemade cake that practically floats off the fork.
Tips for a Vibrant Red Velvet Cake Tutorial
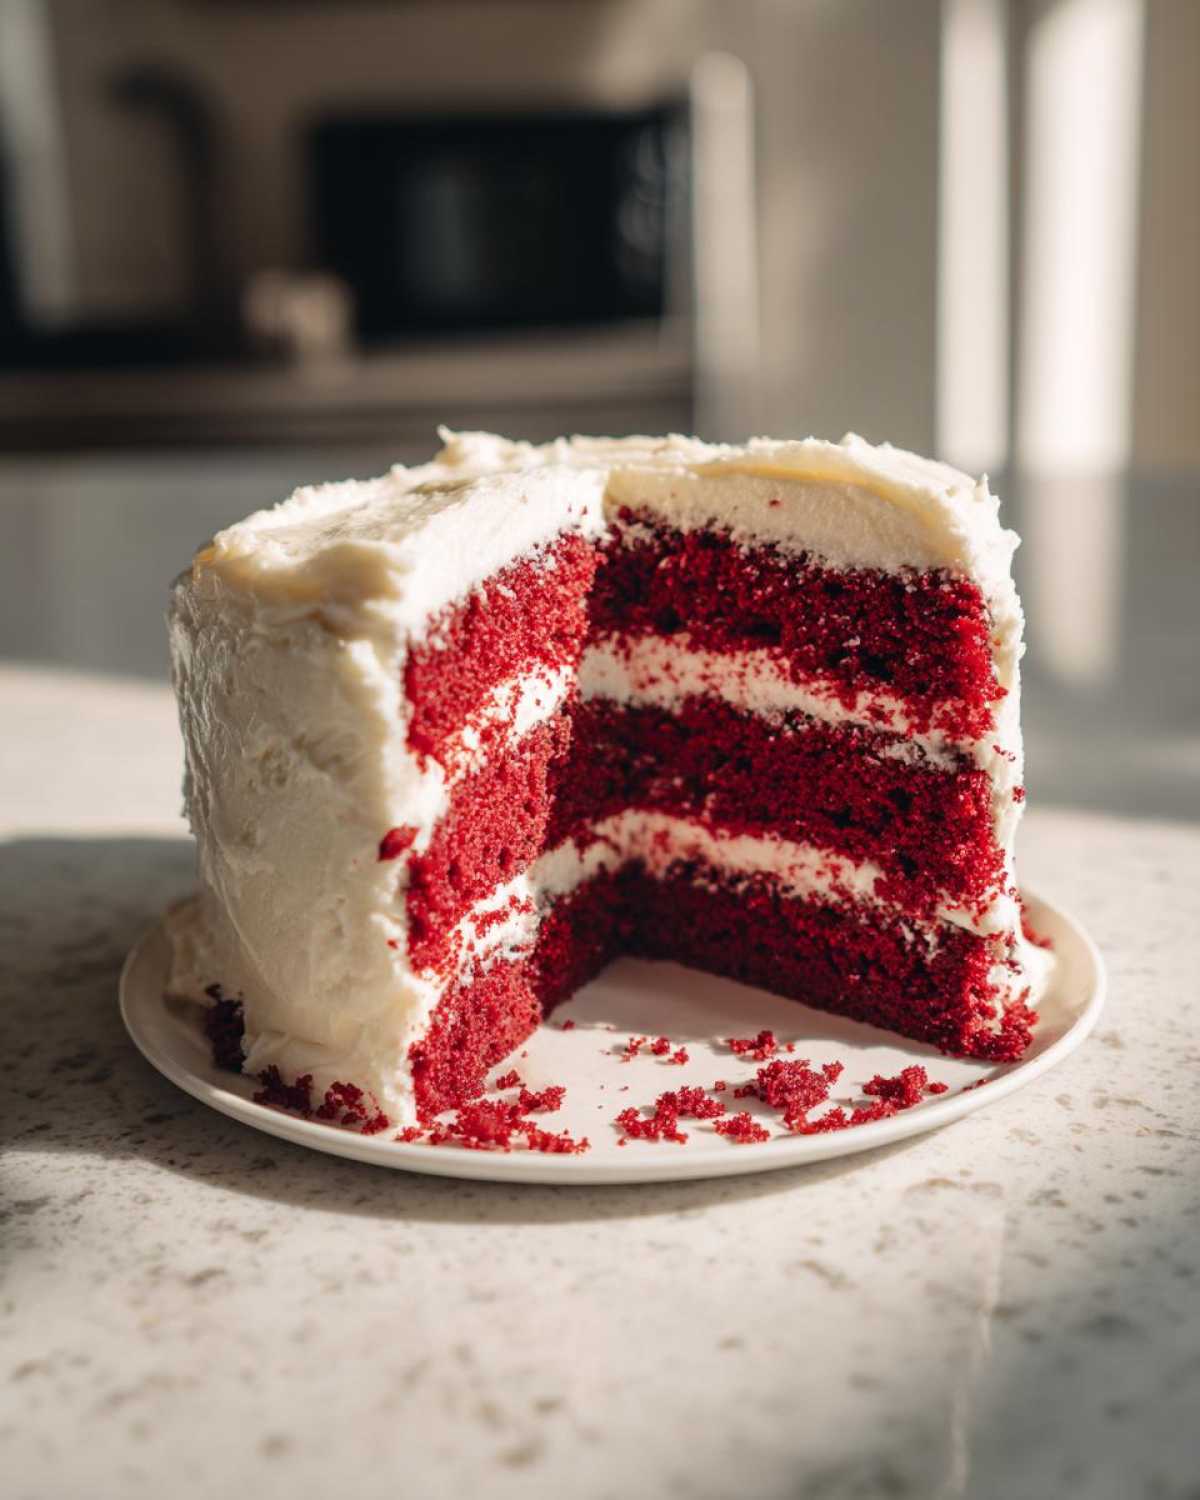
The color needs to be right, or it just won’t feel special! For a truly brilliant hue, skip the liquid food coloring; it just muddies up the batter texture. You absolutely must grab a good quality gel coloring for this vibrant red velvet cake tutorial. A little bit goes a very long way, and it locks that rich color in while baking. Don’t be shy, but don’t go overboard either!
Gathering Ingredients for Your Red Velvet Cake From Scratch
Okay, now that you know why this cake is special, let’s talk about what you need to pull it off. For a truly spectacular result, especially when aiming for that soft homemade cake perfection, the quality and preparation of your ingredients matter more than you think! I always lay everything out before Amina even turns the oven on—it helps keep things orderly, which is key when mixing the batter. I have linked over to my super fluffy vanilla recipe if you want to compare frosting techniques later, though this cream cheese one is the true champion here! Check out the vanilla frosting details here.
For the Soft Homemade Cake Layers
This is the heart of our cake, and you’ll notice we’re using oil, not butter, in the cake for ultimate moisture. Remember, the buttermilk and the *tiny* bit of cocoa powder are what define the flavor here, not the coloring! You’ll need:
- 1 1/2 cups vegetable oil (Don’t skimp here; this keeps it moist!)
- 1 1/2 cups granulated sugar
- 2 large eggs
- 1 teaspoon vanilla extract
- 1 tablespoon unsweetened cocoa powder
- 1 teaspoon baking soda
- 1 teaspoon white vinegar
- 1 cup buttermilk (This is non-negotiable for that authentic tang!)
- 2 1/2 cups all-purpose flour
- 1 teaspoon salt
- 1/4 cup red food coloring (Gel is best, remember?)
For the Best Cream Cheese Frosting Recipe
This frosting is thick, tangy, and pairs perfectly with the subtle cocoa notes. For this to come together smoothly without any lumps, make sure your dairy products come out of the fridge about 45 minutes before you plan to start mixing. You’ll need:
- 1 (8 ounce) package cream cheese, softened completely
- 1/2 cup unsalted butter, softened completely
- 3 cups powdered sugar, sifted (Yes, sift it! No clumps allowed!)
- 1 teaspoon vanilla extract
Step-by-Step Instructions for the Red Velvet Layer Cake
Alright, now for the fun part where it all comes together! This isn’t rocket science, but following the order Amina’s grandmother taught us is the key to that beautiful, soft homemade cake. We’re building layers of flavor and texture here, which is why preparing the red velvet layer cake takes just a few simple phases. If you’re using two 9-inch pans, everything should bake up evenly. For more super helpful baking mechanics, check out this guide on making a chocolate cake from scratch over here. And don’t forget to peek at the technique outlined at Pastry Living for comparison!
Mixing the Red Velvet Cake Batter
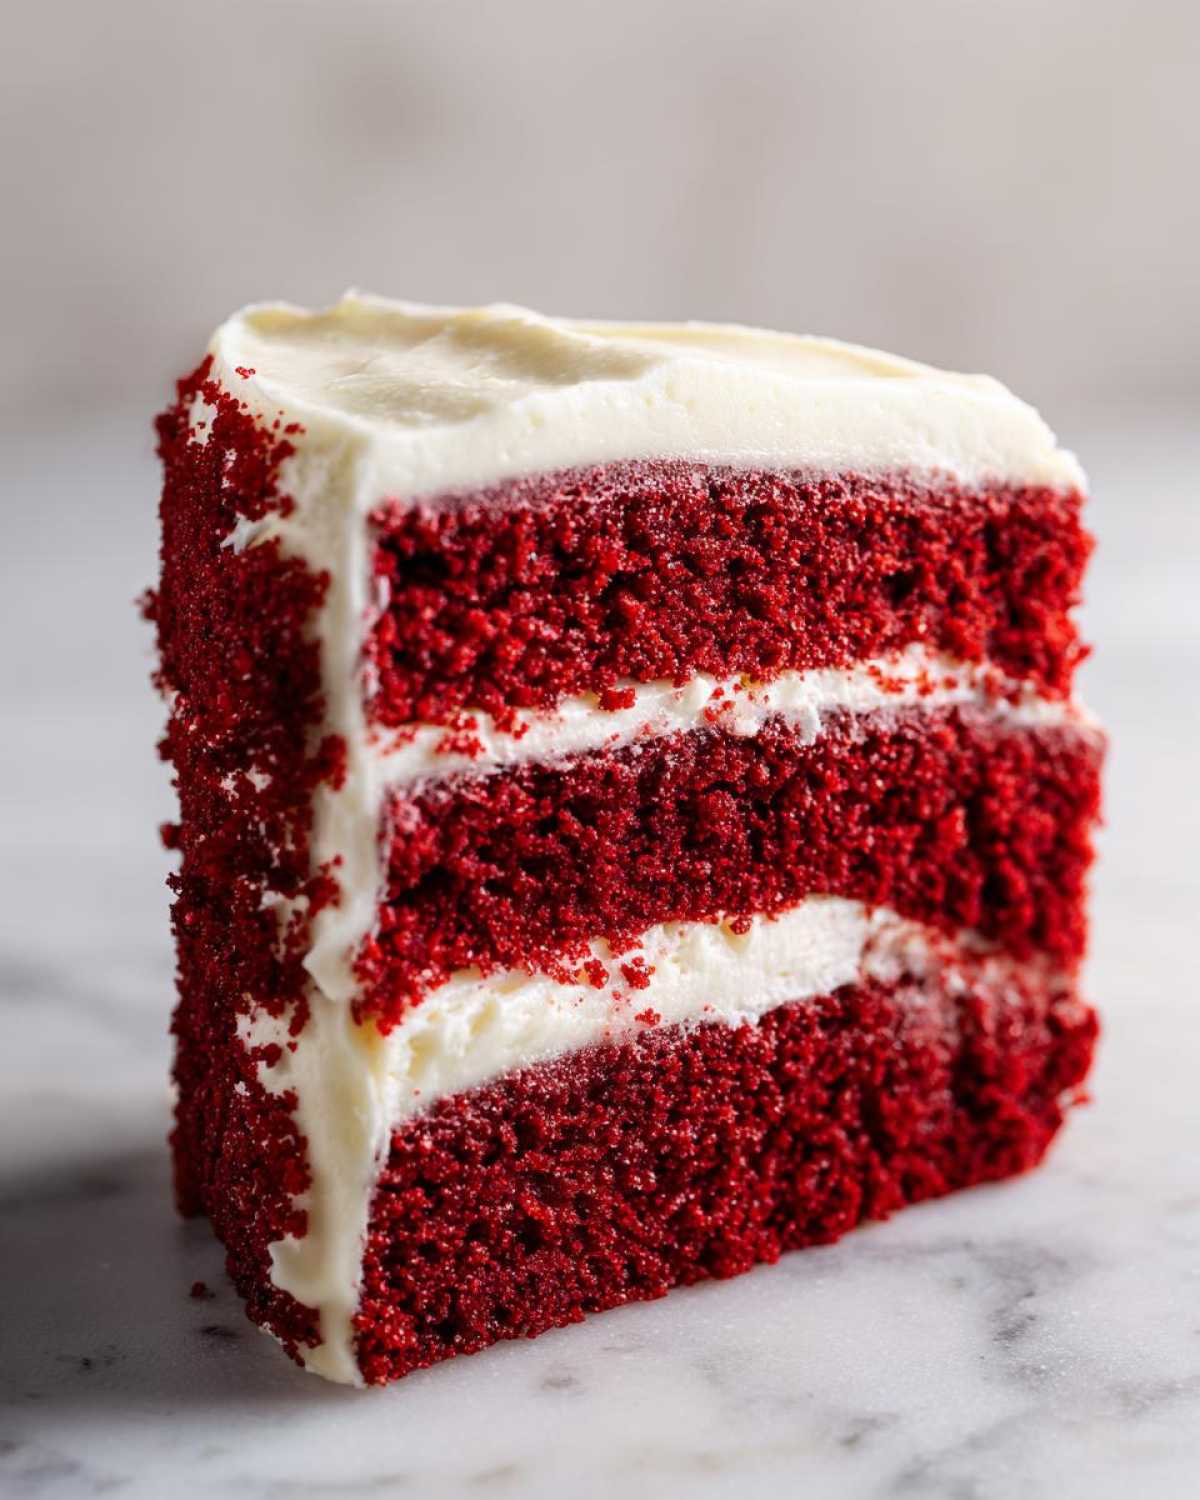
First things first, preheat to 350°F (175°C) and get those pans greased and floured—don’t skip that! Start by whisking the oil and sugar, getting the eggs in one at a time, and then adding your vanilla. Next, mix your cocoa, baking soda, and the *whole* quarter cup of red coloring separately until it’s smooth, then combine it with the wet stuff. You’ll alternate adding the flour mix and the buttermilk mixture. Remember the final step: gently fold in the vinegar/buttermilk last. If you overmix, you lose that airy structure. Mix just until you stop seeing streaks. Trust me, the batter will be thin!
Baking and Cooling the Cake
Once the batter is resting evenly across your pans, slide them into that preheated oven. They usually need about 30 to 35 minutes. You know they’re done when a wooden pick inserted right into the center comes out clean—no wet batter clinging to it! Once they pass the test, pull them out and let them cool in those pans for just about 10 minutes. Any longer, and they might stick! Then, carefully invert them onto a wire rack to cool all the way down. Seriously, don’t even *think* about frosting them until they are stone cold, or the cream cheese frosting will melt straight off!
Crafting the Best Cream Cheese Frosting Recipe
This frosting! Oh, this frosting is what separates a good red velvet cake from the one people talk about for years. Getting the best cream cheese frosting recipe right is all about temperature. If your cream cheese and butter are too cold, you get those annoying lumps—and we are not having those on our showstopper cake!
You need to beat the softened cream cheese and butter together first. I mean really beat them until they look pale, smooth, and creamy, like whipped silk. This takes a couple of minutes, but it’s vital. Only once they are perfectly smooth do you start adding that sifted powdered sugar, a cup at a time, mixing slowly at first so you don’t get a sugar cloud explosion in your kitchen!
A little trick from Amina: once the sugar is incorporated, we whip it on medium-high for a solid minute longer than we think we should. This extra air makes the final frosting extra light and incredibly fluffy. Add your vanilla, scrape down the bowl one last time, and you’ve got that perfect tangy topping. If you want to see how we make a different kind of smooth topping, check out our quick sugar cookie icing recipe for comparison!
Assembling Your Easy Red Velvet Cake
Now that you have two perfectly cooled, beautiful red layers and that sky-high, tangy frosting, we get to the easy part—putting it all together! This is where this becomes one of those truly foolproof, easy baking recipes. First, double-check those layers! If they crowned up too much while baking, just take a long serrated knife and level them off gently. Amina does this part; she says it keeps the layer cake looking professional!
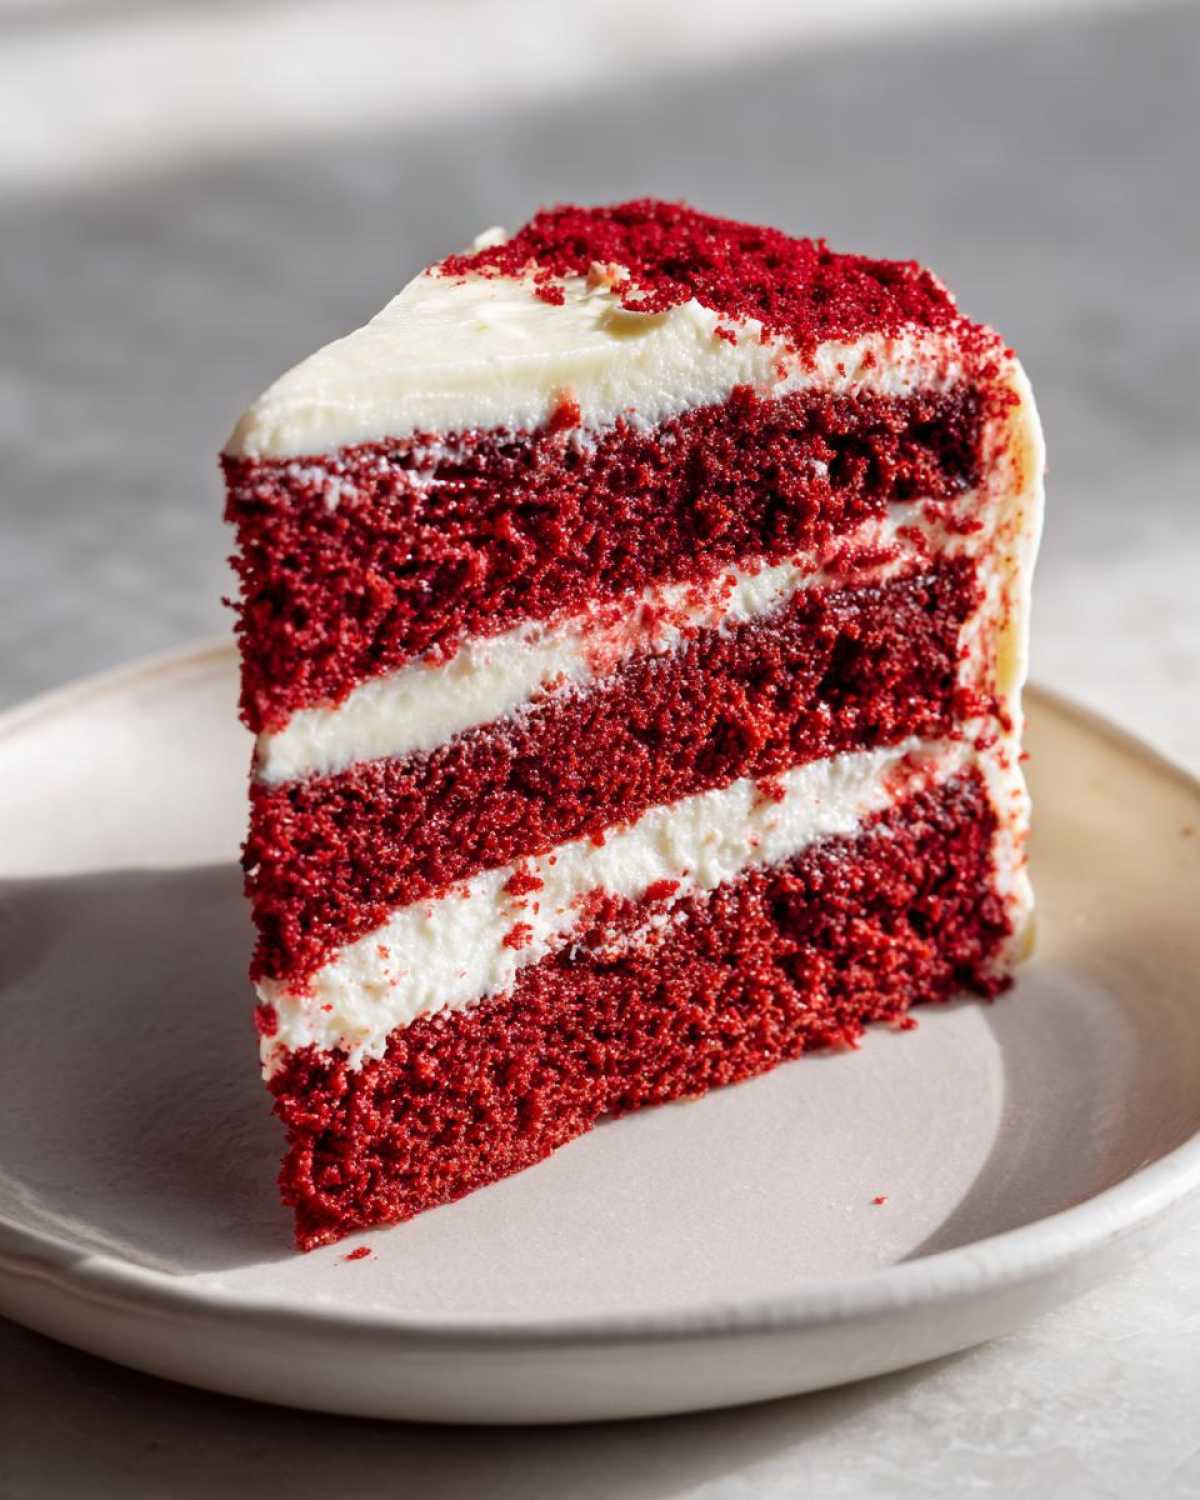
Pop the first layer down on your serving plate. Slather on a generous but even layer of that creamy frosting. Then carefully place the second layer on top. Don’t panic if a few crumbs escape—that’s why we do a crumb coat! A thin layer around the entire cake seals everything in. Then, chill that for about 15 minutes. After that little chill break, you can add your final, thick, beautiful coat of frosting. If you want to see a fun alternative using this batter, check out our red velvet cupcake variation!
Ingredient Notes for an Authentic Southern Red Velvet Cake
I want you to really understand what makes this cake tick, because knowing the ‘why’ means you can bake it perfectly next time too! This isn’t some quick chocolate cake dressed up in red; the small amount of cocoa powder is there to complement the acidity, not dominate. That subtle chocolate hug is key to the authentic southern red velvet cake flavor profile. It’s the buttermilk, truly, that we can’t skip. It interacts with the baking soda and vinegar to create that magnificent lift and tang, giving you that melt-in-your-mouth experience. If you want to geek out on the science behind cocoa versus true chocolate bitterness, I found a great deep dive over at Sugar Geek Show.
Buttermilk Cake Recipes Secrets
If, and I mean *if*, you absolutely cannot find buttermilk at the store, you can fake it! Mix one cup of regular milk with one tablespoon of white vinegar or lemon juice, let it sit for about five minutes, and boom—you have a substitute. But honestly, for the best true flavor and texture in these buttermilk cake recipes, always try to grab the real deal. It makes such a difference!
Tips for Success with Your Red Velvet Cake
Baking for the first time can be nerve-wracking, but honestly, this recipe is so forgiving once you know a few little tricks! When you’re tackling this beautiful easy red velvet cake for the first time, remember my number one rule: room temperature ingredients are your best friend. I mean the eggs, the buttermilk, everything cold needs at least an hour on the counter before you whisk anything.
Why? Because cold ingredients don’t emulsify well with the oil, leading to a curdled, sad-looking batter. We want that smooth mix!
Secondly, when you add the dry and wet mixtures, pay attention. Don’t just dump it all at once. Alternate slowly, and when mixing, stop as soon as the flour disappears. That’s how you lock in that soft, cloud-like texture we’re aiming for. You can see more of the basic techniques we stress for all our easy baking recipes by checking out this post.
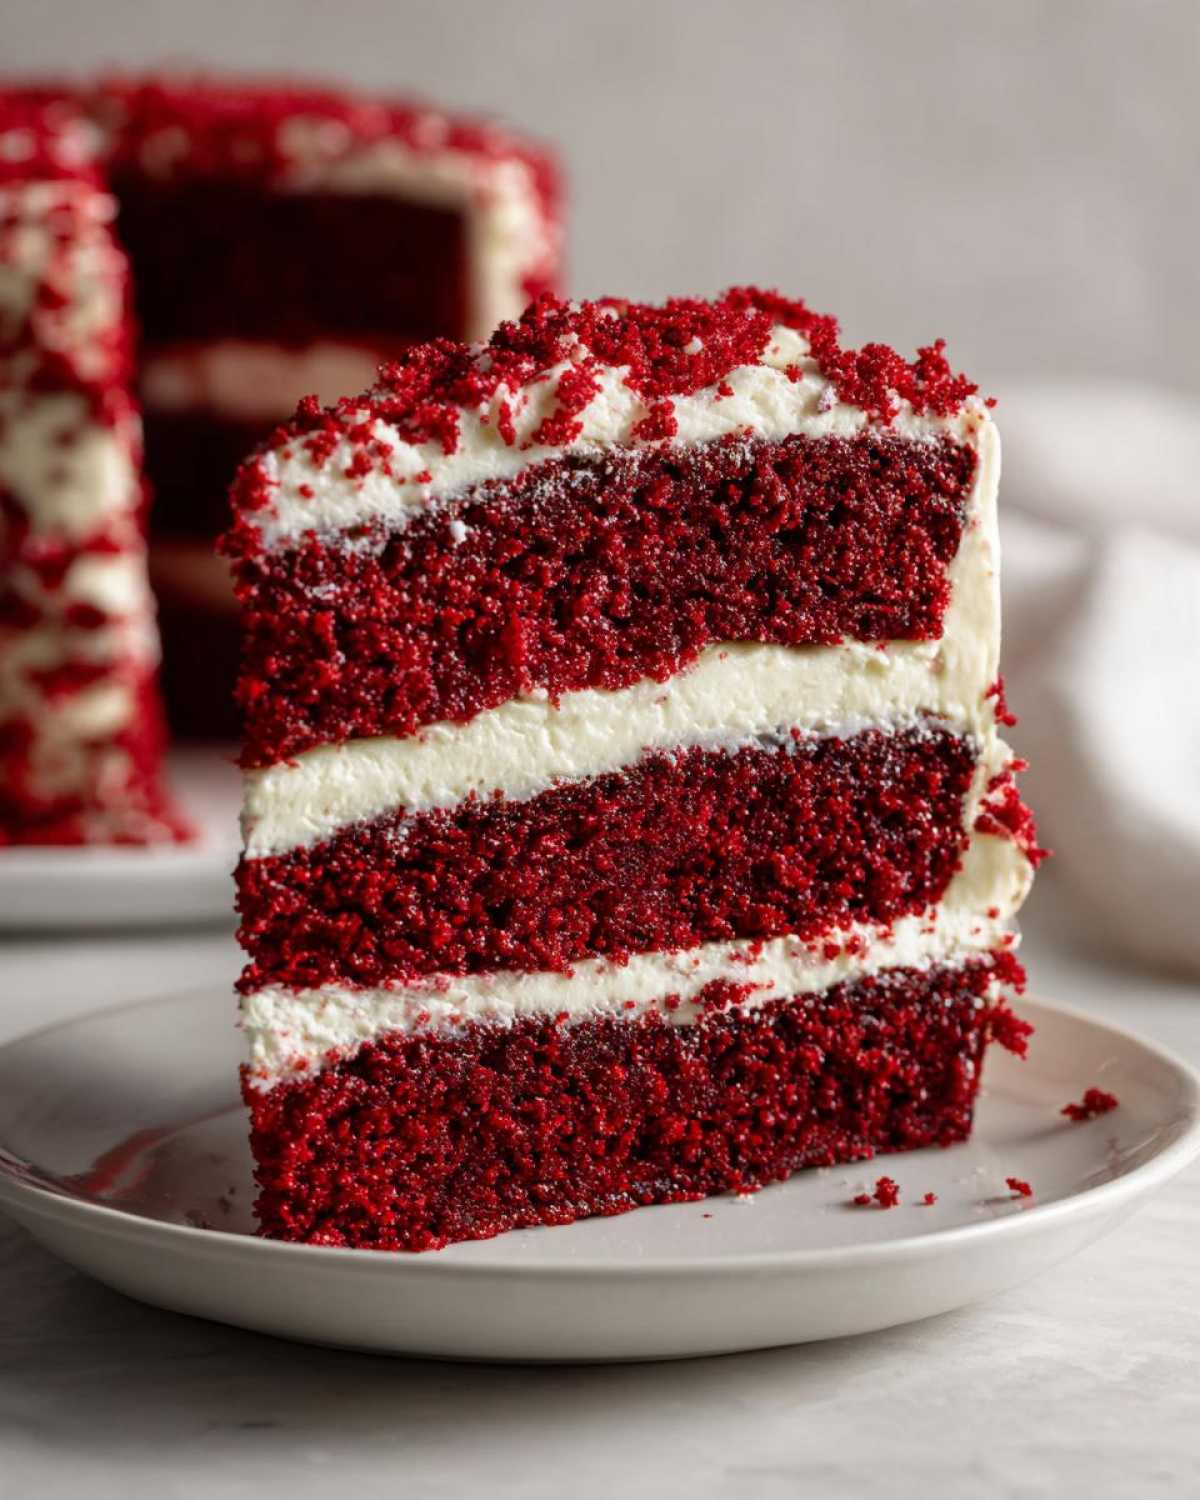
Finally, don’t rely on the visual color alone to tell you when it’s done. Bake until the pick comes out *clean*. That ensures you don’t end up with a beautiful but gummy cake center!
Storage and Reheating for Your Red Velvet Cake
Because we use that gorgeous, tangy cream cheese frosting, this cake has to be treated with a little more respect than a simple buttercream number. Always store your finished red velvet layer cake in an airtight container, and yes, that means the refrigerator. It will keep beautifully for about four days stuffed in there, looking vibrant and ready to go!
Now, here’s the pro tip that Amina always reminds me of: don’t serve it straight from the cold! Cold cake is firm cake, and we want that beautiful soft homemade cake texture to shine. Pull your slice out about 30 to 45 minutes before you plan to eat it. This lets the butter in the frosting soften up and brings all those subtle cocoa and buttermilk flavors back to life. Trust me, the wait is worth it for the best bite!
Frequently Asked Questions About Red Velvet Cake
I know you probably have a few lingering questions after diving into this recipe, especially if you are aiming to make this for the first time for a big event! It’s totally normal, and I want you to feel totally prepared to make this soft homemade cake shine. We’ve collected the ones we get asked the most frequently down here.
Is Red Velvet Cake Just Chocolate Cake with Red Dye?
That’s the million-dollar question! Nope, it really isn’t. While this recipe does use a small amount of cocoa powder, the defining flavor comes from the gentle interaction between the acidic buttermilk and the leavening agents. That reaction, combined with a very small hint of cocoa, is what creates that subtle tang that pure chocolate cake just doesn’t have. The red color is mostly for tradition and show! It’s definitely its own unique thing.
Can I substitute milk for buttermilk in this recipe?
You *can*, but I really advise against it if you want that authentic texture! Buttermilk is vital because it tenderizes the crumb; it prevents the flour proteins from building too much structure, which leads to a drier cake. If you absolutely must substitute, whip up 1 cup of whole milk with 1 tablespoon of white vinegar or lemon juice and let it sit for five minutes before using it. But truly, the real stuff is better for the flavor!
Why does my cake batter always end up so thin?
Don’t worry! This is normal for a high-moisture red velvet cake from scratch like ours. Because we rely on oil instead of just creaming butter, the batter is naturally thinner than a standard birthday cake mix. As long as you didn’t overmix once you added the flour—which would tighten up the batter—you’re good to go. Those thin batters bake up beautifully moist!
Can I make this an easy red velvet cake by preparing it ahead?
Yes, you absolutely should! This is one of those great beginner cake recipes because you can prep the batter the night before. Just mix everything up, cover the bowls tightly, and pop them in the fridge. Pull the batter out about an hour before baking so it warms up slightly. It makes the day of the party so much less stressful!
Estimated Nutritional Data for This Red Velvet Cake
Now, I know some of you are just here for the flavor explosion, but others like to keep an eye on what’s going into the beautiful cake you just baked! Remember, we are passionate about flavor first, so this nutritional breakdown is just an estimate based on standard calculations for a slice of this rich, dairy-packed dessert. It’s definitely a treat for a celebration, not an everyday thing!
For a single serving of this decadent red velvet cake, using the figures we calculated based on the ingredients, here’s what you’re looking at for a standard slice:
- Calories: Approximately 450
- Total Fat: Around 25g (Be generous with that cream cheese frosting!)
- Carbohydrates: Roughly 58g
- Protein: About 4g
This data is based purely on the recipe measurements provided across both the cake and the frosting, so use it as a general idea rather than a strict guideline. Enjoy every bite; you earned it!
Share Your Showstopping Red Velvet Cake Creations
Whew! We made it through the whole process, from measuring the oil to whipping that glorious cream cheese frosting. Doesn’t that sound like the perfect, slightly dramatic, but totally achievable easy red velvet cake? I really hope you loved baking this recipe as much as Amina and I love sharing it with you. Baking is always better when we share the results!
We poured our heart into making sure this red velvet cake from scratch delivers that authentic Southern softness and keeps you coming back for another slice. So, when you slice into that vibrant red layer cake, please let us know how it went!
Did you change anything? Did the crumb come out perfectly fluffy? Drop a rating right here on the page—it helps future bakers feel confident trying it out. And please, snap a picture! We absolutely live for seeing your creations pop up on Instagram or Facebook. Tag us so we can share your success with our Spoonful Snap family!
Thank you again for letting us into your kitchen today. Happy baking, and we can’t wait to see what beautiful things you create next!
All our love and spice,
David & Amina
PrintThe Best Southern Style Moist Red Velvet Cake From Scratch with Classic Cream Cheese Frosting
You can create a show-stopping, ultra-moist, and soft red velvet layer cake from scratch. This authentic Southern recipe balances cocoa flavor with buttermilk for a tender crumb, finished with the perfect homemade cream cheese frosting. It is ideal for birthdays or any celebration.
- Prep Time: 25 min
- Cook Time: 35 min
- Total Time: 60 min
- Yield: 12 servings
- Category: Dessert
- Method: Baking
- Cuisine: American
- Diet: Vegetarian
Ingredients
- 1 1/2 cups vegetable oil
- 1 1/2 cups granulated sugar
- 2 large eggs
- 1 teaspoon vanilla extract
- 1 tablespoon unsweetened cocoa powder
- 1 teaspoon baking soda
- 1 teaspoon white vinegar
- 1 cup buttermilk
- 2 1/2 cups all-purpose flour
- 1 teaspoon salt
- 1/4 cup red food coloring (liquid or gel)
- 1 (8 ounce) package cream cheese, softened
- 1/2 cup unsalted butter, softened
- 3 cups powdered sugar, sifted
- 1 teaspoon vanilla extract
Instructions
- Preheat your oven to 350°F (175°C). Grease and flour two 9-inch round cake pans.
- In a large bowl, whisk together the vegetable oil and granulated sugar until combined. Beat in the eggs one at a time, then stir in the vanilla extract.
- In a separate small bowl, mix the cocoa powder, baking soda, and red food coloring until smooth. Add this mixture to the wet ingredients and mix well.
- In a small bowl, combine the white vinegar and buttermilk.
- In a large bowl, whisk together the flour and salt. Gradually add the flour mixture to the wet ingredients, alternating with the buttermilk mixture, beginning and ending with the flour. Mix until just combined; do not overmix.
- Gently fold in the vinegar/buttermilk mixture last. The batter will be thin.
- Divide the batter evenly between the prepared cake pans.
- Bake for 30 to 35 minutes, or until a wooden pick inserted into the center comes out clean. Let the cakes cool in the pans for 10 minutes before inverting them onto a wire rack to cool completely.
- Prepare the cream cheese frosting: In a large bowl, beat the softened cream cheese and butter together until smooth and creamy.
- Gradually add the sifted powdered sugar, beating until fully incorporated. Stir in the vanilla extract until the frosting is light and fluffy.
- Once the cakes are completely cool, frost and stack the layers to create your red velvet layer cake.
Notes
- For the most vibrant red velvet cake color, use a high-quality gel food coloring instead of liquid coloring.
- True Southern red velvet cake gets its slight tang and moistness from the reaction between buttermilk and vinegar/baking soda, not just from the coloring.
- You can make this an easy baking recipe by preparing the batter ahead of time and chilling it for up to 24 hours before baking.
Nutrition
- Serving Size: 1 slice
- Calories: 450
- Sugar: 55g
- Sodium: 350mg
- Fat: 25g
- Saturated Fat: 10g
- Unsaturated Fat: 15g
- Trans Fat: 0g
- Carbohydrates: 58g
- Fiber: 1g
- Protein: 4g
- Cholesterol: 50mg